Wiring the sPod to the dash lights
 09-28-2014, 09:08 AM
#1
JK Junkie
Thread Starter
Wiring the sPod to the dash lights
...and any other two LED switches that have a separate feed for the bottom LEDs.
You may also like...
https://www.jk-forum.com/forums/modi...ite-up-324369/
https://www.jk-forum.com/forums/modi...ite-up-324463/
Using Gels To Change LED Switch Colors and Brightness
I have one of the sPods that has a pushbutton to turn on the bottom array of LEDs, thus allowing easy visibility at night. And you can tell from the rockers that it is the older style of switches. They're 4 pin switches, not 5, but the lower LED is independent inside the switch. I have not tested this on any other configuration but a couple of members have had to also run a ground wire for the LEDs on the switch. I did not. Some sPods, depending on what you bought, already have the lower led ground pin jumped to the upper LED ground pin either internally or externally so you don't need to run a ground wire. If yours has no been jumped you can run a ground wire either to any ground in the tub or just jump it to the ground pin for the upper LED. If you don't have the pushbutton, you can just cut into the feed wire for the LED array instead, which is the wire that is on the opposite side of the pushbutton on mine. In other words, the pushbutton is simply inserted into the feed wire by sPod so you can turn the lower LED array on or off. You may not have the pushbutton but can still attach the lower LED array to the dash lights.
What I wanted to do was wire this bottom array to a dimmable dash light circuit so when I turn on the dash lights, the array comes on and can be dimmed along with the dash lights. Also, since my sPod is mounted over the windshield, I wanted to be able to shut the array off at night if it becomes annoying when driving around town so I left the push button in the circuit by cutting into the feed for the pushbutton.
For dimmable feeds and who confirmed them we have
[table="width: 750, class: grid, align: left"]
[tr]
[td]Orange/Gray from...[/td]
[td]
[td]
[td]
[td]
[td]
[td]
[td]
[td]
[td]
[td]
[/tr]
[tr]
[td]Power Window Switches[/td]
[td][/td]
[td]
[td][/td]
[td]
[td][/td]
[td]
[td][/td]
[td][/td]
[td][/td]
[td][/td]
[/tr]
[tr]
[td]Footwell Light[/td]
[td]
[td]
[td]
[td]
[td]
[td]
[td]
[td]
[td]
[td][/td]
[/tr]
[tr]
[td]HVAC Controls[/td]
[td]
[td][/td]
[td][/td]
[td][/td]
[td]
[td]
[td]
[td]
[td]
[td]
[/tr]
[tr]
[td]Instrument Cluster (black connector)[/td]
[td][/td]
[td][/td]
[td][/td]
[td][/td]
[td]
[td]
[td]
[td][/td]
[td][/td]
[/tr]
[tr]
[td]Power Mirror Controls[/td]
[td][/td]
[td][/td]
[td][/td]
[td][/td]
[td][/td]
[td][/td]
[td][/td]
[td][/td]
[td][/td]
[td][/td]
[/tr]
[/table]
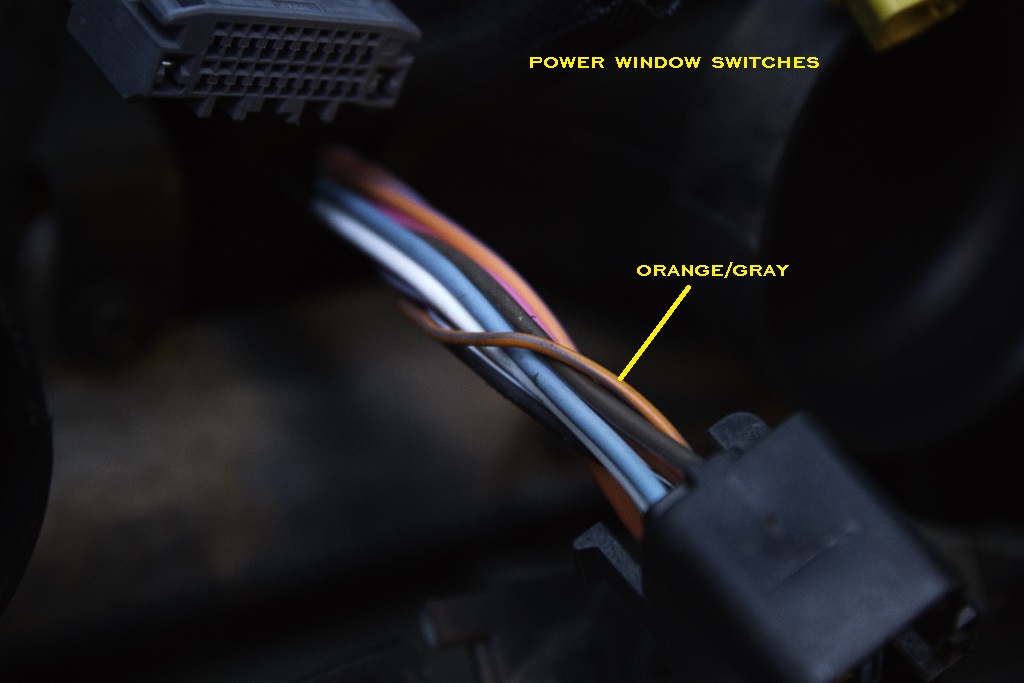
2007 - 2015 with power windows...orange/gray from power window switches (thanks Vlad). See posts #29 and #45 for details (thanks SJ21XDC).
2013 - 2015...orange/gray from footwell light (this write-up)
2007 - 2010?...orange/gray from HVAC controls* (thanks Mark) *May require two wire install. See posts #25-27.

2007 - 2015? - orange/gray (black connector) from instrument cluster (Thanks, DJ1...see this link...https://www.jk-forum.com/forums/jk-e...1/#post4096298

2007 - 2015 with power mirrors...orange/gray from power mirror switches.
And now back to the sPod...
The sPod removed from its bracket.

The wire that feeds the switch in the sPod. It is black and is fed from the middle pin of the last switch. This is where you need to cut.

In order to remove the sPod in the future, a connector should be attached to the new feed wire. I used Weather Pack connectors since the sPod is not water-tight and I go topless sometimes.

I added heat shrink tubing to the end of the unused wire. You can also see the completed weather pack connector. The other side of the connector feeds about 6 feet of 18 gauge wire which I will snake down to the drivers foot well.

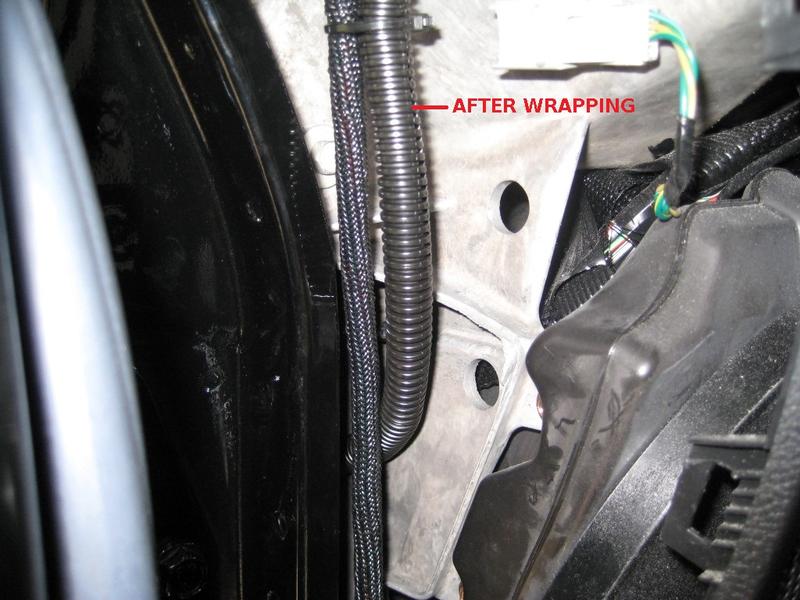
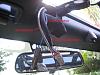
I snaked the new wire (blue) along the same path as the interceptor wire, which is behind the header trim and down the a pillar trim and then out at the foot well. I managed to tuck the wire behind the sun visor trim by just loosening it.


...and any other two LED switches that have a separate feed for the bottom LEDs.
You may also like...
https://www.jk-forum.com/forums/modi...ite-up-324369/
https://www.jk-forum.com/forums/modi...ite-up-324463/
Using Gels To Change LED Switch Colors and Brightness
I have one of the sPods that has a pushbutton to turn on the bottom array of LEDs, thus allowing easy visibility at night. And you can tell from the rockers that it is the older style of switches. They're 4 pin switches, not 5, but the lower LED is independent inside the switch. I have not tested this on any other configuration but a couple of members have had to also run a ground wire for the LEDs on the switch. I did not. Some sPods, depending on what you bought, already have the lower led ground pin jumped to the upper LED ground pin either internally or externally so you don't need to run a ground wire. If yours has no been jumped you can run a ground wire either to any ground in the tub or just jump it to the ground pin for the upper LED. If you don't have the pushbutton, you can just cut into the feed wire for the LED array instead, which is the wire that is on the opposite side of the pushbutton on mine. In other words, the pushbutton is simply inserted into the feed wire by sPod so you can turn the lower LED array on or off. You may not have the pushbutton but can still attach the lower LED array to the dash lights.
What I wanted to do was wire this bottom array to a dimmable dash light circuit so when I turn on the dash lights, the array comes on and can be dimmed along with the dash lights. Also, since my sPod is mounted over the windshield, I wanted to be able to shut the array off at night if it becomes annoying when driving around town so I left the push button in the circuit by cutting into the feed for the pushbutton.
For dimmable feeds and who confirmed them we have
[table="width: 750, class: grid, align: left"]
[tr]
[td]Orange/Gray from...[/td]
[td]
2007
[/td][td]
2008
[/td][td]
2009
[/td][td]
2010
[/td][td]
2011
[/td][td]
2012
[/td][td]
2013
[/td][td]
2014
[/td][td]
2015
[/td][td]
2016
[/td][/tr]
[tr]
[td]Power Window Switches[/td]
[td][/td]
[td]
Vladimer
[/td][td][/td]
[td]
SJ21XDC
[/td][td][/td]
[td]
Vladimer
[/td][td][/td]
[td][/td]
[td][/td]
[td][/td]
[/tr]
[tr]
[td]Footwell Light[/td]
[td]
N/A
[/td][td]
N/A
[/td][td]
N/A
[/td][td]
N/A
[/td][td]
N/A
[/td][td]
N/A
[/td][td]
N/A
[/td][td]
14Sport
[/td][td]
David217
[/td][td][/td]
[/tr]
[tr]
[td]HVAC Controls[/td]
[td]
Mark Doiron
[/td][td][/td]
[td][/td]
[td][/td]
[td]
N/A
[/td][td]
N/A
[/td][td]
N/A
[/td][td]
N/A
[/td][td]
N/A
[/td][td]
N/A
[/td][/tr]
[tr]
[td]Instrument Cluster (black connector)[/td]
[td][/td]
[td][/td]
[td][/td]
[td][/td]
[td]
Dale36
[/td][td]
DJ1
[/td][td]
Jonathan_JK
[/td] [td][/td][td][/td]
[td][/td]
[/tr]
[tr]
[td]Power Mirror Controls[/td]
[td][/td]
[td][/td]
[td][/td]
[td][/td]
[td][/td]
[td][/td]
[td][/td]
[td][/td]
[td][/td]
[td][/td]
[/tr]
[/table]
2007 - 2015 with power windows...orange/gray from power window switches (thanks Vlad). See posts #29 and #45 for details (thanks SJ21XDC).
2013 - 2015...orange/gray from footwell light (this write-up)
2007 - 2010?...orange/gray from HVAC controls* (thanks Mark) *May require two wire install. See posts #25-27.
2007 - 2015? - orange/gray (black connector) from instrument cluster (Thanks, DJ1...see this link...https://www.jk-forum.com/forums/jk-e...1/#post4096298
2007 - 2015 with power mirrors...orange/gray from power mirror switches.
And now back to the sPod...
The sPod removed from its bracket.
The wire that feeds the switch in the sPod. It is black and is fed from the middle pin of the last switch. This is where you need to cut.
In order to remove the sPod in the future, a connector should be attached to the new feed wire. I used Weather Pack connectors since the sPod is not water-tight and I go topless sometimes.
I added heat shrink tubing to the end of the unused wire. You can also see the completed weather pack connector. The other side of the connector feeds about 6 feet of 18 gauge wire which I will snake down to the drivers foot well.
I snaked the new wire (blue) along the same path as the interceptor wire, which is behind the header trim and down the a pillar trim and then out at the foot well. I managed to tuck the wire behind the sun visor trim by just loosening it.
Last edited by 14Sport; 03-05-2016 at 04:29 AM.
 09-28-2014, 09:08 AM
#2
JK Junkie
Thread Starter
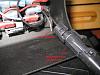
I covered the wire with plastic sheathing because I'm kind of a stickler like that, especially when it is running against metal.
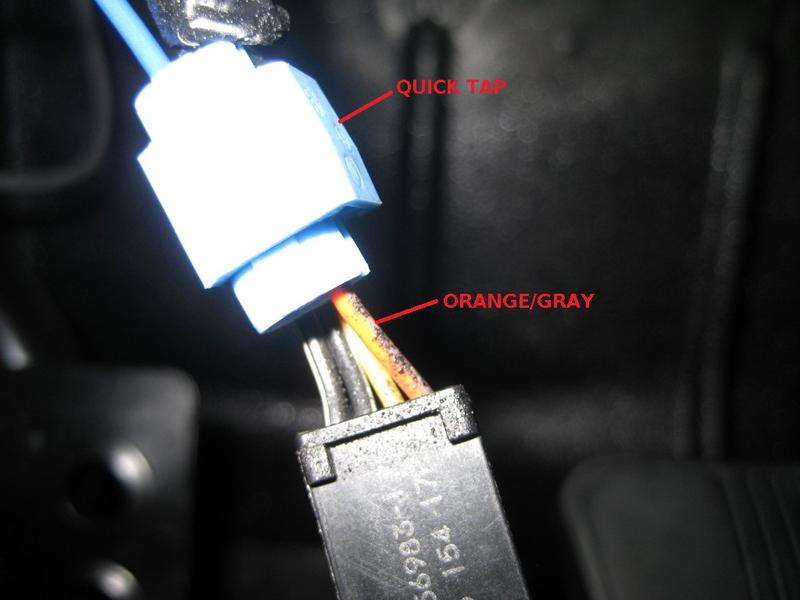
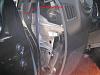
I used a quick tap to tap into the dimmable wire since it is under the dash, not likely to get wet, and I am lazy. The wire I used was the orange with gray stripe on the 4 pin connector that feeds the foot well light when you open your door. To make it easier to work on, simply remove the connector from the light assembly. Mine just slid off with no tabs to be depressed.
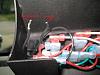
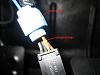
Ready to re-install the sPod switch assembly. You can see the sPod connector, the Interceptor gauge connector, and the new weather pack connector for the push button switch.

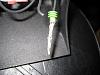
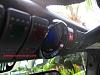
Installation complete. This shows the bottom array of LEDS with the dash lights on and the dimmer switch in the full brightness position.
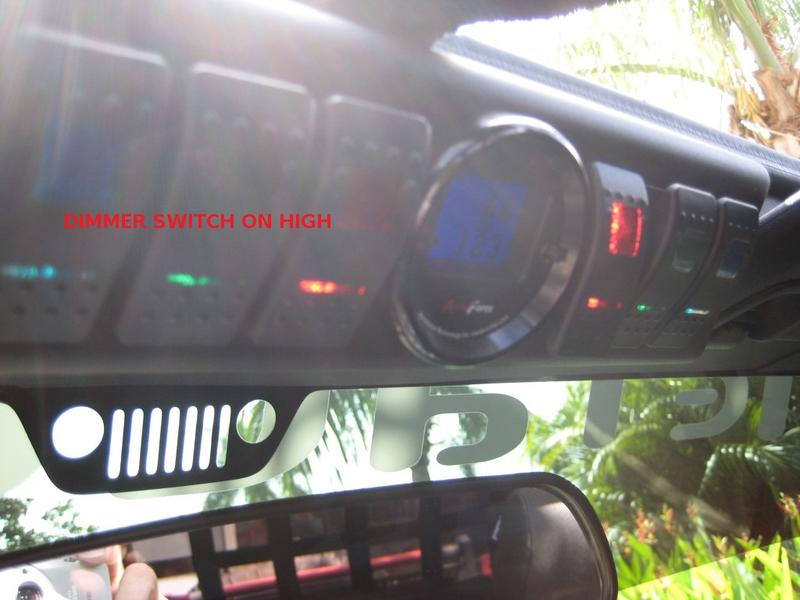
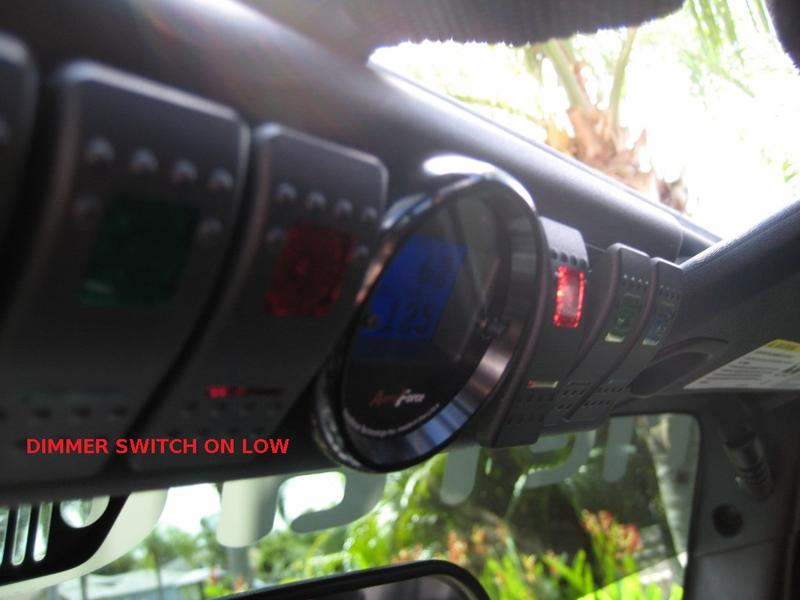
This is with the dash lights on and the dimmer switch in its lowest position before turning off. I lit up the red top led by turning on the switch so you could see the contrast.
That's it. It took about one and a half hours including taking all the pics. Pretty straightforward.
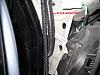

I used a quick tap to tap into the dimmable wire since it is under the dash, not likely to get wet, and I am lazy. The wire I used was the orange with gray stripe on the 4 pin connector that feeds the foot well light when you open your door. To make it easier to work on, simply remove the connector from the light assembly. Mine just slid off with no tabs to be depressed.
Ready to re-install the sPod switch assembly. You can see the sPod connector, the Interceptor gauge connector, and the new weather pack connector for the push button switch.
Installation complete. This shows the bottom array of LEDS with the dash lights on and the dimmer switch in the full brightness position.
This is with the dash lights on and the dimmer switch in its lowest position before turning off. I lit up the red top led by turning on the switch so you could see the contrast.
That's it. It took about one and a half hours including taking all the pics. Pretty straightforward.
Last edited by 14Sport; 02-01-2015 at 10:02 AM.

 09-28-2014, 01:46 PM
#4
JK Junkie
Thread Starter
09-30-2014, 04:17 PM
#5
JK Enthusiast
Join Date: Dec 2011
Location: Slidell Louisiana & Osan, South Korea
Posts: 155
Likes: 0
Received 0 Likes
on
0 Posts
I used a quick tap to tap into the dimmable wire since it is under the dash, not likely to get wet, and I am lazy. The wire I used was the orange with gray stripe on the 4 pin connector that feeds the foot well light when you open your door. To make it easier to work on, simply remove the connector from the light assembly. Mine just slid off with no tabs to be depressed.
I really hate having a 2011... its such a pain trying to figure out what is '10 and what is '12.
10-01-2014, 02:08 AM
#6
JK Enthusiast
Join Date: Dec 2011
Location: Slidell Louisiana & Osan, South Korea
Posts: 155
Likes: 0
Received 0 Likes
on
0 Posts
Nevermind the pic request, met up with one if the guys here, who has a '14 Rubi with the ambient lighting. I was able look his over, although I didn't have time (or his permission) to dig deeper and try to find where the foot well light harness connects to the main harness.
10-01-2014, 05:13 AM
#7
JK Junkie
Thread Starter
Ok. I have tomorrow off so I can take a better look if you need me too. I believe it came off a harness that ran along the side just above the driver kick panel area. The wire you want to look for is orange with a gray stripe.
BTW, my wife has a 2012 and it does NOT have the footwell light.
BTW, my wife has a 2012 and it does NOT have the footwell light.
Trending Topics
10-01-2014, 11:44 AM
#8
JK Super Freak
Foot well lighting? Is that a 2014 thing? Do you think that you could take a pic of the area, I don't have foot well lighting, but how knows, the harness might be there. I have been looking all over the place for a suitable dimmable wire to power the light for my Autometer guage. I also plan to run some LED lighting for the center consul and foot wells as well.
I really hate having a 2011... its such a pain trying to figure out what is '10 and what is '12.
I really hate having a 2011... its such a pain trying to figure out what is '10 and what is '12.
10-01-2014, 12:33 PM
#9
JK Junkie
Thread Starter
