
Audio Experts - Will this setup replace base stereo w/o CANBUS issues?

Thread Starter
JK Junkie
Joined: Nov 2013
Posts: 3,703
Likes: 8
From: The Dirty South
It's the neat part that takes all the time. Unused wires wrapped in electrical tape and then zip-tied so the tape won't peel. Clusters held together throughout the run with zip ties. I'm a little OCD when it comes to wiring. Hope the installation goes as well tomorrow. Haha.
Thanks again, immortal, your help is really appreciated. It wasn't as different from old school as I thought it was going to be. Thanks to the PAC unit doing all the CABUS stuff.
Thanks again, immortal, your help is really appreciated. It wasn't as different from old school as I thought it was going to be. Thanks to the PAC unit doing all the CABUS stuff.
Thread Starter
JK Junkie
Joined: Nov 2013
Posts: 3,703
Likes: 8
From: The Dirty South
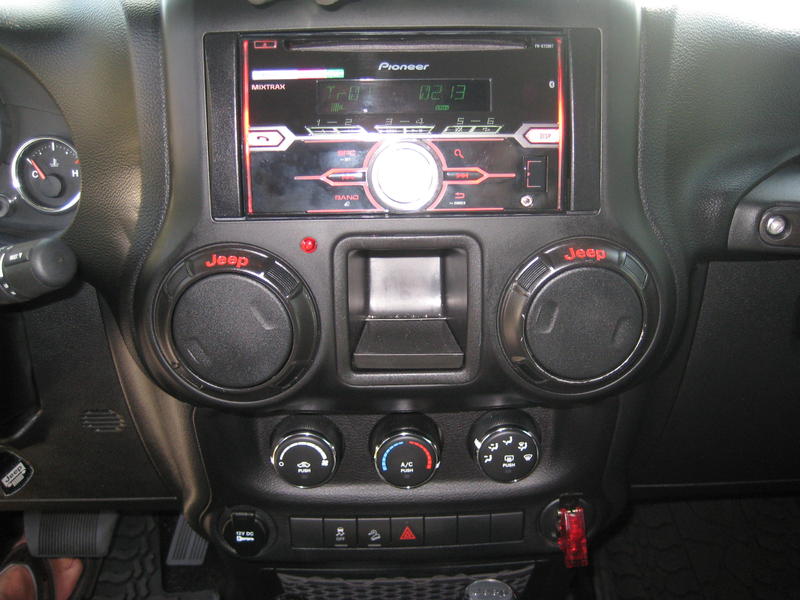
Finally done. The HU came with two different sets of screws for attaching to the dash kit. At first I installed the machine screws which made the sides sit perfect with the HU. However, I couldn't fit the unit in as the screws were hitting the sides of the dash. I switched to the flat head tapered screws and they make the sides distort as you tighten them but then it easily fits by the dash. If I was to do it over again I would trim the dash cutout a little to let the machine screws fit. But overall, I'm happy with it.
Last edited by 14Sport; Mar 14, 2015 at 08:25 AM.
JK Enthusiast
Joined: Jul 2012
Posts: 416
Likes: 1
From: Madison, MS
Finally done. The HU came with two different sets of screws for attaching to the dash kit. At first I installed the machine screws which made the sides sit perfect with the HU. However, I could fit the unit in as the screws were hitting the sides of the dash. I switched to the flat head tapered screws and they make the sides distort as you tighten them but then it easily fits by the dash. If I was to do it over again I would trim the dash cutout a little to let the maching screws fit. But overall, I'm happy with it.


