


Complete OTRATTW switch writeup in RR A pillar mount

Thread Starter
JK Freak
Joined: Jan 2008
Posts: 508
Likes: 5
From: St. Louis, MO

Okay, I spent almost 10 hours yesterday installing my four OTRATTW three way switches in my rugged ridge a pillar mount. I'll caveat the 10 hours in that I'm super anal and use only the highest quality materials. I heat shrink all connections. And I made the entire thing removable by the dealer. So here we go:

Since I'm using carling contours v three ways, the two LEDs each have to be grounded separately. So I made this little negative ground harness, daisy chained together. Four switches times two LEDs per switch equals 8 connections.

I wanted the green lights to be on with the ignition, so I daisy chained the four spades for those. I have them wired into both my switched fuse box, and also to the dome light (using a diode) so when I open the door at night, regardless if the ignition is on or not, the green wording lights up so I know which switch is which.

Green on left side. Not too bright and kind of matches dash.


Side note, I use a $160 crimping tool that gives me factory like crimps. With the jeep bouncing around, these crimps are vital. I also use adhesive lined heat shrink which glues the connection together. The combo of good crimps and this heat shrink results in a connection that cannot be pulled apart. When I wire for others, I guarantee my wiring for 10 years (no kidding).

So on my switches, they're on-off-on switches. With these switches, I can have the switch in "auto" mode and have my reverse lights go on when I go into reverse. If the switch is in the middle (off), the lights are off. And flipping it the other way (in my case to constant power) the lights turn on manually. Well, there are two LEDs on the switch, and I wanted the orange sides of the switches (the logo side) to go on regardless of which direction the switch was switched. When I switch I to reverse, the orange lights goes on; when I manually switch it, the orange light goes on. In order to accomplish this, you have to jump the positive to the orange led to the center output spade on the switch. Hence these double jumpers.
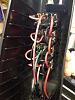
Here's what it looks like hooked up. By the way, I used 18-4 black jacketed speaker wire for my setup. There are four wires with different colored wires in the same sheath. I cut all four about an inch apart so they lined up better when plugging them in. Remember I'm going to have four inputs in "auto" mode, four inputs in constant mode, and four outputs; a total of 28 spades on these four switches. Being organized when cutting and matching colors up saves a lot of time. Wire management is key, because it gets really tight on the back of the switches.
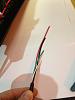
Next was my first "harness" as I'll call it, for the auto side of the switch. Again, I cut the four wires to the same spacing as the switches, and used the same color coding on the input wires as the output wires (for me it was red for top switch, then black, then green, then white, from top to bottom). I made two of these (one for auto side and one for constant side).

Another side note: I've been wiring for almost 25 years (I'm 40 years old). This is my connector box. Having all of the proper ring terminals, spade terminals, Molex connectors, crimp tools, heat shrink, heat gun, wire stripper (another $140 tool) makes all of this easier. My garage is like a factory and it still took me 10 hours!)

One harness, with heat shrink on every connector.

JK mirror makes great heat gun holder. Don't let hot tip touch plastic!

The reason I'm calling these harnesses is because I'm putting disconnects at the bottom of all three of them so that if I have to get the jeep serviced the dealer can unplug these without cutting anything (not having to unplug anything at the switches themselves). The plugs will go down in the dash side compartment cover. So I marked each harness near the top and near the bottom, so once I put the pod in, I don't have to remember which harness is which and what color wire controls which switch.


Two exact harnesses, marked constant and on with wire colors noted.

Since this harness isn't exposed to moisture, I added just a dab of dielectric grease to make sliding them on easier and prevent any corrosion. Not necessary likely, but it can't hurt.
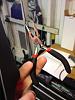
These little pliers helped getting the females onto the spades. It was getting tight in there.


28 connections. Three main harnesses: output, auto Input, constant input. Then I had two loose wires: black was ground for everything, and red was the positive for the green LEDs.

Tested everything on my spare battery before putting in. Everything was in order. Orange light on regardless of which direction I pushed the switch.
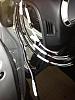
Here's the bottom end of each harness hanging down out the side port at the end of the dash. A perfect place to hide everything and easily access all wiring. Notice how I cut the harnesses a little different length so all connectors didn't bunch up at the exact same place.

I realized that I didn't have any Molex 4-pin connectors, so in the short run, I added Posi-Locks to the end of each wire. These are toolless connectors that can be reused and will keep any unused wire from shorting out. Once my Molex connectors come in, I'll add them to the end of all wires and I will truly have pigtail harnesses that the dealer can unplug to service the dash.


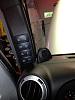
The colors are nice. Not too bright.

Once all that was done, It was then just a matter of getting input and out put wires to the bottom of my harnesses. I was using the black 18-4 wiring which was nice, and I ran it through the hole to the top left in the pic (my dash hole down below is just about maxed out).

I have two blu seas on a custom sPOD mount I did; one is constant, one is hot. Here's a summary of my inputs per switch:
Reverse switch: constant input from constant fuse box; auto input tapped under passenger footwell. White wire with thin gray stripe. Causes Dually D2s in my bumper to come on with reverse lights. For those, I'm using the relay that came with them Mounted next to my battery. The relay lead is what goes to my output wire on the switch. To get the wiring back to the lights, I actually fished the wire through the frame of the jeep (yes, inside the actual frame); I figured it would never get hung up on anything while wheeling,
Driving lights switch: same as reverse basically. Constant feed from constant fuse box. Auto feed from a wire I tapped I to the high beams up by the bulbs and just ran the wire back. Output goes to the relay that came with the D2 Drivings on front bumper.
Fog lights: these are PIAA LEDs and I'm using them as DRLs. So one lead is from the switched fuse box and one lead is from the constant fuse box.
By the way, I'm using the constant fuse box on the one side so that I can reach in the jeep at any time and turn some lights on. I load a trailer frequently and have the reverse lights on their own switch where I don't have to turn the jeep on will be nice. Remember, my green led illuminating the switch name turns on with the dome lights when I open the door, so voila, I can see what is what when I open the door.
My last switch says dome lights, but I'm actually putting Rigid SRM red diffused on the taillights. They will be wired as constant (for fog and heavy rain) and I'm adding a strobe flasher for emergencies and pulling over on the side of the road. Same switch setup, but the wiring is a little backwards on that once since the flasher is in the mix. For this switch, there's one constant input and two outputs, so the switch is wired the opposite of the others (which have two inputs and one output). Pm me for more info.
By the time I got everything wired, it took aBout 10 hours. It looks almost oem though! Okay, my fingers are sore, I need a break,


Color is great. Loving the setup.
Since I'm using carling contours v three ways, the two LEDs each have to be grounded separately. So I made this little negative ground harness, daisy chained together. Four switches times two LEDs per switch equals 8 connections.
I wanted the green lights to be on with the ignition, so I daisy chained the four spades for those. I have them wired into both my switched fuse box, and also to the dome light (using a diode) so when I open the door at night, regardless if the ignition is on or not, the green wording lights up so I know which switch is which.
Green on left side. Not too bright and kind of matches dash.
Side note, I use a $160 crimping tool that gives me factory like crimps. With the jeep bouncing around, these crimps are vital. I also use adhesive lined heat shrink which glues the connection together. The combo of good crimps and this heat shrink results in a connection that cannot be pulled apart. When I wire for others, I guarantee my wiring for 10 years (no kidding).
So on my switches, they're on-off-on switches. With these switches, I can have the switch in "auto" mode and have my reverse lights go on when I go into reverse. If the switch is in the middle (off), the lights are off. And flipping it the other way (in my case to constant power) the lights turn on manually. Well, there are two LEDs on the switch, and I wanted the orange sides of the switches (the logo side) to go on regardless of which direction the switch was switched. When I switch I to reverse, the orange lights goes on; when I manually switch it, the orange light goes on. In order to accomplish this, you have to jump the positive to the orange led to the center output spade on the switch. Hence these double jumpers.
Here's what it looks like hooked up. By the way, I used 18-4 black jacketed speaker wire for my setup. There are four wires with different colored wires in the same sheath. I cut all four about an inch apart so they lined up better when plugging them in. Remember I'm going to have four inputs in "auto" mode, four inputs in constant mode, and four outputs; a total of 28 spades on these four switches. Being organized when cutting and matching colors up saves a lot of time. Wire management is key, because it gets really tight on the back of the switches.
Next was my first "harness" as I'll call it, for the auto side of the switch. Again, I cut the four wires to the same spacing as the switches, and used the same color coding on the input wires as the output wires (for me it was red for top switch, then black, then green, then white, from top to bottom). I made two of these (one for auto side and one for constant side).
Another side note: I've been wiring for almost 25 years (I'm 40 years old). This is my connector box. Having all of the proper ring terminals, spade terminals, Molex connectors, crimp tools, heat shrink, heat gun, wire stripper (another $140 tool) makes all of this easier. My garage is like a factory and it still took me 10 hours!)
One harness, with heat shrink on every connector.
JK mirror makes great heat gun holder. Don't let hot tip touch plastic!
The reason I'm calling these harnesses is because I'm putting disconnects at the bottom of all three of them so that if I have to get the jeep serviced the dealer can unplug these without cutting anything (not having to unplug anything at the switches themselves). The plugs will go down in the dash side compartment cover. So I marked each harness near the top and near the bottom, so once I put the pod in, I don't have to remember which harness is which and what color wire controls which switch.
Two exact harnesses, marked constant and on with wire colors noted.
Since this harness isn't exposed to moisture, I added just a dab of dielectric grease to make sliding them on easier and prevent any corrosion. Not necessary likely, but it can't hurt.
These little pliers helped getting the females onto the spades. It was getting tight in there.
28 connections. Three main harnesses: output, auto Input, constant input. Then I had two loose wires: black was ground for everything, and red was the positive for the green LEDs.
Tested everything on my spare battery before putting in. Everything was in order. Orange light on regardless of which direction I pushed the switch.
Here's the bottom end of each harness hanging down out the side port at the end of the dash. A perfect place to hide everything and easily access all wiring. Notice how I cut the harnesses a little different length so all connectors didn't bunch up at the exact same place.
I realized that I didn't have any Molex 4-pin connectors, so in the short run, I added Posi-Locks to the end of each wire. These are toolless connectors that can be reused and will keep any unused wire from shorting out. Once my Molex connectors come in, I'll add them to the end of all wires and I will truly have pigtail harnesses that the dealer can unplug to service the dash.
The colors are nice. Not too bright.
Once all that was done, It was then just a matter of getting input and out put wires to the bottom of my harnesses. I was using the black 18-4 wiring which was nice, and I ran it through the hole to the top left in the pic (my dash hole down below is just about maxed out).
I have two blu seas on a custom sPOD mount I did; one is constant, one is hot. Here's a summary of my inputs per switch:
Reverse switch: constant input from constant fuse box; auto input tapped under passenger footwell. White wire with thin gray stripe. Causes Dually D2s in my bumper to come on with reverse lights. For those, I'm using the relay that came with them Mounted next to my battery. The relay lead is what goes to my output wire on the switch. To get the wiring back to the lights, I actually fished the wire through the frame of the jeep (yes, inside the actual frame); I figured it would never get hung up on anything while wheeling,
Driving lights switch: same as reverse basically. Constant feed from constant fuse box. Auto feed from a wire I tapped I to the high beams up by the bulbs and just ran the wire back. Output goes to the relay that came with the D2 Drivings on front bumper.
Fog lights: these are PIAA LEDs and I'm using them as DRLs. So one lead is from the switched fuse box and one lead is from the constant fuse box.
By the way, I'm using the constant fuse box on the one side so that I can reach in the jeep at any time and turn some lights on. I load a trailer frequently and have the reverse lights on their own switch where I don't have to turn the jeep on will be nice. Remember, my green led illuminating the switch name turns on with the dome lights when I open the door, so voila, I can see what is what when I open the door.
My last switch says dome lights, but I'm actually putting Rigid SRM red diffused on the taillights. They will be wired as constant (for fog and heavy rain) and I'm adding a strobe flasher for emergencies and pulling over on the side of the road. Same switch setup, but the wiring is a little backwards on that once since the flasher is in the mix. For this switch, there's one constant input and two outputs, so the switch is wired the opposite of the others (which have two inputs and one output). Pm me for more info.
By the time I got everything wired, it took aBout 10 hours. It looks almost oem though! Okay, my fingers are sore, I need a break,
Color is great. Loving the setup.
Last edited by bobholthaus; Feb 11, 2013 at 06:19 PM.


Thread Starter
JK Freak
Joined: Jan 2008
Posts: 508
Likes: 5
From: St. Louis, MO
No, I had to sand them, which was a real pain. That was a different day. If you have a power sander or grinding wheel, I suggest that. The covers on these particular switches pop right off. And Jim at OTRATTW is great to work with.


Thread Starter
JK Freak
Joined: Jan 2008
Posts: 508
Likes: 5
From: St. Louis, MO
Pretty good if I recall. At first it didn't seem like it was fitting correctly but I moved it around and it seems fine. I will say that you can just see the bottom of the round cutout on the inside of the pod. Rugged ridge took a little too much plastic off there. It's barely noticeable. This is the surround at one of the bolt hole cutouts.
Trending Topics

JK Newbie
Joined: Jun 2012
Posts: 13
Likes: 0
From: Edison, NJ
Okay, I spent almost 10 hours yesterday installing my four OTRATTW three way switches in my rugged ridge a pillar mount. I'll caveat the 10 hours in that I'm super anal and use only the highest quality materials. I heat shrink all connections. And I made the entire thing removable by the dealer. So here we go:
<img src="https://www.jk-forum.com/forums/attachment.php?attachmentid=421191"/>
Since I'm using carling contours v three ways, the two LEDs each have to be grounded separately. So I made this little negative ground harness, daisy chained together. Four switches times two LEDs per switch equals 8 connections.
<img src="https://www.jk-forum.com/forums/attachment.php?attachmentid=421192"/>
I wanted the green lights to be on with the ignition, so I daisy chained the four spades for those. I have them wired into both my switched fuse box, and also to the dome light (using a diode) so when I open the door at night, regardless if the ignition is on or not, the green wording lights up so I know which switch is which.
<img src="https://www.jk-forum.com/forums/attachment.php?attachmentid=421193"/>
Green on left side. Not too bright and kind of matches dash.
<img src="https://www.jk-forum.com/forums/attachment.php?attachmentid=421194"/>
<img src="https://www.jk-forum.com/forums/attachment.php?attachmentid=421195"/>
Side note, I use a $160 crimping tool that gives me factory like crimps. With the jeep bouncing around, these crimps are vital. I also use adhesive lined heat shrink which glues the connection together. The combo of good crimps and this heat shrink results in a connection that cannot be pulled apart. When I wire for others, I guarantee my wiring for 10 years (no kidding).
<img src="https://www.jk-forum.com/forums/attachment.php?attachmentid=421196"/>
So on my switches, they're on-off-on switches. With these switches, I can have the switch in "auto" mode and have my reverse lights go on when I go into reverse. If the switch is in the middle (off), the lights are off. And flipping it the other way (in my case to constant power) the lights turn on manually. Well, there are two LEDs on the switch, and I wanted the orange sides of the switches (the logo side) to go on regardless of which direction the switch was switched. When I switch I to reverse, the orange lights goes on; when I manually switch it, the orange light goes on. In order to accomplish this, you have to jump the positive to the orange led to the center output spade on the switch. Hence these double jumpers.
<img src="https://www.jk-forum.com/forums/attachment.php?attachmentid=421201"/>
Here's what it looks like hooked up. By the way, I used 18-4 black jacketed speaker wire for my setup. There are four wires with different colored wires in the same sheath. I cut all four about an inch apart so they lined up better when plugging them in. Remember I'm going to have four inputs in "auto" mode, four inputs in constant mode, and four outputs; a total of 28 spades on these four switches. Being organized when cutting and matching colors up saves a lot of time. Wire management is key, because it gets really tight on the back of the switches.
<img src="https://www.jk-forum.com/forums/attachment.php?attachmentid=421204"/>
Next was my first "harness" as I'll call it, for the auto side of the switch. Again, I cut the four wires to the same spacing as the switches, and used the same color coding on the input wires as the output wires (for me it was red for top switch, then black, then green, then white, from top to bottom). I made two of these (one for auto side and one for constant side).
<img src="https://www.jk-forum.com/forums/attachment.php?attachmentid=421206"/>
Another side note: I've been wiring for almost 25 years (I'm 40 years old). This is my connector box. Having all of the proper ring terminals, spade terminals, Molex connectors, crimp tools, heat shrink, heat gun, wire stripper (another $140 tool) makes all of this easier. My garage is like a factory and it still took me 10 hours!)
<img src="https://www.jk-forum.com/forums/attachment.php?attachmentid=421207"/>
One harness, with heat shrink on every connector.
<img src="https://www.jk-forum.com/forums/attachment.php?attachmentid=421209"/>
JK mirror makes great heat gun holder. Don't let hot tip touch plastic!
<img src="https://www.jk-forum.com/forums/attachment.php?attachmentid=421210"/>
The reason I'm calling these harnesses is because I'm putting disconnects at the bottom of all three of them so that if I have to get the jeep serviced the dealer can unplug these without cutting anything (not having to unplug anything at the switches themselves). The plugs will go down in the dash side compartment cover. So I marked each harness near the top and near the bottom, so once I put the pod in, I don't have to remember which harness is which and what color wire controls which switch.
<img src="https://www.jk-forum.com/forums/attachment.php?attachmentid=421213"/>
<img src="https://www.jk-forum.com/forums/attachment.php?attachmentid=421214"/>
<img src="https://www.jk-forum.com/forums/attachment.php?attachmentid=421215"/>
Two exact harnesses, marked constant and on with wire colors noted.
<img src="https://www.jk-forum.com/forums/attachment.php?attachmentid=421216"/>
Since this harness isn't exposed to moisture, I added just a dab of dielectric grease to make sliding them on easier and prevent any corrosion. Not necessary likely, but it can't hurt.
<img src="https://www.jk-forum.com/forums/attachment.php?attachmentid=421217"/>
These little pliers helped getting the females onto the spades. It was getting tight in there.
<img src="https://www.jk-forum.com/forums/attachment.php?attachmentid=421218"/>
<img src="https://www.jk-forum.com/forums/attachment.php?attachmentid=421219"/>
<img src="https://www.jk-forum.com/forums/attachment.php?attachmentid=421220"/>
28 connections. Three main harnesses: output, auto Input, constant input. Then I had two loose wires: black was ground for everything, and red was the positive for the green LEDs.
<img src="https://www.jk-forum.com/forums/attachment.php?attachmentid=421222"/>
Tested everything on my spare battery before putting in. Everything was in order. Orange light on regardless of which direction I pushed the switch.
<img src="https://www.jk-forum.com/forums/attachment.php?attachmentid=421223"/>
Here's the bottom end of each harness hanging down out the side port at the end of the dash. A perfect place to hide everything and easily access all wiring. Notice how I cut the harnesses a little different length so all connectors didn't bunch up at the exact same place.
<img src="https://www.jk-forum.com/forums/attachment.php?attachmentid=421224"/>
I realized that I didn't have any Molex 4-pin connectors, so in the short run, I added Posi-Locks to the end of each wire. These are toolless connectors that can be reused and will keep any unused wire from shorting out. Once my Molex connectors come in, I'll add them to the end of all wires and I will truly have pigtail harnesses that the dealer can unplug to service the dash.
<img src="https://www.jk-forum.com/forums/attachment.php?attachmentid=421225"/>
<img src="https://www.jk-forum.com/forums/attachment.php?attachmentid=421226"/>
<img src="https://www.jk-forum.com/forums/attachment.php?attachmentid=421227"/>
The colors are nice. Not too bright.
<img src="https://www.jk-forum.com/forums/attachment.php?attachmentid=421230"/>
Once all that was done, It was then just a matter of getting input and out put wires to the bottom of my harnesses. I was using the black 18-4 wiring which was nice, and I ran it through the hole to the top left in the pic (my dash hole down below is just about maxed out).
<img src="https://www.jk-forum.com/forums/attachment.php?attachmentid=421231"/>
I have two blu seas on a custom sPOD mount I did; one is constant, one is hot. Here's a summary of my inputs per switch:
Reverse switch: constant input from constant fuse box; auto input tapped under passenger footwell. White wire with thin gray stripe. Causes Dually D2s in my bumper to come on with reverse lights. For those, I'm using the relay that came with them Mounted next to my battery. The relay lead is what goes to my output wire on the switch. To get the wiring back to the lights, I actually fished the wire through the frame of the jeep (yes, inside the actual frame); I figured it would never get hung up on anything while wheeling,
Driving lights switch: same as reverse basically. Constant feed from constant fuse box. Auto feed from a wire I tapped I to the high beams up by the bulbs and just ran the wire back. Output goes to the relay that came with the D2 Drivings on front bumper.
Fog lights: these are PIAA LEDs and I'm using them as DRLs. So one lead is from the switched fuse box and one lead is from the constant fuse box.
By the way, I'm using the constant fuse box on the one side so that I can reach in the jeep at any time and turn some lights on. I load a trailer frequently and have the reverse lights on their own switch where I don't have to turn the jeep on will be nice. Remember, my green led illuminating the switch name turns on with the dome lights when I open the door, so voila, I can see what is what when I open the door.
My last switch says dome lights, but I'm actually putting Rigid SRM red diffused on the taillights. They will be wired as constant (for fog and heavy rain) and I'm adding a strobe flasher for emergencies and pulling over on the side of the road. Same switch setup, but the wiring is a little backwards on that once since the flasher is in the mix. For this switch, there's one constant input and two outputs, so the switch is wired the opposite of the others (which have two inputs and one output). Pm me for more info.
By the time I got everything wired, it took aBout 10 hours. It looks almost oem though! Okay, my fingers are sore, I need a break,
<img src="https://www.jk-forum.com/forums/attachment.php?attachmentid=421235"/>
<img src="https://www.jk-forum.com/forums/attachment.php?attachmentid=421237"/>
Color is great. Loving the setup.
<img src="https://www.jk-forum.com/forums/attachment.php?attachmentid=421191"/>
Since I'm using carling contours v three ways, the two LEDs each have to be grounded separately. So I made this little negative ground harness, daisy chained together. Four switches times two LEDs per switch equals 8 connections.
<img src="https://www.jk-forum.com/forums/attachment.php?attachmentid=421192"/>
I wanted the green lights to be on with the ignition, so I daisy chained the four spades for those. I have them wired into both my switched fuse box, and also to the dome light (using a diode) so when I open the door at night, regardless if the ignition is on or not, the green wording lights up so I know which switch is which.
<img src="https://www.jk-forum.com/forums/attachment.php?attachmentid=421193"/>
Green on left side. Not too bright and kind of matches dash.
<img src="https://www.jk-forum.com/forums/attachment.php?attachmentid=421194"/>
<img src="https://www.jk-forum.com/forums/attachment.php?attachmentid=421195"/>
Side note, I use a $160 crimping tool that gives me factory like crimps. With the jeep bouncing around, these crimps are vital. I also use adhesive lined heat shrink which glues the connection together. The combo of good crimps and this heat shrink results in a connection that cannot be pulled apart. When I wire for others, I guarantee my wiring for 10 years (no kidding).
<img src="https://www.jk-forum.com/forums/attachment.php?attachmentid=421196"/>
So on my switches, they're on-off-on switches. With these switches, I can have the switch in "auto" mode and have my reverse lights go on when I go into reverse. If the switch is in the middle (off), the lights are off. And flipping it the other way (in my case to constant power) the lights turn on manually. Well, there are two LEDs on the switch, and I wanted the orange sides of the switches (the logo side) to go on regardless of which direction the switch was switched. When I switch I to reverse, the orange lights goes on; when I manually switch it, the orange light goes on. In order to accomplish this, you have to jump the positive to the orange led to the center output spade on the switch. Hence these double jumpers.
<img src="https://www.jk-forum.com/forums/attachment.php?attachmentid=421201"/>
Here's what it looks like hooked up. By the way, I used 18-4 black jacketed speaker wire for my setup. There are four wires with different colored wires in the same sheath. I cut all four about an inch apart so they lined up better when plugging them in. Remember I'm going to have four inputs in "auto" mode, four inputs in constant mode, and four outputs; a total of 28 spades on these four switches. Being organized when cutting and matching colors up saves a lot of time. Wire management is key, because it gets really tight on the back of the switches.
<img src="https://www.jk-forum.com/forums/attachment.php?attachmentid=421204"/>
Next was my first "harness" as I'll call it, for the auto side of the switch. Again, I cut the four wires to the same spacing as the switches, and used the same color coding on the input wires as the output wires (for me it was red for top switch, then black, then green, then white, from top to bottom). I made two of these (one for auto side and one for constant side).
<img src="https://www.jk-forum.com/forums/attachment.php?attachmentid=421206"/>
Another side note: I've been wiring for almost 25 years (I'm 40 years old). This is my connector box. Having all of the proper ring terminals, spade terminals, Molex connectors, crimp tools, heat shrink, heat gun, wire stripper (another $140 tool) makes all of this easier. My garage is like a factory and it still took me 10 hours!)
<img src="https://www.jk-forum.com/forums/attachment.php?attachmentid=421207"/>
One harness, with heat shrink on every connector.
<img src="https://www.jk-forum.com/forums/attachment.php?attachmentid=421209"/>
JK mirror makes great heat gun holder. Don't let hot tip touch plastic!
<img src="https://www.jk-forum.com/forums/attachment.php?attachmentid=421210"/>
The reason I'm calling these harnesses is because I'm putting disconnects at the bottom of all three of them so that if I have to get the jeep serviced the dealer can unplug these without cutting anything (not having to unplug anything at the switches themselves). The plugs will go down in the dash side compartment cover. So I marked each harness near the top and near the bottom, so once I put the pod in, I don't have to remember which harness is which and what color wire controls which switch.
<img src="https://www.jk-forum.com/forums/attachment.php?attachmentid=421213"/>
<img src="https://www.jk-forum.com/forums/attachment.php?attachmentid=421214"/>
<img src="https://www.jk-forum.com/forums/attachment.php?attachmentid=421215"/>
Two exact harnesses, marked constant and on with wire colors noted.
<img src="https://www.jk-forum.com/forums/attachment.php?attachmentid=421216"/>
Since this harness isn't exposed to moisture, I added just a dab of dielectric grease to make sliding them on easier and prevent any corrosion. Not necessary likely, but it can't hurt.
<img src="https://www.jk-forum.com/forums/attachment.php?attachmentid=421217"/>
These little pliers helped getting the females onto the spades. It was getting tight in there.
<img src="https://www.jk-forum.com/forums/attachment.php?attachmentid=421218"/>
<img src="https://www.jk-forum.com/forums/attachment.php?attachmentid=421219"/>
<img src="https://www.jk-forum.com/forums/attachment.php?attachmentid=421220"/>
28 connections. Three main harnesses: output, auto Input, constant input. Then I had two loose wires: black was ground for everything, and red was the positive for the green LEDs.
<img src="https://www.jk-forum.com/forums/attachment.php?attachmentid=421222"/>
Tested everything on my spare battery before putting in. Everything was in order. Orange light on regardless of which direction I pushed the switch.
<img src="https://www.jk-forum.com/forums/attachment.php?attachmentid=421223"/>
Here's the bottom end of each harness hanging down out the side port at the end of the dash. A perfect place to hide everything and easily access all wiring. Notice how I cut the harnesses a little different length so all connectors didn't bunch up at the exact same place.
<img src="https://www.jk-forum.com/forums/attachment.php?attachmentid=421224"/>
I realized that I didn't have any Molex 4-pin connectors, so in the short run, I added Posi-Locks to the end of each wire. These are toolless connectors that can be reused and will keep any unused wire from shorting out. Once my Molex connectors come in, I'll add them to the end of all wires and I will truly have pigtail harnesses that the dealer can unplug to service the dash.
<img src="https://www.jk-forum.com/forums/attachment.php?attachmentid=421225"/>
<img src="https://www.jk-forum.com/forums/attachment.php?attachmentid=421226"/>
<img src="https://www.jk-forum.com/forums/attachment.php?attachmentid=421227"/>
The colors are nice. Not too bright.
<img src="https://www.jk-forum.com/forums/attachment.php?attachmentid=421230"/>
Once all that was done, It was then just a matter of getting input and out put wires to the bottom of my harnesses. I was using the black 18-4 wiring which was nice, and I ran it through the hole to the top left in the pic (my dash hole down below is just about maxed out).
<img src="https://www.jk-forum.com/forums/attachment.php?attachmentid=421231"/>
I have two blu seas on a custom sPOD mount I did; one is constant, one is hot. Here's a summary of my inputs per switch:
Reverse switch: constant input from constant fuse box; auto input tapped under passenger footwell. White wire with thin gray stripe. Causes Dually D2s in my bumper to come on with reverse lights. For those, I'm using the relay that came with them Mounted next to my battery. The relay lead is what goes to my output wire on the switch. To get the wiring back to the lights, I actually fished the wire through the frame of the jeep (yes, inside the actual frame); I figured it would never get hung up on anything while wheeling,
Driving lights switch: same as reverse basically. Constant feed from constant fuse box. Auto feed from a wire I tapped I to the high beams up by the bulbs and just ran the wire back. Output goes to the relay that came with the D2 Drivings on front bumper.
Fog lights: these are PIAA LEDs and I'm using them as DRLs. So one lead is from the switched fuse box and one lead is from the constant fuse box.
By the way, I'm using the constant fuse box on the one side so that I can reach in the jeep at any time and turn some lights on. I load a trailer frequently and have the reverse lights on their own switch where I don't have to turn the jeep on will be nice. Remember, my green led illuminating the switch name turns on with the dome lights when I open the door, so voila, I can see what is what when I open the door.
My last switch says dome lights, but I'm actually putting Rigid SRM red diffused on the taillights. They will be wired as constant (for fog and heavy rain) and I'm adding a strobe flasher for emergencies and pulling over on the side of the road. Same switch setup, but the wiring is a little backwards on that once since the flasher is in the mix. For this switch, there's one constant input and two outputs, so the switch is wired the opposite of the others (which have two inputs and one output). Pm me for more info.
By the time I got everything wired, it took aBout 10 hours. It looks almost oem though! Okay, my fingers are sore, I need a break,
<img src="https://www.jk-forum.com/forums/attachment.php?attachmentid=421235"/>
<img src="https://www.jk-forum.com/forums/attachment.php?attachmentid=421237"/>
Color is great. Loving the setup.

JK Newbie
Joined: Dec 2012
Posts: 12
Likes: 0
From: IL
Finally connected to the dash lights (for dimmer control power) for my OTRATTW switches. And for those with the lighted per lock button in the door, the harness going to the door is a great accessible place to tie in. As long as your a contortionist and can reach up under the dash.