When you click on links to various merchants on this site and make a purchase, this can result in this site earning a commission. Affiliate programs and affiliations include, but are not limited to, the eBay Partner Network.
I had some quiet time one afternoon and got to work on getting the housing stripped down a bit and prepped for welding the truss. The first step was to matchmark the carrier caps to the housing, then remove the shafts and carrier:
After that, I turned my attention to removing the vent hose fitting. Note for anyone needing to do this, you’ll need to completely remove the adjusting collar as the hole is covered up (see red arrow):
A few quick whacks with a long punch and it popped right out. The hole that the fitting is pressed into is just about perfectly sized for a 1/4” NPT fitting. I’m gonna run a 7/16” drill bit down just to clean up any edges, but it’s probably not required.
I’ll be picking up a brand new in box Gamechanger 3.5” lift kit from someone about 2 hours away (we are meeting halfway). I already have the 2.5” Dual Rate MetalCloak kit, but wanted to get the full set of arms and rear track bar, and a set of 3.5” springs. I was waiting on a Black Friday sale, but for $2000, this is basically the same $$ I would be spending, plus will let me save my 2.5” lift for Charlotte’s Jeep next year (which will also get my current axles with a fresh regear, and a set of 35”s).
Speaking of picking things up... now the REAL fun and planning begins:
It's a 2010 5.7L VVT Hemi out of a truck. The PO of this engine bought the entire truck as a project. He said it had a CEL light that came up for Cylinder 8 misfire and had a video of it running. It sounded and idled fine, so figured it was a good a candidate as any really.
It needs a deep cleaning, but is otherwise complete with all accessories, harness, PCM, etc. I'm gonna get it on a stand, scrape off as much flaking paint and surface rust as I can, and then get it thoroughly power-washed this weekend (before it gets too cold outside and I run out of time!). This way, once I'm done building the rear axle, I can pull the heads, cam, and lifters and give this a good once over.
Assuming everything looks good, I'm going to give the engine a full refresh. It's very possible that the Cyl 8 misfire is due to a cam/lifter issue. Given the propensity for cam failures in these, I'm going to just plan on swapping the cam anyways and might as well get something with a little bit more zing (currently looking at the Comp Cam HRT Stage 1). I know in stock form, with most modern tunes these VVT engines are good for about 410-415 hp at the crank. With the HRT cam and an appropriate adjustment to the tune, these can easily hit 465 hp and over 475 lb-ft of torque. I can't see needing much more than that, especially with the ZF 8HP70 8-speed transmission's exceptional gearing. Doing the MDS delete and limiting the VVT should make this about as reliable as humanly possible, sans maybe a forged 6.1 take-out crank.
Took some time to finish a house project. Two hours of sweating pipes together and I finally have a spigot in the front of the house!! Not only a spigot, but I plumbed both cold and hot water to it. My original plan was to install two spigots, but due to space issues on the exterior wall, I decided to simply run a single spigot with two water feeds. I can keep the cold water open, but when needed, can open the hot water supply and have 145° water right at the tap...
And let me tell you, it's amazing! Even just rinsing the motor with hot water got so much grime cleaned off. A few sprays with Simple Clean, followed by a proper power washing (also using the hot water!) and the motor is squeaky clean now! I'll wheel it to the back of the garage, pull all the plugs, spray in some fogging spray, and likely pull the intake. At that point, I'll wrap it in a tight bag and there it will sit until I'm done building the 14-Bolt and get the lift installed.
A few Saturday's ago, I made a trek up to Binghamton to meet the guy selling the 3.5" MC Gamechanger. Even though I already had the 2.5" Dual Rate on the shelf, I wanted a full set of arms and was also considering picking up some 3.5" MC springs to use when I swap the axles. I got the 3.5" full kit for less than I would have paid for the arms and springs even on a holiday sale, so it made sense to pick it up.
Although my original plan was to swap the suspension alongside the axles, I decided to take a few days and get the suspension swapped out before winter. I was constantly bottoming out and had banging and clanging the more and more I drove the Jeep. I will use both the 2.5" Dual Rate kit and the 3.5" Gamechanger kit to make a "hybrid" of sorts, using the 2.5" springs to start and then ultimately swapping them over to my daughter's Islander JKU when it comes time.
It took me a good bit of time to do the full install by myself, at least much more so than I thought it would. Truth be told I'm past the 40-year old mark and am slowing down a bit. Plus, I stopped a few times to run some other errands and get some stuff done around the house. I also spent a good bit of time cleaning up the frame and undercarriage. Here it is after some wire wheel and air needler work:
New Crown bump stops since my fronts are totally missing and the rears are crumbling apart:
Double-checking my inventory and then pre-setting the arm lengths according to the MC instructions:
Nothing major again, but it did add at least 3 hours to the total install (for both front and rear) as I took my time and did a thorough powerwash and dry before applying rust-converting primer and paint. Aside from the two front brake lines (going into the hose) that did not want to rotate (I had to "twist off" the hose and reinstall the new MC hoses the same way!), the install went incredibly smooth.
The only major unexpected thing was when I was installing the springs. A lot of people say you can install these springs without a spring compressor. I didn't feel like disconnecting the speed sensor wiring (worrying about damaging it, given its age) or pulling/hanging the calipers, so the compressors certainly made life easier:
Thankfully there weren't any rust or corrosion issues that prevented disassembly. Overall, I got to the point of bleeding brakes and centering the steering wheel after about 11 hours of total work...
After the first test drive, I'm really happy with the set up! I no longer have to bite my teeth together to brace myself when coming up the driveway, or going down certain roads waiting for the suspension to bottom out. I was worried that the 2.5" springs were going to look like I skipped leg day too many times but overall I'm not upset with how it looks in the short term. The backspacing on these wheels help push the edge of the 285/75's out to the edge of the fender flare, and their slightly larger size helps a bit. It would look better with a set of 35"s slapped on there, but such is life. She'll be wearing a set of 37-38"s soon enough (once I swap the axles this spring), though if I find a nice set of 35"s, I would consider doing a short-term swap (again, these wheels are likely going to my daughter's rig when I'm done with them).
After the test drive, I decided to check the toe and tweak the steering wheel centeredness:
Toe looked off a tad but was dead on with 1/4” toe-in so I didn’t touch it. I did a slight tweak on the drag link and the wheel is dead straight and drives perfectly centered down the road (on top of the crown of course):
The Mrs asked if I would run some errands, so I spent the better part of two hours driving around, up and down country roads, through town, over railroad tracks, and nearly everything in between.
The handling and ride are great. It will take some time to get used to how tight and responsive the suspension and steering are now. The worn bushings and sagging factory springs made for a supple, but unresponsive driving experience...
Been driving her around the past two days, including some highway trips. She’s smooth as butter, so smooth in fact my wife commented on how nice the ride is now (though she is back to complaining that I have a vehicle that she can’t get into… being 5’2” is tough with a Jeeper husband). I rechecked the torque on all the hardware and did my best to tighten up the locknuts on the control arms and track bars. I’m gonna order the crow’s feet from MetalCloak on their next sale weekend.
I picked up a new Duralast 34-DT battery to replace the economy brand battery in the Jeep now. It’s not acting up, but I don’t like how the terminals are crossed (the current battery has terminals on the opposite side that the factory Jeep terminals are), and I want to get my Warn Zeon 10S installed soon. I’ll keep the current battery on the trickle charger and have it as a backup through the winter months. I got the new battery installed, though one of the accessory posts is stripped (it stripped while taking the nut off!), so it’s not in its final configuration at the moment but close:
I used the Made in the USA Moroso aluminum battery terminals and wow are these things nice!
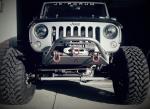
With the new battery in place, I finally had a chance to install the Zeon 10S I had on the shelf. It needs a new hook, so it’s only lightly spooled at this point, but overall it fit great on the Red Rock bumper!
Found this low-mile 8HP70 about an hour away, so I went ahead and picked it up:
Turning my attention to wrapping up the rear axle. Getting these lugs off were a nightmare! Spray, clean, soak, spray, on and on for weeks now and I still had to bust out the MAPP torch…
Thankfully, none required the smoke wrench! I was able to pull the caliper mount bolts out fairly easily, so I got those off and ready to be core-swapped for a new set shortly.
In preparation for welding the tubes and bracketry this weekend, I picked up a set of used 33” tires to replace the worn set of 35”s that were on those 18” Dodge wheels I got a few weeks back.
For $180, I won’t complain as these Coopers have a lot of tread left and will make for a perfect set of rollers during the Hemi swap. They will also make for a good set to drive to the shop during my annual safety inspection each year.
With any luck, ECGS will have some good sales soon and I’ll place the order for the gears, TrueTrac, and install kit and can be done with this axle, allowing me to then focus on the engine and trans swap…
Looking good. Couple comments....now that you have gone higher, high-steer kit/drag link flip is gonna benefit you if you have not done that yet or contemplated it. also, those MC arm bushings are "low-maintenance", not "no-maintenance" as most like to pretend. I have been really happy with my arms for years and years, but I do pull them off every other year or so to regrease them with their unicorn teflon grease. That kinda is a pain in the butt since it requires essentially uninstalling and reinstalling em vs. having a grease zerk. I have also had to do a complete replacement of the bushings once. I have a thread somewhere on here but i want to say i got maybe 6 years out of the originals. obviously any joint is a maintenance item, and you are both an intelligent and capable man so i'm sure this isn't news....just highlighting it. Some folks are a bit more oblivious.
Looking good. Couple comments....now that you have gone higher, high-steer kit/drag link flip is gonna benefit you if you have not done that yet or contemplated it.
Thanks, I'm happy with how it's progressing. Overall, the JKU was a good move for me as the added space really comes in handy. Heck I even used it to bring home a new 50-gal Rheem hot water tank when the 20-year old tank in our house gave up the ghost!
The draglink isn't a concern for me at the moment. Remember I'm switching over to the UD60/14B in the spring and the UD60 already has a high-steer arm installed (plus improved tie-rod arm geometry) and an appropriately raised trackbar mount to keep them parallel. The draglink joint still mounts below-the-arm, which helps keep the link out of the frame rail, and out of the engine (esp important with my pending Hemi swap). I'll see how it all clears once it's all said and done and if necessary, make some changes at that point, particularly if tie rod clearance becomes an issue (though not have reported it that I've seen).
Originally Posted by resharp001
also, those MC arm bushings are "low-maintenance", not "no-maintenance" as most like to pretend. I have been really happy with my arms for years and years, but I do pull them off every other year or so to regrease them with their unicorn teflon grease. That kinda is a pain in the butt since it requires essentially uninstalling and reinstalling em vs. having a grease zerk. I have also had to do a complete replacement of the bushings once. I have a thread somewhere on here but i want to say i got maybe 6 years out of the originals. obviously any joint is a maintenance item, and you are both an intelligent and capable man so i'm sure this isn't news....just highlighting it. Some folks are a bit more oblivious.
Yeah, I've seen a lot of folks suggest that MC arms are "no maintenance", even though the instruction manual is explicit and clear about the required maintenance. I'm like you, I just plan on doing it every spring before wheeling season starts up. When I was in AZ, we did it every fall, since wheeling season started in October. Nowadays, I use fall for frame cleaning and paint touch-ups in preparation for winter.
Despite cleaning the $hit out of this axle, and preheating it twice with a MAPP torch, my first pass on both sides had some porosity. With a distinct smell of oil, I suspect there was something deep in the junction that worked its way out.
I ground it clean, preheated once more, and hit again, this time laying down a nice bead. I wrapped it with a welding blanket and let it cool for 20-30 minutes to the point where it was still warm but able to be touched by hand.
My axle had a small step between the tube and housing, so not wanting to leave a stress point, I ended up doing 3 passes, letting it cool between each.
Some primer while it was still warm and she’s ready for the truss to be welded on this weekend!
Didn't realize how long it's been since I put together an update. It's been a busy winter with college visits and house-related stuff, but still was able to keep progress moving...
Got the Artec Apex truss all installed:
Ended up going with 4.88 gearing (due to the forthcoming Hemi and ZF 8HP70 swap) and a Richmond Power-Trax Helical LSD. I figured that since this is more of an expedition/camping/trail rig and not a rock crawler, the LSD would be more useful than an air locker, especially with the Hemi.
All new and ready to rock!
Hoped on a Fusion 4x4 "F-Ton Steering" sale they had...
New studs, fresh paint, new Timken bearings and races, new National seals, and Artec tone rings...
New "corrosion coated" rotors (from AutoZone)... just waiting on open-top 9/16" lug nuts so I can mount the wheels up nice and tight and can then start rolling these underneath.
Progress being made... my daughter started college a few weeks ago, which means I have her Islander to drive around as needed.
I got the UD60/14B swapped in place. I'm saving the take-out axles from my JKU and am rebuilding them for my daughter's Islander (which needs some rebuilds anyways) with a TrueTrac and a set of 5.13's (that 3.8L needs all the help it can get with 33"s!). Her Islander also got my wheels/tires, and Rubi sliders.
Fresh hardware makes installation much nicer!
With how the Artec Apex truss sits, there's a slight interference with the backing plate. Thankfully, a quick hit with a cut off disc and flap wheel made this an easy fix.
The front brake lines needed to be replaced as the tube nut was rust-welded to the tube itself. For the rear, I needed to shorten up the line a bit and move it forward of the coil spring. This is because the 14B has calipers in the front, unlike the D44 which has it towards the rear. I moved the control arms up and down to check clearances. It is close but should be good. I'll of course check once I'm able to do so.
I picked up a set of 40" Pat's from Marketplace to see how it looked and get an idea of clearances, and more importantly, overall height.
While I took my daughter back to school after the long weekend, I found a guy selling a 10th Anniversary Bumper w/AEV tire carrier for a steal of a price! This is good for a few reasons, the main reason being that the tire carrier is a "one handed" design and can still accommodate a 40" tire.
I also picked up some lightly used Bushwhacker Flat Flares a few weeks ago. Even though these wheels aren't the correct backspacing, I'm surprised as to the amount of coverage the flares provide. I'll get some poke out but not enough to cause too many problems with the State Troopers.
The 40"s look great but I am going to drop down a bit for a few reasons. First, I don't think the 3.5" springs are enough to get a decent amount of uptravel in the rear. It would force me to use a 4.5" spring (or longer), which unfortunately would prevent me from driving the Jeep into the garage. The second reason is that the bumper is about 3" higher than the state limit. With a smaller tire, I can potentially drop the rear down to 2.5" springs (which will eliminate the rake), and would make a ~37" tire keep it road legal. I may eventually do all the clearancing needed to clear 40"s for "trail days", but will run around on a set of 37-38"s to keep things legal.
Making progress still... modified the AEV tire carrier to accept the 8x6.5" pattern. I simply ordered a Barnes DIY Tire Carrier plate, cut the old one off, and welded the new one on.
I drilled and tapped a 1/4" hole in the center of the plate to give me a good spot to mount the Alpine back up camera.
I had to take a break from working on my JKU to work on my daughter's Islander. I rebuild the axles I took out of my JKU, added 5.13's, a TrueTrac rear, all new Bilstein shocks, all new bushings and balljoints, new Moog wheel bearings, brakes, parking brakes, and more. I even threw on some Spicer cast diff covers for a little extra sparkle haha...
The shafts in the old axles were in terrible shape and were being a PITA getting the new Spicers to fit correctly. I got tired of trying to make them work and ordered the last set of these at Quadratec...
Gears are all broken in, brakes feel great, steering is 100x better than it was, and she doesn't wiggle all over the road when you hit a pothole!
Back to working on my JKU, I pulled the old, smelly carpet out - hopefully I can catch a good Christmas sale on a BedRug set...
I started pulling the Hemi apart and found some bad news... the lobe on cylinder 8 was chewed up, and the lobes on 4 and 5 were working on the same:
I spent some time deciding if I wanted to deal with cleaning the block I bought. Decided it was easier and more efficient - and not much more $$ - to just find a new Mopar Crate motor, so that's what I did:
The 3.8L is out and will be sold soon. I'll begin prepping the frame this weekend and hope to order my JSS parts once their Black Friday sales start hitting
Making progress still... modified the AEV tire carrier to accept the 8x6.5" pattern. I simply ordered a Barnes DIY Tire Carrier plate, cut the old one off, and welded the new one on.
I drilled and tapped a 1/4" hole in the center of the plate to give me a good spot to mount the Alpine back up camera.
I had to take a break from working on my JKU to work on my daughter's Islander. I rebuild the axles I took out of my JKU, added 5.13's, a TrueTrac rear, all new Bilstein shocks, all new bushings and balljoints, new Moog wheel bearings, brakes, parking brakes, and more. I even threw on some Spicer cast diff covers for a little extra sparkle haha...
The shafts in the old axles were in terrible shape and were being a PITA getting the new Spicers to fit correctly. I got tired of trying to make them work and ordered the last set of these at Quadratec...
Gears are all broken in, brakes feel great, steering is 100x better than it was, and she doesn't wiggle all over the road when you hit a pothole!
Back to working on my JKU, I pulled the old, smelly carpet out - hopefully I can catch a good Christmas sale on a BedRug set...
I started pulling the Hemi apart and found some bad news... the lobe on cylinder 8 was chewed up, and the lobes on 4 and 5 were working on the same:
I spent some time deciding if I wanted to deal with cleaning the block I bought. Decided it was easier and more efficient - and not much more $$ - to just find a new Mopar Crate motor, so that's what I did:
The 3.8L is out and will be sold soon. I'll begin prepping the frame this weekend and hope to order my JSS parts once their Black Friday sales start hitting





 I have been really happy with my arms for years and years, but I do pull them off every other year or so to regrease them with their unicorn teflon grease. That kinda is a pain in the butt since it requires essentially uninstalling and reinstalling em vs. having a grease zerk. I have also had to do a complete replacement of the bushings once. I have a thread somewhere on here but i want to say i got maybe 6 years out of the originals. obviously any joint is a maintenance item, and you are both an intelligent and capable man so i'm sure this isn't news....just highlighting it. Some folks are a bit more oblivious.


