Notices
JK Garage - Member Builds Post your Jeep builds here and share your experiences on the build with the JK-Forum community.

Ade's JK Build (2 Door)

Thread Tools
 
Old Feb 16, 2015 | 08:36 PM
  #81  
BubbaJK2012's Avatar
JK Junkie
 
Joined: Jun 2012
Posts: 3,336
Likes: 0
From: Midwest
Default

Originally Posted by ade
Thanks, we will have to hit the trails soon. Have you installed your sleeves yet, I have a set to install also.
Sleeves, guessets, Reid knuckles, pro steers, RCV axles, big brake kit, Currie Drag link and steering
Reply
Old Feb 16, 2015 | 08:38 PM
  #82  
BubbaJK2012's Avatar
JK Junkie
 
Joined: Jun 2012
Posts: 3,336
Likes: 0
From: Midwest
Default

Originally Posted by ade
Thanks Bubba. Do you have a build thread for your 2 door?
I did mine back in 2010/2011 and was in the spring so I was in a hurry to get bubba on the road because I don't drive him on salty Minnesota roads
Reply
Old Feb 16, 2015 | 08:39 PM
  #83  
BubbaJK2012's Avatar
JK Junkie
 
Joined: Jun 2012
Posts: 3,336
Likes: 0
From: Midwest
Default

Originally Posted by ade
I really like them. I wish the rears had some adjustment on height though, my 3" of lift only just clears them. Thinking of pulling one apart to see if I can shorten them an inch.
I currently run the speed bumps front and rear and run great as DD and running fast on back basic country roads
Reply
Old Feb 21, 2015 | 06:46 PM
  #84  
ade's Avatar
ade
Thread Starter
JK Enthusiast
 
Joined: Apr 2014
Posts: 479
Likes: 0
From: Alameda, CA
Default

Time to keep everything safe under the hood. Installed a Mopar hood lock. 15mins work may save $100s, will never know but time to be safe.

Click image for larger version

Name:	20150221_164532.jpg
Views:	295
Size:	46.8 KB
ID:	598111

Reply
Old Feb 21, 2015 | 06:51 PM
  #85  
ade's Avatar
ade
Thread Starter
JK Enthusiast
 
Joined: Apr 2014
Posts: 479
Likes: 0
From: Alameda, CA
Default

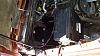
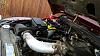
So the Genesis dual battery kit went in today. Looked like it might be complicated but was quite simple in the end. Only needed to cut one evap tube, other seems to be ok in the new position.
Click image for larger version

Name:	20150221_120153.jpg
Views:	326
Size:	59.8 KB
ID:	598112

Click image for larger version

Name:	20150221_164341.jpg
Views:	317
Size:	65.5 KB
ID:	598114

Click image for larger version

Name:	20150221_163925.jpg
Views:	337
Size:	91.6 KB
ID:	598116

Last edited by ade; Feb 21, 2015 at 06:58 PM.
Reply
Old Feb 21, 2015 | 06:56 PM
  #86  
ade's Avatar
ade
Thread Starter
JK Enthusiast
 
Joined: Apr 2014
Posts: 479
Likes: 0
From: Alameda, CA
Default

Also installed the Genesis indicator switch unit. Install needs cleaning up a bit. Switch not sitting straight at the moment.

Click image for larger version

Name:	20150221_164032.jpg
Views:	376
Size:	50.3 KB
ID:	598118

Reply
Old Feb 21, 2015 | 07:03 PM
  #87  
JK505's Avatar
JK Super Freak
 
Joined: Aug 2014
Posts: 1,813
Likes: 0
From: Nokesville, Va
Default

Originally Posted by ade
Also installed the Genesis indicator switch unit. Install needs cleaning up a bit. Switch not sitting straight at the moment. <img src="https://www.jk-forum.com/forums/attachment.php?attachmentid=598118"/>
What's this switch for?
Reply
Old Feb 22, 2015 | 07:41 AM
  #88  
ade's Avatar
ade
Thread Starter
JK Enthusiast
 
Joined: Apr 2014
Posts: 479
Likes: 0
From: Alameda, CA
Default

Originally Posted by JK505

What's this switch for?
It allows you to check battery voltages and operate the boost mode. Bit expensive for what it does but went with it anyway.
Reply
Old Feb 24, 2015 | 07:44 PM
  #89  
DJ1's Avatar
DJ1
Former Member
 
Joined: Apr 2012
Posts: 2,573
Likes: 2
From: USA
Default

Originally Posted by ade
I have the Evo ones so I think it will be more as case of lots of welding than hammering into place. Will let you know when before I start, an extra set of hands is alway helpful.
Sounds good
Reply
Old Mar 23, 2015 | 11:57 AM
  #90  
ade's Avatar
ade
Thread Starter
JK Enthusiast
 
Joined: Apr 2014
Posts: 479
Likes: 0
From: Alameda, CA
Default

Swapped out the rear CA skids for the EVO weld on ones.

Click image for larger version

Name:	image10.jpg
Views:	290
Size:	58.3 KB
ID:	602737

Click image for larger version

Name:	image11.jpg
Views:	272
Size:	38.0 KB
ID:	602738

Also started work on installing Teraflex prerunner bumpstops in the rear.

Last edited by ade; Mar 23, 2015 at 02:58 PM.
Reply


All times are GMT -8. The time now is 07:07 AM.