


Ghost Rider


Thread Starter
JK Newbie
Joined: Jul 2012
Posts: 18
Likes: 0
From: Oakland, CA

Some updates.
Had a few issues I wanted to share with the forum.
1. Beadlockers leaking - both rear wheels are leaking air. Left rear is worse, losing about 20 PSI every day. Fortunately I now have the on-board compressor, which is getting a lot more usage then I expected. Taking it into the shop on Monday to tear down the two rear wheels and reseal the bead-lockers. I'm convinced that I must have missed a little dirt or other debris under the lock ring when I put it together.
2. Frontend Alignment - The guys down at my local 4WheelParts did the alignment for me, but it still needs more tuning. Very squirrelly at highway speeds, especially in a turn, she practically wants to wiggle herself right off the road. While it's in the shop on Monday, I'm going to have them put it back on the alignment rack and see if they can tune it in better.
3. Flashpaq Tuner - I got the Superchip Flashpaq tuner to adjust wheel size and axle ratio, but after that was done I started playing around with the performance tuner configurations. Started with the high performance setup. Definitely boosted performance by a very noticeable amount, but mileage plummeted. After 3 days of long driving, I was only averaging 9 MPG on that config. Switched to the high-mileage config, which is better for mileage but now the throttle response is very erratic. Going to keep experimenting with this.
4. Genesis Offroad Dual Battery Kit - This kit is absolutely awesome!! I opted for two Odyssey PC1500 batteries instead of the Optima yellow tops in the end. Great batteries for sure, but the absolute maximum size that will fit into the dual battery tray. Took a lot of wrestling and cussing to get those damn things seated in the tray. Still have a problem with the stock wiring harnesses which are now out of place due to the longer battery tray and block the plastic engine cover from fitting on. This weekend I'm going to take a stab at some major rerouting of the harness to get everything looking cleaner and fitting nicer. Had a problem with the main battery consistently showing only 9.9 volts, but with the Boost mode enabled, meaning the isolator circuit was detecting that both batteries were fully charged. Finally figured out that the stock battery connectors are inferior to the ones on the Genesis Offroad harness and just weren't getting a solid connection. The right solution would be to rip out all that stock shit and put some proper battery cables on the JK, but I just don't have the patience for that right now. So I used a socket to knock those connectors down nice and solid on the terminals and then tighten them down. Seems to have alleviated the problem. I'm much stronger in electrical then the mechanical work, I'm routinely disappointed by the quality of some of the electrical accessories I've encountered, but I am VERY pleased with the quality and ease of installation of this kit. Genesis Offroad really knows their shit!!!
5. Rockslide Engineering Step-Slider - Overall this was a good choice for getting the clearance I wanted on my rocksliders, while still giving the kids a prayer of climbing into this beast. However, I've had numerous problems with this setup. First the passenger side rail would get stuck partially extended. Turned out to be a lubrication issue - these things are EXTREMELY finicky to lubrication. I've had to lubricate the moving parts about once a week or so to keep things moving smoothly. Then for a while the passenger side rail would not retract. Turned out that when cleaning the jeep I accidentally moved one of the magnets on the door jam so it couldn't actuate the motor to retract. Took me several days to figure out that is what happened. I plan to put in some recessed screws to hold those magnets in place to prevent this from happening again. Finally, the steps sometimes don't extend or retract the first time, a simple opening and closing of the door seems to clear this situation, but it's annoying how erratic these things seem to be. I'm seriously considering a different option.
6. sPOD - Mounting the 2nd sPOD turned out to be tricky. In the end I fabricated a removable bracket to place the 2nd Source Unit on top of the fuse box in front of the battery tray. Seems to work reasonably well, but I'm going to have to do a lot of sheathing and zip ties of the wires to keep anything from getting stressed and causing a major short against the positive battery terminal on the auxiliary battery. I opted not to use sPOD's switch panel for the 2nd set of switches, instead I'm using a switch panel in a new a-pillar panel. I'm also ordering new contura switches with the correct labels, and using independent lighting tied into the dimmer circuit on the dash for both switch panels.
Overall, I'm really happy with this build. Other then the front end alignment issue, this lift performs flawlessly. Did some mild off-roading with some moderate rock climbing and the clearance, articulation and overall performance were exactly what I had hoped for. Can't wait to really see what she can do on the Rubicon Trail in Spring. The Line-X exterior is totally bad-ass!! So much stronger then paint at resisting the little bruises and scratches that inevitably happen offroad, and also looks just awesome! A real head turner. I've been dreaming about this build for 2 years, and it's finally coming together!
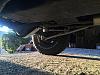
Here are some new pics:



Had a few issues I wanted to share with the forum.
1. Beadlockers leaking - both rear wheels are leaking air. Left rear is worse, losing about 20 PSI every day. Fortunately I now have the on-board compressor, which is getting a lot more usage then I expected. Taking it into the shop on Monday to tear down the two rear wheels and reseal the bead-lockers. I'm convinced that I must have missed a little dirt or other debris under the lock ring when I put it together.
2. Frontend Alignment - The guys down at my local 4WheelParts did the alignment for me, but it still needs more tuning. Very squirrelly at highway speeds, especially in a turn, she practically wants to wiggle herself right off the road. While it's in the shop on Monday, I'm going to have them put it back on the alignment rack and see if they can tune it in better.
3. Flashpaq Tuner - I got the Superchip Flashpaq tuner to adjust wheel size and axle ratio, but after that was done I started playing around with the performance tuner configurations. Started with the high performance setup. Definitely boosted performance by a very noticeable amount, but mileage plummeted. After 3 days of long driving, I was only averaging 9 MPG on that config. Switched to the high-mileage config, which is better for mileage but now the throttle response is very erratic. Going to keep experimenting with this.
4. Genesis Offroad Dual Battery Kit - This kit is absolutely awesome!! I opted for two Odyssey PC1500 batteries instead of the Optima yellow tops in the end. Great batteries for sure, but the absolute maximum size that will fit into the dual battery tray. Took a lot of wrestling and cussing to get those damn things seated in the tray. Still have a problem with the stock wiring harnesses which are now out of place due to the longer battery tray and block the plastic engine cover from fitting on. This weekend I'm going to take a stab at some major rerouting of the harness to get everything looking cleaner and fitting nicer. Had a problem with the main battery consistently showing only 9.9 volts, but with the Boost mode enabled, meaning the isolator circuit was detecting that both batteries were fully charged. Finally figured out that the stock battery connectors are inferior to the ones on the Genesis Offroad harness and just weren't getting a solid connection. The right solution would be to rip out all that stock shit and put some proper battery cables on the JK, but I just don't have the patience for that right now. So I used a socket to knock those connectors down nice and solid on the terminals and then tighten them down. Seems to have alleviated the problem. I'm much stronger in electrical then the mechanical work, I'm routinely disappointed by the quality of some of the electrical accessories I've encountered, but I am VERY pleased with the quality and ease of installation of this kit. Genesis Offroad really knows their shit!!!
5. Rockslide Engineering Step-Slider - Overall this was a good choice for getting the clearance I wanted on my rocksliders, while still giving the kids a prayer of climbing into this beast. However, I've had numerous problems with this setup. First the passenger side rail would get stuck partially extended. Turned out to be a lubrication issue - these things are EXTREMELY finicky to lubrication. I've had to lubricate the moving parts about once a week or so to keep things moving smoothly. Then for a while the passenger side rail would not retract. Turned out that when cleaning the jeep I accidentally moved one of the magnets on the door jam so it couldn't actuate the motor to retract. Took me several days to figure out that is what happened. I plan to put in some recessed screws to hold those magnets in place to prevent this from happening again. Finally, the steps sometimes don't extend or retract the first time, a simple opening and closing of the door seems to clear this situation, but it's annoying how erratic these things seem to be. I'm seriously considering a different option.
6. sPOD - Mounting the 2nd sPOD turned out to be tricky. In the end I fabricated a removable bracket to place the 2nd Source Unit on top of the fuse box in front of the battery tray. Seems to work reasonably well, but I'm going to have to do a lot of sheathing and zip ties of the wires to keep anything from getting stressed and causing a major short against the positive battery terminal on the auxiliary battery. I opted not to use sPOD's switch panel for the 2nd set of switches, instead I'm using a switch panel in a new a-pillar panel. I'm also ordering new contura switches with the correct labels, and using independent lighting tied into the dimmer circuit on the dash for both switch panels.
Overall, I'm really happy with this build. Other then the front end alignment issue, this lift performs flawlessly. Did some mild off-roading with some moderate rock climbing and the clearance, articulation and overall performance were exactly what I had hoped for. Can't wait to really see what she can do on the Rubicon Trail in Spring. The Line-X exterior is totally bad-ass!! So much stronger then paint at resisting the little bruises and scratches that inevitably happen offroad, and also looks just awesome! A real head turner. I've been dreaming about this build for 2 years, and it's finally coming together!
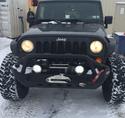
Here are some new pics:
Last edited by Cpeterso87; Jan 2, 2015 at 05:05 PM.

Thread Starter
JK Newbie
Joined: Jul 2012
Posts: 18
Likes: 0
From: Oakland, CA
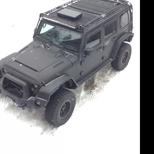
Some things to keep in mind for Line-X exteriors:
- Line-X does not adhere to plastic or fiberglass - stock fenders, mirrors, door handles and the hard top cannot be coated with Line-X.
- Line-X will not adhere well to aluminum without a special primer coating - took 3 attempts on my aluminum fenders to get it to adhere properly.
- Line-X doesn't work well on intricate parts like the hinges - on mine I had them tape off the hinges on the doors and hood, and I think the gloss black is a great accent look with the Line-X.
- Having the exterior Line-Xed and the interior still gloss black looks a little odd in some places, but overall I like it.
- I saved some money by removing the bumpers, rockrails and all the lights - it would have cost additional labor if I had let them do all that.

JK Newbie
Joined: Nov 2014
Posts: 38
Likes: 0
From: Walnut Creek, CA
Your jeep looks great! I also had a grill and hood done at Linex Kustoms in Pittsburgh.
*I do want to add something in regards to materials that Linex can adhere to. Fiberglass will work fine with this material if it is fully encapsulated. My fiberglass hood and grill are completely covered on the inside and outside in this way. See attached:
*I do want to add something in regards to materials that Linex can adhere to. Fiberglass will work fine with this material if it is fully encapsulated. My fiberglass hood and grill are completely covered on the inside and outside in this way. See attached:
Last edited by patmasterflash; Jan 6, 2015 at 01:19 PM. Reason: added more pics