


WxNerd2015's Never Ending Build -

Thread Starter
JK Enthusiast
Joined: Sep 2015
Posts: 419
Likes: 22
From: Madison Heights, MI

When it comes to ball joints, we can provide a solution there! https://www.dynatrac.com/rebuildable...alljoints.html
And for brakes too! https://www.dynatrac.com/brake-syste...e-jeep-jk.html
And for brakes too! https://www.dynatrac.com/brake-syste...e-jeep-jk.html
Thread Starter
JK Enthusiast
Joined: Sep 2015
Posts: 419
Likes: 22
From: Madison Heights, MI
Enjoying the Rig and Gettin' Dirty!
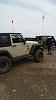
Guess I will cover a few of the trips before I get into the full install of the CB, sPod, and the Compressor. So in February, I took TWSTR out Bundy Hill ORV Park in Jerome, MI. I went out with the Wicked Jeeps SE Michigan Fam and had a fun day of wheeling! Ground started off pretty frozen in the morning still, however, as the day went on, things thawed out, and it got a bit more slick and muddy! But all around, it was a fun day! And I definitely pushed my limits on some of the trails, testing and learning the Jeep, but TWSTR didn't even break a sweat! I was very impressed! Bundy Hill is definitely one of my favorite ORV parks, can't wait to get back again! The main season just opened up for the year this past weekend! But anyways, here's some pics from the trip!

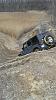
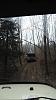
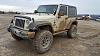

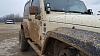
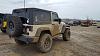
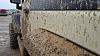
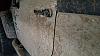
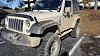
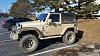
Even ended up with mud inside! Definitely a good day!
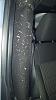
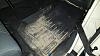
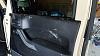
Even ended up with mud inside! Definitely a good day!
Last edited by WxNerd2015; Mar 16, 2017 at 10:53 AM.
Thread Starter
JK Enthusiast
Joined: Sep 2015
Posts: 419
Likes: 22
From: Madison Heights, MI
Ready for anything! New Ski Rack!
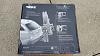
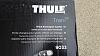
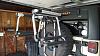
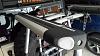
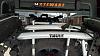
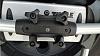
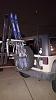
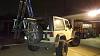
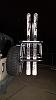
Well, after my regear, got to really test out the new gearing! Took a trip up north here in the Mitten to Crystal Mountian for a fun birthday weekend and ski trip a few weekend back! But to get my skis up there and my fiance's I didn't feel like squeezing em inside, so I ended up getting a ski rack! I got he Thule 9033 Tram because I already had the SpareMe spare tire bike rack, of which the ski rack attaches too! I like this rack because it had plenty of locks to make sure that everything was secure on the back, as well as the padded mounts prevented any damage to skis! The rack has many mounting points and was very secure to the rack! The install was 10-12 steps, as the frame of the ski rack itself had to be attached together, however mounting to the Jeep was very easy, but just placing the cross bars on the to mounts for the bike rack, and then attaching the lower cross bar to the middle of the SpareMe mount on the tire and the rack was good to go! Here's some pics of it!
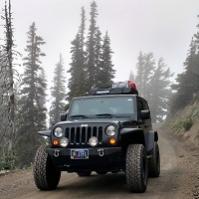
Oh! And for a 500 mile trip, the newly regeared Jeep was amazing! I was so happy with how it worked! I was able to use the O/D gear (4th) most of the way, I was able to put power down when I needed it, and didn't burn a crazy amount of gas! That was the first heavy test for the new gears, and I just could not be happier! And no issues from the gears either, everything was done properly!
Oh! And for a 500 mile trip, the newly regeared Jeep was amazing! I was so happy with how it worked! I was able to use the O/D gear (4th) most of the way, I was able to put power down when I needed it, and didn't burn a crazy amount of gas! That was the first heavy test for the new gears, and I just could not be happier! And no issues from the gears either, everything was done properly!
JK Newbie
Joined: Jan 2016
Posts: 89
Likes: 1
From: Portland, OR
I know how much the Yukon gears are, but if you don't mind me asking, how much was it for the install? I was hoping to wait only re-gear if I made the jump to 35s, but I can't help but feel like I'm torturing my transmission with the current setup.
Thread Starter
JK Enthusiast
Joined: Sep 2015
Posts: 419
Likes: 22
From: Madison Heights, MI
That's great to hear and very helpful feedback. I've been considering re-gearing or doing a Superchips flash cal on my ECU. I have been wondering which route to go with my '09 JK with Auto tranny to get some power back. I'm running 33's and I hate the way it never seems like it's in the right gear driving on the highway, especially going up hills.
I know how much the Yukon gears are, but if you don't mind me asking, how much was it for the install? I was hoping to wait only re-gear if I made the jump to 35s, but I can't help but feel like I'm torturing my transmission with the current setup.
I know how much the Yukon gears are, but if you don't mind me asking, how much was it for the install? I was hoping to wait only re-gear if I made the jump to 35s, but I can't help but feel like I'm torturing my transmission with the current setup.
JK Newbie
Joined: Jan 2016
Posts: 89
Likes: 1
From: Portland, OR
Yeah, I know the feeling! I hated that extra, unneeded wear in the transmission from it! The regear is definitely a first step and the cheapest good route to go to get that power back at least a bit! 4.56s or 4.88s are perfect for that setup you have like mine, just depends on your usage, future plans, and wants! I do not plan to go higher than a 33 and mine is a daily highway driver, so I went 4.56 to keep a bit higher top speed, as well as a bit better fuel mileage. I had them installed at Unlimted Offroad for a total (parts and labor) of just under $1700. It sounds like a big amount, but to let the engine and tranny not work as hard, and maybe get some more life out of em, as well as the fuel mileage gains...it's worth every penny! Hope that helps your decision some!

Thread Starter
JK Enthusiast
Joined: Sep 2015
Posts: 419
Likes: 22
From: Madison Heights, MI
Definitely some good info. And you're right about it seeming like it may be a lot, but by your claim that it feels like it has an extra 100 hp, it sounds well worth it. Not to mention the money that's likely being saved by likely extending the of critical powertrain components. Same here in regards to the daily driver, all the more reason I need to bite the bullet and get'r done. Thanks for the insight
Thread Starter
JK Enthusiast
Joined: Sep 2015
Posts: 419
Likes: 22
From: Madison Heights, MI
Coming Soon!
Here's a sneak peak at the upcoming write up, as I t was a big installation done all at once with an sPod, New CB, and ARB Compressor! So it is taking me a little longer to get this written up, but I promise it is coming soon! Here's some pics to hold ya over!
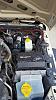
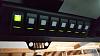
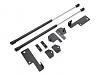
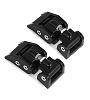
Also, I got some birthday money from earlier this month so I snagged a couple more small mods that I have been meaning to do with the Rugged Ridge Hood Lift Kit from Extreme Terrain and the Rugged Ridge Aluminum Hood Latch Kit from All Things Jeep (Most of the money was a gift card specifically here, otherwise I might have gone a different route, but any mod on the Jeep is good, so no complaints)! And I snagged a Jeep Travel Mug and Coffee Mug and a nice Jeep Polo! I will post pics as they arrive, but here's the links to the products I purchased below!
Rugged Ridge Hood Lift Kit
Rugged Ridge Aluminum Hood Latch Kit
Also, I got some birthday money from earlier this month so I snagged a couple more small mods that I have been meaning to do with the Rugged Ridge Hood Lift Kit from Extreme Terrain and the Rugged Ridge Aluminum Hood Latch Kit from All Things Jeep (Most of the money was a gift card specifically here, otherwise I might have gone a different route, but any mod on the Jeep is good, so no complaints)! And I snagged a Jeep Travel Mug and Coffee Mug and a nice Jeep Polo! I will post pics as they arrive, but here's the links to the products I purchased below!
Rugged Ridge Hood Lift Kit
Rugged Ridge Aluminum Hood Latch Kit
Last edited by WxNerd2015; Mar 22, 2017 at 05:20 AM.
Thread Starter
JK Enthusiast
Joined: Sep 2015
Posts: 419
Likes: 22
From: Madison Heights, MI
Hood Flutter Gone!
Yesterday I managed to have an hour free and decided I would get the Rugged Ridge HD Aluminum Hood Catch system installed on the Jeep! My overall impression was the the installation was rather straight forward and simple, and the hinges were definitely much heavier than I expected and high quality. I was surprised to see that, the little rubber bumper that goes between the hood and fender where the hood closes, was included in the kit and I didn't have to pull off the factory one. I was disappointed however with the fact that the kit came with washers, but no where in the directions does it mention to install them, nor is it even listed in the parts list I believe (however the latter I could have missed). I know that it should have been rather obvious to add the washers onto the bolts since the factory ones that came out had washers and the bolts which were already threaded onto the hinges did not, but I would have liked that explicitly stated, and I had to uninstall some parts when I realized this and add the washers back in. Not a big deal, and shouldn't have needed to be expressed, however, still would have been nice to have in the directions as a reminder. Other plused here that the directions were straight forward and there was no reuse of factory parts, all parts were new and either stainless steel or HD aluminum and the gaskets that go between the metal were really nice as well.
An additional disclaimer before I get into the write-up...make sure that you have plenty of extension and joint options for you sockets to be able to play with some combinations to get the right set up to get to the bolts on the inner fenders. I had all of my stuff out to get the right options. Also, instead of using the allen wrenches like I did, if you have a bit that you could get into a socket, that would work MUCH better and be a lot easier! And lastly, it helps greatly, especially with the passenger side, to remove the grill to give you better sight lines and more access into the bolts inside the fender.
So enough with the disclaimers and impressions, and I already gave ya a link to the product in a previous post, so we will dive into the in installation now. I started off with using this video from Trailrecon to help with the initial flow and to supplement the directions, as it is a great video, and the extra perspective never hurts!
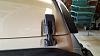
https://www.youtube.com/watch?v=ePdgdBSU0k8 So here are some before pics with the stock latches:
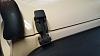
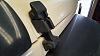
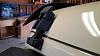
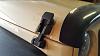
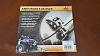
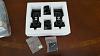
Here are the contents of the kit as well. You receive the latches (upper and lower parts), New bumpers to attach to the lower pieces, washers for all the bolts, and the rest of the hardware needed for installation.
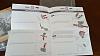
First step was to remove the factory latches, so i started with the upper part of the latch on the drivers side attached to the hood. I used a 10mm deep socket and wrench to remove the two bolts holding that latch to the hood. Once the bolts were removed, the upper part of the latch slide straight out of the holes.
I then grabbed some cleaner and go in behind that bracket really good making sure it was spotless, as I don't plan on getting back into that area to clean for a while!
I then moved onto the driver side fender bolt. There is only one in the middle of the bracket, but it is very hard to get to. i first removed the grill from the Jeep, as this gave me some additional sight lines and clearances to get into where i needed to, but just try through any openings you can to get the right angle you need on the bolt. I had to come in from near the radiator cap fish through and opening on the driver's side. I needed a 13 mm deep socket, a long extension, and a joint on the extension. Once that nut is removed, you can slight the bracket straight out of the fender and I recommend cleaning here too.
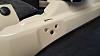
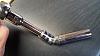
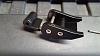
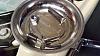
With that removed, it's now time to grab your new hood latch and start installing. You first need to remove the latch and arm from the base of the latch (the part the attaches to the fender) as the flat allen head screw that you need to tighten is located underneath that. To remove the arm, grab two allen wrenches and loosen the base and completely remove the bearing. Your latch will look like this:
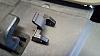
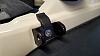
Next, line the base of the latch up with the bolt hole and 2 mounting holes in the fender in place the latch where it needs to go. Grab you locking nut, and one of the 2 bigger provided washers and thread those on to the bolt inside the fender. Be very careful not to drop these! And once those are threaded on, fish your wrench with various joints and extensions back into the fender to hold the nut and tighten the bolt on the outside with an allen wrench or a bit and socket. When finished, it will look like this:
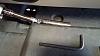
These are the tools needed for that part:
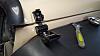
Now, move back to the hood, and attaching the upper mount. This is done using a 10mm socket and the same allen wrench used above. grab 2 of the 4 smaller washers and thread both on to the inner part of the hood while holding the bracket in proper place. This bracket liked to rotation slightly on me, and the gasket underneath was slightly off so I have a few times of tightening and loosening the nuts to get the bracket and gasket just right. This I recommend holding the bolt with the allen head and tighten using the socket wrench, it goes much easier and faster. With that attached, you can also reattach the latch to the lower bracket too but reinserting the ends through the latch and mount and tightening down. Your product will not look like this:
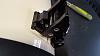
From here, you are now ready to make the file adjustments on your latch. Loosen the jam nuts (the nuts just above the lower mount and below the upper part of the latch. Try to attach the latch to the mount on the hood, if it is too tight or you can't, twist the upper part of the latch around once counter clockwise and try again. If the latch is too loose, go ahead and rotate the latch clockwise to tighten it up. Once you reach the desired level and you can latch your hood securely but there it's too much pressure or force needed to close the latch, tighten both jam nuts back up, and you are done with that latch!
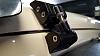
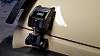
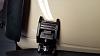
Now you can move to the other side and repeat the same process! For this side, the only thing that I had to do differently was the extensions and joints on the wrench to get to the bolt inside the fender. For the passenger side, I needed to use a long and medium extension with a joint on the end and a regular 13mm socket attached and I came from underneath most of the components there and behind the headlight and their was a small gap to get the socket on properly. Just be patient and find the way that works for you to get to those bolts, you will find a way. But besides that part, everything else was done exactly the same.
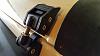
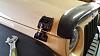
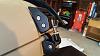
i am very happy with the look of these latches, they are very rugged and the contour is nice to the hood. I am also happy with the powder coating on the latches, as well as how solid these latches feel. and I can definitely tell that hood flutter is a thing of the past. I ran the Jeep up to 75 for a quick test drive and the hood did not budge once. I think this is a great product and I highly recommend it. Let me know if you have any further questions on the install or anything like that and I will do my best to answer!
An additional disclaimer before I get into the write-up...make sure that you have plenty of extension and joint options for you sockets to be able to play with some combinations to get the right set up to get to the bolts on the inner fenders. I had all of my stuff out to get the right options. Also, instead of using the allen wrenches like I did, if you have a bit that you could get into a socket, that would work MUCH better and be a lot easier! And lastly, it helps greatly, especially with the passenger side, to remove the grill to give you better sight lines and more access into the bolts inside the fender.
So enough with the disclaimers and impressions, and I already gave ya a link to the product in a previous post, so we will dive into the in installation now. I started off with using this video from Trailrecon to help with the initial flow and to supplement the directions, as it is a great video, and the extra perspective never hurts!
https://www.youtube.com/watch?v=ePdgdBSU0k8 So here are some before pics with the stock latches:
Here are the contents of the kit as well. You receive the latches (upper and lower parts), New bumpers to attach to the lower pieces, washers for all the bolts, and the rest of the hardware needed for installation.
First step was to remove the factory latches, so i started with the upper part of the latch on the drivers side attached to the hood. I used a 10mm deep socket and wrench to remove the two bolts holding that latch to the hood. Once the bolts were removed, the upper part of the latch slide straight out of the holes.
I then grabbed some cleaner and go in behind that bracket really good making sure it was spotless, as I don't plan on getting back into that area to clean for a while!
I then moved onto the driver side fender bolt. There is only one in the middle of the bracket, but it is very hard to get to. i first removed the grill from the Jeep, as this gave me some additional sight lines and clearances to get into where i needed to, but just try through any openings you can to get the right angle you need on the bolt. I had to come in from near the radiator cap fish through and opening on the driver's side. I needed a 13 mm deep socket, a long extension, and a joint on the extension. Once that nut is removed, you can slight the bracket straight out of the fender and I recommend cleaning here too.
With that removed, it's now time to grab your new hood latch and start installing. You first need to remove the latch and arm from the base of the latch (the part the attaches to the fender) as the flat allen head screw that you need to tighten is located underneath that. To remove the arm, grab two allen wrenches and loosen the base and completely remove the bearing. Your latch will look like this:
Next, line the base of the latch up with the bolt hole and 2 mounting holes in the fender in place the latch where it needs to go. Grab you locking nut, and one of the 2 bigger provided washers and thread those on to the bolt inside the fender. Be very careful not to drop these! And once those are threaded on, fish your wrench with various joints and extensions back into the fender to hold the nut and tighten the bolt on the outside with an allen wrench or a bit and socket. When finished, it will look like this:
These are the tools needed for that part:
Now, move back to the hood, and attaching the upper mount. This is done using a 10mm socket and the same allen wrench used above. grab 2 of the 4 smaller washers and thread both on to the inner part of the hood while holding the bracket in proper place. This bracket liked to rotation slightly on me, and the gasket underneath was slightly off so I have a few times of tightening and loosening the nuts to get the bracket and gasket just right. This I recommend holding the bolt with the allen head and tighten using the socket wrench, it goes much easier and faster. With that attached, you can also reattach the latch to the lower bracket too but reinserting the ends through the latch and mount and tightening down. Your product will not look like this:
From here, you are now ready to make the file adjustments on your latch. Loosen the jam nuts (the nuts just above the lower mount and below the upper part of the latch. Try to attach the latch to the mount on the hood, if it is too tight or you can't, twist the upper part of the latch around once counter clockwise and try again. If the latch is too loose, go ahead and rotate the latch clockwise to tighten it up. Once you reach the desired level and you can latch your hood securely but there it's too much pressure or force needed to close the latch, tighten both jam nuts back up, and you are done with that latch!
Now you can move to the other side and repeat the same process! For this side, the only thing that I had to do differently was the extensions and joints on the wrench to get to the bolt inside the fender. For the passenger side, I needed to use a long and medium extension with a joint on the end and a regular 13mm socket attached and I came from underneath most of the components there and behind the headlight and their was a small gap to get the socket on properly. Just be patient and find the way that works for you to get to those bolts, you will find a way. But besides that part, everything else was done exactly the same.
i am very happy with the look of these latches, they are very rugged and the contour is nice to the hood. I am also happy with the powder coating on the latches, as well as how solid these latches feel. and I can definitely tell that hood flutter is a thing of the past. I ran the Jeep up to 75 for a quick test drive and the hood did not budge once. I think this is a great product and I highly recommend it. Let me know if you have any further questions on the install or anything like that and I will do my best to answer!
Thread Starter
JK Enthusiast
Joined: Sep 2015
Posts: 419
Likes: 22
From: Madison Heights, MI
Big Upgrades (CB, sPod, and OBA)
First off, here's the load of stuff again that I got for christmas again! With the highlights being the Compressor, the sPod, and the new CB!
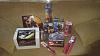
So, we will dive right in here! First step was to go ahead and install the CB mount/mic bracket to the passenger side dash handle. Start by removing the silver insert on the passenger side of the dash handle using a knife or trim removal tool, or something similar. For me, I used my pocket knife.
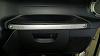
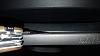
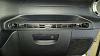
With that removed, locate the 2 bolts holding handle piece on located at the outside ends of the handle. And proceed to remove thse.
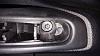
The kit comes with a spacer for the passenger side of the handle, and the plate where the CB will mount for the driver side, to keep the handle even on both sides. So line up the proper plate/mount on each side and hold the handle back up to hold them in place. Grab the bolts and tighten them back into place. As a side note though, you do need to hold both of the plates that go behind the handle as they like to rotate since there is only one attachment point and they have a slight adjustment behind the handles too, so when tightening, you may need to tighten and loosen a few times on each bolt to get them exactly right, but when mounted and tighten in, it'll look like this!
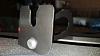
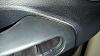
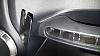
Lastly, just line up your handle insert (The silver plastic piece) and snap it in! That's all you need to mount the CB Mic Mount! This is a great mount for the Cobra 75 WX radio, or if you need a good spot to hold you mic, this is a perfect spot for it in the Wrangler!

So, we will dive right in here! First step was to go ahead and install the CB mount/mic bracket to the passenger side dash handle. Start by removing the silver insert on the passenger side of the dash handle using a knife or trim removal tool, or something similar. For me, I used my pocket knife.
With that removed, locate the 2 bolts holding handle piece on located at the outside ends of the handle. And proceed to remove thse.
The kit comes with a spacer for the passenger side of the handle, and the plate where the CB will mount for the driver side, to keep the handle even on both sides. So line up the proper plate/mount on each side and hold the handle back up to hold them in place. Grab the bolts and tighten them back into place. As a side note though, you do need to hold both of the plates that go behind the handle as they like to rotate since there is only one attachment point and they have a slight adjustment behind the handles too, so when tightening, you may need to tighten and loosen a few times on each bolt to get them exactly right, but when mounted and tighten in, it'll look like this!
Lastly, just line up your handle insert (The silver plastic piece) and snap it in! That's all you need to mount the CB Mic Mount! This is a great mount for the Cobra 75 WX radio, or if you need a good spot to hold you mic, this is a perfect spot for it in the Wrangler!
Last edited by WxNerd2015; Mar 29, 2017 at 12:26 PM.

