Custom modular JK hardtop
 06-02-2015, 07:08 AM
#351
JK Super Freak
Thread Starter

I agree, late model 2dr ; on the 2drs, the slider itself can be one size , largest possible ; make the adapter 2 sizes, early and late , or trim flange on earlier opening more to accept larger size. I need to measure an earlier hardtop to actually know glass difference.
The retrofit kit isn't an "adapter" really, the way I designed it the windows that get installed are the correct size for the specific model Jeep, and the retrofit kit really isn't visible at all. I didn't want it to look "adapted", I wanted it to look like it could have come from the factory that way, so I designed the retrofit kit so that it isn't noticeable.
So the windows need to be made the correct size for the specific model hardtop, which is good because they'll fit perfectly and look factory. That's why there would have to be 4 different window sizes to cover all of the models and years. The good news is that the RV window company is willing to do very small production runs, like 5 pairs of windows in a size, so the investment per size for a company that might sell these is pretty reasonable. Even so, I'd expect a company might want to start with one size first and then expand to the other sizes as demand warrants.
 06-04-2015, 08:19 AM
#352
JK Super Freak
Thread Starter
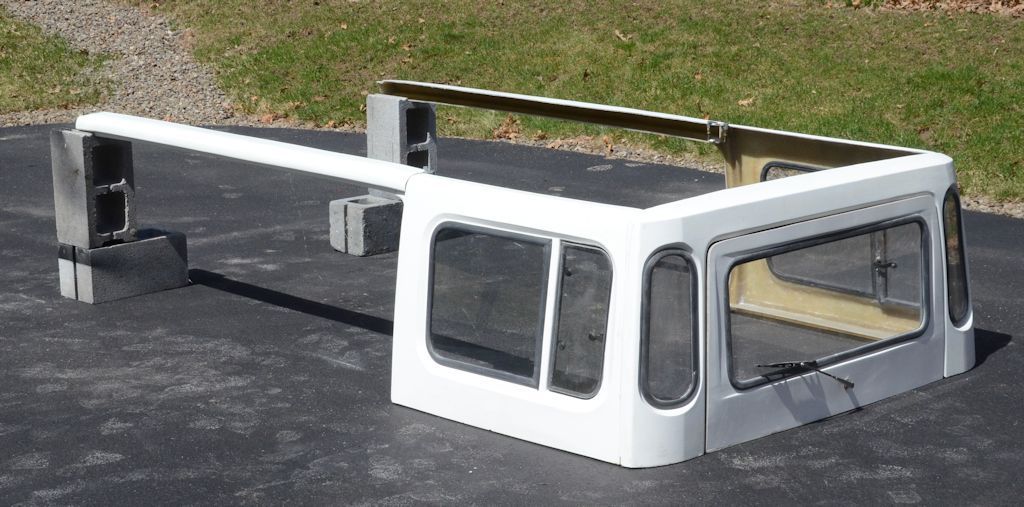
The last work I did on the JK Safari Cab was about 6 weeks ago, when I molded the upper door jambs and front parts of the drip rails. I posted this photo of the parts mocked up back then:
I'm now working on the master pattern for the roof mold. A master (also called a "plug", "model" or "pattern" by some fiberglass people) is a full-size replica of the part the mold is to be made for. It can be made of any material that will stand up to a fiberglass mold being made from it. I've made masters from metal, fiberglass, modified factory parts, and wood, among other things. In the case of the Safari Cab roof, I'm making the master from wood.
Here are a few detail photos, I'm not sure if people are interested in this level of detail, but here goes...
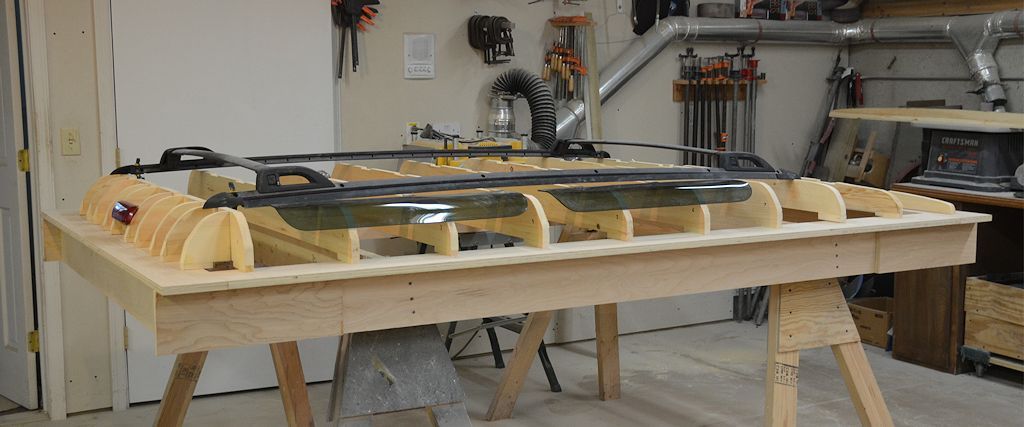
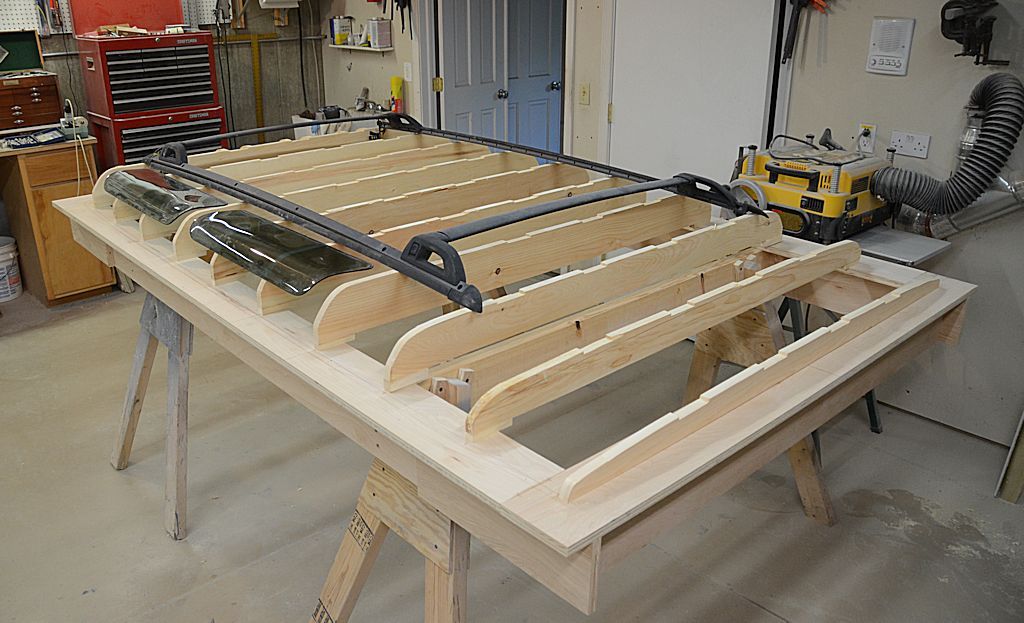
In this photo I've got a frame set up to build the master on. The frame has cleats on it to accept sawhorse legs so it's easy to work on. At the far end of this photo (the front of the roof) there's a curved rib that matches the curve of the top of the windshield. Laid on top of the frame are the drip rail parts I molded earlier, I'm using them as templates to trace the outline of the roof panel onto the frame to ensure I make the roof the correct size. The roof will set down in the grooves of the drip rails and be bonded to the drip rails - the portion of the drip rail flange of the roof edge will serve as the bolt flange to bolt the roof to the side panels.

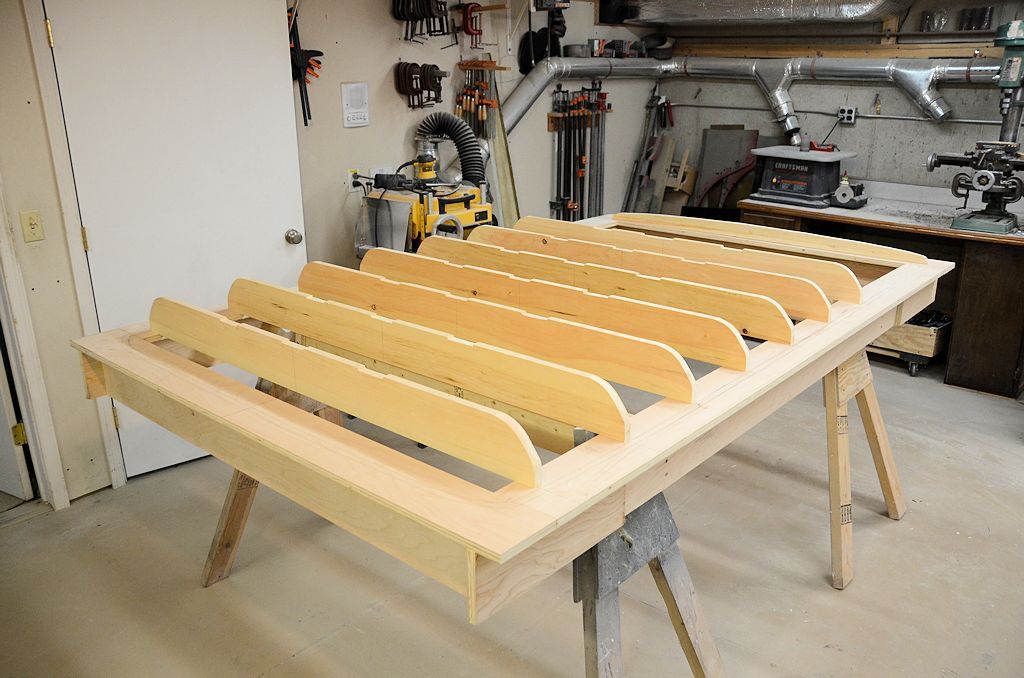
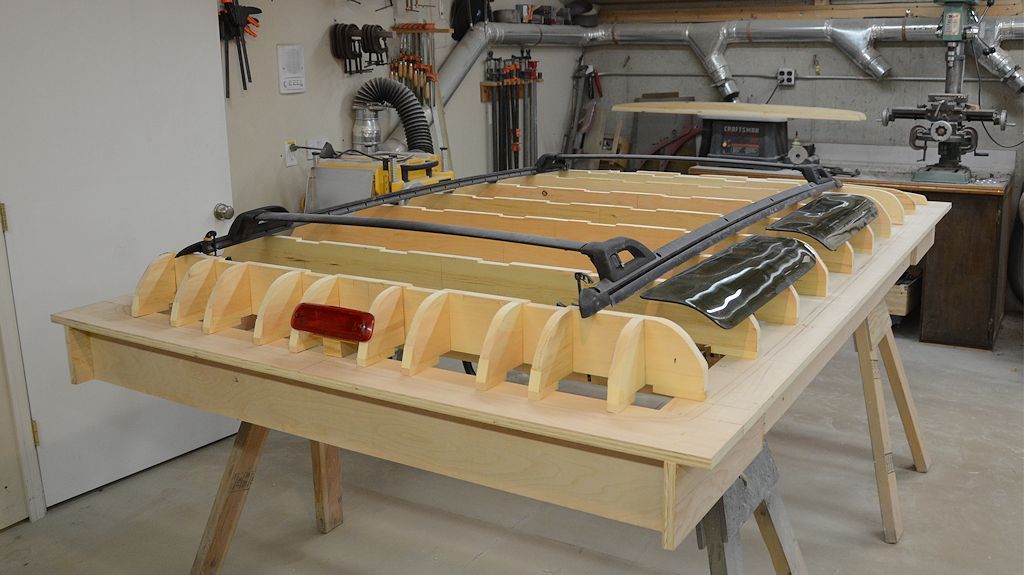
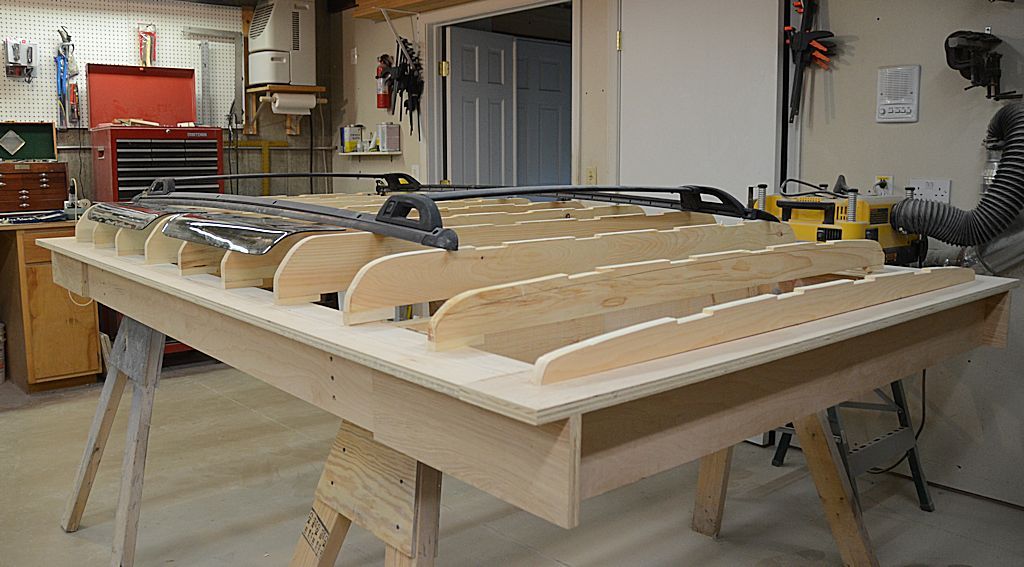
In this next photo I've got the main ribs setting in place. There will also be two ribs in the front sloped portion of the roof, but I haven't made them yet. Once all the ribs are in place, the skin will be put on the ribs, it'll be part birch plywood (the flatter parts) and part pine stripwood (the sharper curves). All of that will be planed and sanded so the curves are perfectly smooth.
Once the skin is completed, a finish will be put on everything and then I'll make the mold from it.
Along the way I do frequent mockups so I know how the finished shapes will look and how the components will fit - here's the framework with two alpine windows, the ZJ roof rack, and an XJ third brake light mocked up.
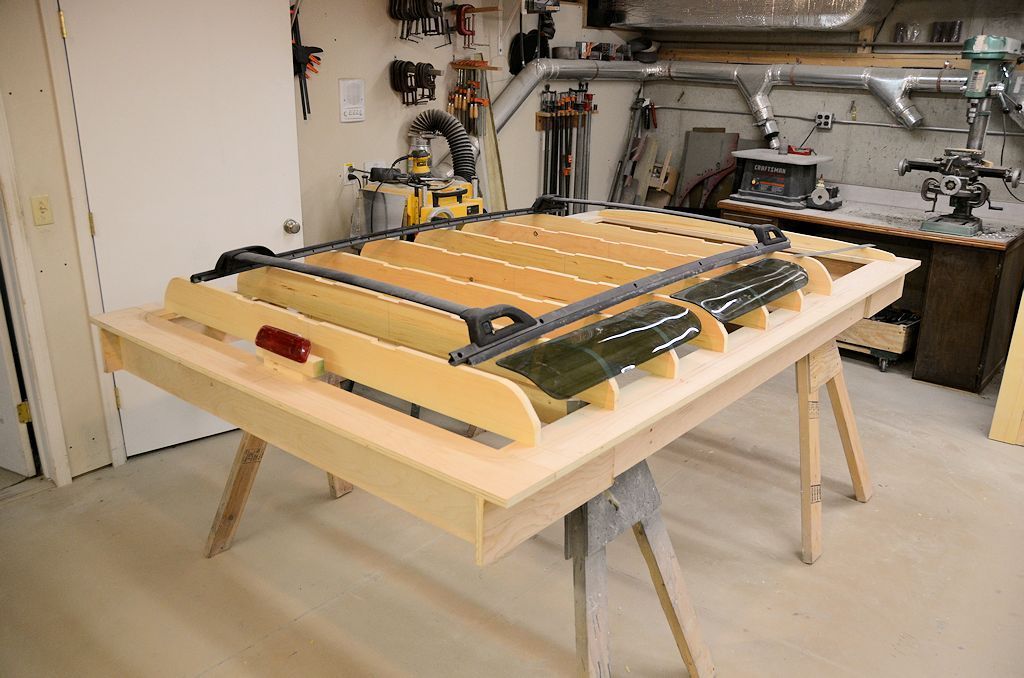
All of the components mocked up are optional, the roof panel will come out of the mold without cutouts for the alpine windows or other components, so a Safari Cab without alpine windows could be assembled from a part out of the same mold.
I'm now working on the master pattern for the roof mold. A master (also called a "plug", "model" or "pattern" by some fiberglass people) is a full-size replica of the part the mold is to be made for. It can be made of any material that will stand up to a fiberglass mold being made from it. I've made masters from metal, fiberglass, modified factory parts, and wood, among other things. In the case of the Safari Cab roof, I'm making the master from wood.
Here are a few detail photos, I'm not sure if people are interested in this level of detail, but here goes...
In this photo I've got a frame set up to build the master on. The frame has cleats on it to accept sawhorse legs so it's easy to work on. At the far end of this photo (the front of the roof) there's a curved rib that matches the curve of the top of the windshield. Laid on top of the frame are the drip rail parts I molded earlier, I'm using them as templates to trace the outline of the roof panel onto the frame to ensure I make the roof the correct size. The roof will set down in the grooves of the drip rails and be bonded to the drip rails - the portion of the drip rail flange of the roof edge will serve as the bolt flange to bolt the roof to the side panels.
In this next photo I've got the main ribs setting in place. There will also be two ribs in the front sloped portion of the roof, but I haven't made them yet. Once all the ribs are in place, the skin will be put on the ribs, it'll be part birch plywood (the flatter parts) and part pine stripwood (the sharper curves). All of that will be planed and sanded so the curves are perfectly smooth.
Once the skin is completed, a finish will be put on everything and then I'll make the mold from it.
Along the way I do frequent mockups so I know how the finished shapes will look and how the components will fit - here's the framework with two alpine windows, the ZJ roof rack, and an XJ third brake light mocked up.
All of the components mocked up are optional, the roof panel will come out of the mold without cutouts for the alpine windows or other components, so a Safari Cab without alpine windows could be assembled from a part out of the same mold.
06-05-2015, 04:30 AM
#354
JK Super Freak
Thread Starter
It was exactly 5 years ago that I was doing exactly the same woodworking to make the mold master for the roof of the LJ Safari Cab project, so for those of you who are wondering how the top panel framework I posted yesterday gets turned into a finished fiberglass roof, here's a flashback...
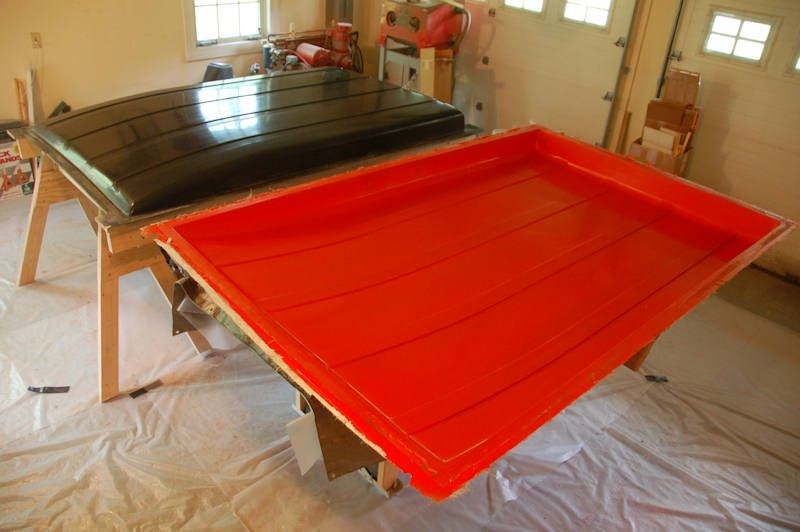
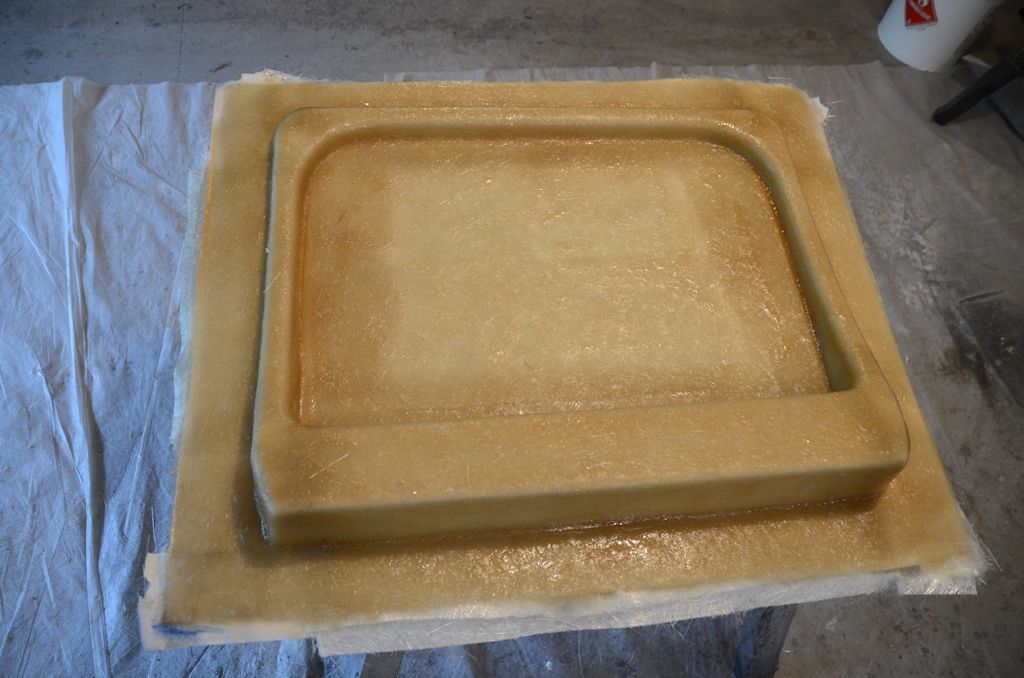
The end of the woodworking project results in a roof panel that looks like this, here's the LJ roof master after the woodworking was finished and a few coats of polyurethane sanding sealer were applied:
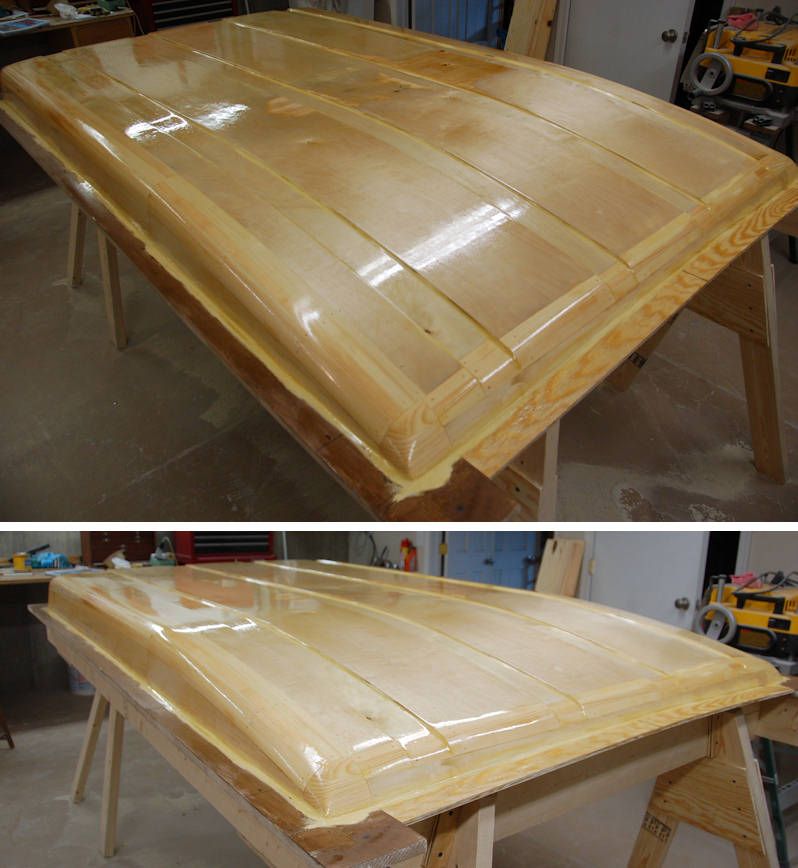
Next a high quality finish gets put on the master, on the left below is the same wooden LJ master after finishing. The finish will be reproduced exactly by the mold, so the nicer the master is at this stage, the nicer the final parts will be. I often do a black finish at this stage, because black often shows imperfections better than a lighter color.
On the right in this photo is the finished mold, this photo was taken right after the mold was made and removed from the master:
Another shot of the mold:
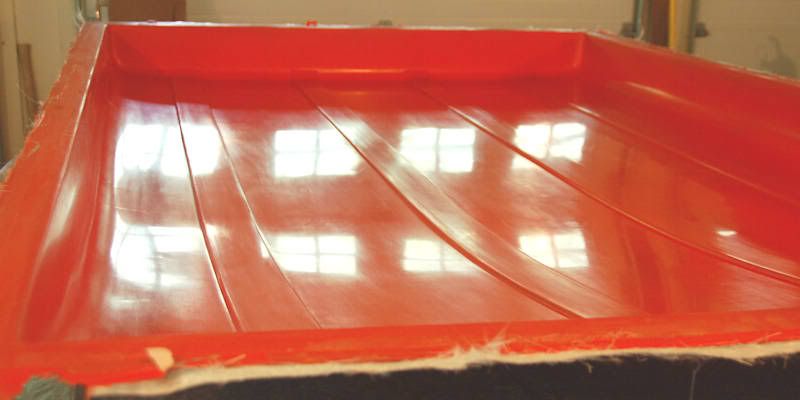
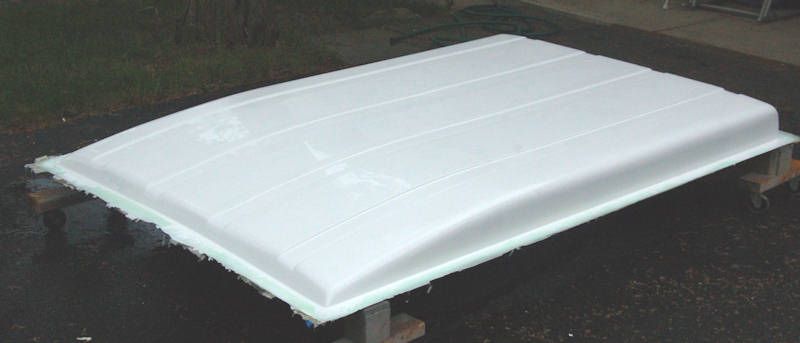
Then the mold is ready to make parts. Here's the first roof out just out of the mold, it hasn't been trimmed yet:
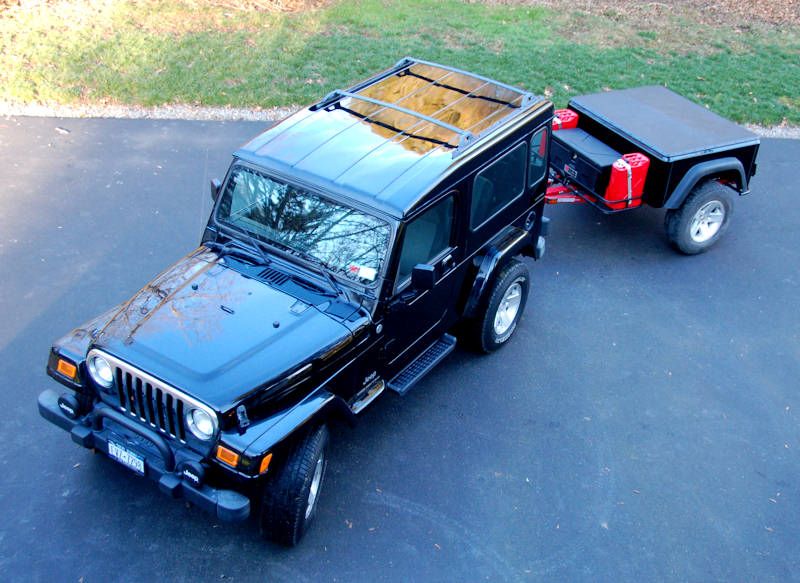
And after trimming and finishing, the end result (shown with the project I did right after the LJ Safari Cab, my fiberglass Jeep-tub trailer kit):
I'll be going through the same process to get from where I am today with the JK Safari Cab roof framework to a finished part. Stay tuned...
The end of the woodworking project results in a roof panel that looks like this, here's the LJ roof master after the woodworking was finished and a few coats of polyurethane sanding sealer were applied:
Next a high quality finish gets put on the master, on the left below is the same wooden LJ master after finishing. The finish will be reproduced exactly by the mold, so the nicer the master is at this stage, the nicer the final parts will be. I often do a black finish at this stage, because black often shows imperfections better than a lighter color.
On the right in this photo is the finished mold, this photo was taken right after the mold was made and removed from the master:
Another shot of the mold:
Then the mold is ready to make parts. Here's the first roof out just out of the mold, it hasn't been trimmed yet:
And after trimming and finishing, the end result (shown with the project I did right after the LJ Safari Cab, my fiberglass Jeep-tub trailer kit):
I'll be going through the same process to get from where I am today with the JK Safari Cab roof framework to a finished part. Stay tuned...
06-05-2015, 07:05 AM
#356
JK Super Freak
Thread Starter
 06-07-2015, 08:46 AM
#357
JK Super Freak
Thread Starter
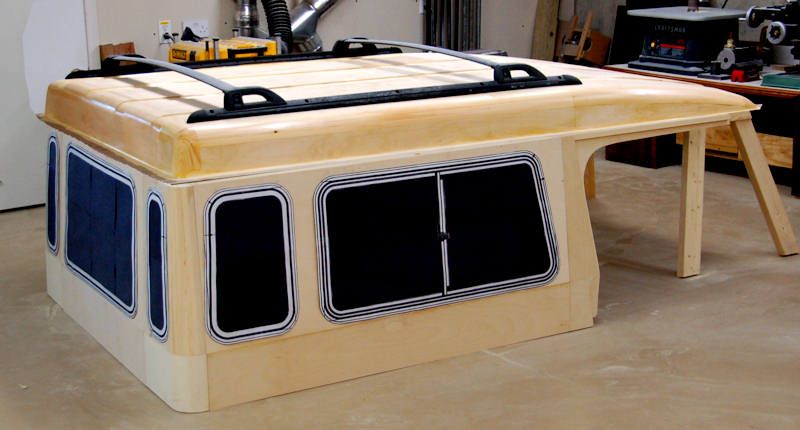
For those who want to follow along with the detail... I finished the framing for the roof master, here are some photos with the windows and other accessories mocked up. Hopefully at this stage you can start to get a feel for the shape of the roof.
The next step is to put the skin on, which starts with plywood on the flatter parts that the plywood can bend to.
The next step is to put the skin on, which starts with plywood on the flatter parts that the plywood can bend to.
06-08-2015, 01:15 PM
#358
JK Super Freak
Thread Starter
Didn't get much done on the Safari Cab roof today because spent my time doing fiberglass - I'm making up molds for fiberglass JK half door uppers. Today I worked on the mold for the JKU rear uppers. I'll have the mold work finished tomorrow and hope to have first parts out of the molds by the end of the week.
06-08-2015, 06:26 PM
#359
JK Enthusiast
Join Date: Mar 2011
Location: College Park, MD
Posts: 434
Likes: 0
Received 0 Likes
on
0 Posts
Didn't get much done on the Safari Cab roof today because spent my time doing fiberglass - I'm making up molds for fiberglass JK half door uppers. Today I worked on the mold for the JKU rear uppers. I'll have the mold work finished tomorrow and hope to have first parts out of the molds by the end of the week.
06-09-2015, 02:46 AM
#360
JK Super Freak
Thread Starter
For now I just plan to make one or two fiberglass sets as a proof of concept and for testing. Don't know what might happen after that.