
Better Back Up Lighting.

Thread Starter
JK Enthusiast
Joined: Oct 2006
Posts: 162
Likes: 0
From: Mansfield, TX
This project came to light (pun intended) after seeing Wayoflife's Walmart Platinum Burner Rock Lights Installation Write-Up & Review. See https://www.jk-forum.com/forums/show...-Up-amp-Review I went to Wally World and they only had one set of the lights so I decided to use them as extra back up lighting as the rock lights could wait until I could find more. After searching for a good location to mount these very small lights for some time i did not like any of the locations. I decided to remove the tail light assembly and see if it could be mounted inside out of the way. It look like a perfect fit so the project began. Please note not to try this if you are not completely comfortable with what is shown below and know that this is how I did it on my 2007 Jeep Wrangler JKU. I am not liable for what you do to your Jeep or for any other things you do or have done to your jeep.
Tools needed.
Phillips screw driver
Small saw or hot knife
Drill with small drill bit
Wire cutters
Crimpers
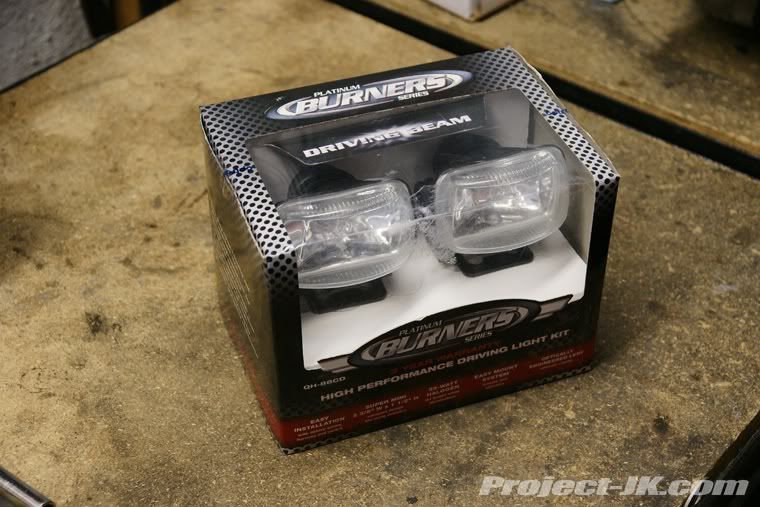
Start with purchasing lights. (Thank you for the picture Wayalife)
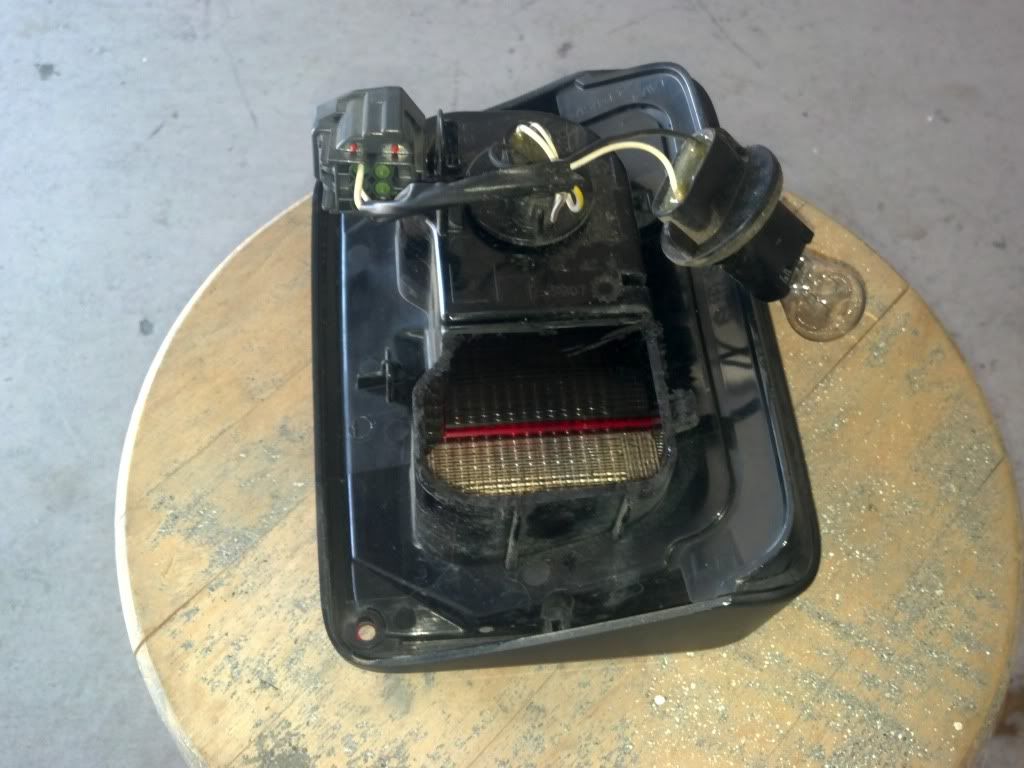
Next remove one of the rear tail lights by removing the two inside screws with phillips screw driver. The assembly will slid inward slightly and pop off. Unplug wiring harness.

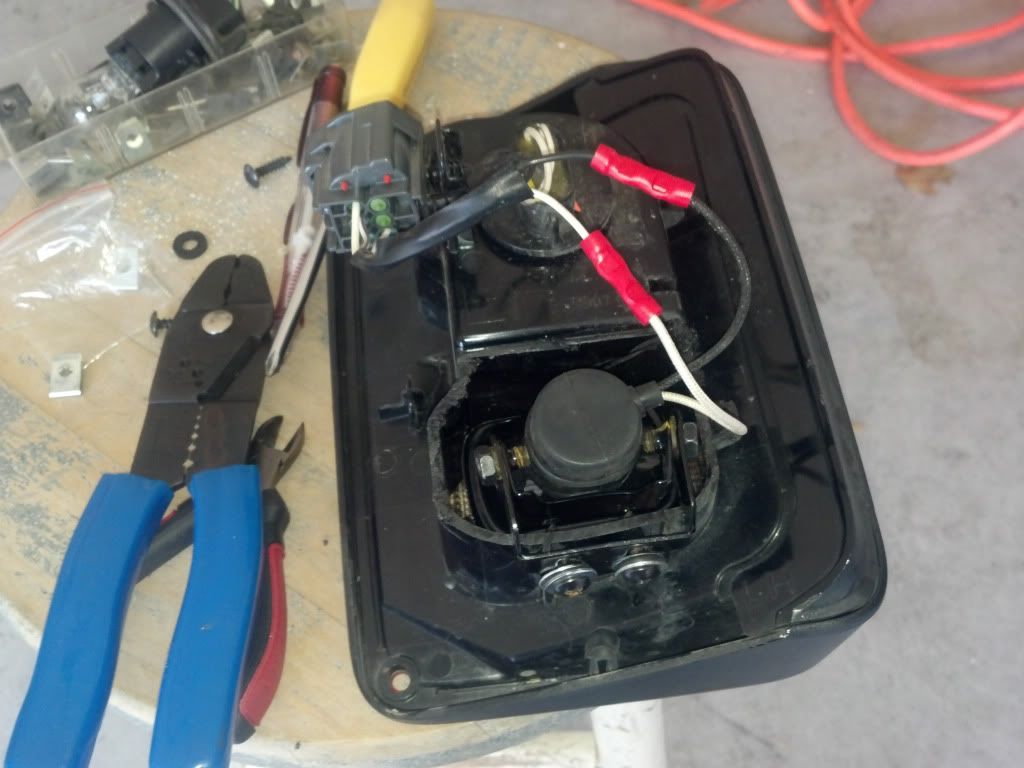
Remove back up lamp (as seen it picture above) by turning counter clockwise. Push bulb and wiring a side to allow for removal of plastic back from where back up lamp mounts. I used a high speed air saw but a hot knife or simlar would due the trick as well. Remove only the very back of light housing for the back up light as shown below.
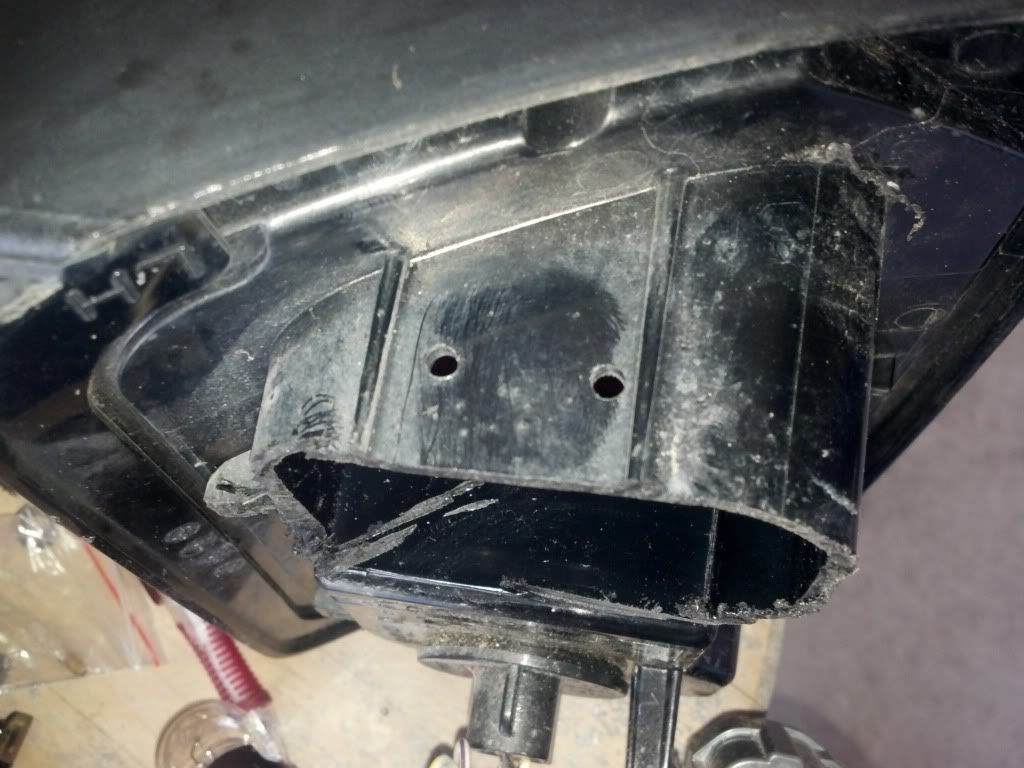
The light should fit in opening easily at this point. Place the light so that the mounting bracket is on the out side of the light housing and the light itself is in the housing. mark on the out side where to drill mounting holes. Drill two small pilot holes where you marked housing. Make sure that the pilot holes are smaller than the mount screws that you use. I used the ones that came with the lights. See below for how your light housing should look after this is complete.
Place the light back into the housing with the mounting bracket on the outside of the housing and screw the light down. You may need to loosen the two screws on the sides of the light to allow for proper angle ajustment. If you use the screws that came with the lights you will need a couple of washers placed on the screws before mounting the light to keep them from hitting the light once they come thru the housing as shown below.
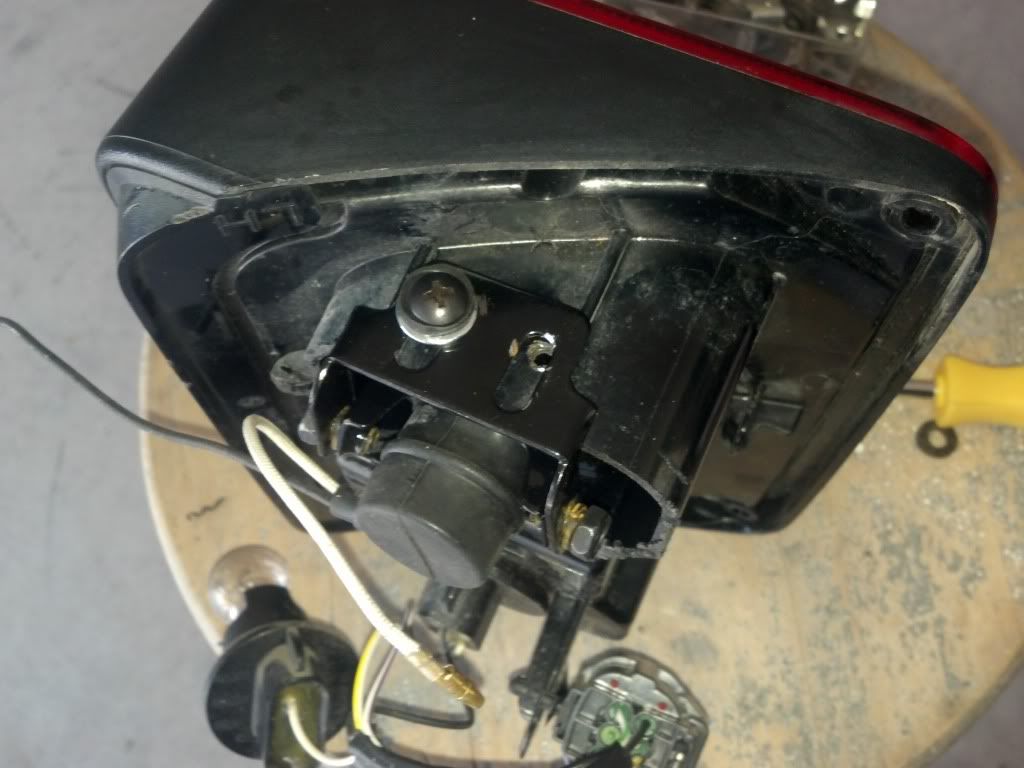
Hook up wiring by cutting off old lamp and using butt conectors to crimp wires together. Connect the black to black and white to white as shown below. You may conect the wires any way you want as this is just one option. At this point you may plug in lighting harness and install back on your jeep, but if you are into mudding you may wish to cover the back of the new light with some duct tape to keep it clean inside. I left my open to allow more air in to keep them cool. You will know if this is necessary when you remove the light the first time if it is completly nasty and needs to be cleaned before you start.
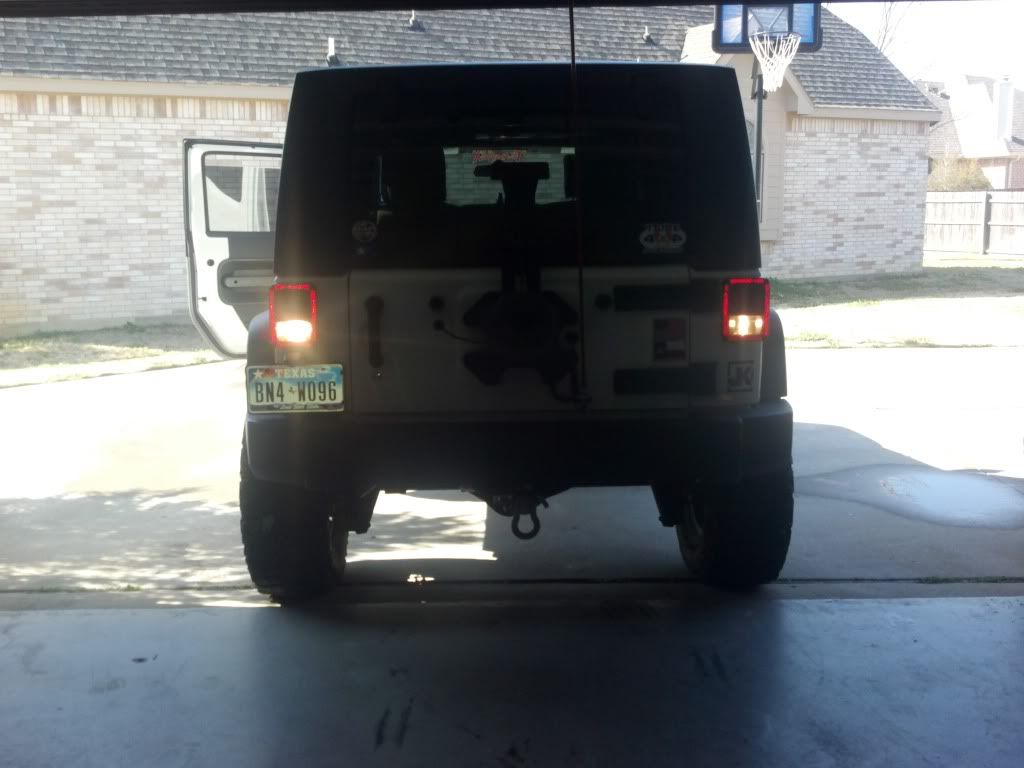
As you can see by the picture below the drivers side light looks brighter even in the day time.
Here is a look at night.

Here is what you see behind the jeep.
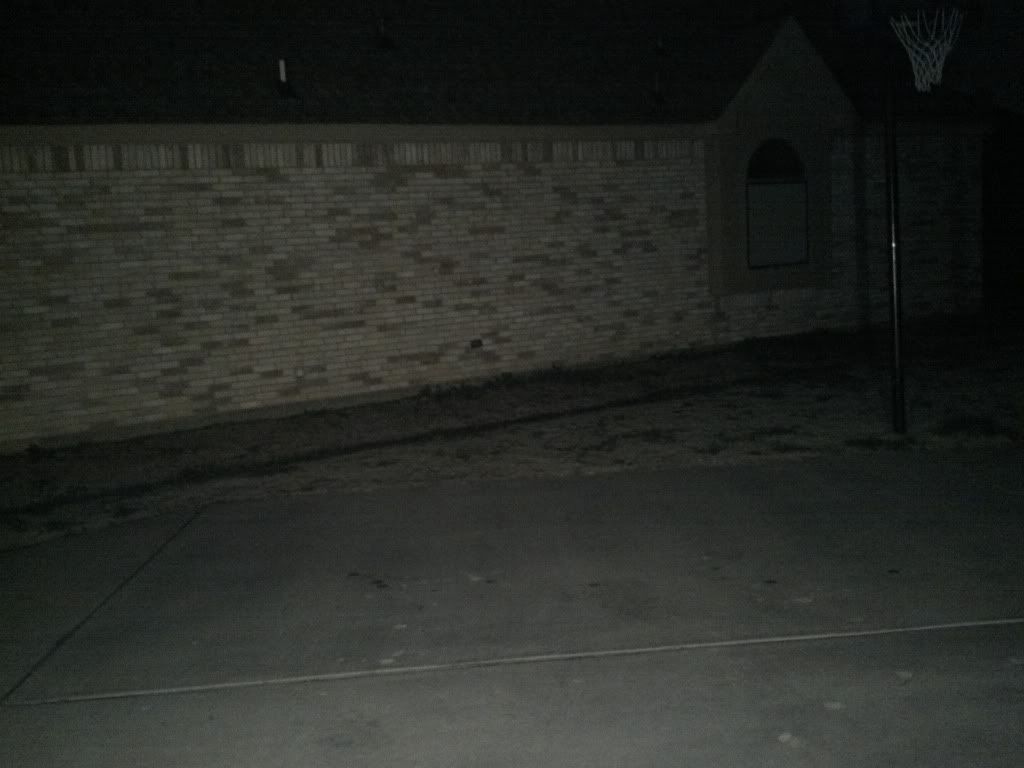
The lights are much brighter than stock and will allow you to see out at night even with dark tint on the windows.
Let me know what you think or if you have any questions.
JK-ing
Tools needed.
Phillips screw driver
Small saw or hot knife
Drill with small drill bit
Wire cutters
Crimpers
Start with purchasing lights. (Thank you for the picture Wayalife)
Next remove one of the rear tail lights by removing the two inside screws with phillips screw driver. The assembly will slid inward slightly and pop off. Unplug wiring harness.
Remove back up lamp (as seen it picture above) by turning counter clockwise. Push bulb and wiring a side to allow for removal of plastic back from where back up lamp mounts. I used a high speed air saw but a hot knife or simlar would due the trick as well. Remove only the very back of light housing for the back up light as shown below.
The light should fit in opening easily at this point. Place the light so that the mounting bracket is on the out side of the light housing and the light itself is in the housing. mark on the out side where to drill mounting holes. Drill two small pilot holes where you marked housing. Make sure that the pilot holes are smaller than the mount screws that you use. I used the ones that came with the lights. See below for how your light housing should look after this is complete.
Place the light back into the housing with the mounting bracket on the outside of the housing and screw the light down. You may need to loosen the two screws on the sides of the light to allow for proper angle ajustment. If you use the screws that came with the lights you will need a couple of washers placed on the screws before mounting the light to keep them from hitting the light once they come thru the housing as shown below.
Hook up wiring by cutting off old lamp and using butt conectors to crimp wires together. Connect the black to black and white to white as shown below. You may conect the wires any way you want as this is just one option. At this point you may plug in lighting harness and install back on your jeep, but if you are into mudding you may wish to cover the back of the new light with some duct tape to keep it clean inside. I left my open to allow more air in to keep them cool. You will know if this is necessary when you remove the light the first time if it is completly nasty and needs to be cleaned before you start.
As you can see by the picture below the drivers side light looks brighter even in the day time.
Here is a look at night.
Here is what you see behind the jeep.
The lights are much brighter than stock and will allow you to see out at night even with dark tint on the windows.
Let me know what you think or if you have any questions.
JK-ing
Last edited by JK-ing; Jan 22, 2012 at 06:45 AM.


JK Jedi
Joined: Dec 2011
Posts: 5,234
Likes: 4
From: Nevada City California
Thanks for the detailed write up! I'm going to do this as I've been wanting to brighten up the reverse bulbs, and know that none of the swap out led bulbs etc will really do much to help. Great idea
JK Jedi Master

Joined: Feb 2008
Posts: 12,907
Likes: 185
From: Maine
Thanks for the write-up. It looks like a good way to have more light in the back.
Keep us posted on whether or not the wattage is a problem for the electrical system, and if heat from the bulb is a problem.
Keep us posted on whether or not the wattage is a problem for the electrical system, and if heat from the bulb is a problem.
Trending Topics
Thread Starter
JK Enthusiast
Joined: Oct 2006
Posts: 162
Likes: 0
From: Mansfield, TX
EVO35
I have not had any issues yet. I thought it might be a problem but does not seem to be yet.
Ronjenx,
There is plenty of room arround the light and unless you drive in reverse for a long time I doubt there would be a heat issue. I have left them on in the sun for about 5 minutes without heating it up much more that normal.
Thanks all,
JK-ing
I have not had any issues yet. I thought it might be a problem but does not seem to be yet.
There is plenty of room arround the light and unless you drive in reverse for a long time I doubt there would be a heat issue. I have left them on in the sun for about 5 minutes without heating it up much more that normal.
Thanks all,
JK-ing
JK Enthusiast
Joined: Aug 2011
Posts: 409
Likes: 0
From: Santa Maria, CA
This is exactly why I pursue this Jeep Forum, mods like this.
I have already done the Walmart Rock crawling lights mod and these little blazers put out quite a bit of light.
Now to the back-up lights - I too am interested in the Canbus issue, as that's an immediate red-flag to any dealership.
Subscribed to this thread and really wanting to do this - I would, however, solder ll connections and shrink wrap the connections as well, somewhat better water proofing.
JK Freak
Joined: Dec 2007
Posts: 752
Likes: 0
From: New York
Brilliant!
I had attempted to squeeze a HID bulb (leftover H11) in there and gave up after figuring out I didnt have enough clearance to do so.
For those of us who don't have access to a walmart, can you tell us what the dimensions of the light is?
I had attempted to squeeze a HID bulb (leftover H11) in there and gave up after figuring out I didnt have enough clearance to do so.
For those of us who don't have access to a walmart, can you tell us what the dimensions of the light is?