
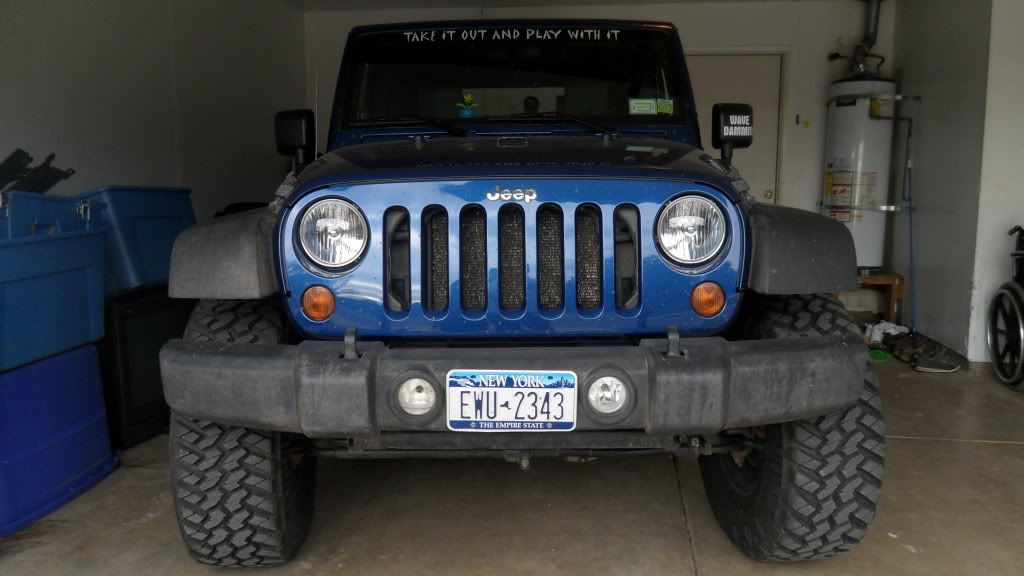
A grill mod...My way.

Thread Starter
JK Enthusiast
Joined: Feb 2010
Posts: 311
Likes: 0
From: Saratoga Springs/Upstate, NY
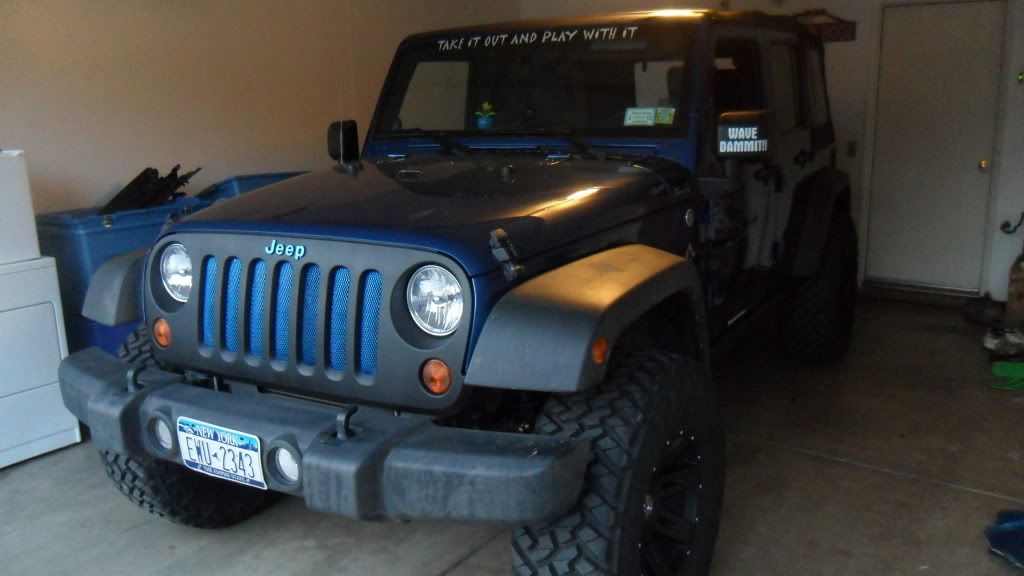
So after looking at pages and pages of grill mods I finally decided what I wanted to do. This isn't much different than other grill mods. Except that I've read several other posts on it and found out what to do, and most importantly, what not to do. This is just my own personal way.
This is my first time doing it and I completely relied on JK-Forum and members like you.
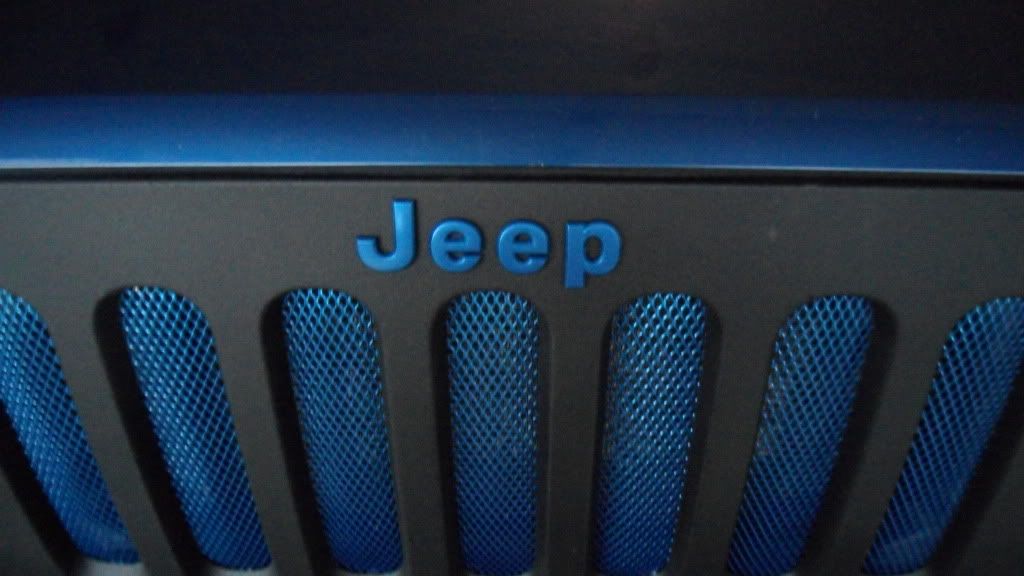
HINT: Since I used the gutter guards that already had a slight bend to them, I took advantage of this and held down the mesh into the grill slot so it looks like its rounded out from the outside. Kind of like the expensive one on Quadratec. It gives it a little bit of a raised look instead of flat like everyone else who did this mod with a big sheet of mesh instead of individual pieces.
Hope you enjoy!
Materials:
Package of 6 gutter guards (Home Depot)
Epoxy (5 minute dry time)
Color Matched DupliColor Chrysler Blue rattle can
DupliColor Bedliner rattle can
3M double sided tape
Masking tape
Tools:
metal shears
scissors
Drill w/ wood screw
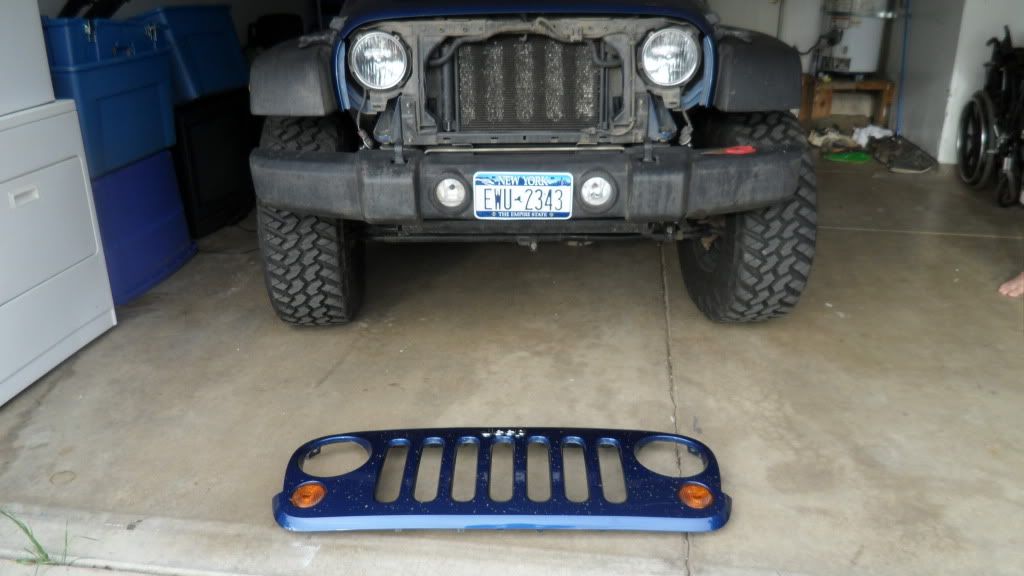
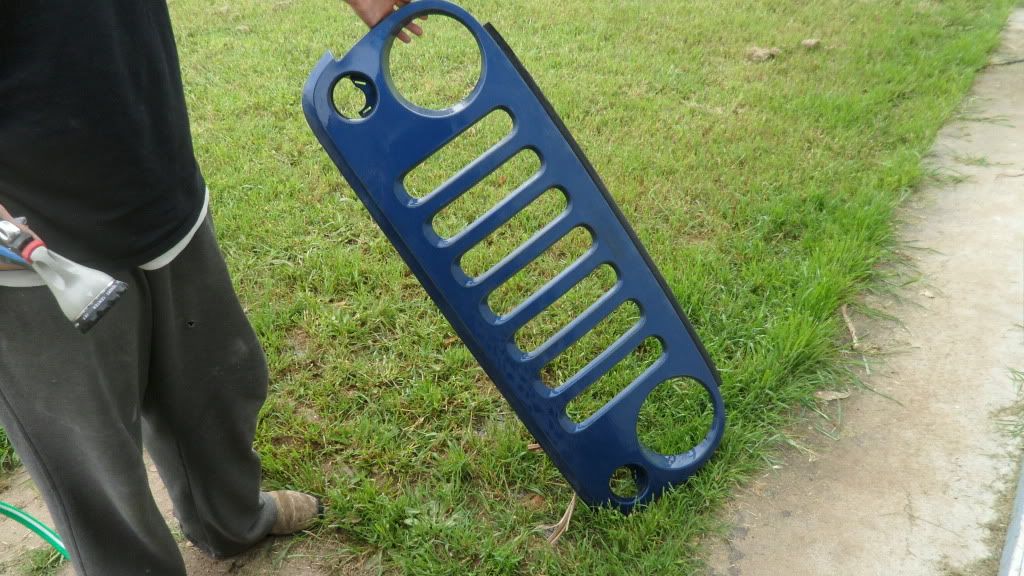
Before.....

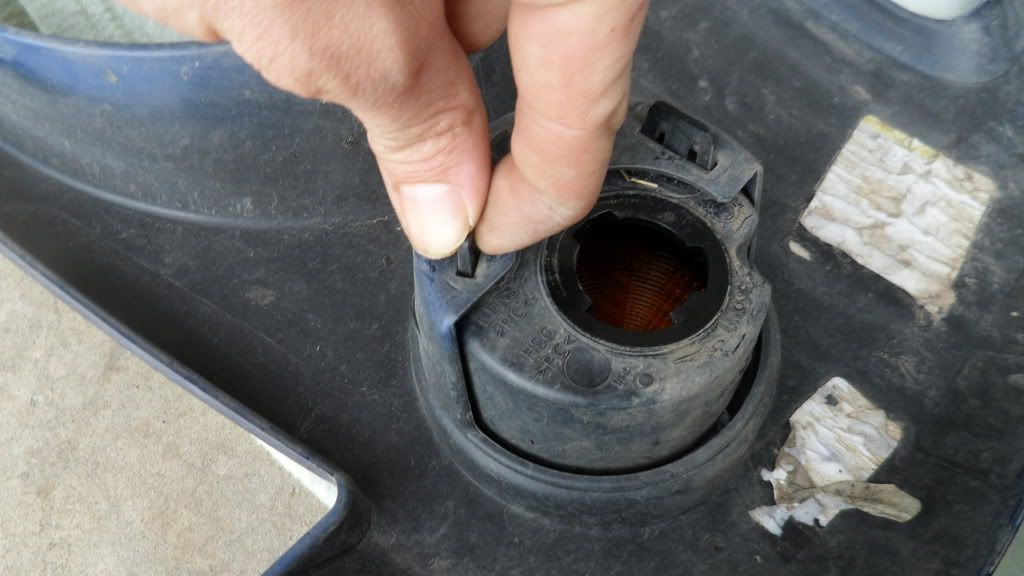
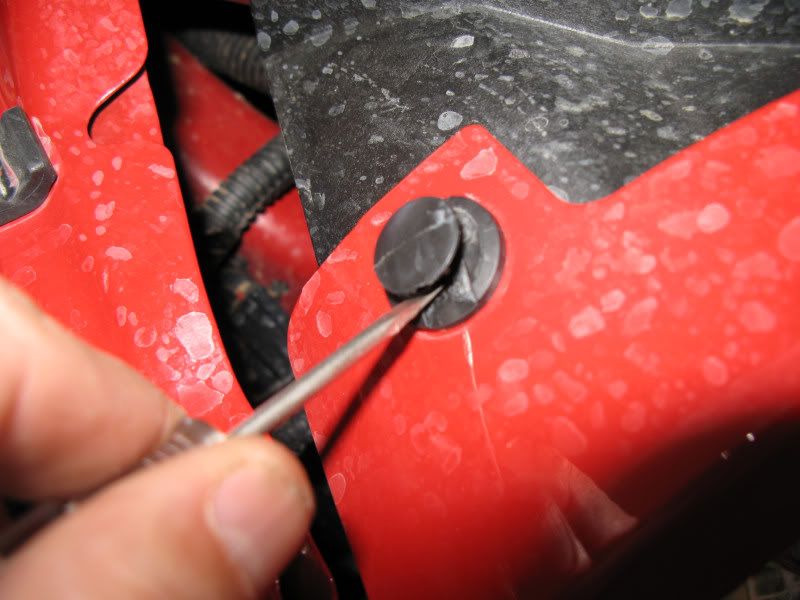
I started out by taking off the front grill. (Obviously) Removing the plastic rivets was easy.
Just drill a screw into the center about a 1/4 inch.
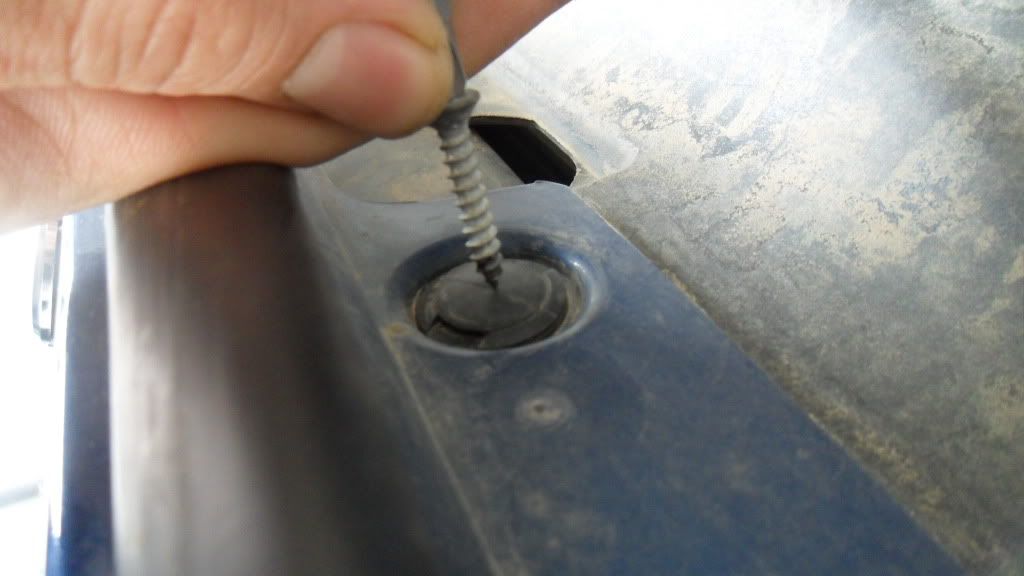
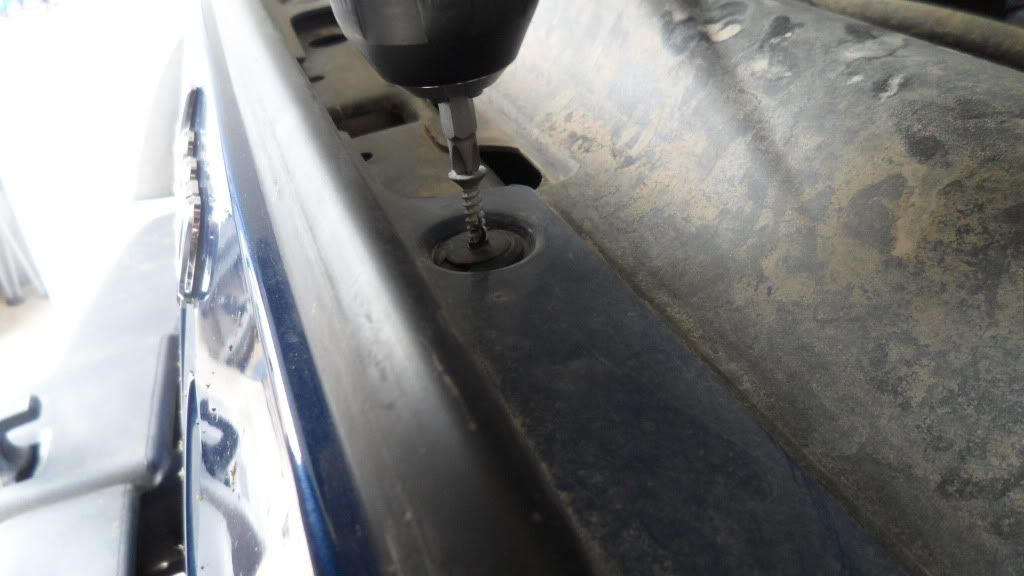
Pull it out with a pair of pliers.
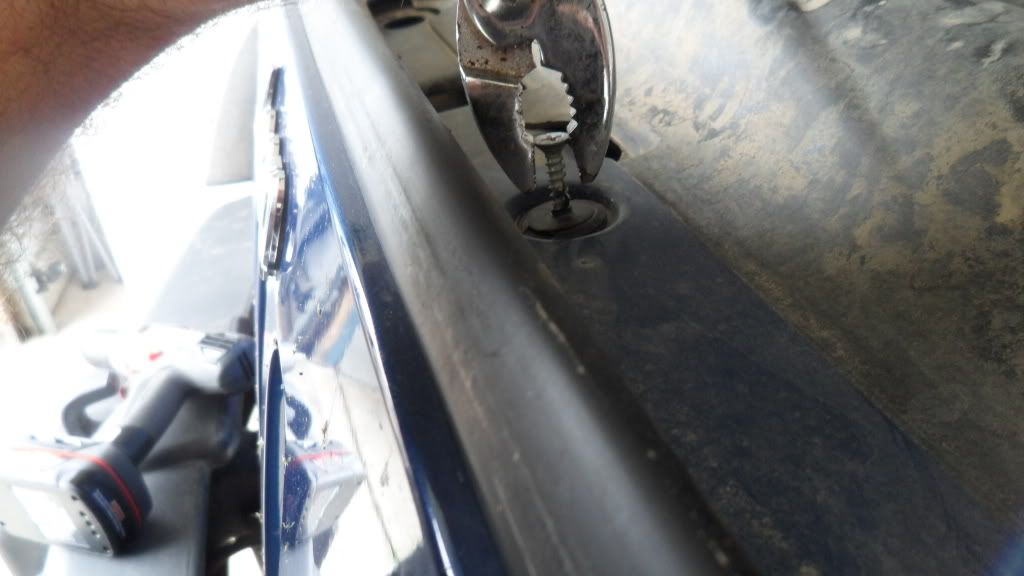
Reverse drill to get screw out of plastic bit.
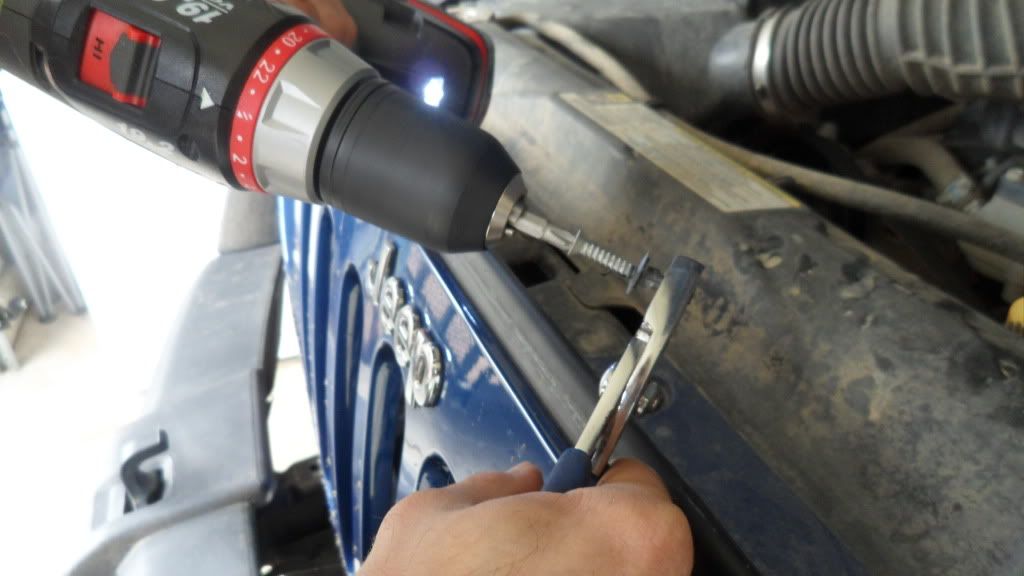
Use needlenose pliers to pull up on the remaining plastic tab. Repeat for the others.
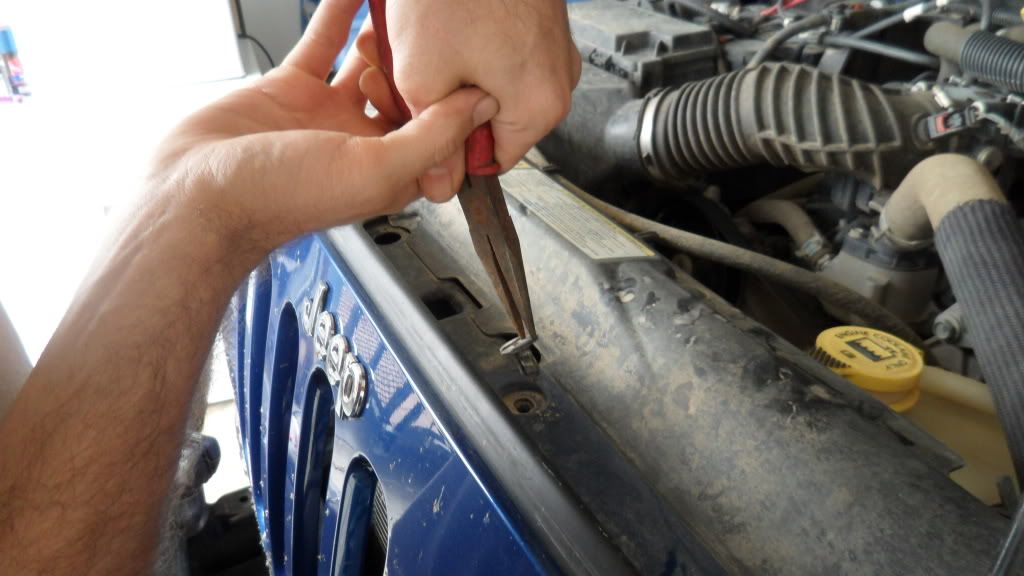
Pull outward on grill.
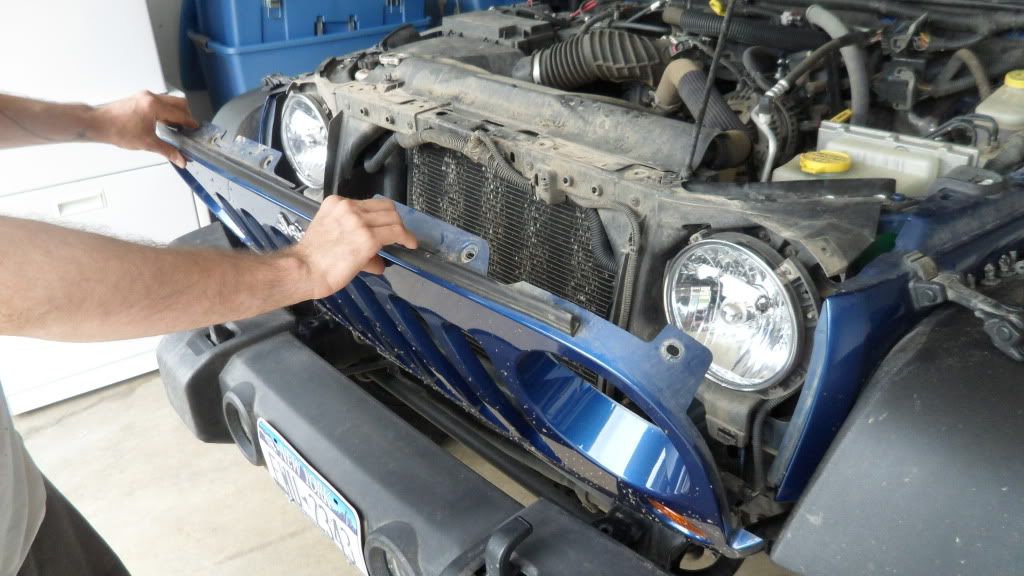
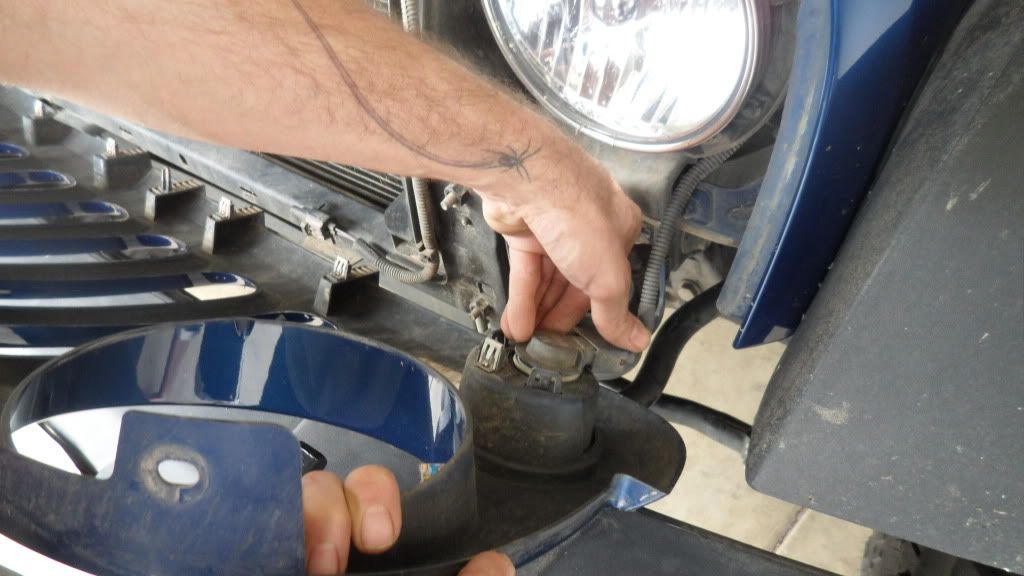
Twist the turn signal bulbs and gently remove them.
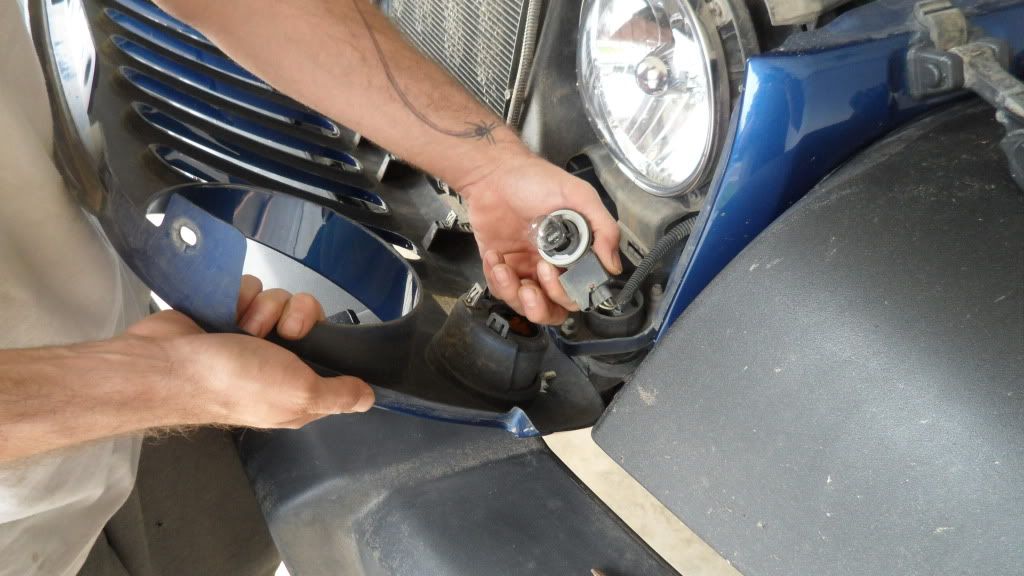
Pull grill out from tabs on bottom and lift grill up and remove.
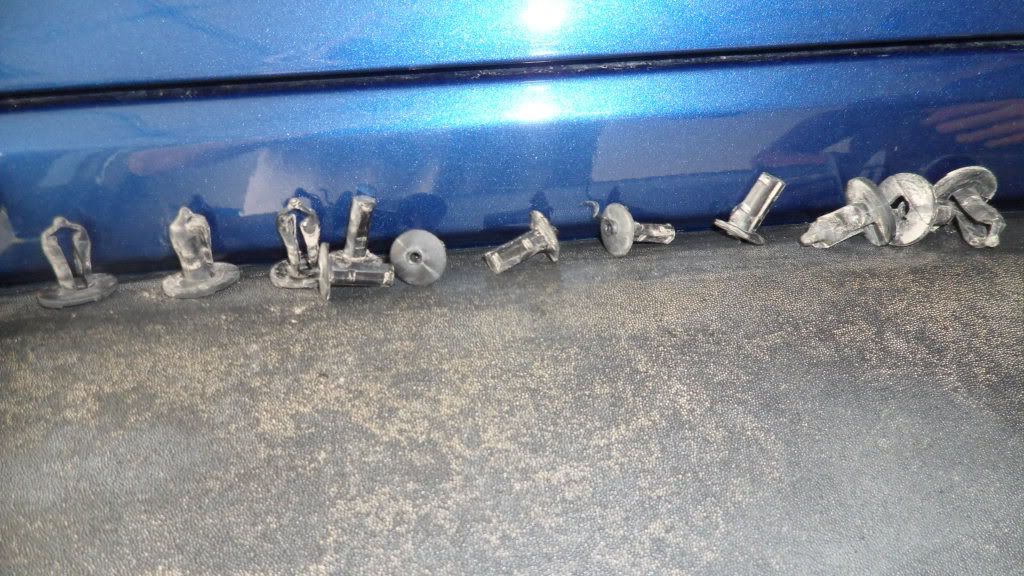
I put all the plastic clips/tabs on the fender so they don't get lost.
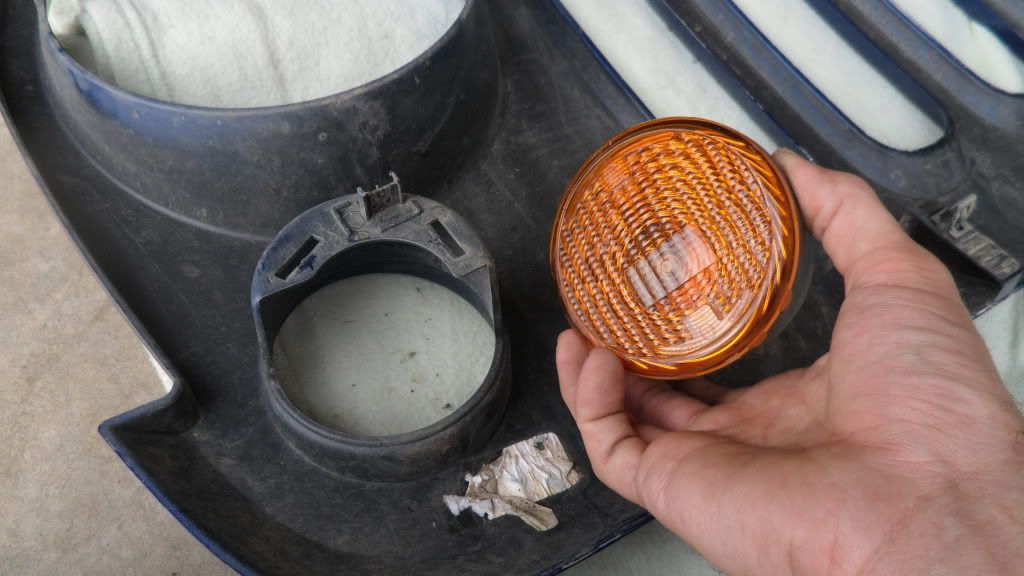
Remove the lenses by pressing in on the tabs and releasing.
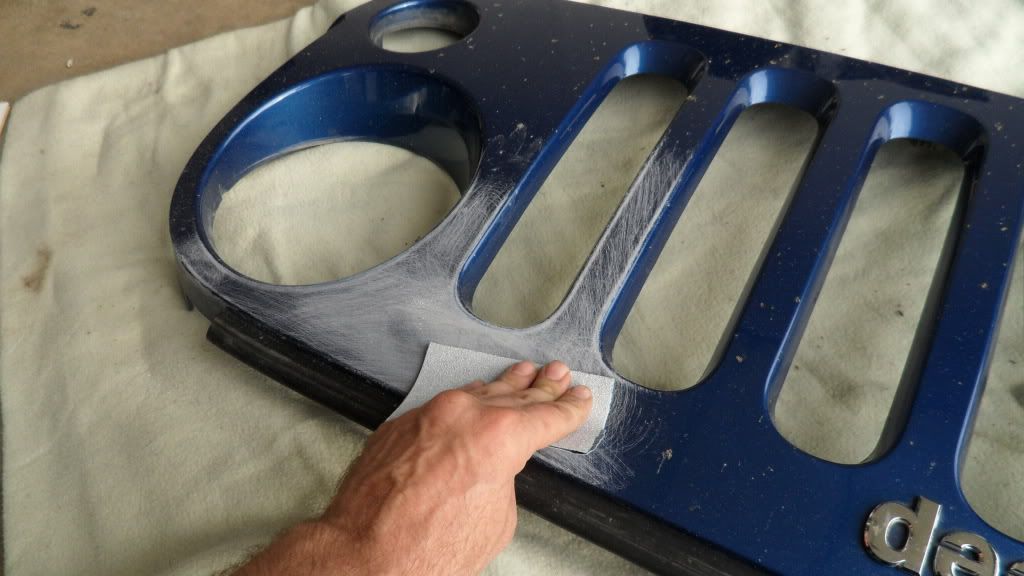
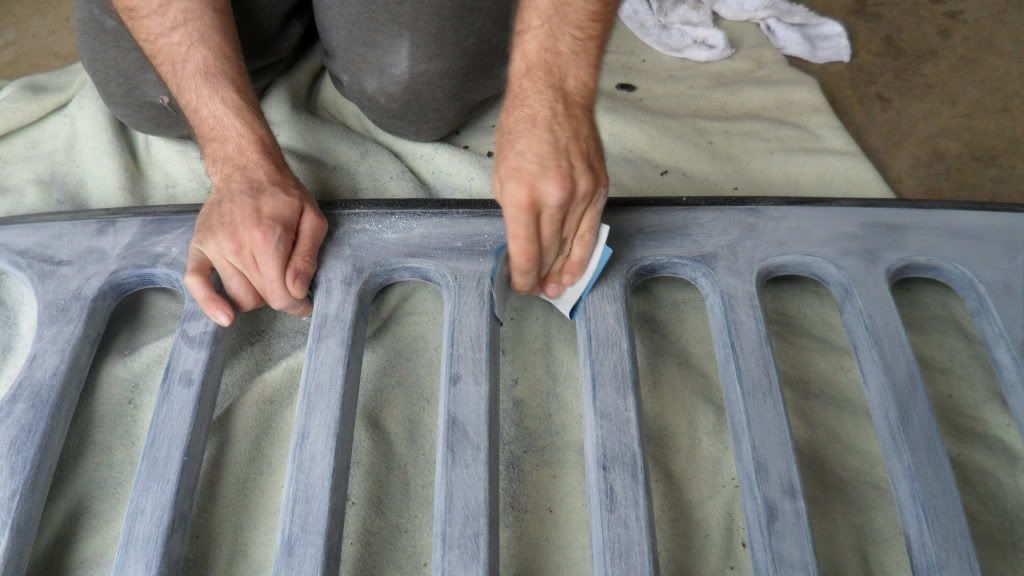
Start sanding away.
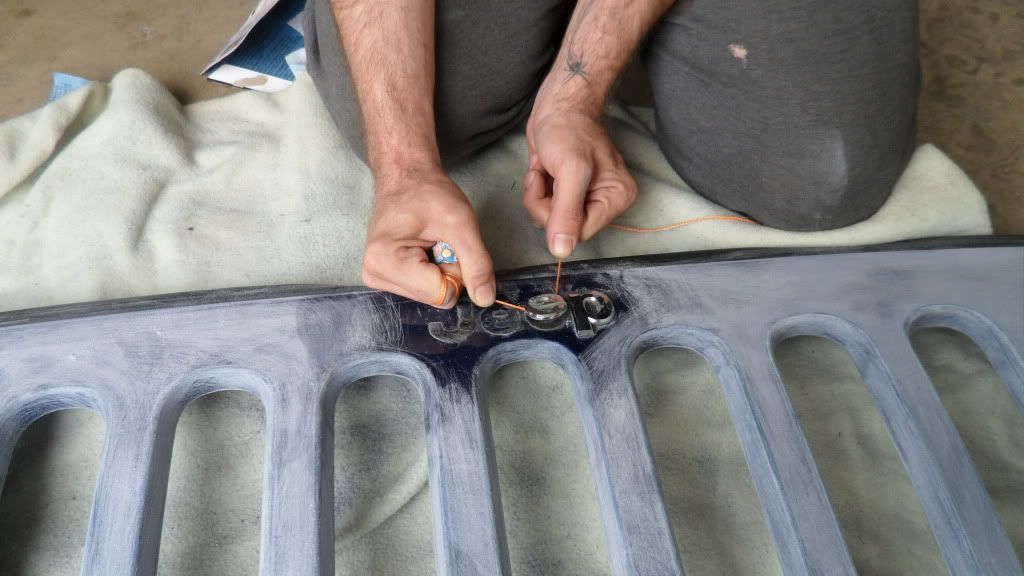
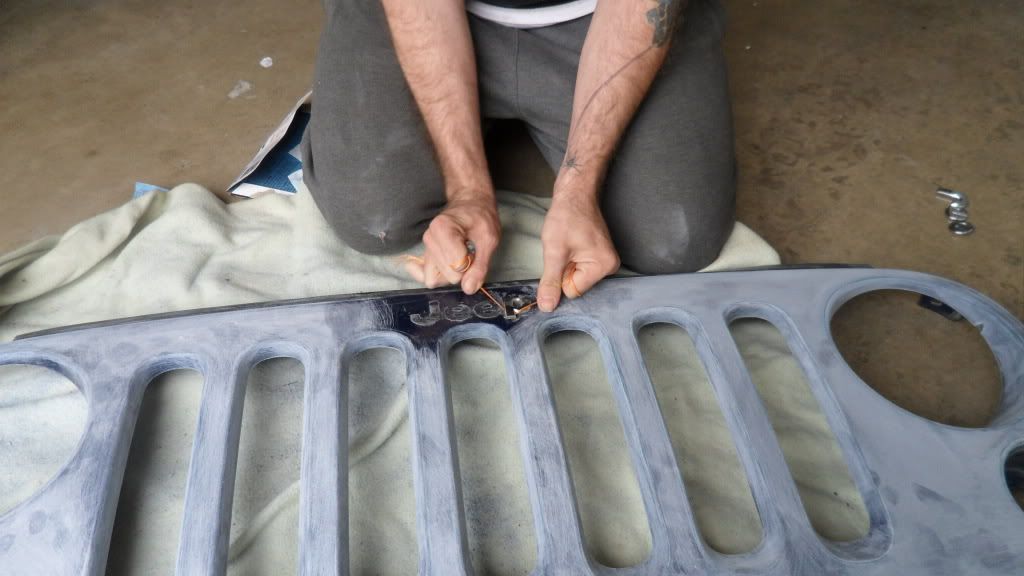
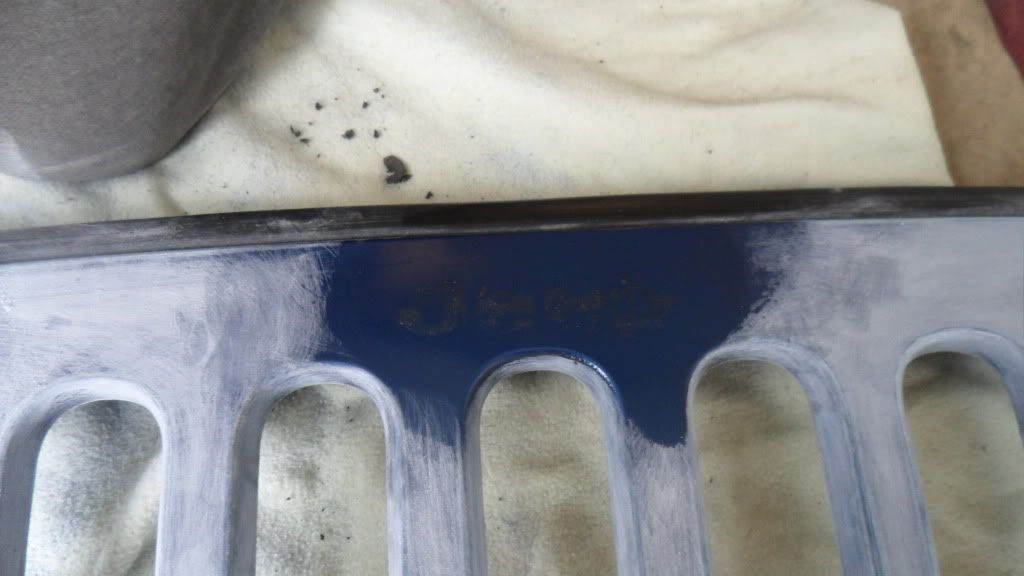
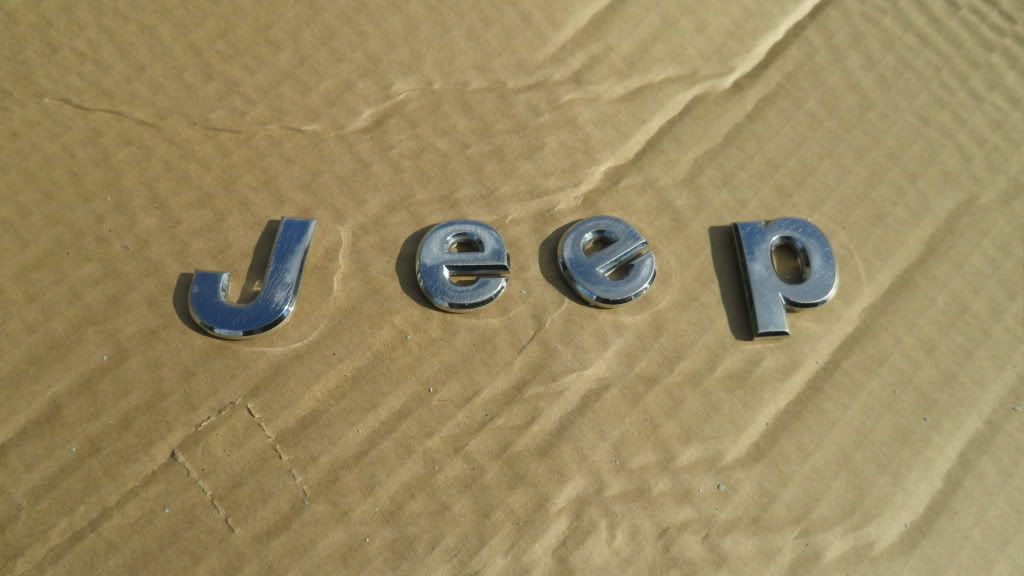
Removing the letters. I used string, and no heat gun. I felt that using heat melts the tape even worse. They came off very easily this way.
Goo Gone to get the remaining sticky stuff. You don't have to get it all. You're going to sand it anyway. This just prevents the sandpaper from clogging with glue.
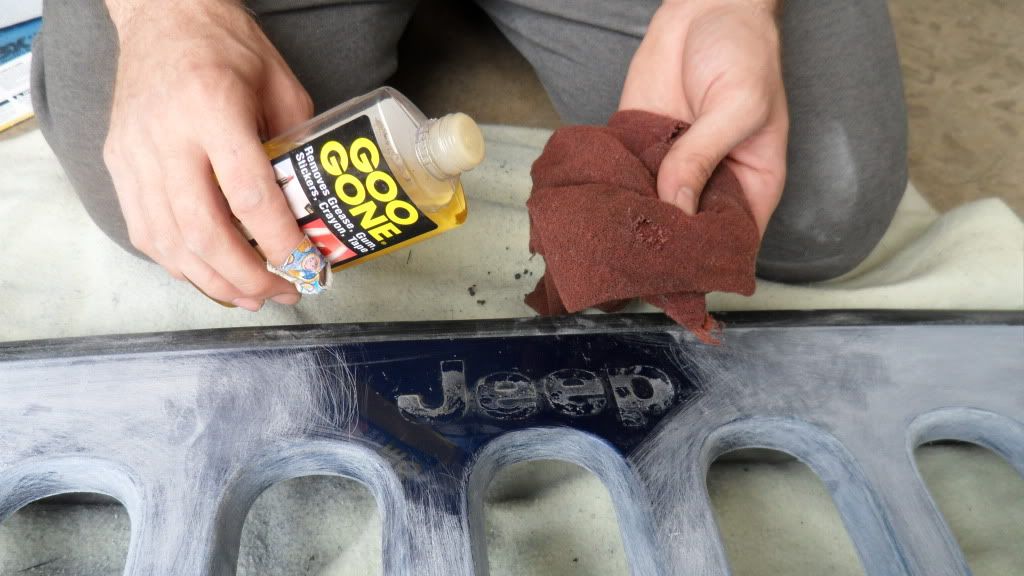
Finish sanding all the nooks n crannies.
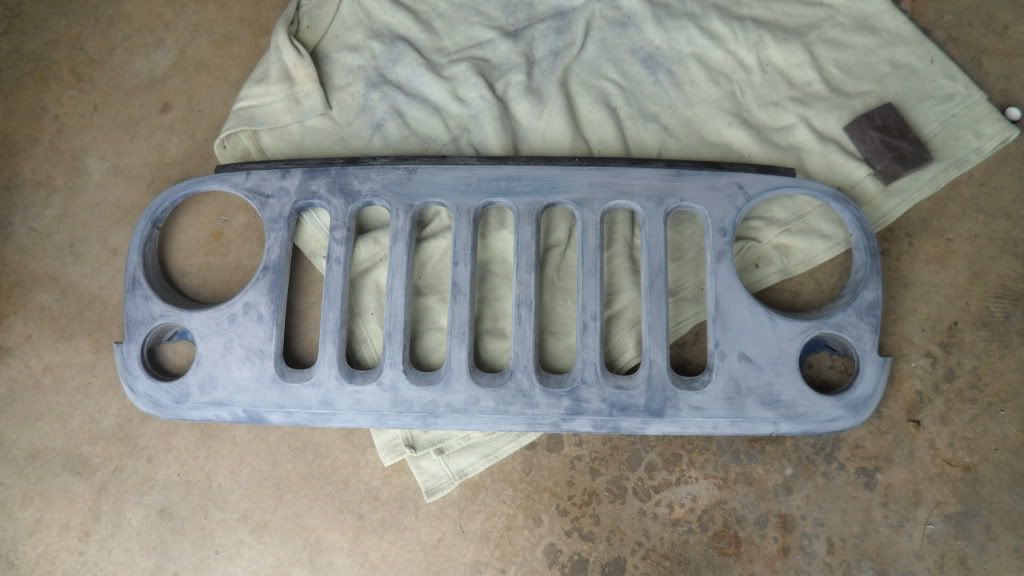
Wash with soap and water to remove all dust. Dry completely.
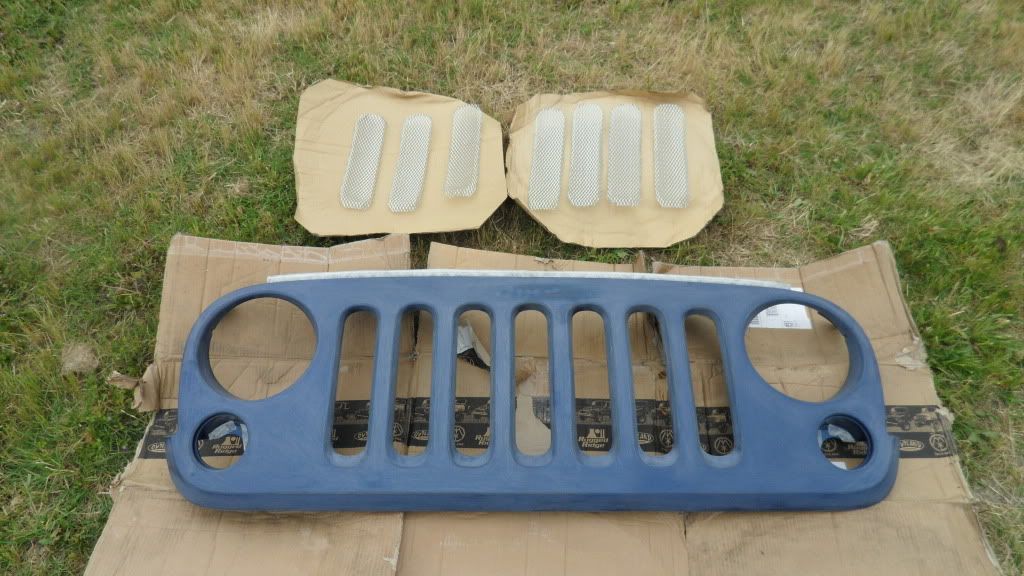
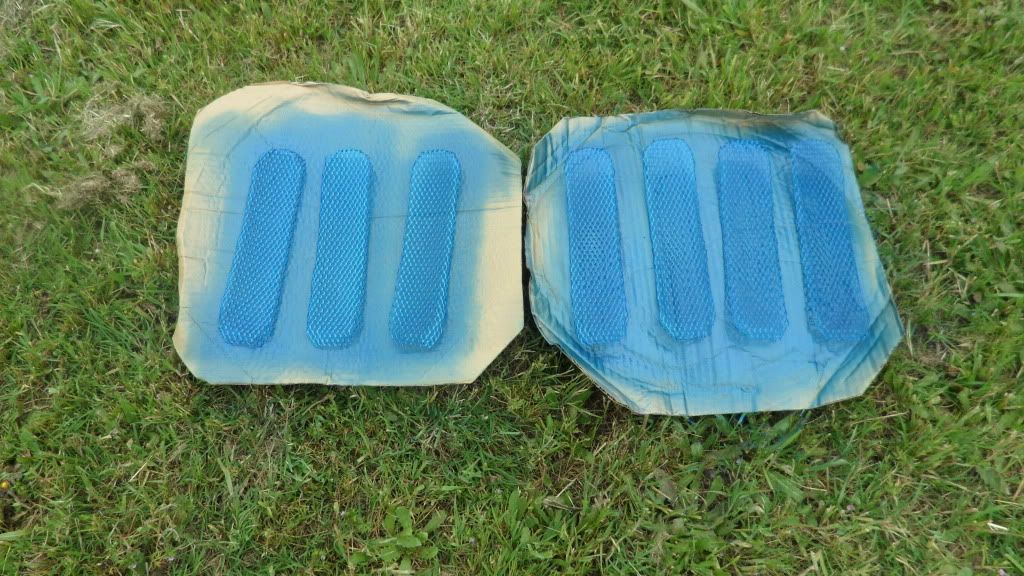
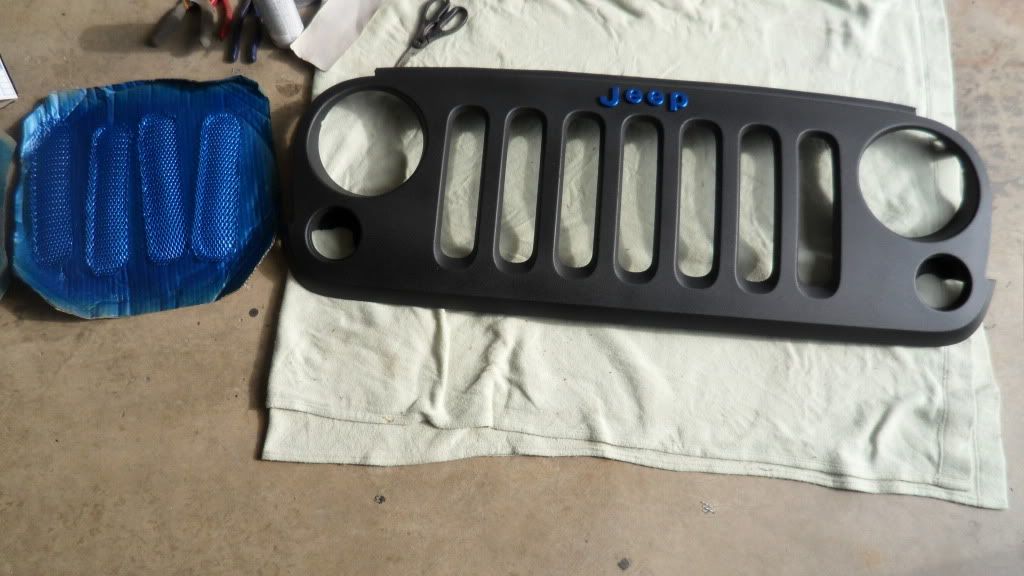
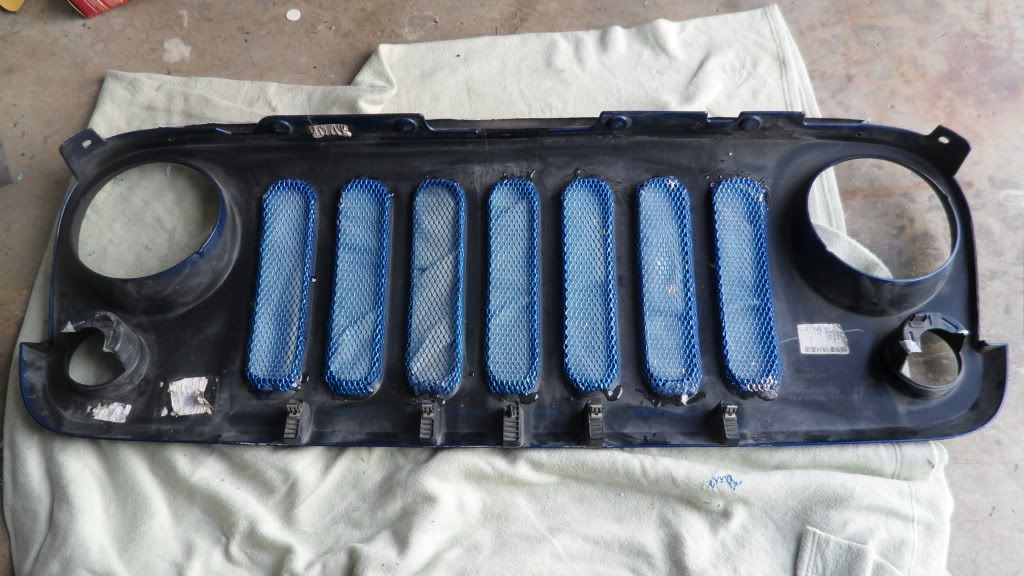
Eyeball out where you need to cut the mesh and cut it.
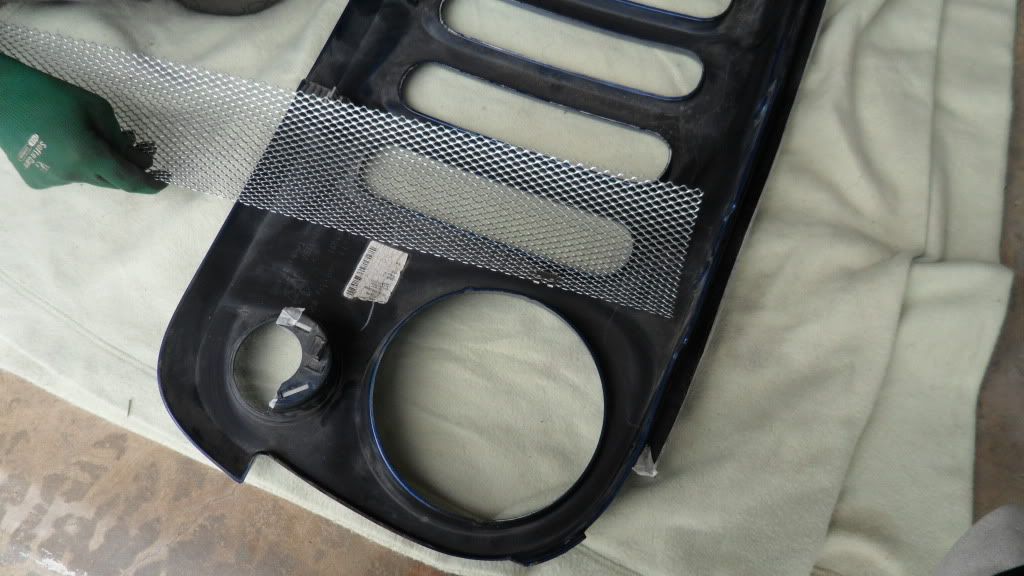
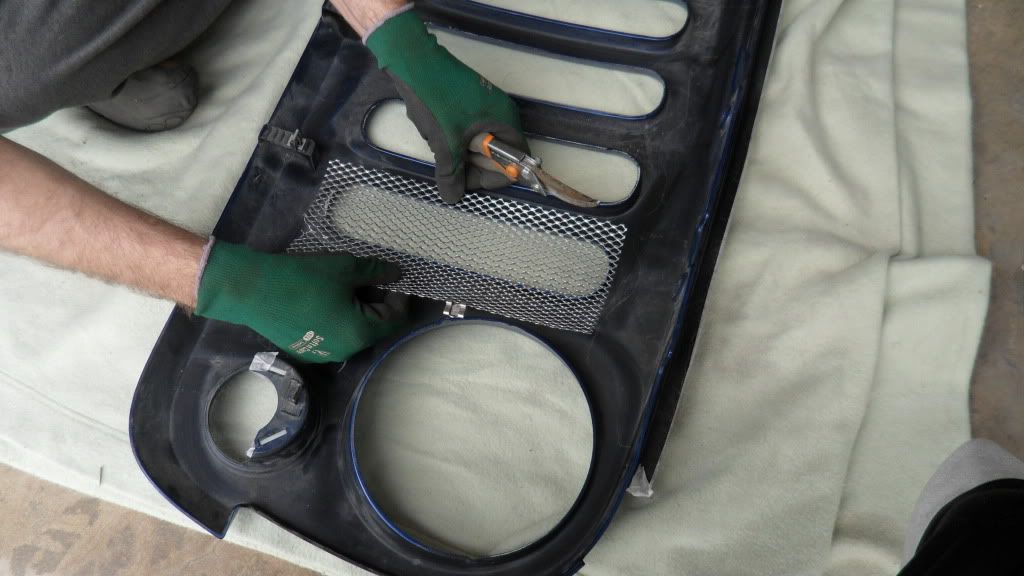
Conform and bend to the shape of the grill opening.
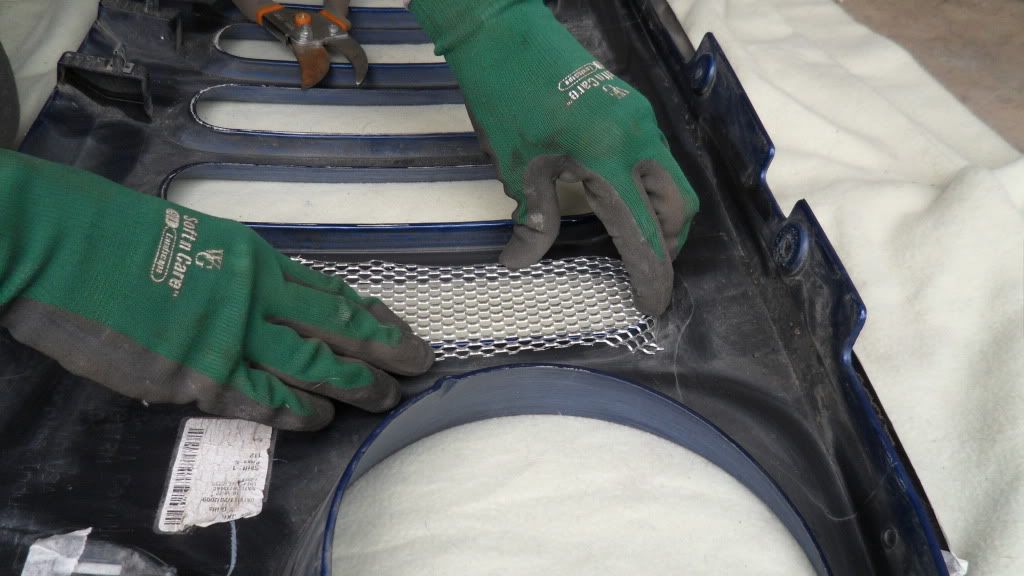

Repeat for the rest.
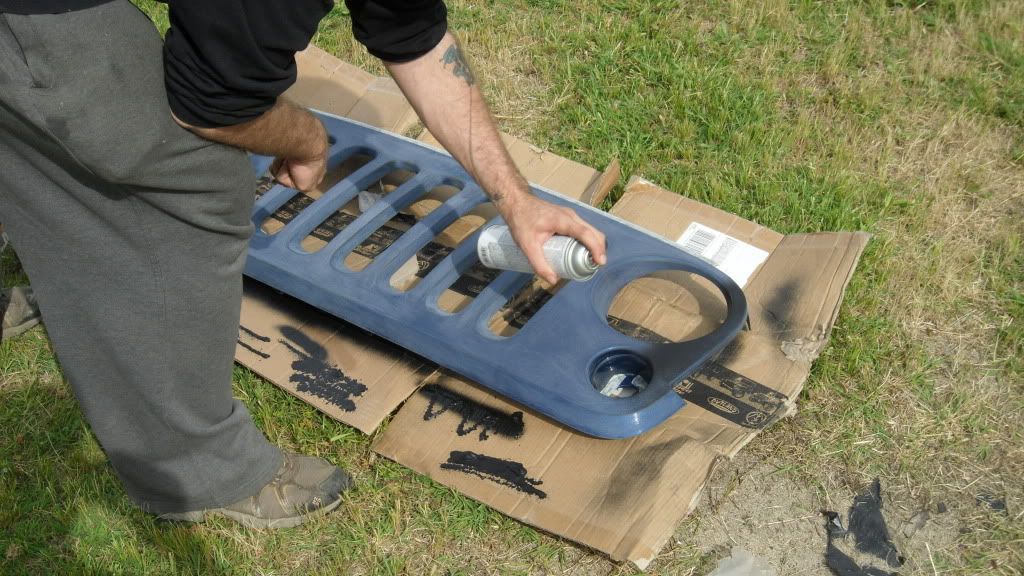
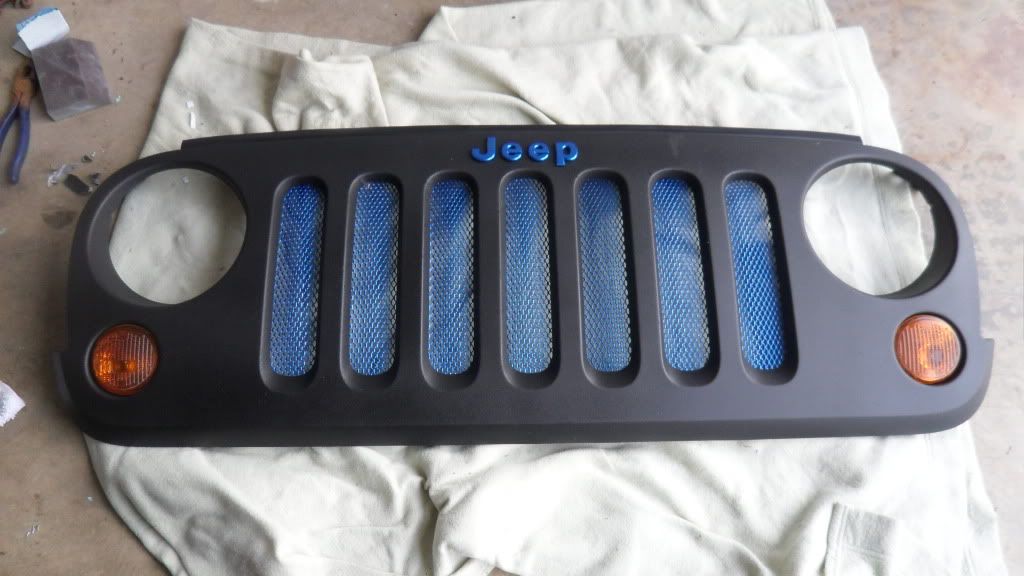
Prepped to paint. I used masking tape to cover the top rubber piece where the hood closes on it.
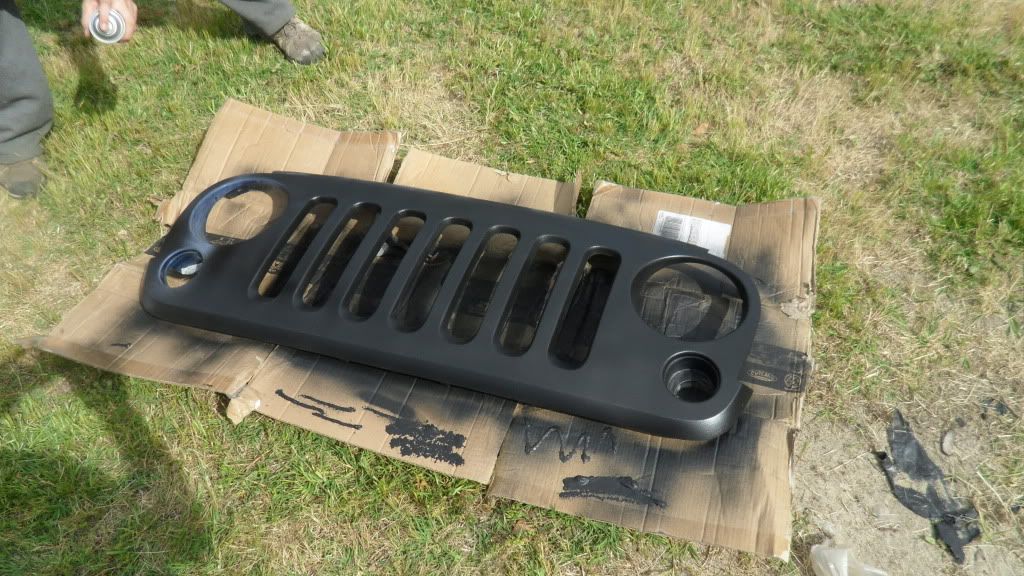
Use even light coats. I did 4 complete coats on everything. Be patient.

While waiting for the paint to dry, remove the old tape from the letters and cut and press on the new 3M tape.
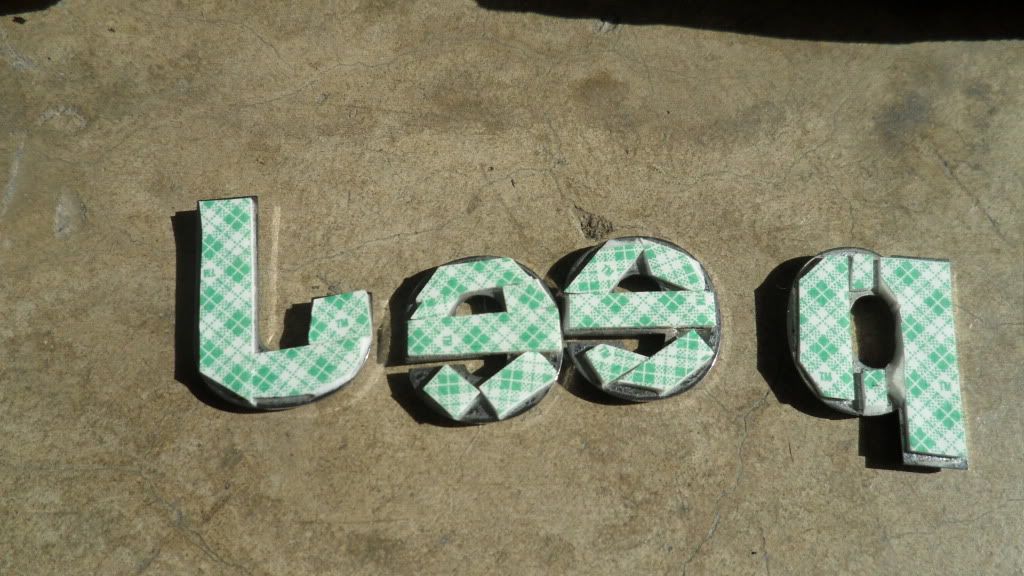
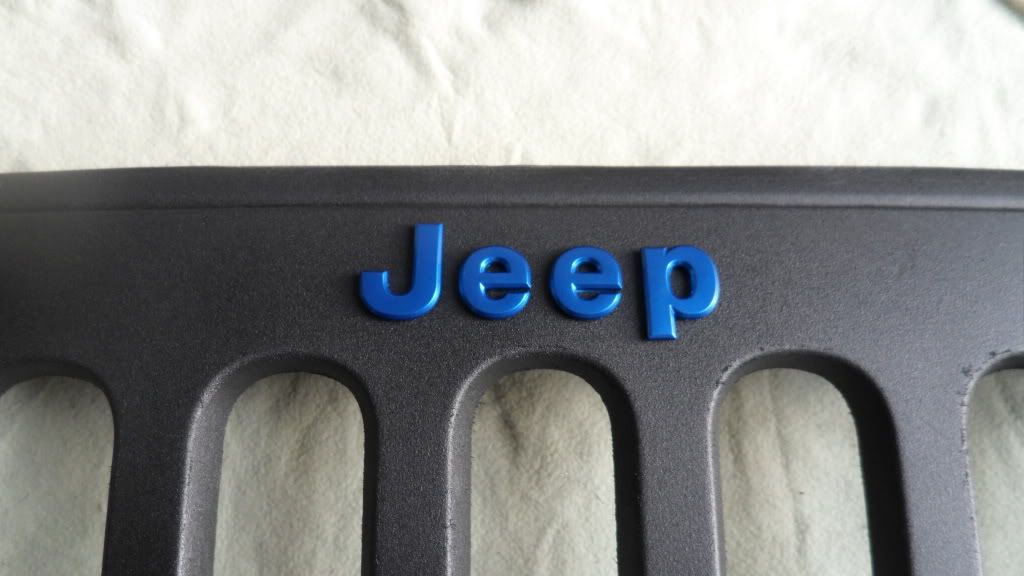
When the grill paint was done drying...I eyeballed the letters and I think it's perfect.
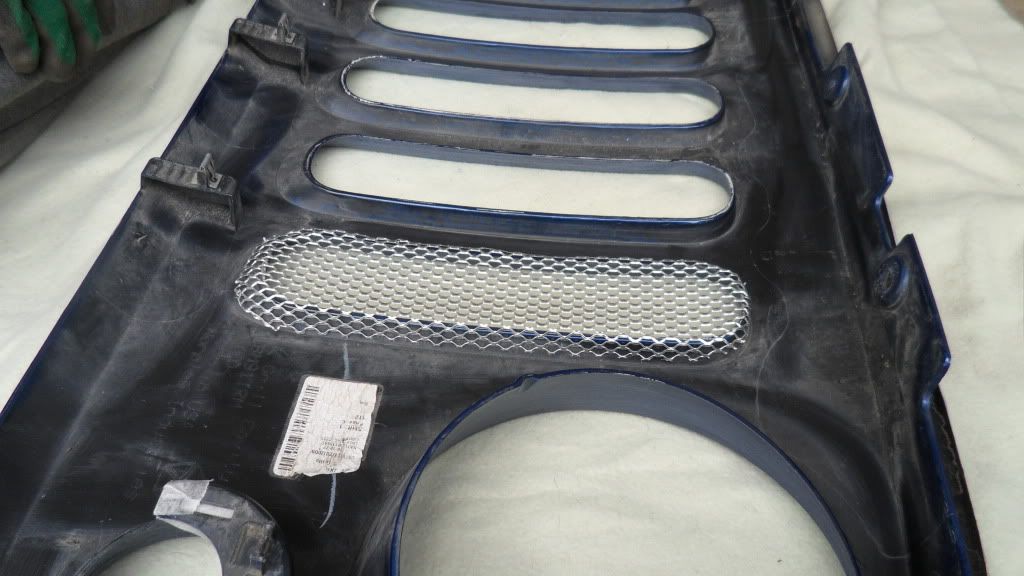
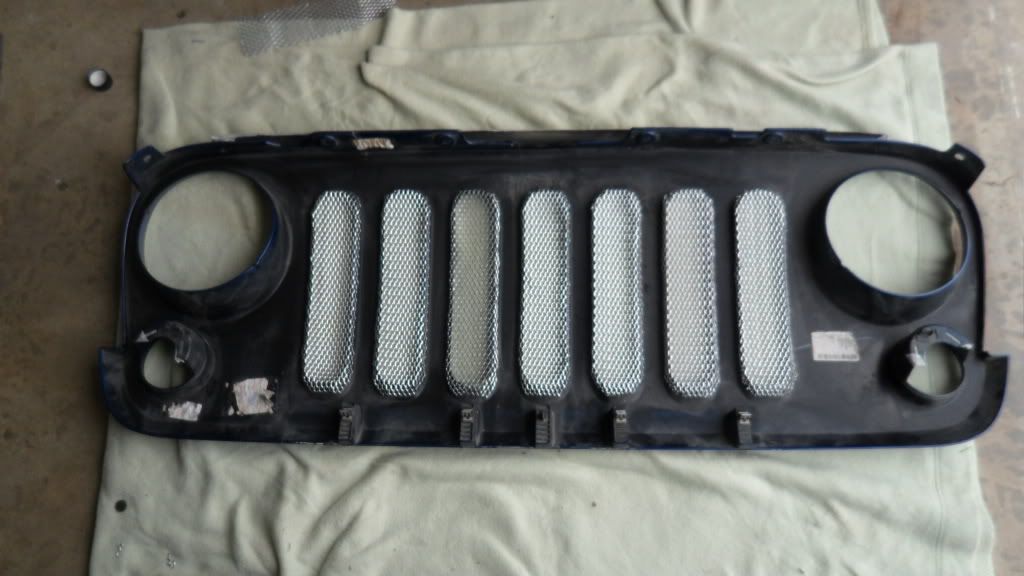
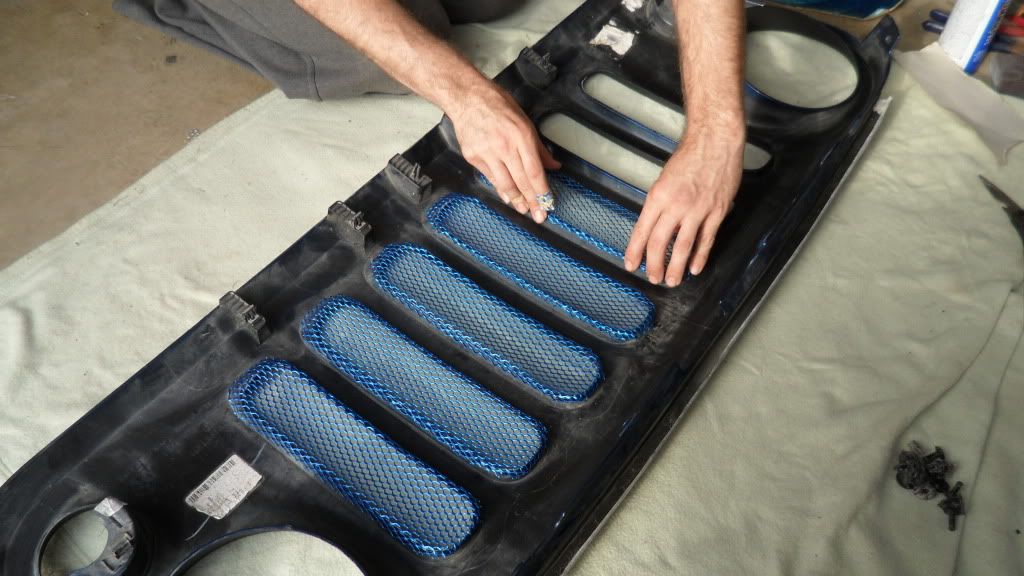
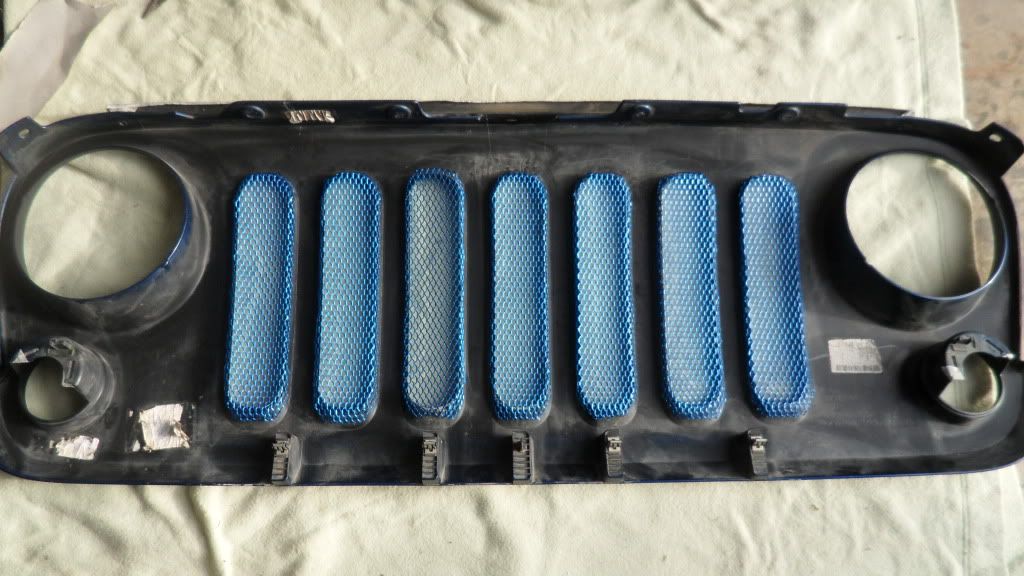
Install the mesh. Press them on and conform them. They were very tight and didn't wiggle around.
I put goops of epoxy on the top and bottom and then dotted around the sides every 6 inches or so.
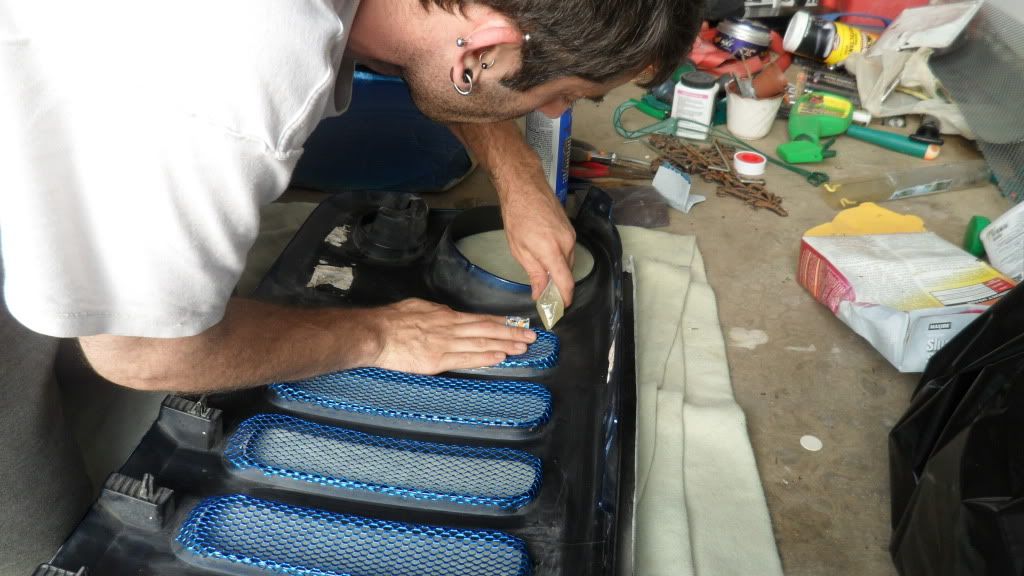
Only mix a little bit of epoxy at a time as it sets quick. Be patient and go slow with this process. Have a friend help by holding and pressing the mesh down while you apply the epoxy.
Let dry for a couple hours. (Cures in 24 hours)
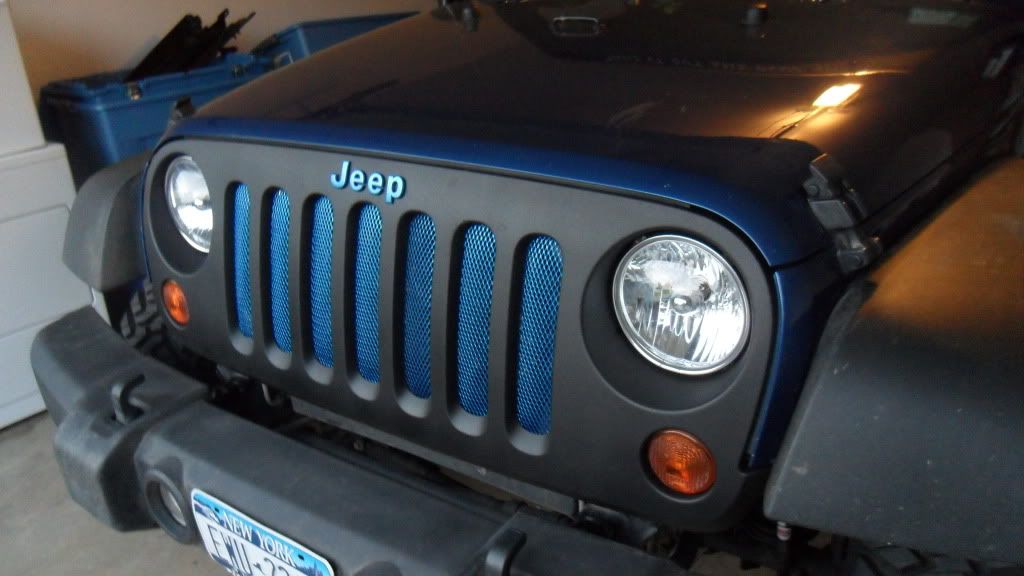
Reinstall the turn signal lenses and the grill the same way you removed it...and VOILA! Done!
This is my first time doing it and I completely relied on JK-Forum and members like you.
HINT: Since I used the gutter guards that already had a slight bend to them, I took advantage of this and held down the mesh into the grill slot so it looks like its rounded out from the outside. Kind of like the expensive one on Quadratec. It gives it a little bit of a raised look instead of flat like everyone else who did this mod with a big sheet of mesh instead of individual pieces.
Hope you enjoy!
Materials:
Package of 6 gutter guards (Home Depot)
Epoxy (5 minute dry time)
Color Matched DupliColor Chrysler Blue rattle can
DupliColor Bedliner rattle can
3M double sided tape
Masking tape
Tools:
metal shears
scissors
Drill w/ wood screw
Before.....
I started out by taking off the front grill. (Obviously) Removing the plastic rivets was easy.
Just drill a screw into the center about a 1/4 inch.
Pull it out with a pair of pliers.
Reverse drill to get screw out of plastic bit.
Use needlenose pliers to pull up on the remaining plastic tab. Repeat for the others.
Pull outward on grill.
Twist the turn signal bulbs and gently remove them.
Pull grill out from tabs on bottom and lift grill up and remove.
I put all the plastic clips/tabs on the fender so they don't get lost.
Remove the lenses by pressing in on the tabs and releasing.
Start sanding away.
Removing the letters. I used string, and no heat gun. I felt that using heat melts the tape even worse. They came off very easily this way.
Goo Gone to get the remaining sticky stuff. You don't have to get it all. You're going to sand it anyway. This just prevents the sandpaper from clogging with glue.
Finish sanding all the nooks n crannies.
Wash with soap and water to remove all dust. Dry completely.
Eyeball out where you need to cut the mesh and cut it.
Conform and bend to the shape of the grill opening.
Repeat for the rest.
Prepped to paint. I used masking tape to cover the top rubber piece where the hood closes on it.
Use even light coats. I did 4 complete coats on everything. Be patient.
While waiting for the paint to dry, remove the old tape from the letters and cut and press on the new 3M tape.
When the grill paint was done drying...I eyeballed the letters and I think it's perfect.
Install the mesh. Press them on and conform them. They were very tight and didn't wiggle around.
I put goops of epoxy on the top and bottom and then dotted around the sides every 6 inches or so.
Only mix a little bit of epoxy at a time as it sets quick. Be patient and go slow with this process. Have a friend help by holding and pressing the mesh down while you apply the epoxy.
Let dry for a couple hours. (Cures in 24 hours)
Reinstall the turn signal lenses and the grill the same way you removed it...and VOILA! Done!

JK Freak
Joined: May 2010
Posts: 677
Likes: 0
From: Missoula, Montana, United States
Wow that looks absolutely amazing! I really like it when people take the time and effort to do these kinds of mods and then post up their progress along with it. Very nice and clean! I like it
Thread Starter
JK Enthusiast
Joined: Feb 2010
Posts: 311
Likes: 0
From: Saratoga Springs/Upstate, NY

JK Super Freak
Joined: Oct 2010
Posts: 1,270
Likes: 1
From: Tucson, AZ
JK Super Freak
Joined: Oct 2007
Posts: 1,572
Likes: 0
From: Phoenix, AZ
The trick on the fasteners is that you have to rotate the top 1/4 of a turn then you can pop them out easier (note the direction of the base and top pieces):
Trending Topics
Thread Starter
JK Enthusiast
Joined: Feb 2010
Posts: 311
Likes: 0
From: Saratoga Springs/Upstate, NY
And it definitely makes it all worth while to post progress. Makes me feel accomplished and hopefully this thread can help people out in the future.
Thread Starter
JK Enthusiast
Joined: Feb 2010
Posts: 311
Likes: 0
From: Saratoga Springs/Upstate, NY
