
this is my bed liner write up.


Thread Starter
JK Enthusiast
Joined: May 2007
Posts: 370
Likes: 0
From: dallas texas
first things first. as this is a current project i will be updating as i go. i will be using the Upol raptor liner. google "upol" for more info or you can go to tptools dot com to purchase said product. this will be my third vehicle to use the raptor liner on and thus far i am very pleased with its performance. just to put it out there this product is not a "rubbery" liner. its more of a hard texture but LOOKS similar to linex. i have this product on a 97 TJ and a 2008 chevy work van. its holding up great on the tj (tub and hard top). the chevy van has a few scratches but other wise is holding up well. where it is scratched in the chevy is probably my fault and not the liners. i purposely put it on thin ( i was running low) because i thought it would be a low impact area. it wasnt. just in case some of you are wandering i load cabinets, trim, tools and big tool boxes in the van daily.
so, with that said i will begin with the tear down and prep.
tear down is pretty self explanatory. you will need an assortment of tools, sockets and socket wrench ( i used 18mm,15mm, 1/2") flat head screw driver (to help in popping some of the plastic pieces off, needle nose pliers (to pull the plastic push pins out), green tape (imho it holds a better tape line than the blue tape), chisel/air chisel (not needed but preferred imho) and a breaker bar or one bad ass impact wrench and grinder with wire cup brush. oh and dont forget an assortment of torx head bits as well (it is a jeep after all). a decent size air compressor is a must as well. pancake compressors need not apply, you will burn them up or at the very least shorten their life span
so whatever you dont wont covered in the liner i suggest you pull it out.
i took out the following:
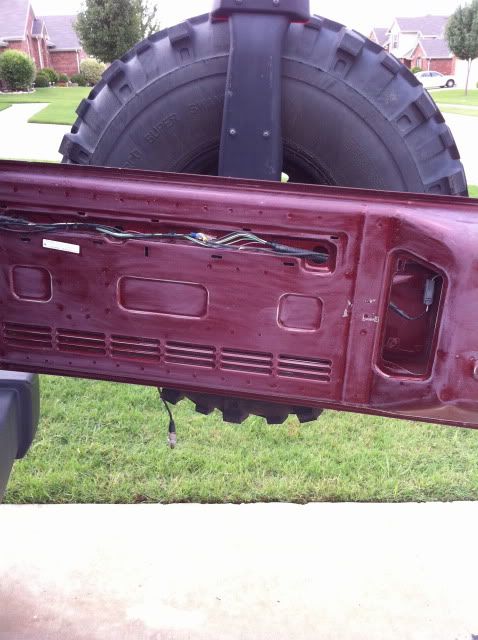
doors
top
back seat
front seats (just passenger for now as i will be dd'ing the whole time)
rear seat belts.
trim pieces
sub woofer
rear door surrounds (for soft top owners)
rubber molding throughout
drain plugs and grommets etc...
once i got most everything out i began to wash out the tub with soap and water. this is self explanatory so i dont feel like pics are needed. just use common sense.
tid bit of info on the removal process. i found it to be very very very very hard to remove the seat bracket bolts with your average socket wrench. i have a 350-400 ft lbs impact wrench that refused to budge the bolts. i ended up using a breaker bar and the door sills as leverage. dont blame me if you bust a knuckle, a nut, or give yourself a hemorrhoid trying to remove these bolts.
just saying it was hard.
sanding: i used 60-150 grit. 150 for the easier to reach places and the lower grit for the harder to reach areas
a good portion of the tub wont need much work, thanks to jeep, because a lot of it is barely painted. for some reason under my driver seat it seemed as though some one thought it would be a good idea to lay down a full paint job there but not other areas. again, all you are really looking to do is scuff up the area to be covered in liner. i went a bit overboard in some areas but i feel its worth it.
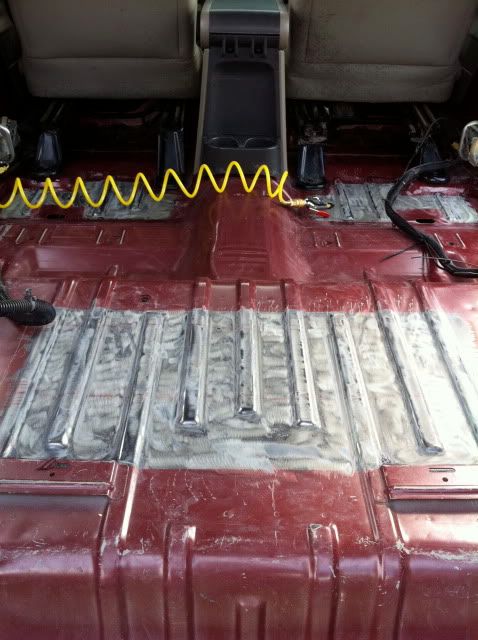
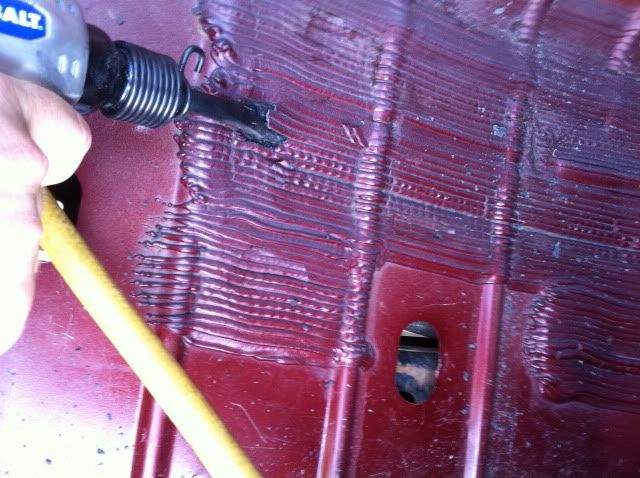
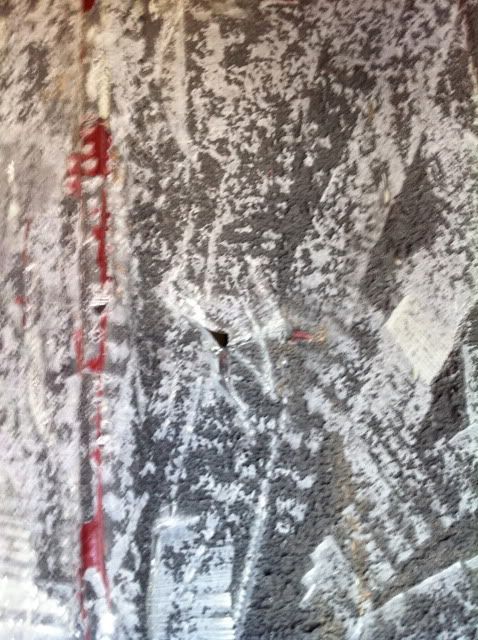
now to those that dont want to peel off the sound deadening, i think its silly not to. why? well if youre like me and have ran with out carpet now for about 2 years it begins to crack and water get trapped under there. i will show some pics a bit later that shows this. this stuff however is pretty easy to remove, it just takes the right tools. i used a air hammer with a chisel attachment and i had the top layer off in about 5 minutes. it will literally peel right of. now before i go to far i need to mention, pay attention to what you are doing. you are trying to peel the stuff off not jack hammer it off. if you dont lay the chisel down at a flat angle but instead hold it more perpendicular to the floor you can and more than likely will put a whole in the floor (ask me how i know). the floor pan on our jeeps is scary thin. now depending on how well you chiseled this stuff off will determine how much work you have under it. the back sections in my jeep i got off most of it with just the chisel, the front seemed to be thicker. after i got done with the chisel i used my grinder with a wire cup brush and just let the tool do the work. this stuff creates a lot of dust, so use a mask or hold your breath. i was basically trying to get the floor smooth and to the metal.
the front floor took me a while, all added up, it took me about 2 hours for the front and about and 1hr for the rear. most of that was because it was harder to get in the front than the back. i should mention that you dont have to use a grinder to get this stuff off. an orbital sander and/or other tools come to mind that could help or be easier.
again if you dont want to do this part then dont but i wouldnt be surprised that years down the road it starts to peel off. the rest of the sanding is pretty easy. just scuff it up and get it hazy.
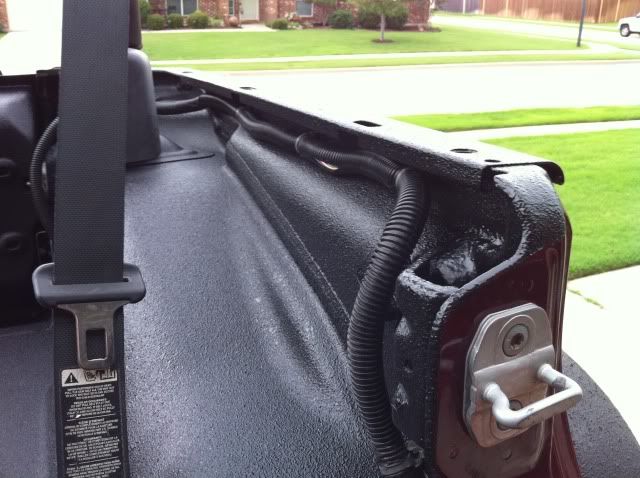
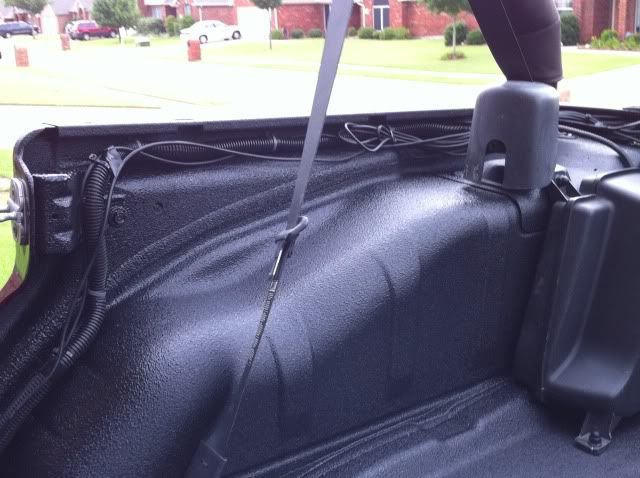
so here are some pics of the prep so far
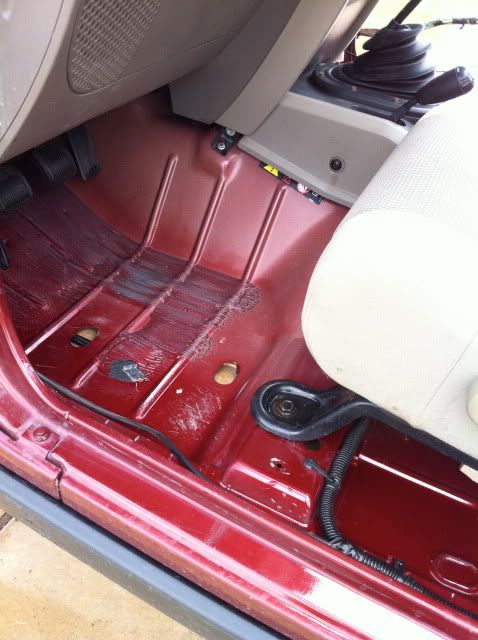
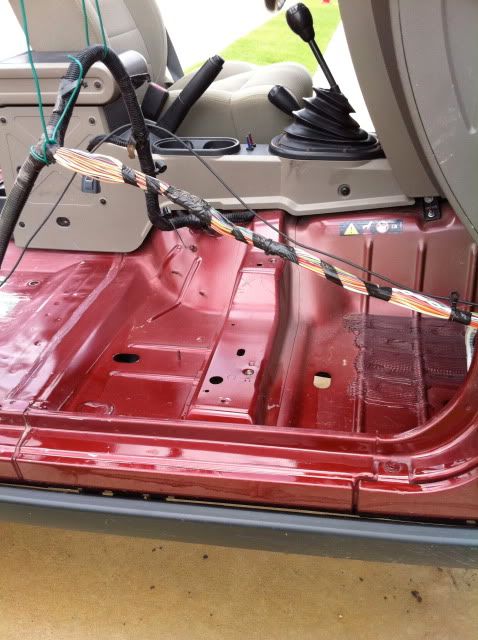
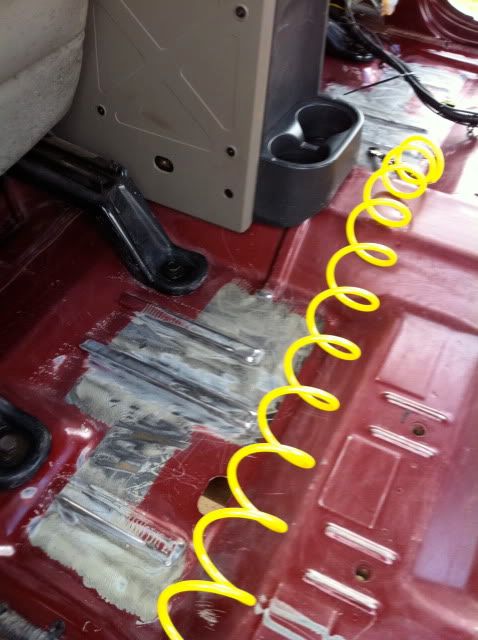
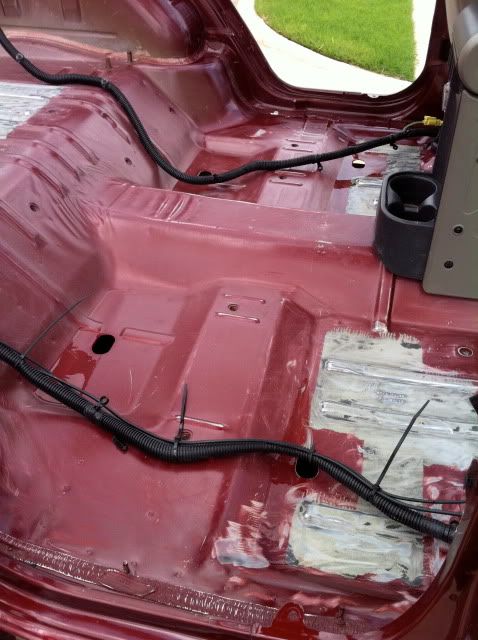

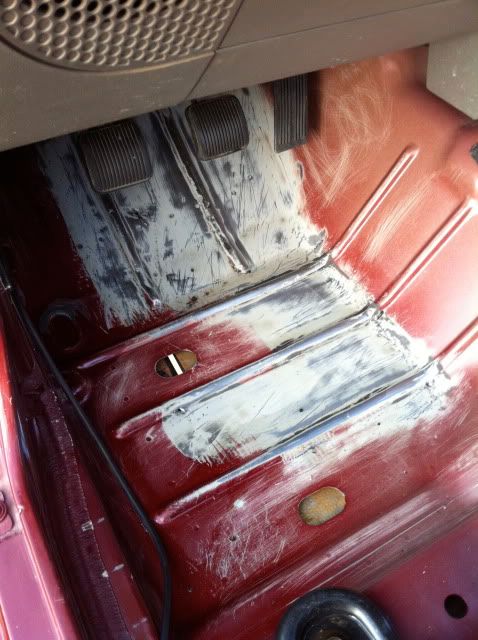
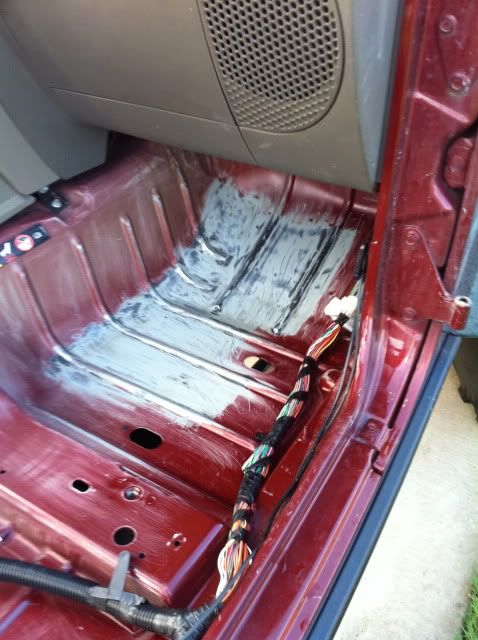
now that some of you have figured out i did exactly what i told you not too. and in some of the pics there is still some standing water in the tub, so it still looks glossy but it isnt.
again i can not explain or prepare you for every problem or step that may come up, so please use common sense and think before you start tearing your jeep up.
dont forget i will be adding as i go. i plan to finish by next sunday (7-11-10)......weather permitting.
-shaun h
so, with that said i will begin with the tear down and prep.
tear down is pretty self explanatory. you will need an assortment of tools, sockets and socket wrench ( i used 18mm,15mm, 1/2") flat head screw driver (to help in popping some of the plastic pieces off, needle nose pliers (to pull the plastic push pins out), green tape (imho it holds a better tape line than the blue tape), chisel/air chisel (not needed but preferred imho) and a breaker bar or one bad ass impact wrench and grinder with wire cup brush. oh and dont forget an assortment of torx head bits as well (it is a jeep after all). a decent size air compressor is a must as well. pancake compressors need not apply, you will burn them up or at the very least shorten their life span
so whatever you dont wont covered in the liner i suggest you pull it out.
i took out the following:
doors
top
back seat
front seats (just passenger for now as i will be dd'ing the whole time)
rear seat belts.
trim pieces
sub woofer
rear door surrounds (for soft top owners)
rubber molding throughout
drain plugs and grommets etc...
once i got most everything out i began to wash out the tub with soap and water. this is self explanatory so i dont feel like pics are needed. just use common sense.
tid bit of info on the removal process. i found it to be very very very very hard to remove the seat bracket bolts with your average socket wrench. i have a 350-400 ft lbs impact wrench that refused to budge the bolts. i ended up using a breaker bar and the door sills as leverage. dont blame me if you bust a knuckle, a nut, or give yourself a hemorrhoid trying to remove these bolts.
just saying it was hard.
sanding: i used 60-150 grit. 150 for the easier to reach places and the lower grit for the harder to reach areas
a good portion of the tub wont need much work, thanks to jeep, because a lot of it is barely painted. for some reason under my driver seat it seemed as though some one thought it would be a good idea to lay down a full paint job there but not other areas. again, all you are really looking to do is scuff up the area to be covered in liner. i went a bit overboard in some areas but i feel its worth it.
now to those that dont want to peel off the sound deadening, i think its silly not to. why? well if youre like me and have ran with out carpet now for about 2 years it begins to crack and water get trapped under there. i will show some pics a bit later that shows this. this stuff however is pretty easy to remove, it just takes the right tools. i used a air hammer with a chisel attachment and i had the top layer off in about 5 minutes. it will literally peel right of. now before i go to far i need to mention, pay attention to what you are doing. you are trying to peel the stuff off not jack hammer it off. if you dont lay the chisel down at a flat angle but instead hold it more perpendicular to the floor you can and more than likely will put a whole in the floor (ask me how i know). the floor pan on our jeeps is scary thin. now depending on how well you chiseled this stuff off will determine how much work you have under it. the back sections in my jeep i got off most of it with just the chisel, the front seemed to be thicker. after i got done with the chisel i used my grinder with a wire cup brush and just let the tool do the work. this stuff creates a lot of dust, so use a mask or hold your breath. i was basically trying to get the floor smooth and to the metal.
the front floor took me a while, all added up, it took me about 2 hours for the front and about and 1hr for the rear. most of that was because it was harder to get in the front than the back. i should mention that you dont have to use a grinder to get this stuff off. an orbital sander and/or other tools come to mind that could help or be easier.
again if you dont want to do this part then dont but i wouldnt be surprised that years down the road it starts to peel off. the rest of the sanding is pretty easy. just scuff it up and get it hazy.
so here are some pics of the prep so far
now that some of you have figured out i did exactly what i told you not too. and in some of the pics there is still some standing water in the tub, so it still looks glossy but it isnt.
again i can not explain or prepare you for every problem or step that may come up, so please use common sense and think before you start tearing your jeep up.
dont forget i will be adding as i go. i plan to finish by next sunday (7-11-10)......weather permitting.
-shaun h


Thread Starter
JK Enthusiast
Joined: May 2007
Posts: 370
Likes: 0
From: dallas texas
Out if curiousity how many cans did it take you
I bought the kit plus I extra bottle of liner. I know when u did my chevy van I used 7 cans and when I dud my tj it took all 4 including the hard top
I bought the kit plus I extra bottle of liner. I know when u did my chevy van I used 7 cans and when I dud my tj it took all 4 including the hard top
Trending Topics

Thread Starter
JK Enthusiast
Joined: May 2007
Posts: 370
Likes: 0
From: dallas texas
alright guys i am done. well minus putting the rear seats in. im too tired to mess with it right now.
lets just get straight to the pics.
well i did the final clean and then masked everything off
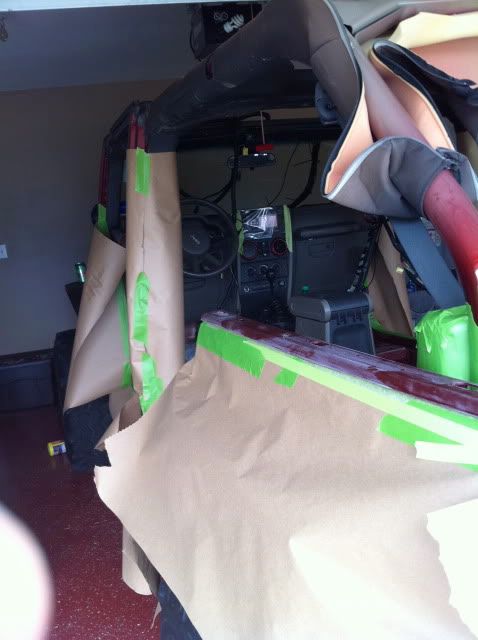
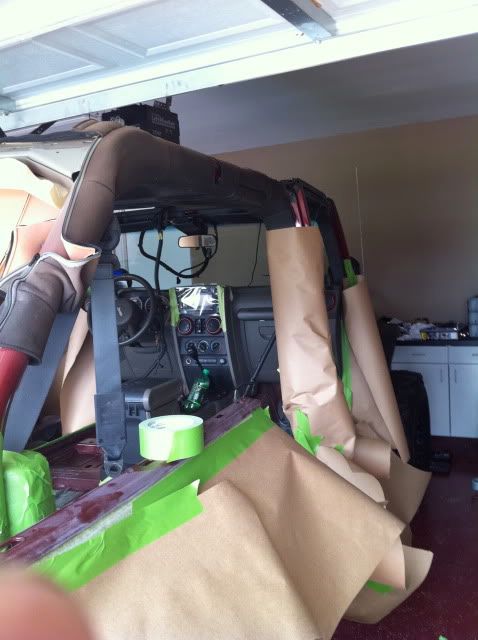
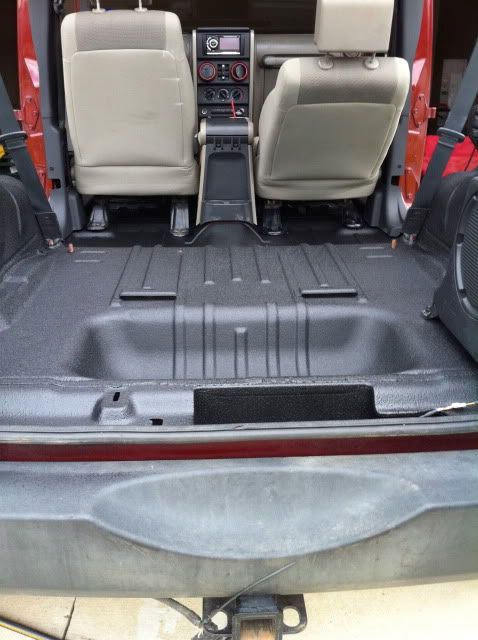
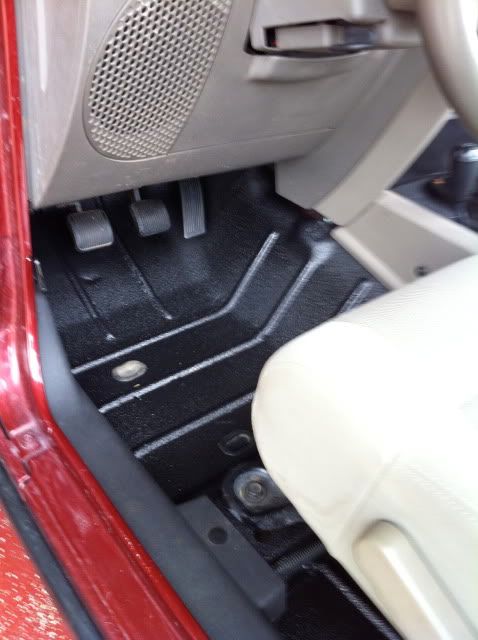
then i got to spaying and this is the result.
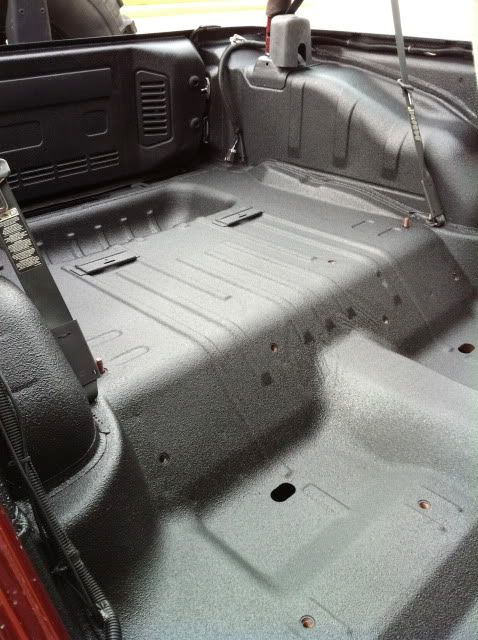
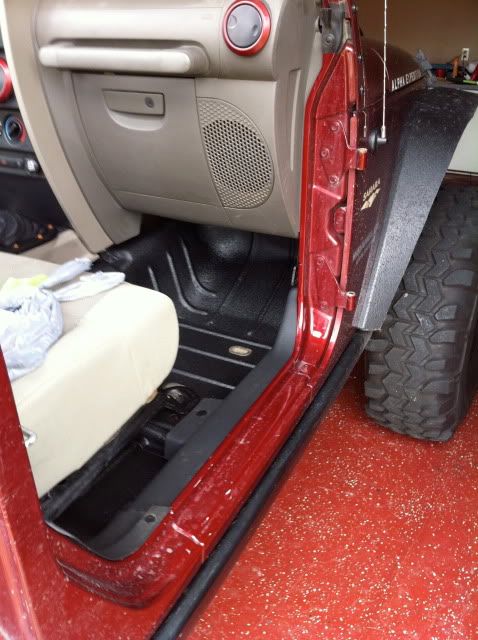
i started spraying outside in the driveway and then the rain came in so i had to move it in the garage. good and bad news, good news was that i was smart enough to leave the driver side till the last. that way i was able to actually get in and drive it into the garage. bad news was i planned on doing it outside and didnt bring my respirator. so the last bit was in the garage and i got a bit stoned.
this stuff is the greatest diy liner kit in my opinion. its easy to spray and it doesnt cost much more than some of the other more popular diy kits out there. all in all im out about 200$ for everything, that includes some tools, paper, tape and the cost of the kit. the downside of this kit is that it can be very addicting. im now thinking about buying the tint able version and spraying the whole exterior in a desert sand color.
anyone wanting to liner the inside of their jeep should consider this kit.
if you have any questions please feel free to ask.
shaun h
lets just get straight to the pics.
well i did the final clean and then masked everything off
then i got to spaying and this is the result.
i started spraying outside in the driveway and then the rain came in so i had to move it in the garage. good and bad news, good news was that i was smart enough to leave the driver side till the last. that way i was able to actually get in and drive it into the garage. bad news was i planned on doing it outside and didnt bring my respirator. so the last bit was in the garage and i got a bit stoned.
this stuff is the greatest diy liner kit in my opinion. its easy to spray and it doesnt cost much more than some of the other more popular diy kits out there. all in all im out about 200$ for everything, that includes some tools, paper, tape and the cost of the kit. the downside of this kit is that it can be very addicting. im now thinking about buying the tint able version and spraying the whole exterior in a desert sand color.
anyone wanting to liner the inside of their jeep should consider this kit.
if you have any questions please feel free to ask.
shaun h
JK Enthusiast
Joined: Jun 2010
Posts: 378
Likes: 0
From: Ottawa ON
Great job, all the prep and time you took to sand in the hard to reach places paid off for you big time. I am impressed that it turned out as good as it did. I'm wondering how much of a 'texture' there is to it and whether or not you plan on putting your carpet BACK in to cover it or you going to leave it so you can hose it down anytime you want.