planman's 2dr Rubi JK gets RIPP'd
 01-21-2013, 09:42 PM
#1
Forum Tech Advisor
Thread Starter
After wheeling with a friend who had a RIPP'd and stretched 07 2dr Rubi in Colorado during summer of '11 and in Moab during EJS '12, and witnessing how it did on 42s--then 44s (tire size)--did with his RIPP supercharger, I decided that it was time for another upgrade for my 2 dr Rubi JK.
My 6 speed JK did great offroad--even with 40s--due to 5.38 gears in my Currie RJ 60s and 4:1 Rubi transfer case. The 3.8L at higher rpms due to the lower gearing seemed okay, but I still felt a lack of power on the highway and in the sand or deep snow. My Superchips Flashpaq and Sprintbooster together made a big difference, but not as much as I wanted.
So, I bought myself a RIPP V3 GEN-2 Supercharger with Intercooler.
However, when my wife found out, she told me she wanted one for her 4 dr Rubi automatic on 37s with 5.38s and 37s. So, I bought one for her jeep also and installed hers first. I can tell you that it made a huge difference with her rig. That 42RLE automatic used to be almost boring to drive, and now, it is quite fun.
Although there is an excellent install video on YouTube (youtube.com/watch?v=Pqs9Cxskni8) and the instructions from RIPP that come with the supercharger are absolutely excellent, I thought I'd go ahead and document my install and comment on a few things.
As it sits now, my 2 dr Rubi has a 4.5" Trailmaster Stealth long arm with Fox adjustable reservoir shocks, stretched to about a 98" wheelbase, with Currie RJ 60s (5.38s and ARBs), on ATX Slab beadlocks wrapped in 40" Xterrains. Here is my JK on the Crack at EJS '12 (pic taken by Tim Kemp's wife):

Please do not use my write-up as a substitute for RIPP's install instructions. The purpose of this thread is to give a few observations and show that the install is a relatively simple weekend project.
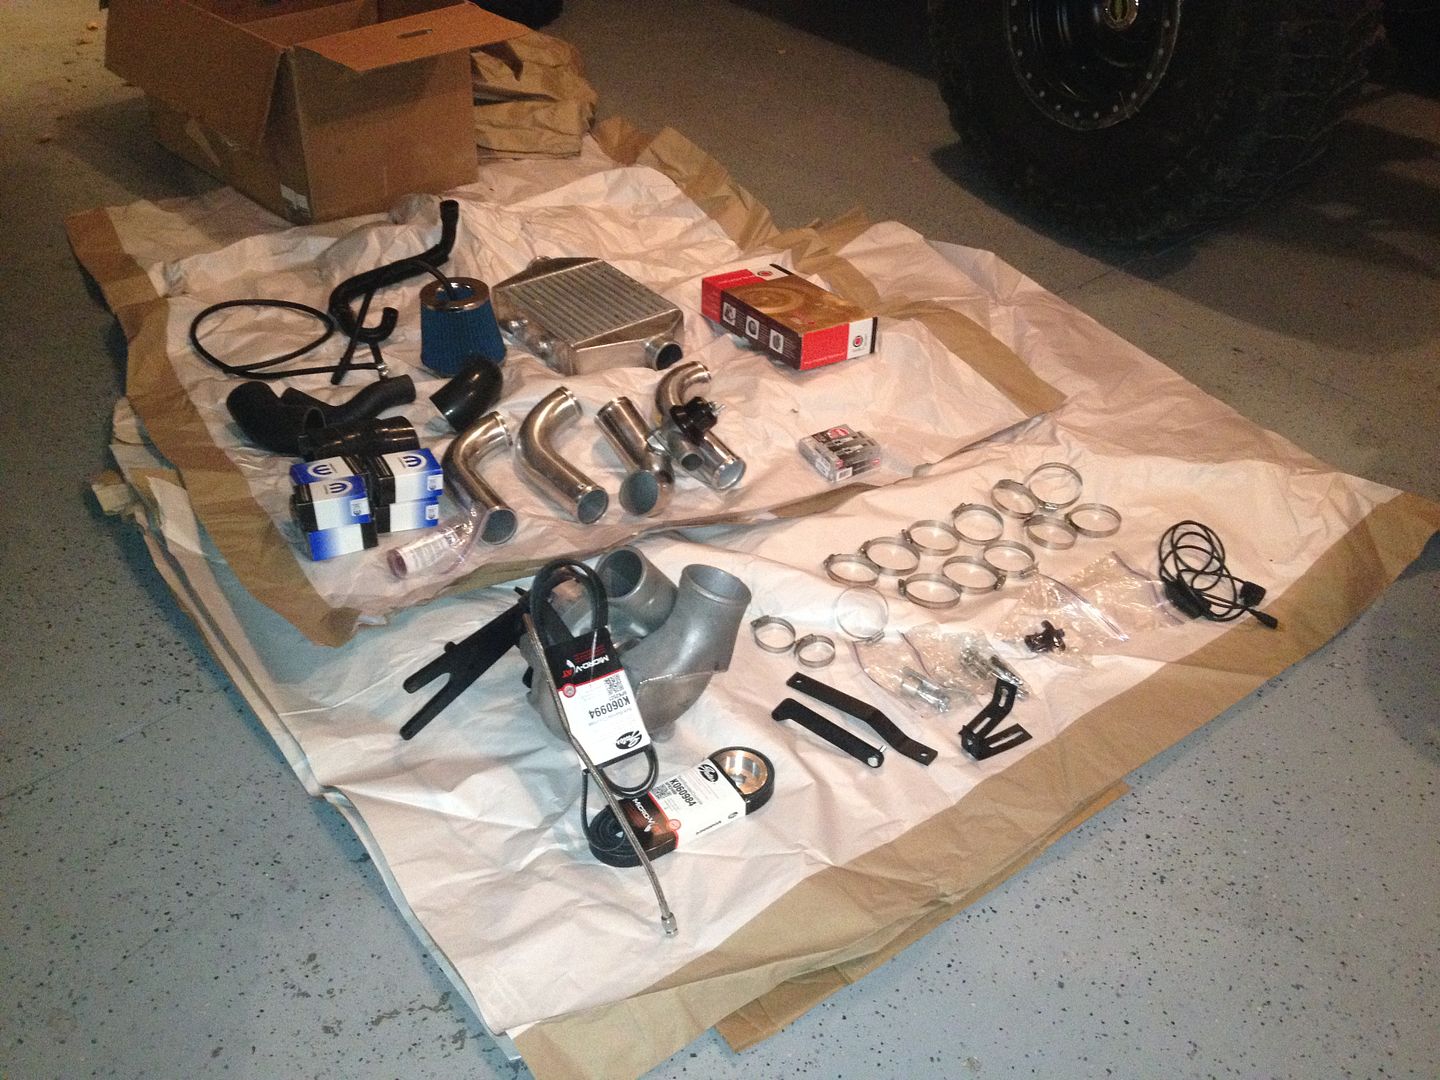
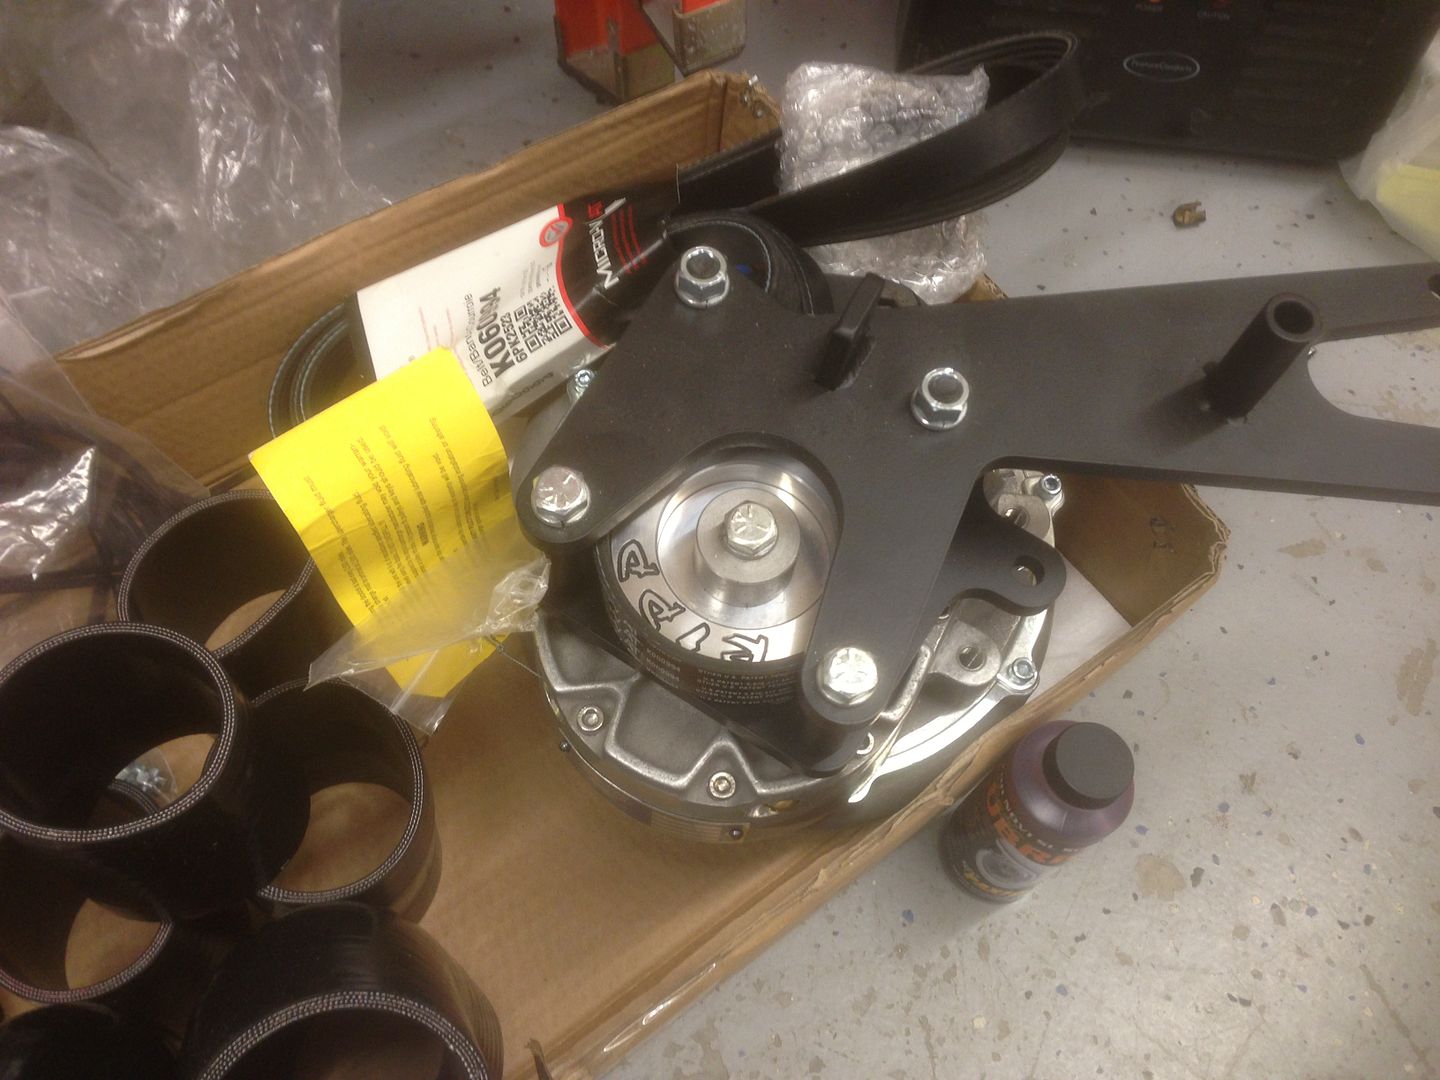
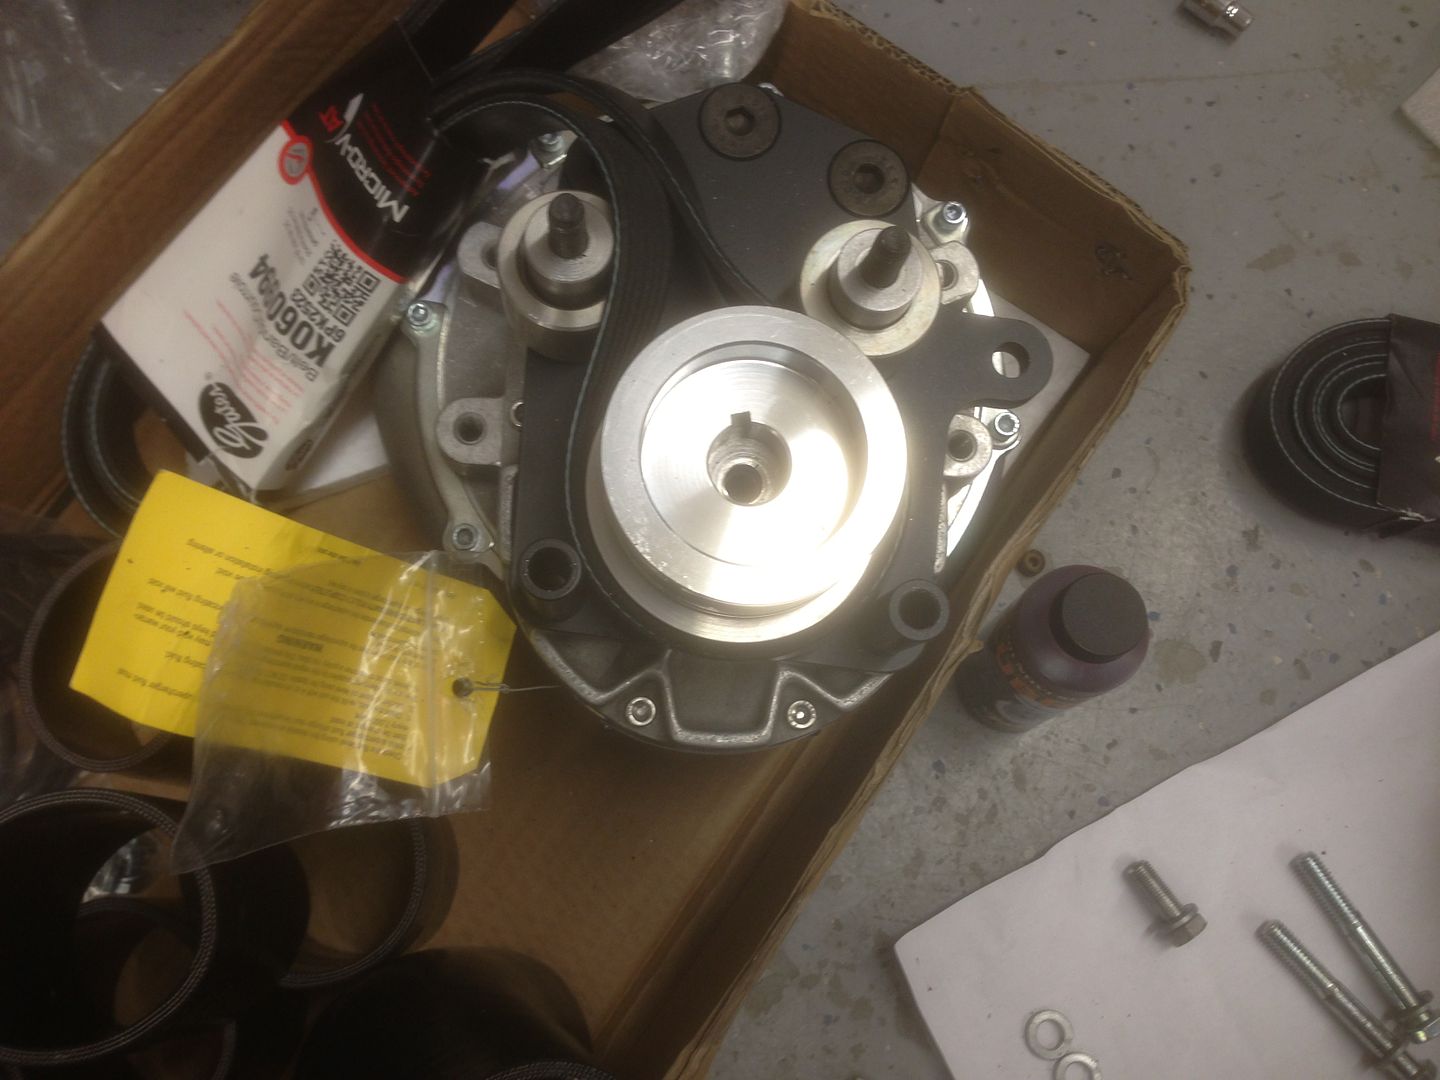
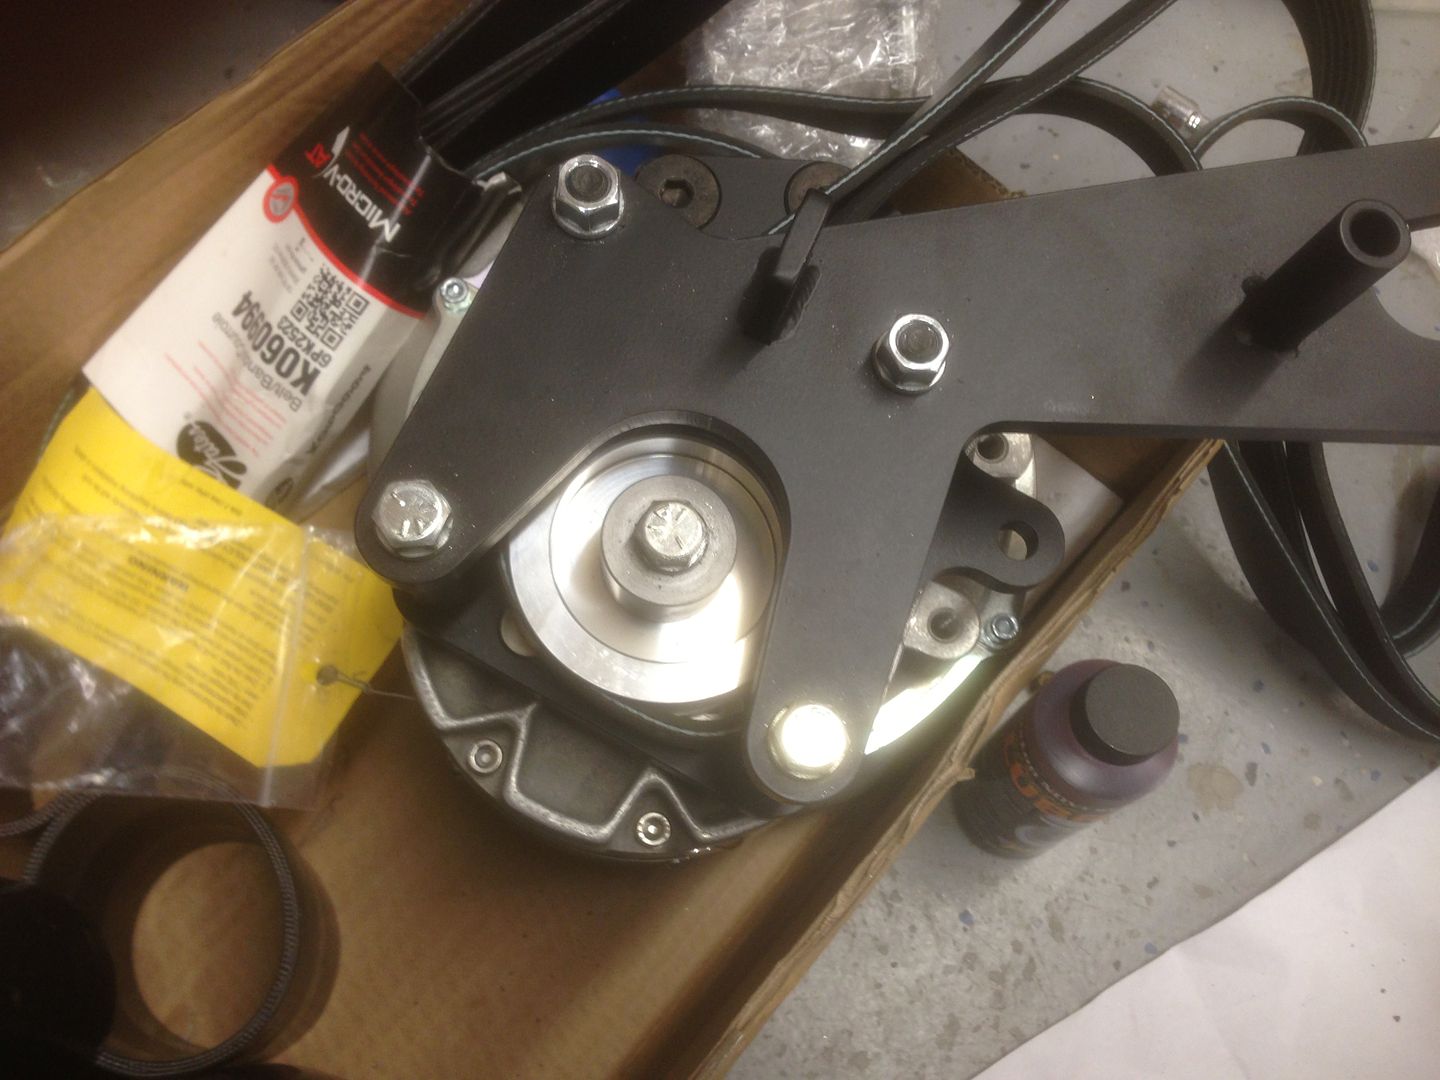
Being that we live at an elevation of 3500 ft above sea level and wheel at elevations up to 10,000 ft, I obtained a smaller, "high altitude" pulley from RIPP. Here is a pic of what comes in the kit--including the "high altitude" pulley and smaller belt in the middle bottom of the picture. (This was my wife's kit laid out before her install.)
Now, on my JK I'm running a 1" body lift to reduce the length of extended bumpstops needed and increase overall suspension travel. I have a Warn Powerplant winch, PSC hydro assist steering, and a steering cooler that I would need to navigate. In the end, the install on my JK was slightly easier due to the 1" body lift--even though I had to relocate the cooler.
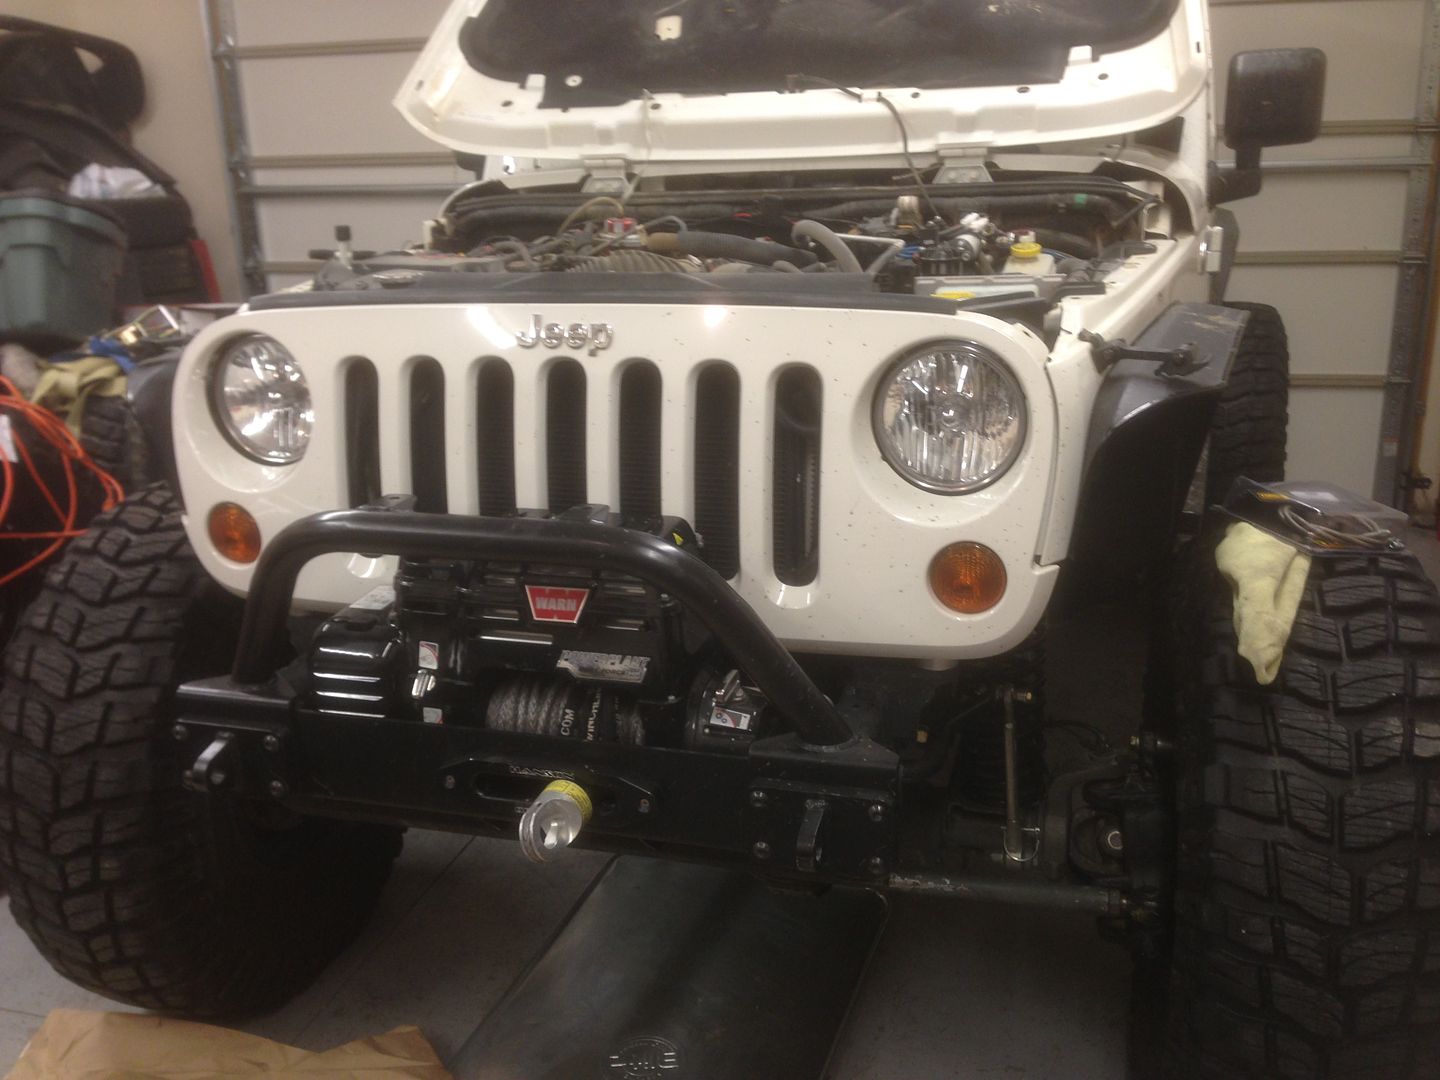
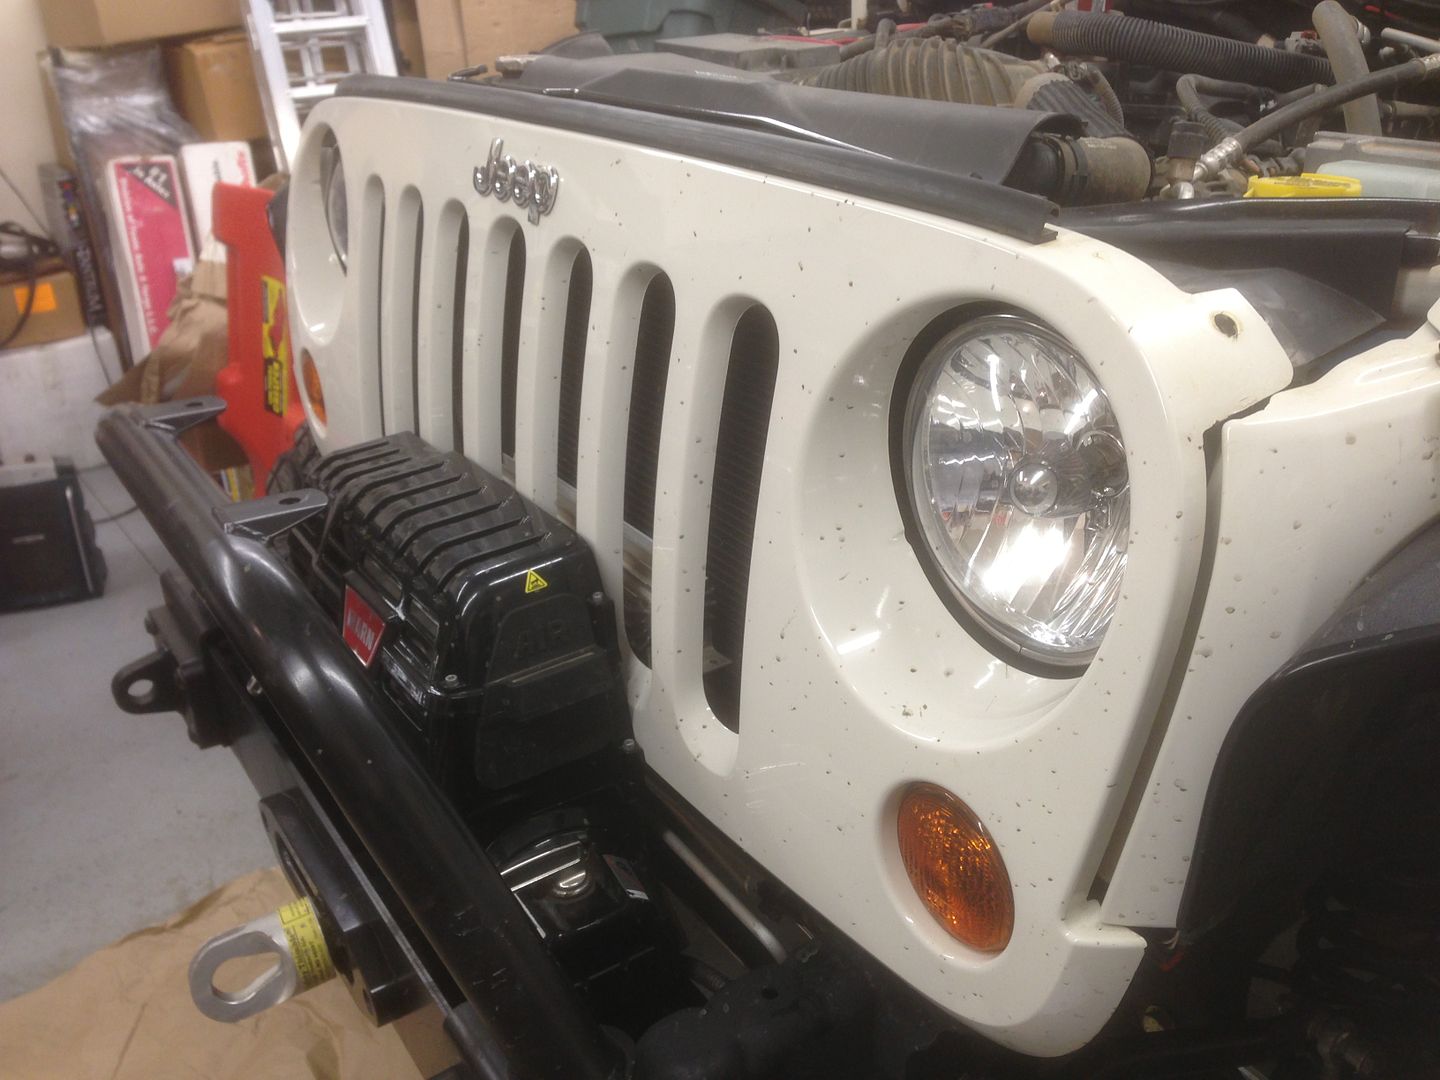
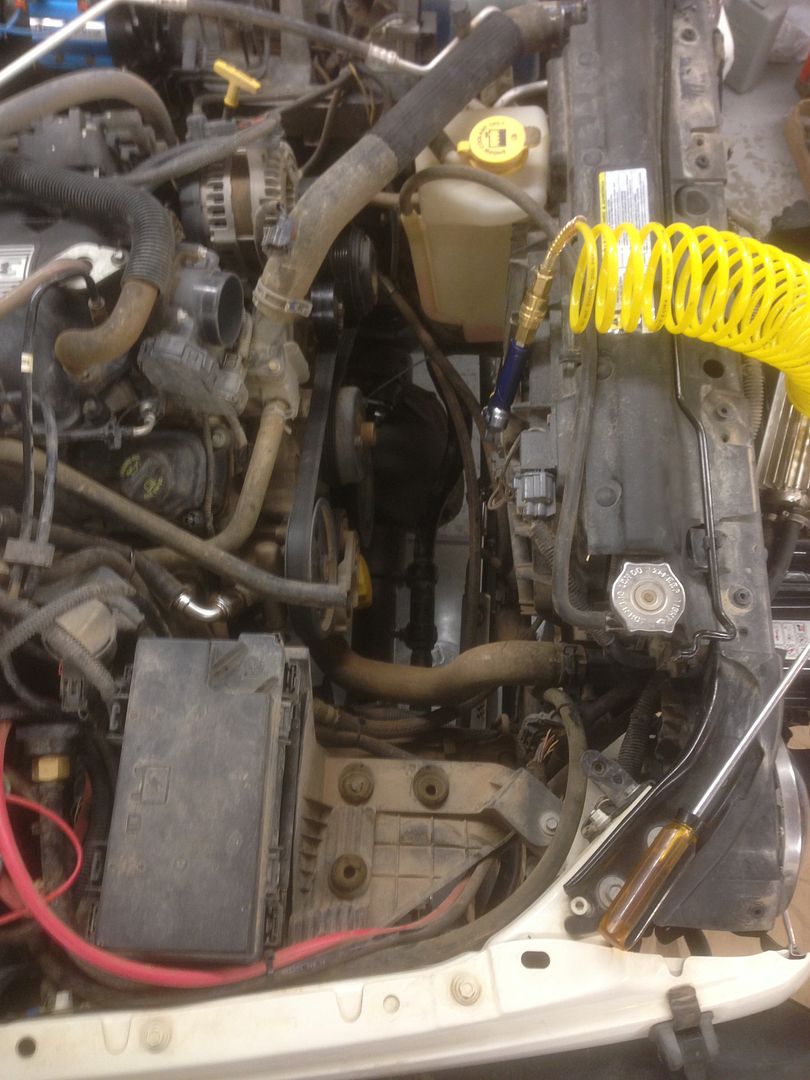
Remove the front clip (there is my steering cooler):
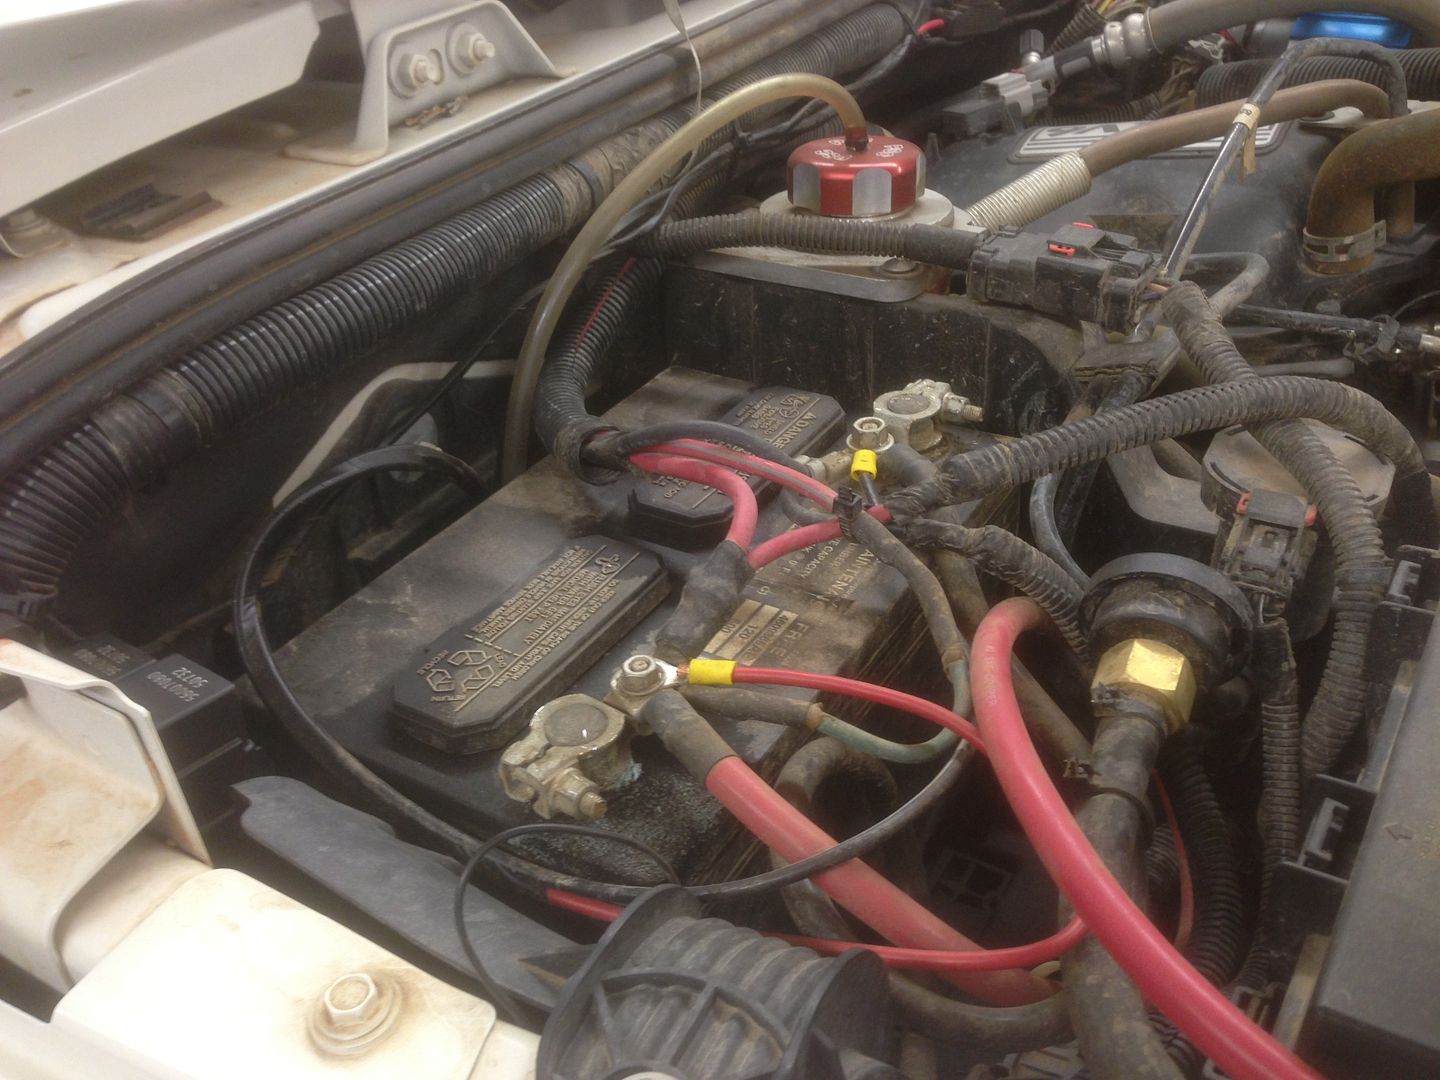
Disconnect the positive battery cable.
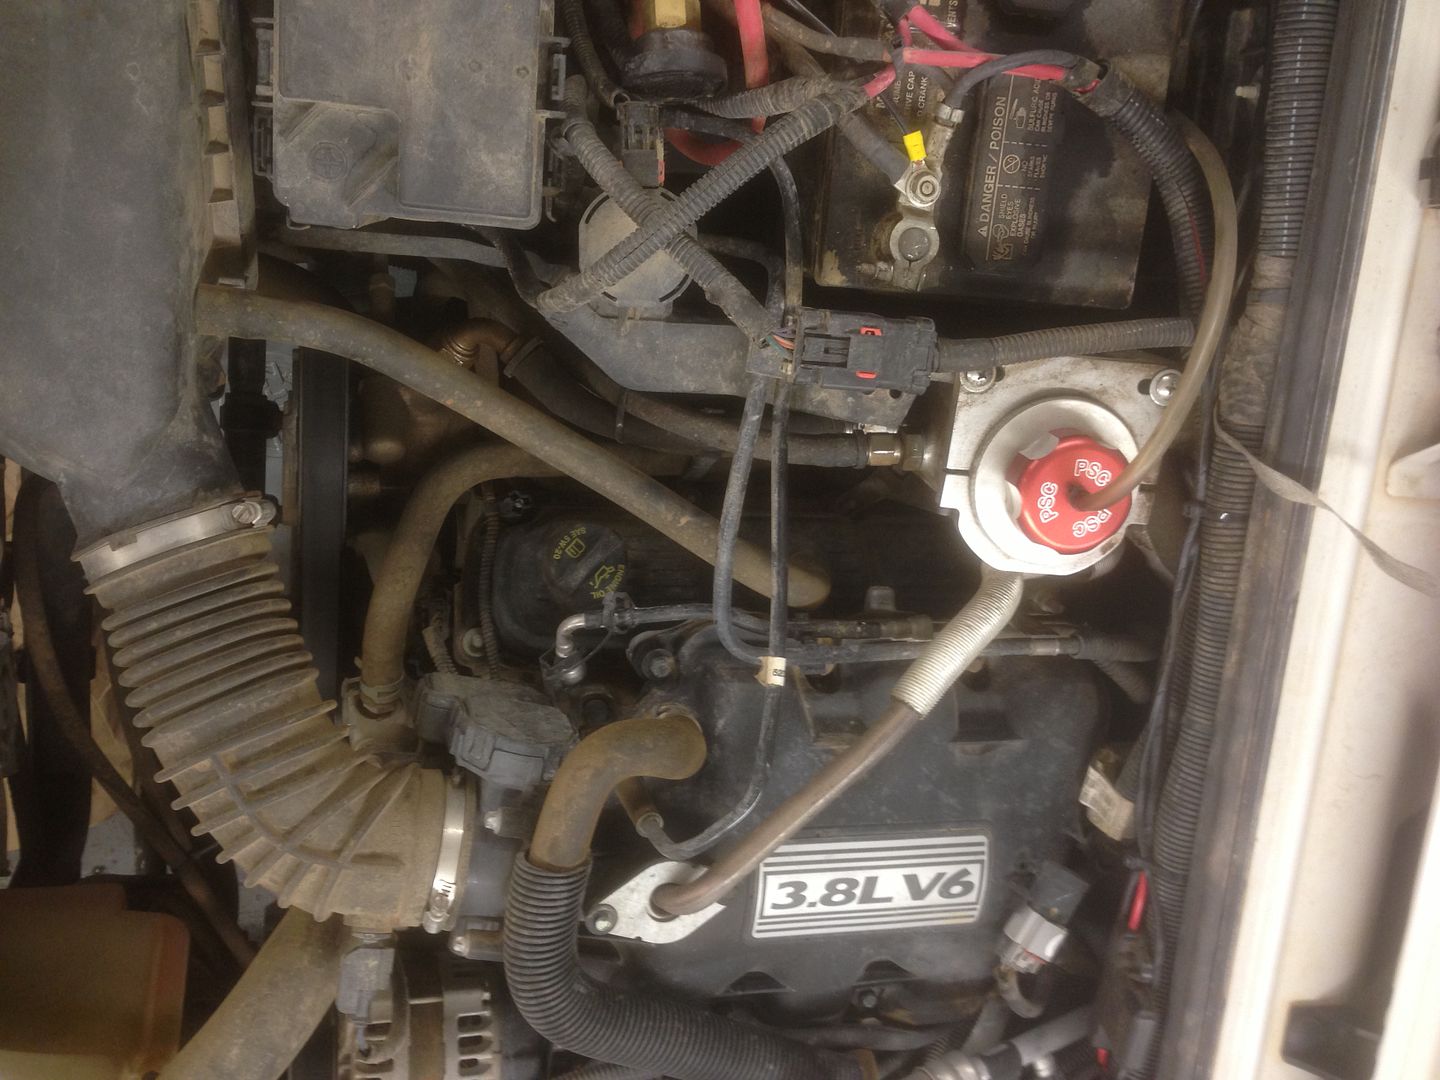
This is my PSC steering fluid reservoir that I needed to temporarily move for the install.
Remove the stock airbox. Also, carefully remove the stock air temp sensor from the intake hose that will be reinstalled later. (Notice how dirty my engine compartment is and that I used an air blow gun to clean/blow off debris during the install in order to keep dirt out of my engine.)
Remove the stock spark plugs (long extensions help here):

Replace them with the newly supplied spark plugs after adjusting to the suggested gap spec (apply some anti-seize):
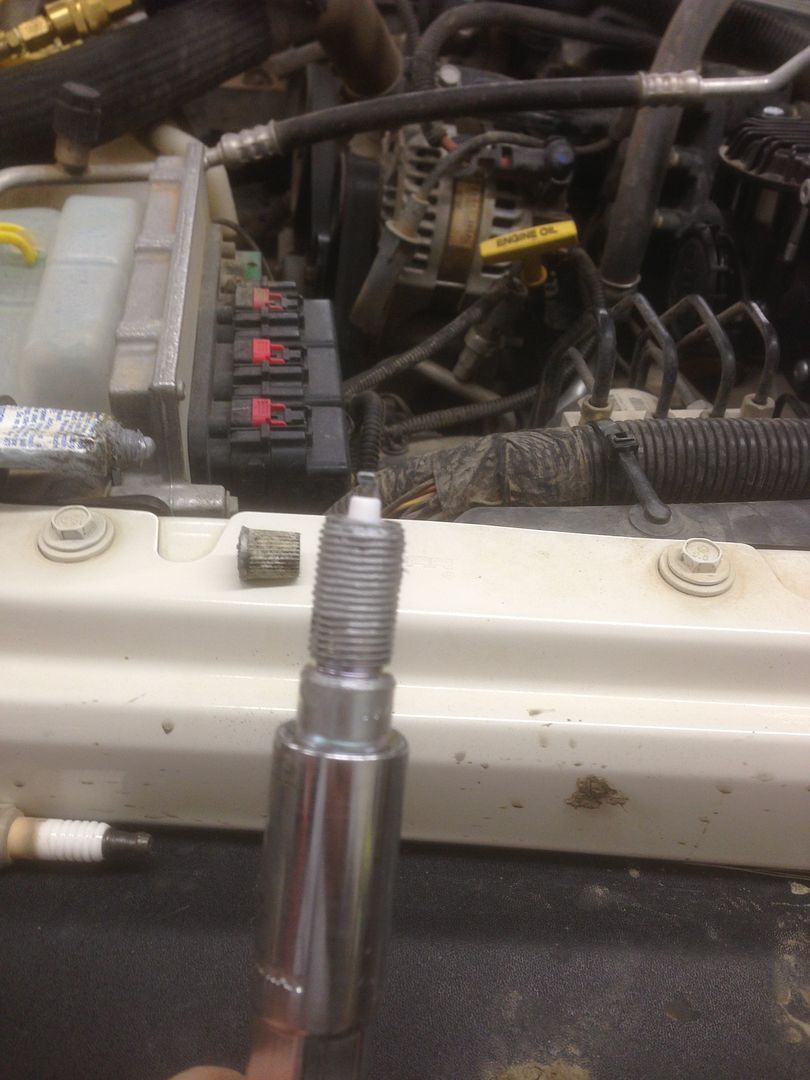
A wobbly or u-joint extension piece like the black one in this picture really helps:

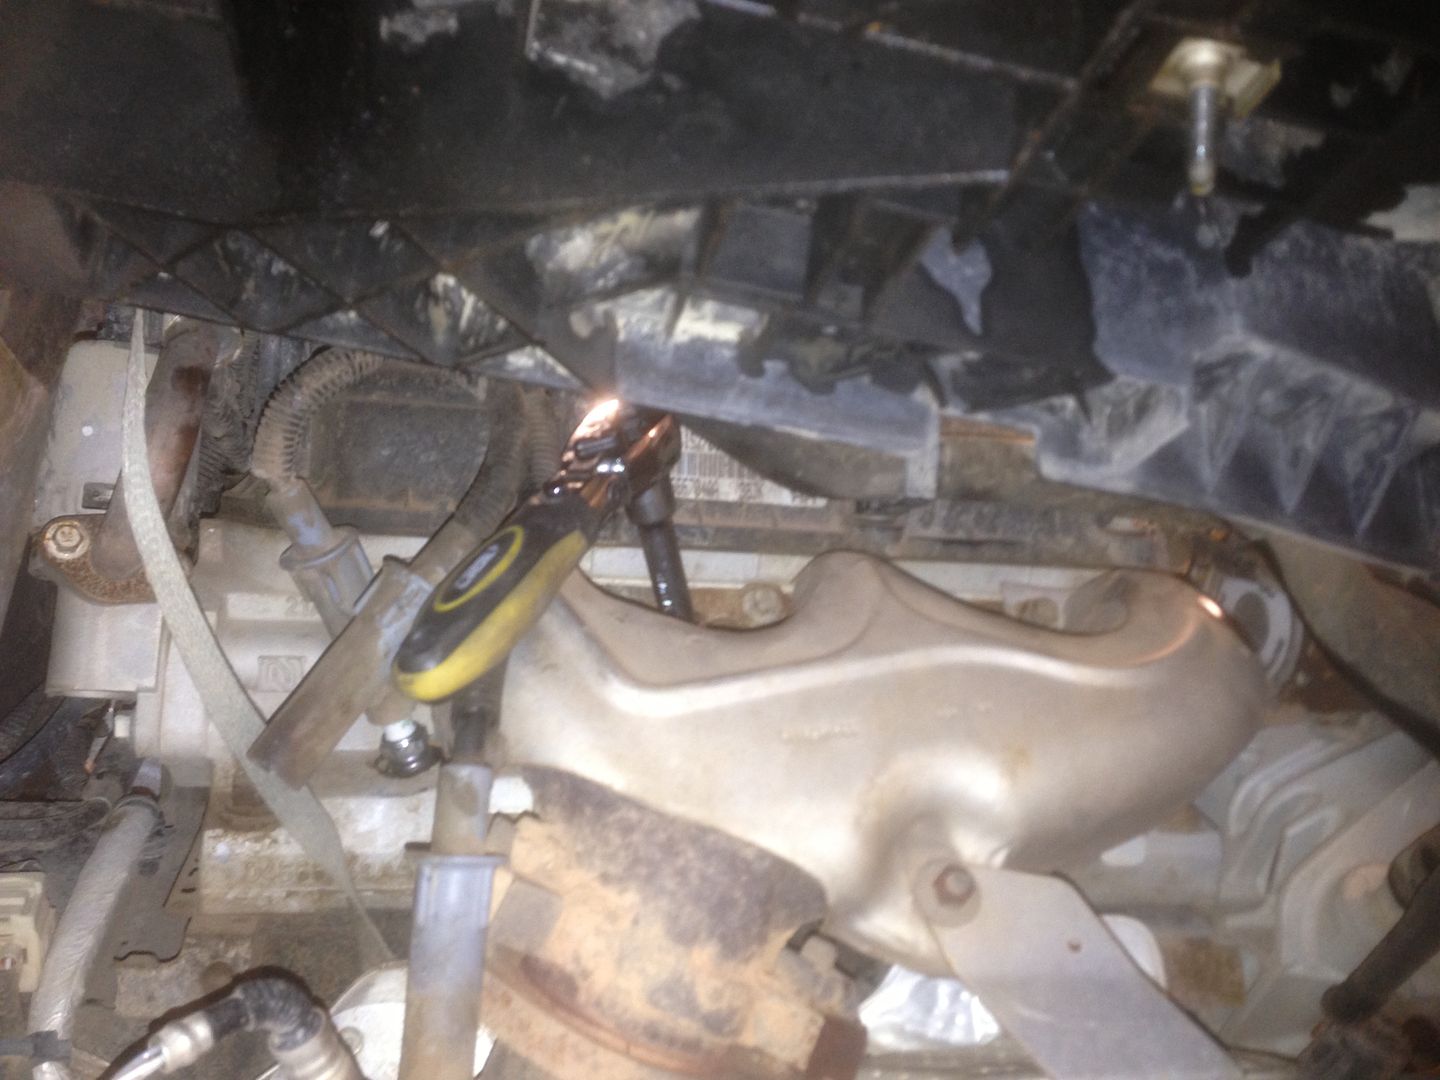
Remove or pull back the inner fender liner on the front passenger side and switch out the spark plugs (the body lift gave me a little extra room here):
My 6 speed JK did great offroad--even with 40s--due to 5.38 gears in my Currie RJ 60s and 4:1 Rubi transfer case. The 3.8L at higher rpms due to the lower gearing seemed okay, but I still felt a lack of power on the highway and in the sand or deep snow. My Superchips Flashpaq and Sprintbooster together made a big difference, but not as much as I wanted.
So, I bought myself a RIPP V3 GEN-2 Supercharger with Intercooler.
However, when my wife found out, she told me she wanted one for her 4 dr Rubi automatic on 37s with 5.38s and 37s. So, I bought one for her jeep also and installed hers first. I can tell you that it made a huge difference with her rig. That 42RLE automatic used to be almost boring to drive, and now, it is quite fun.
Although there is an excellent install video on YouTube (youtube.com/watch?v=Pqs9Cxskni8) and the instructions from RIPP that come with the supercharger are absolutely excellent, I thought I'd go ahead and document my install and comment on a few things.
As it sits now, my 2 dr Rubi has a 4.5" Trailmaster Stealth long arm with Fox adjustable reservoir shocks, stretched to about a 98" wheelbase, with Currie RJ 60s (5.38s and ARBs), on ATX Slab beadlocks wrapped in 40" Xterrains. Here is my JK on the Crack at EJS '12 (pic taken by Tim Kemp's wife):
Please do not use my write-up as a substitute for RIPP's install instructions. The purpose of this thread is to give a few observations and show that the install is a relatively simple weekend project.
Being that we live at an elevation of 3500 ft above sea level and wheel at elevations up to 10,000 ft, I obtained a smaller, "high altitude" pulley from RIPP. Here is a pic of what comes in the kit--including the "high altitude" pulley and smaller belt in the middle bottom of the picture. (This was my wife's kit laid out before her install.)
Now, on my JK I'm running a 1" body lift to reduce the length of extended bumpstops needed and increase overall suspension travel. I have a Warn Powerplant winch, PSC hydro assist steering, and a steering cooler that I would need to navigate. In the end, the install on my JK was slightly easier due to the 1" body lift--even though I had to relocate the cooler.
Remove the front clip (there is my steering cooler):
Disconnect the positive battery cable.
This is my PSC steering fluid reservoir that I needed to temporarily move for the install.
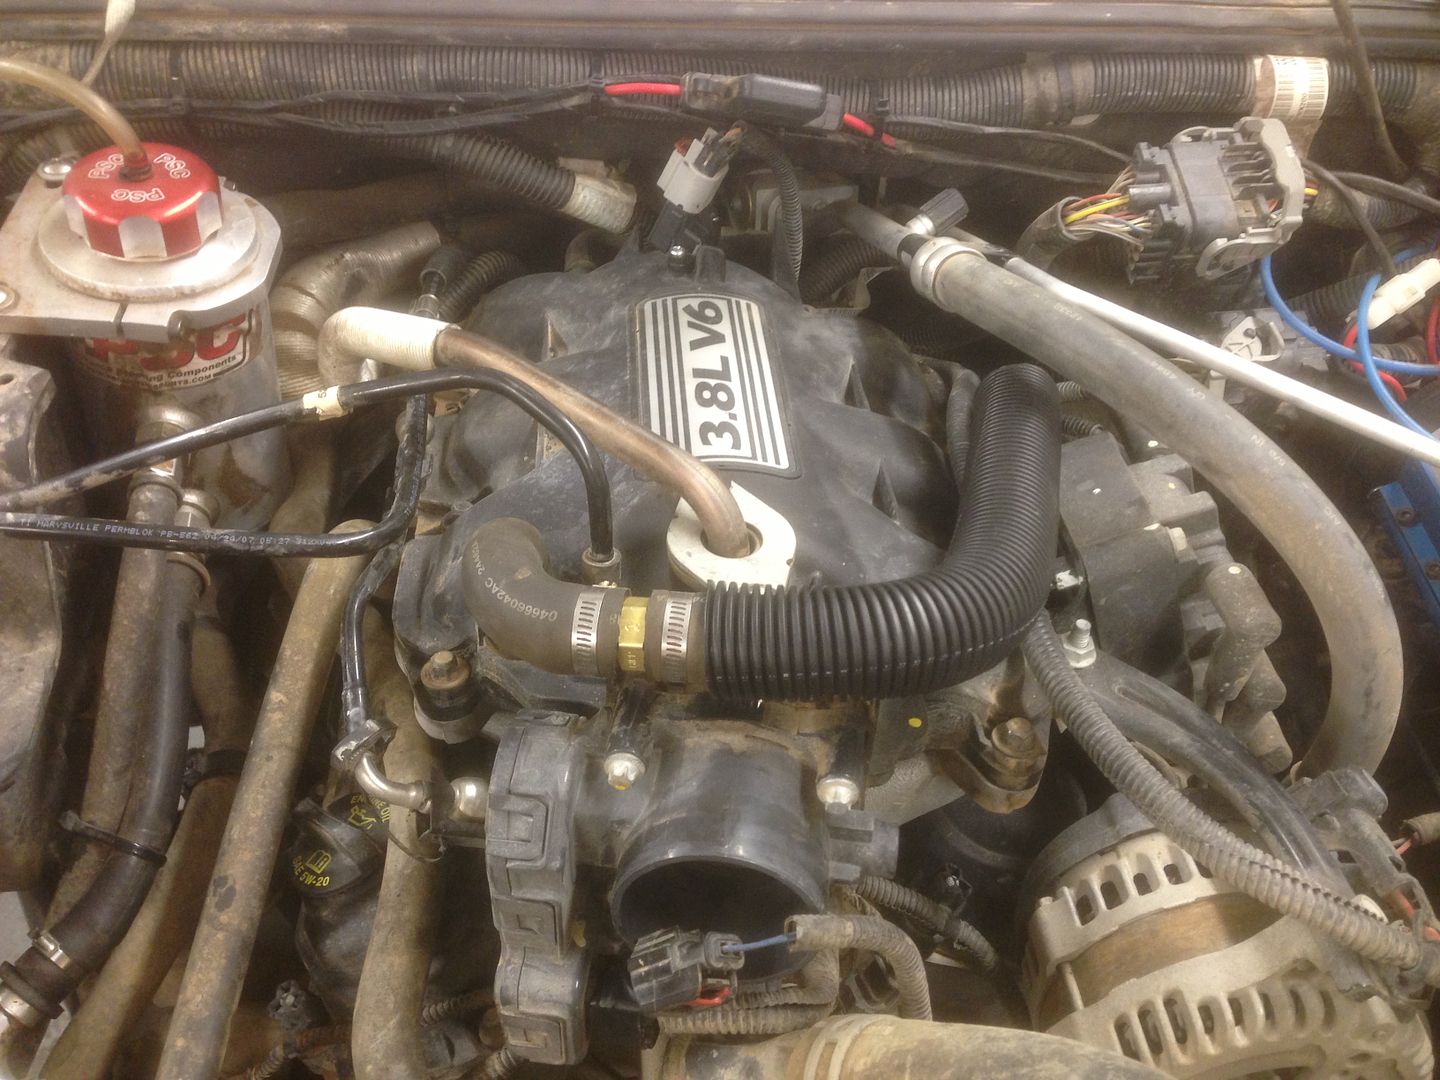
Remove the stock airbox. Also, carefully remove the stock air temp sensor from the intake hose that will be reinstalled later. (Notice how dirty my engine compartment is and that I used an air blow gun to clean/blow off debris during the install in order to keep dirt out of my engine.)
Remove the stock spark plugs (long extensions help here):
Replace them with the newly supplied spark plugs after adjusting to the suggested gap spec (apply some anti-seize):
A wobbly or u-joint extension piece like the black one in this picture really helps:
Remove or pull back the inner fender liner on the front passenger side and switch out the spark plugs (the body lift gave me a little extra room here):
Last edited by planman; 01-24-2013 at 09:21 AM.
 01-21-2013, 09:42 PM
#2
Forum Tech Advisor
Thread Starter
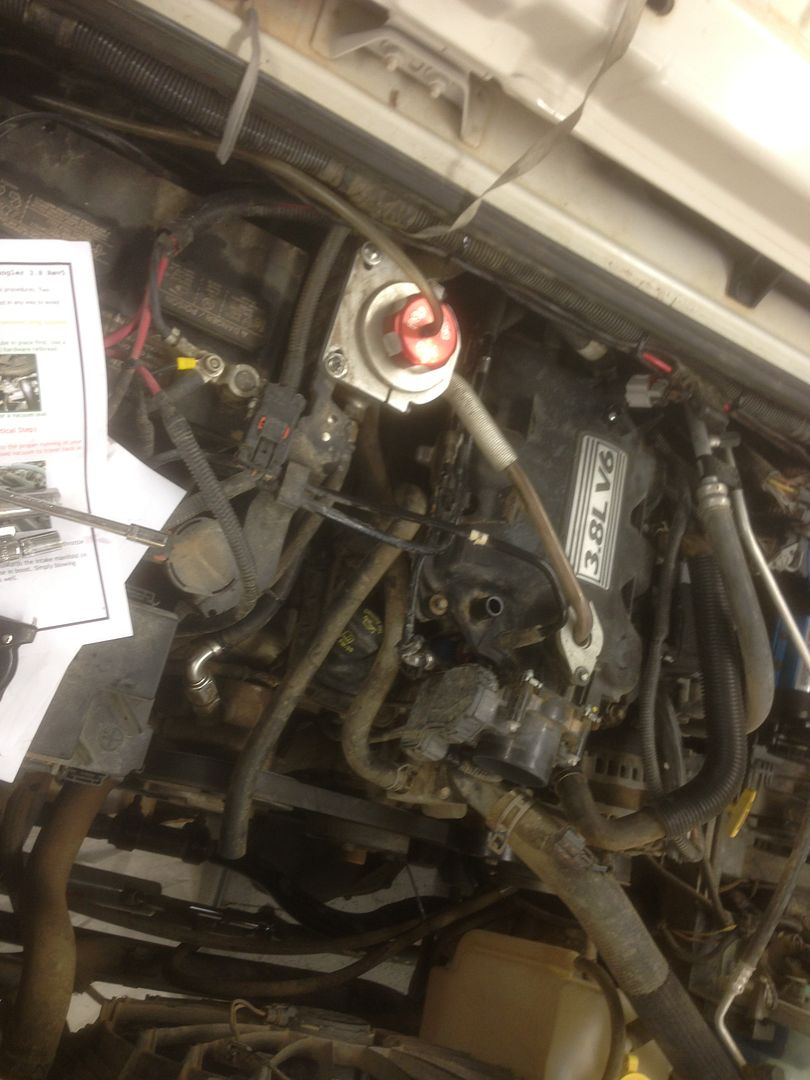
Drain about 1/2 gallon coolant out of your radiator. The plug is on the lower left hand side and also has a nipple at the bottom to which you can attach a small tube/hose to make less of a mess (I should have just removed my winch by this point to make the job easier).
Cut about 3" off the heater hose. The reattach it by routing it around the oil cap.

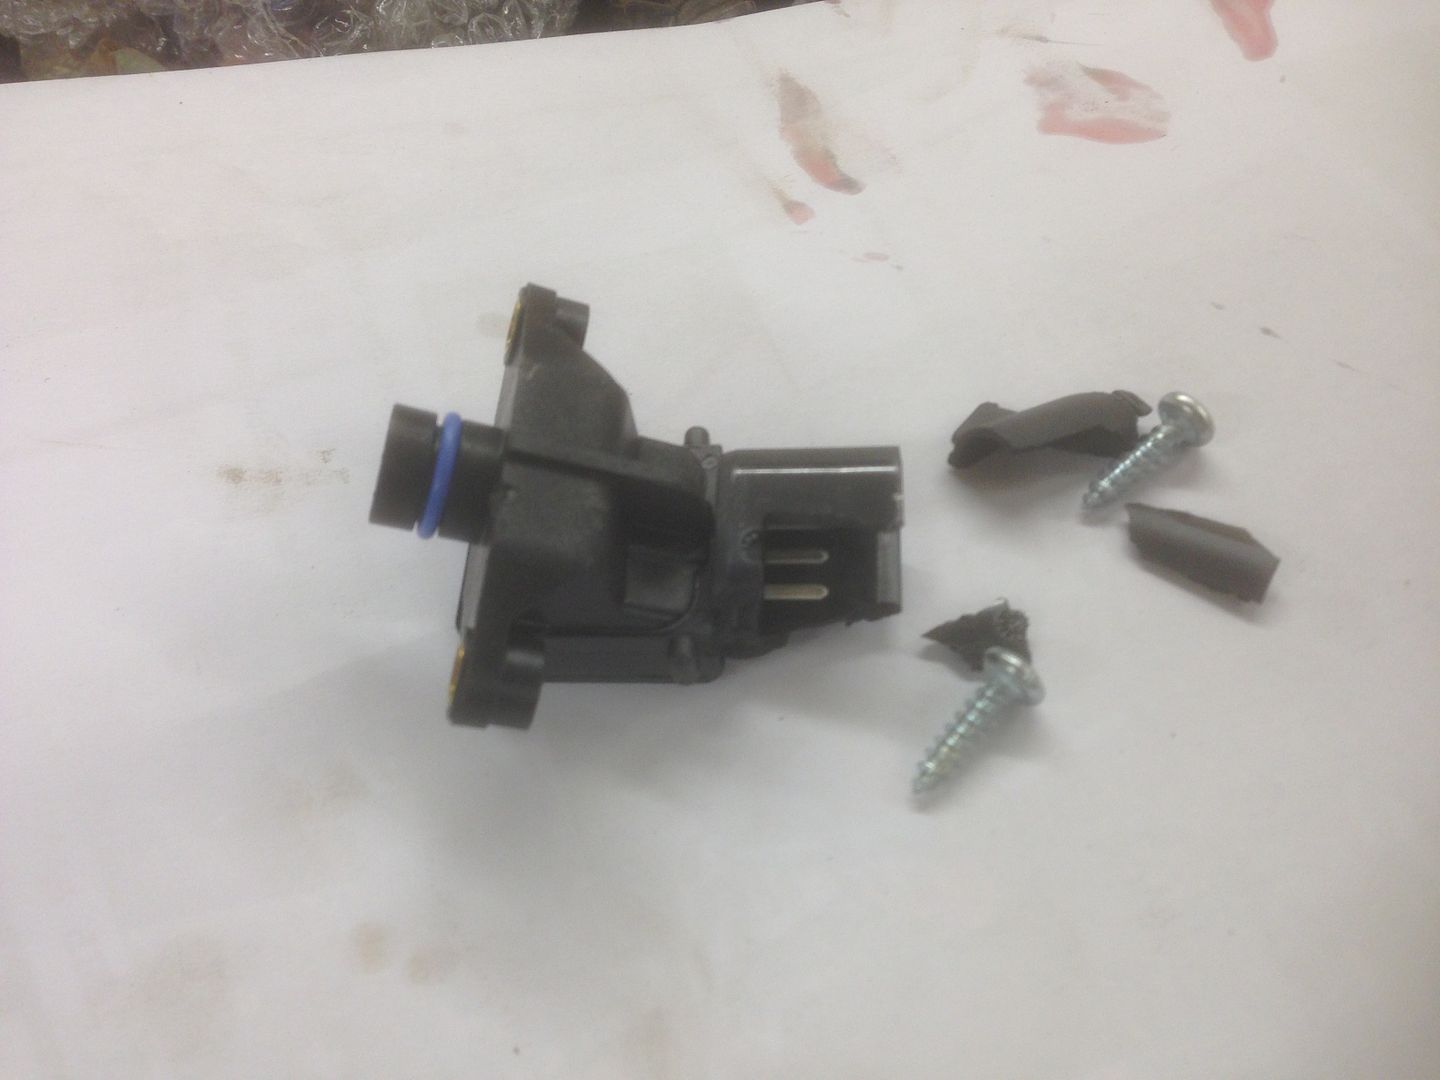
Unplug the stock MAP sensor (sliding back the red locking clip, and then rotating the sensor counter clockwise until you can pull it out of the plenum). The MAP sensor gets replaced.
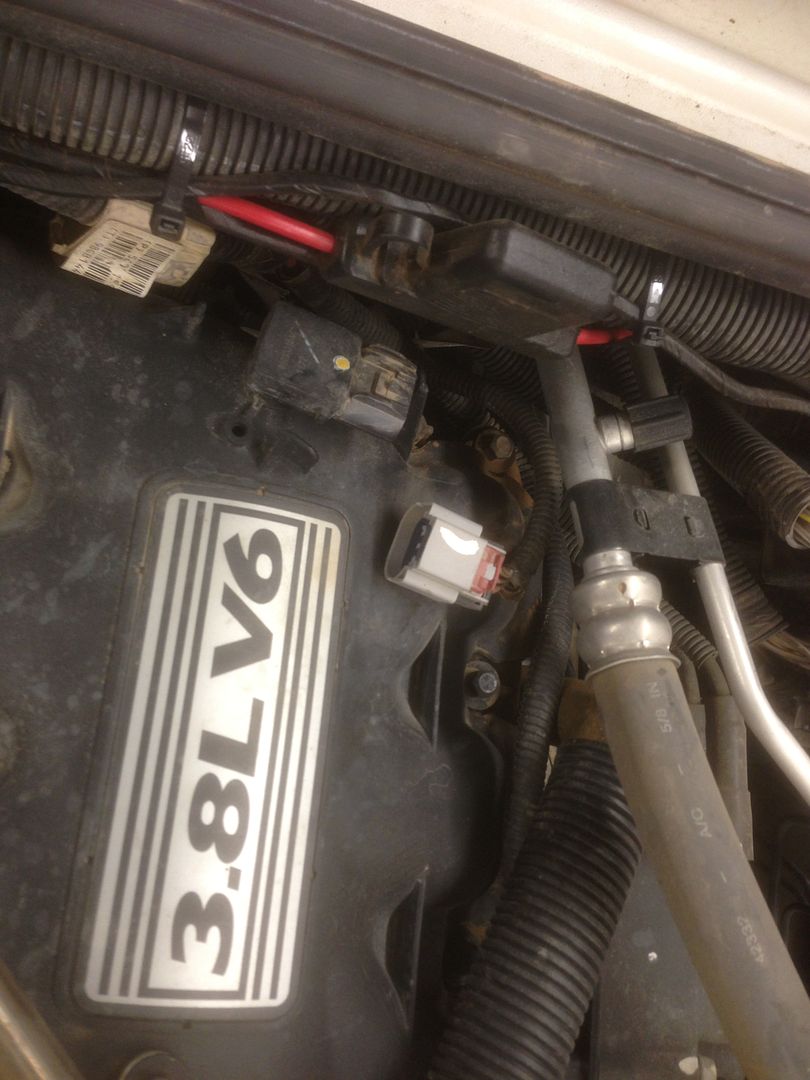
After unplugging the main breather hoses to the intake plenum, remove the EGR tube. In addition to the 2 small bolts at the top of the plenum, there is a small bracket with a stud that needs to be removed. There are a couple black tubes that need to be removed from the bracket in order to remove the stud.

This is the stud and small bracket removed:

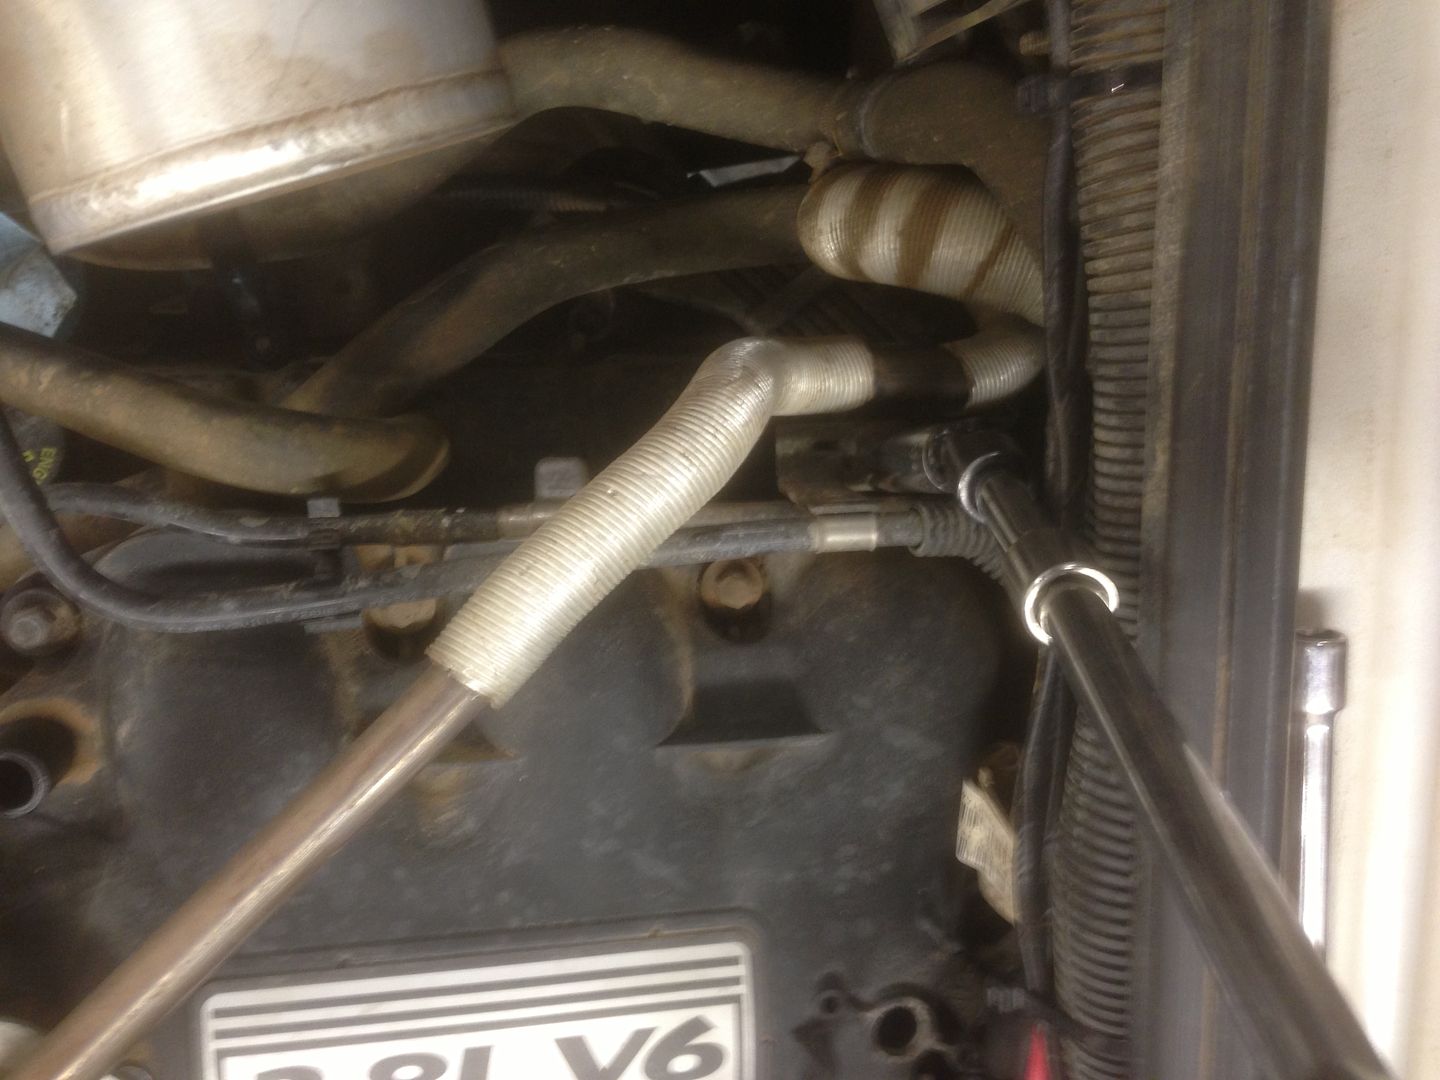
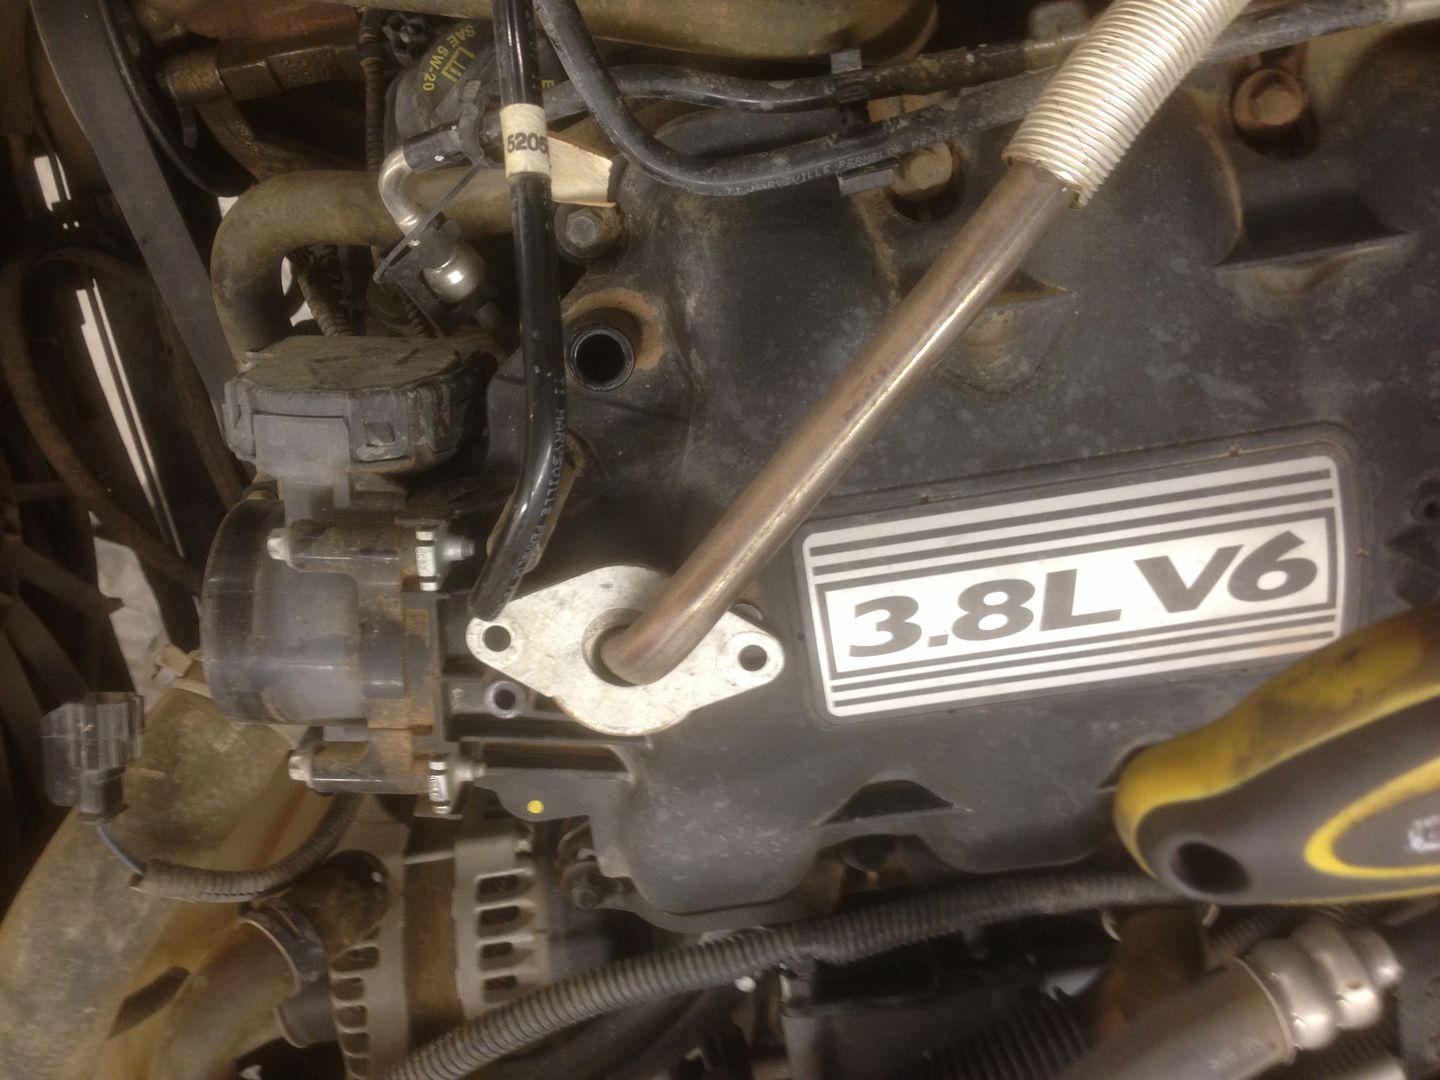
This is where the EGR tub attaches at the bottom. Remove the 2 mall bolts (nice to have the 1" body lift and the fender liner removed for this one).

EGR tube removed:

Cut about 3" off the heater hose. The reattach it by routing it around the oil cap.
Unplug the stock MAP sensor (sliding back the red locking clip, and then rotating the sensor counter clockwise until you can pull it out of the plenum). The MAP sensor gets replaced.
After unplugging the main breather hoses to the intake plenum, remove the EGR tube. In addition to the 2 small bolts at the top of the plenum, there is a small bracket with a stud that needs to be removed. There are a couple black tubes that need to be removed from the bracket in order to remove the stud.
This is the stud and small bracket removed:
This is where the EGR tub attaches at the bottom. Remove the 2 mall bolts (nice to have the 1" body lift and the fender liner removed for this one).
EGR tube removed:
Last edited by planman; 01-24-2013 at 09:12 AM.
01-21-2013, 09:43 PM
#3
Forum Tech Advisor
Thread Starter
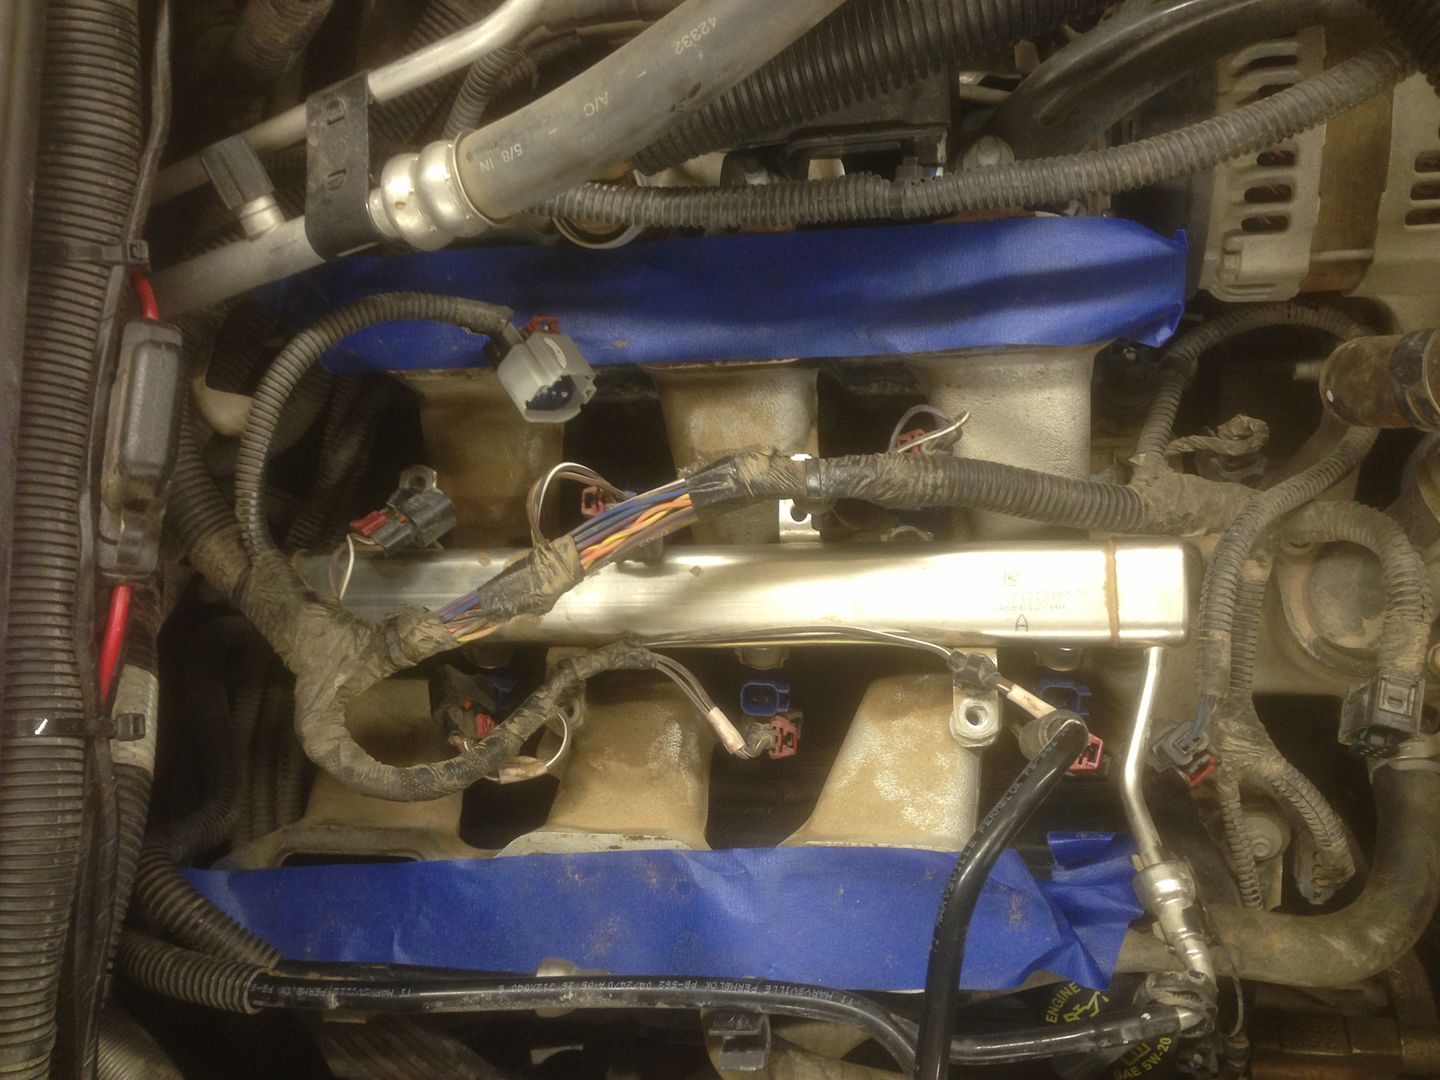
After installing the new injectors, reinstall the locking clips.
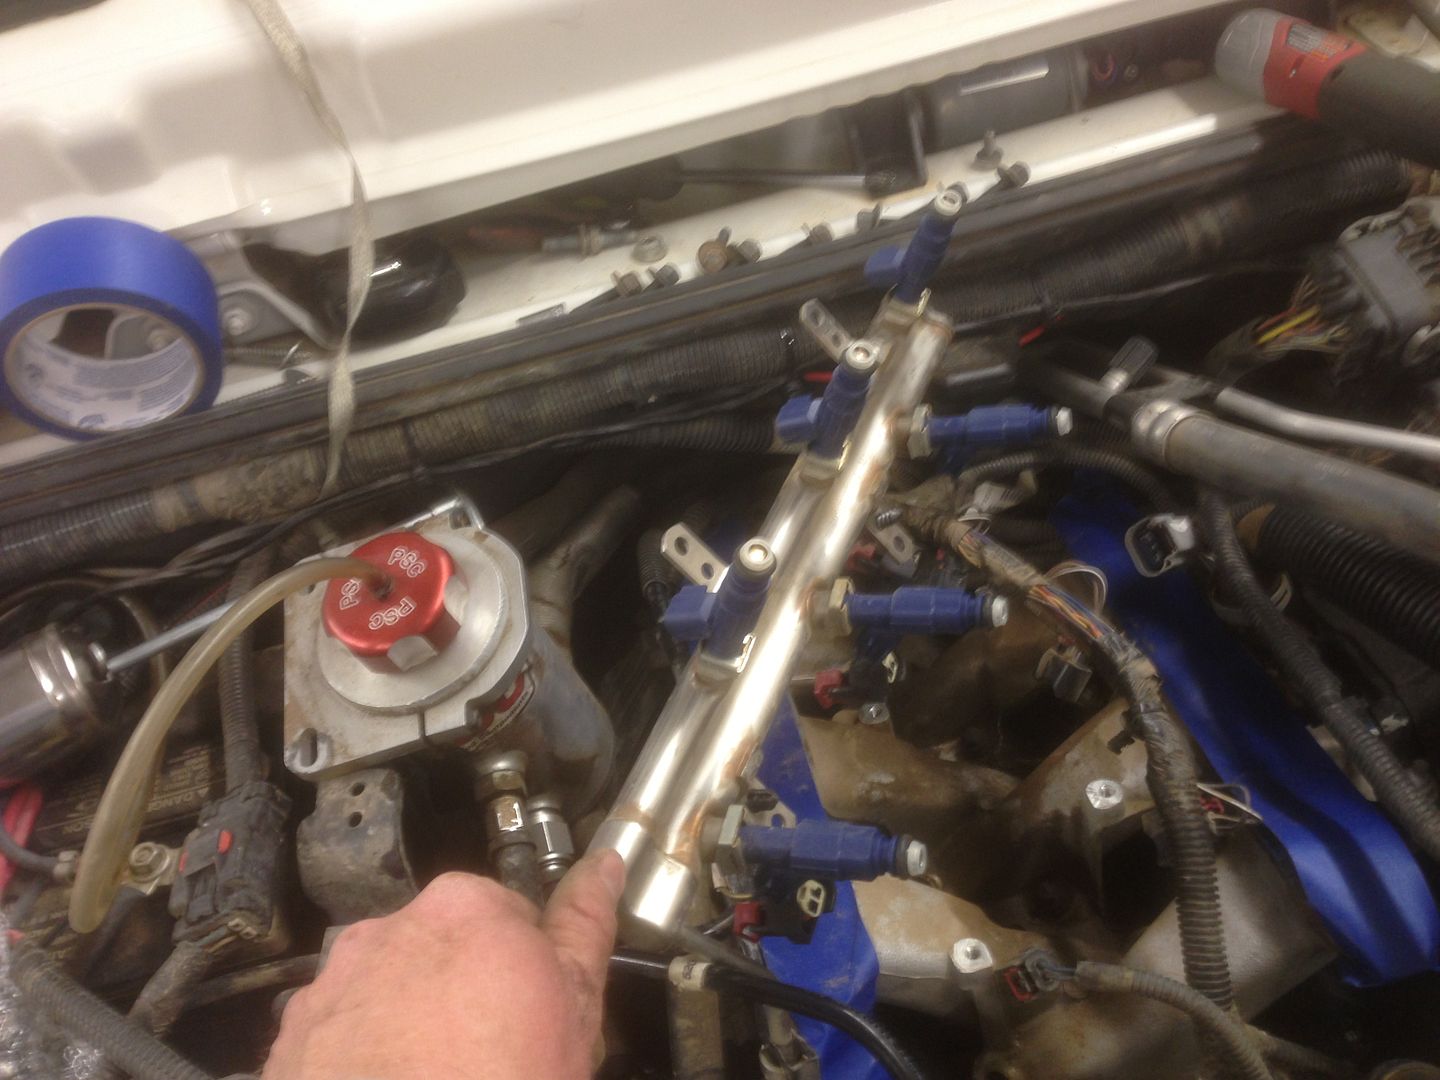
Reinstall the fuel rail, bolts, plugs, locking clips, etc.
Reinstall the plenum (take special care to make sure the TPS sensor is out of the way). Then, resintall the brake booster hose.
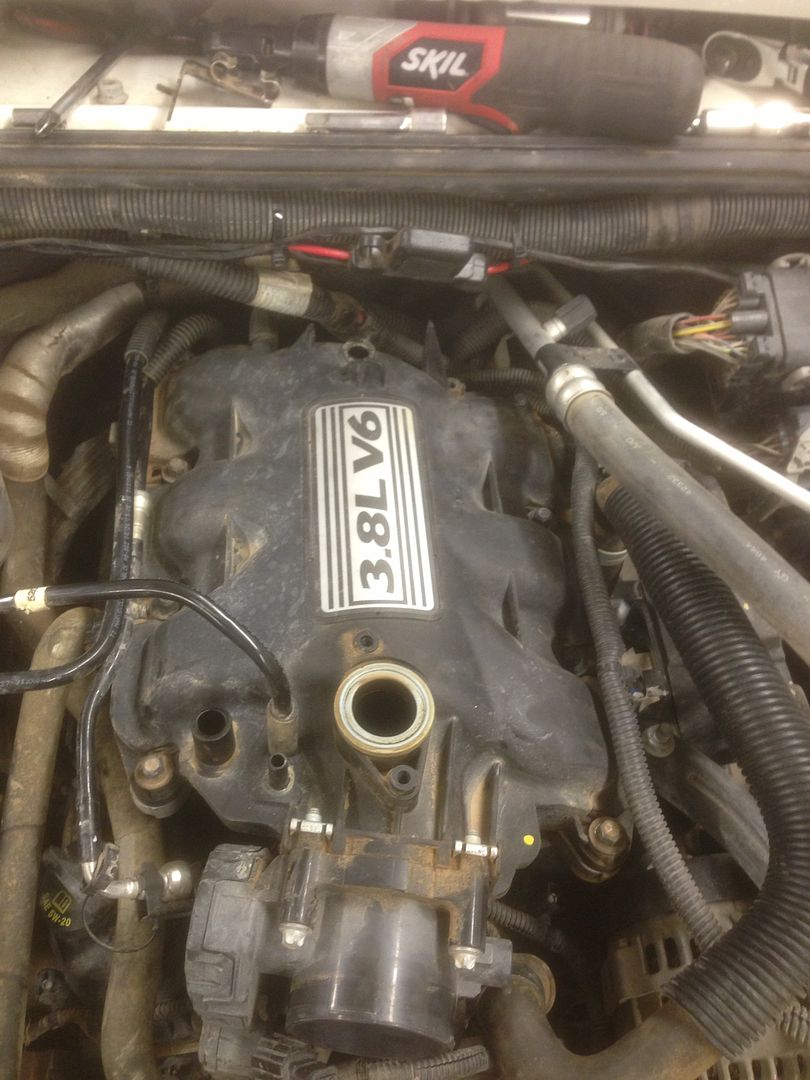
Install your new MAP sensor (mine somehow got damaged moving the kit around my garage or in the packaging, and RIPP is sending me a replacement).
Reconnect your TPS and reinstall the EGR tube (I also reattached my PSC power steering reservoir at this point).
Reinstall the fuel rail, bolts, plugs, locking clips, etc.
Reinstall the plenum (take special care to make sure the TPS sensor is out of the way). Then, resintall the brake booster hose.
Install your new MAP sensor (mine somehow got damaged moving the kit around my garage or in the packaging, and RIPP is sending me a replacement).
Reconnect your TPS and reinstall the EGR tube (I also reattached my PSC power steering reservoir at this point).
Last edited by planman; 01-24-2013 at 09:13 AM.
01-21-2013, 09:44 PM
#4
Forum Tech Advisor
Thread Starter
After installing the new injectors, reinstall the locking clips.
Reinstall the fuel rail, bolts, plugs, locking clips, etc.
Reinstall the plenum (take special care to make sure the TPS sensor is out of the way). Then, resintall the brake booster hose.
Install your new MAP sensor (mine somehow got damaged moving the kit around my garage or in the packaging, and RIPP is sending me a replacement).
Reconnect your TPS and reinstall the EGR tube (I also reattached my PSC power steering reservoir at this point).
Last edited by planman; 01-24-2013 at 09:14 AM.
01-21-2013, 09:44 PM
#5
Forum Tech Advisor
Thread Starter
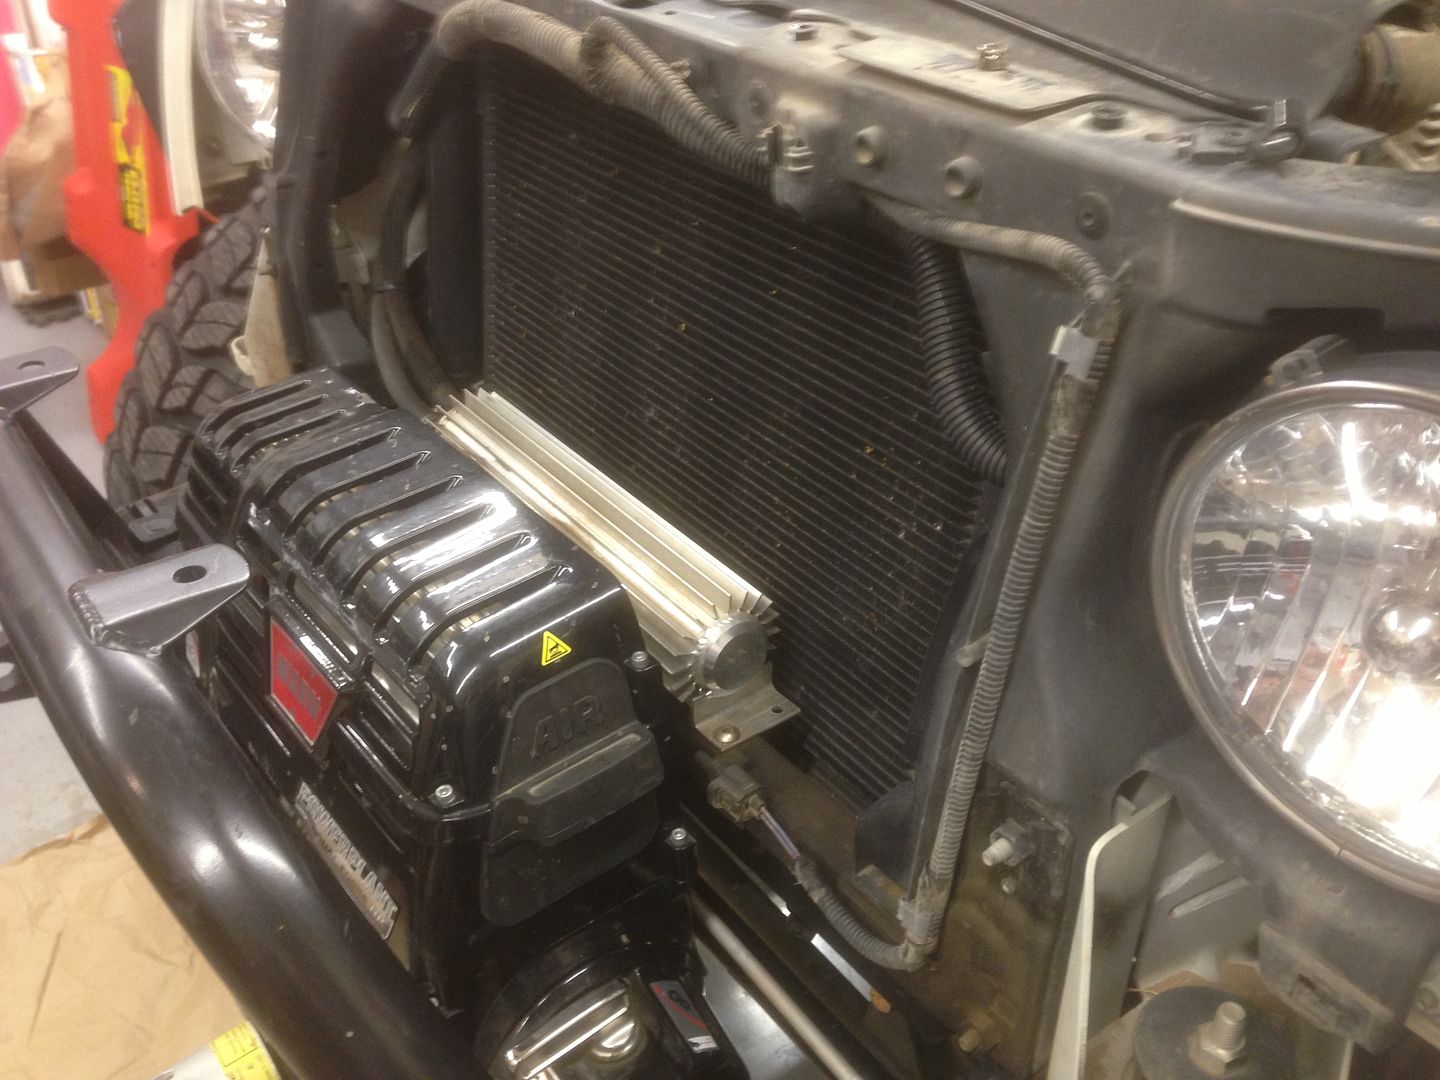
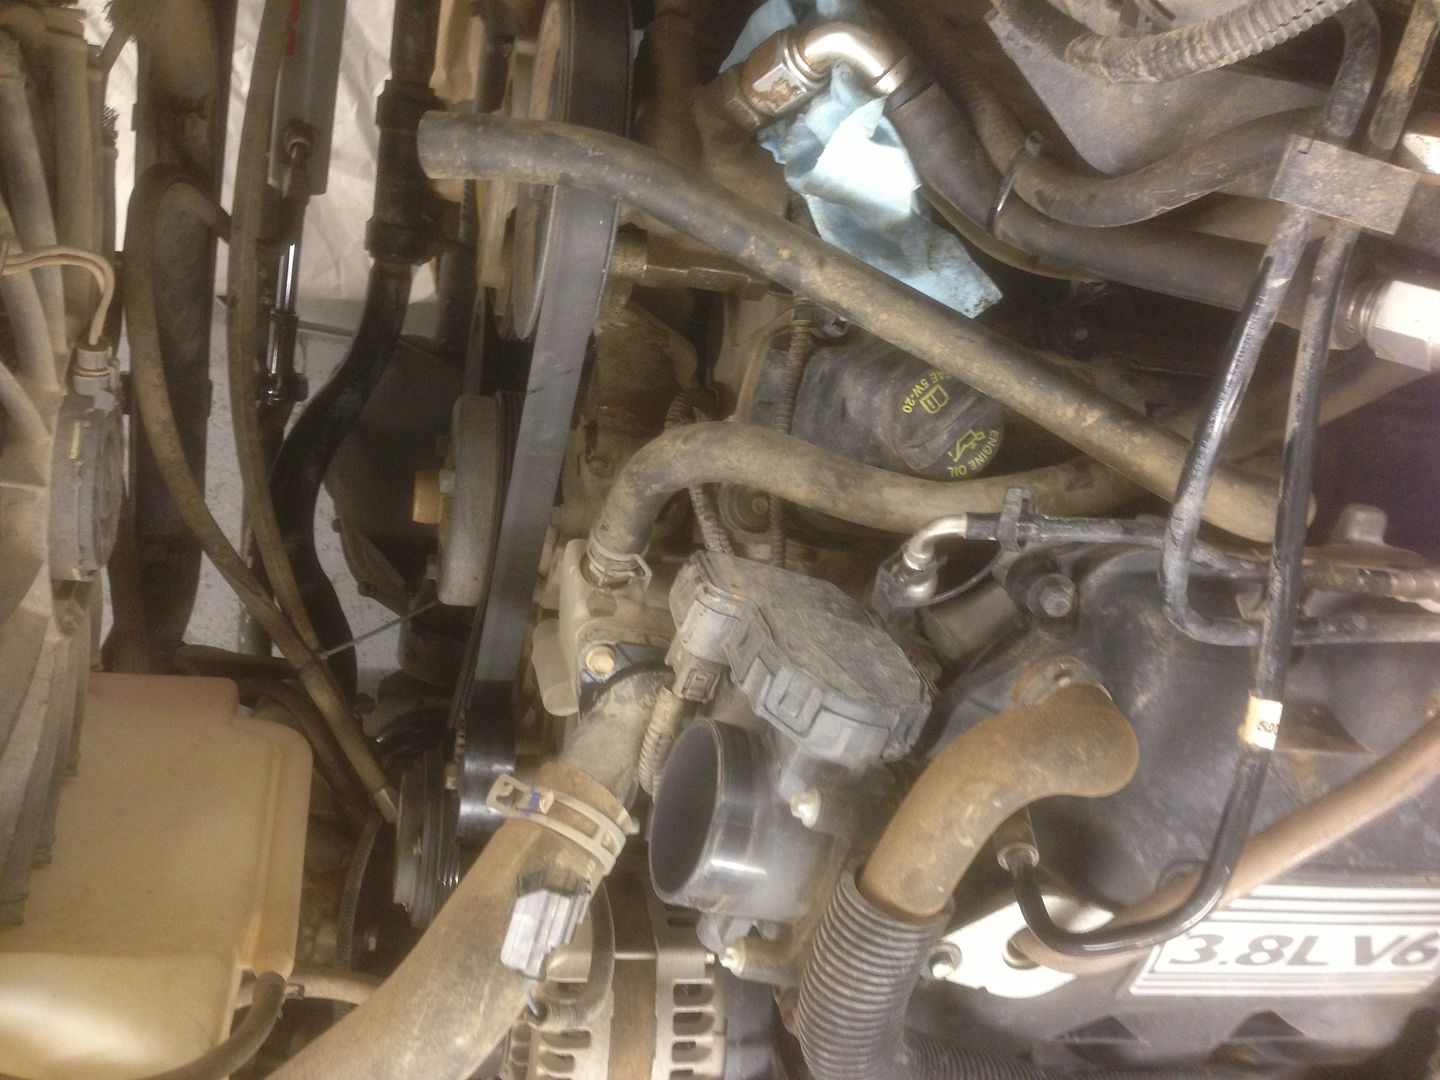
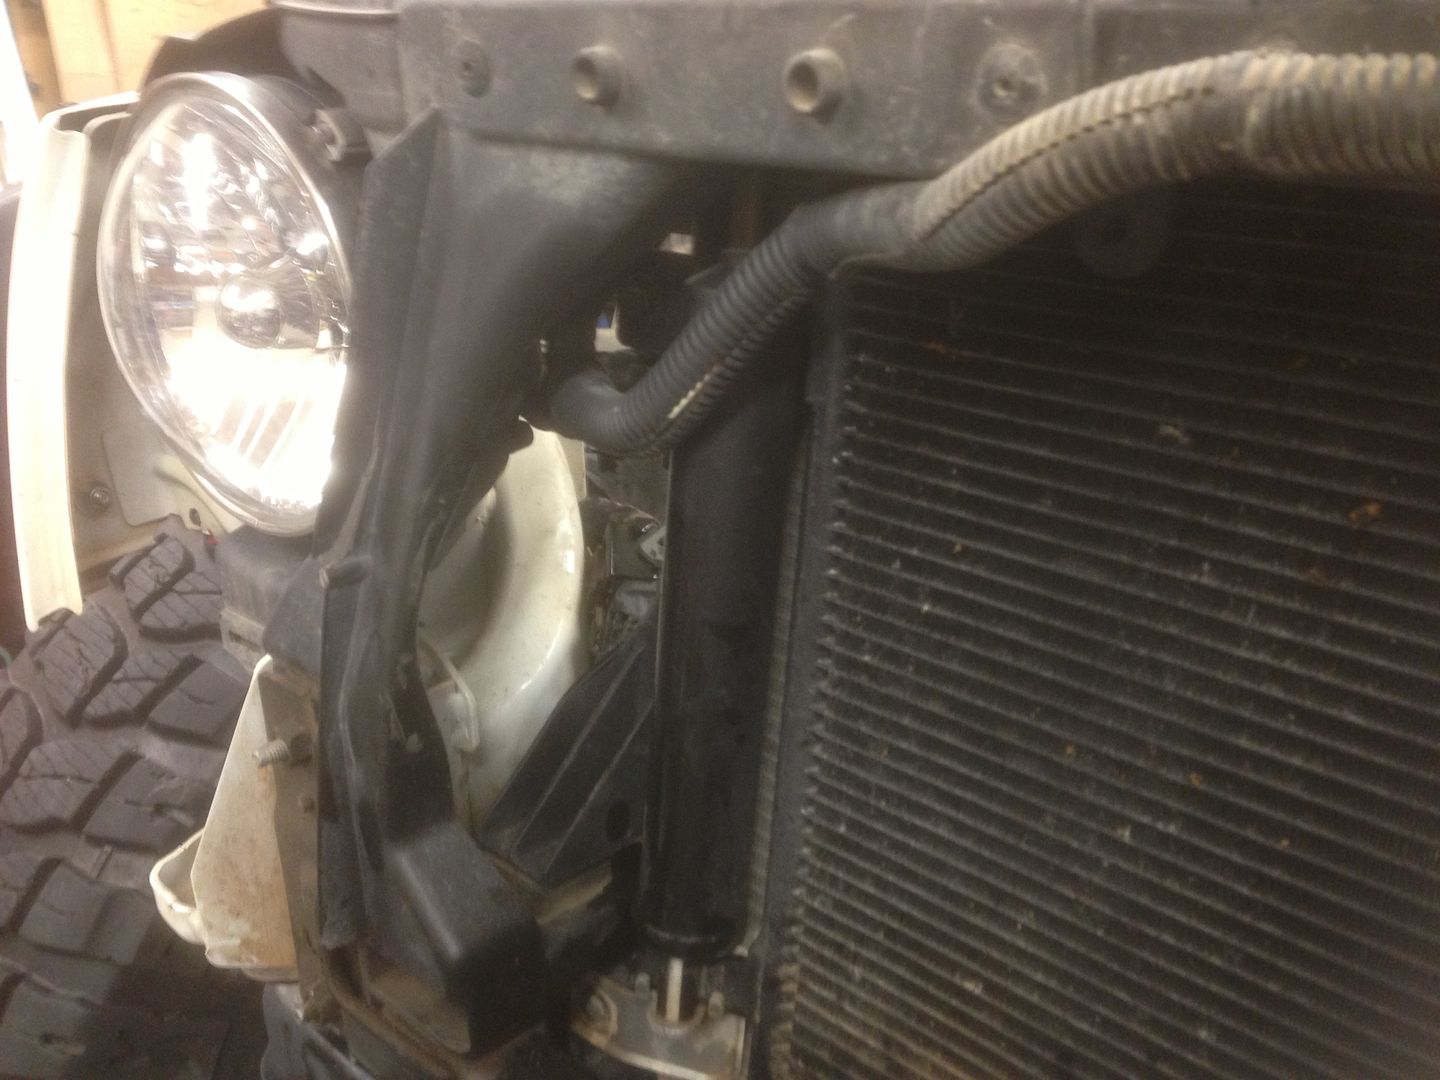
At this point, I was tired of bending over the engine while standing in the gap with the right foot on the trackbar and the left foot on the passenger upper control arm. So, I decided to deal with the steering cooler that would need to be relocated. Although I should have earlier, at this point I removed the winch and set it aside.
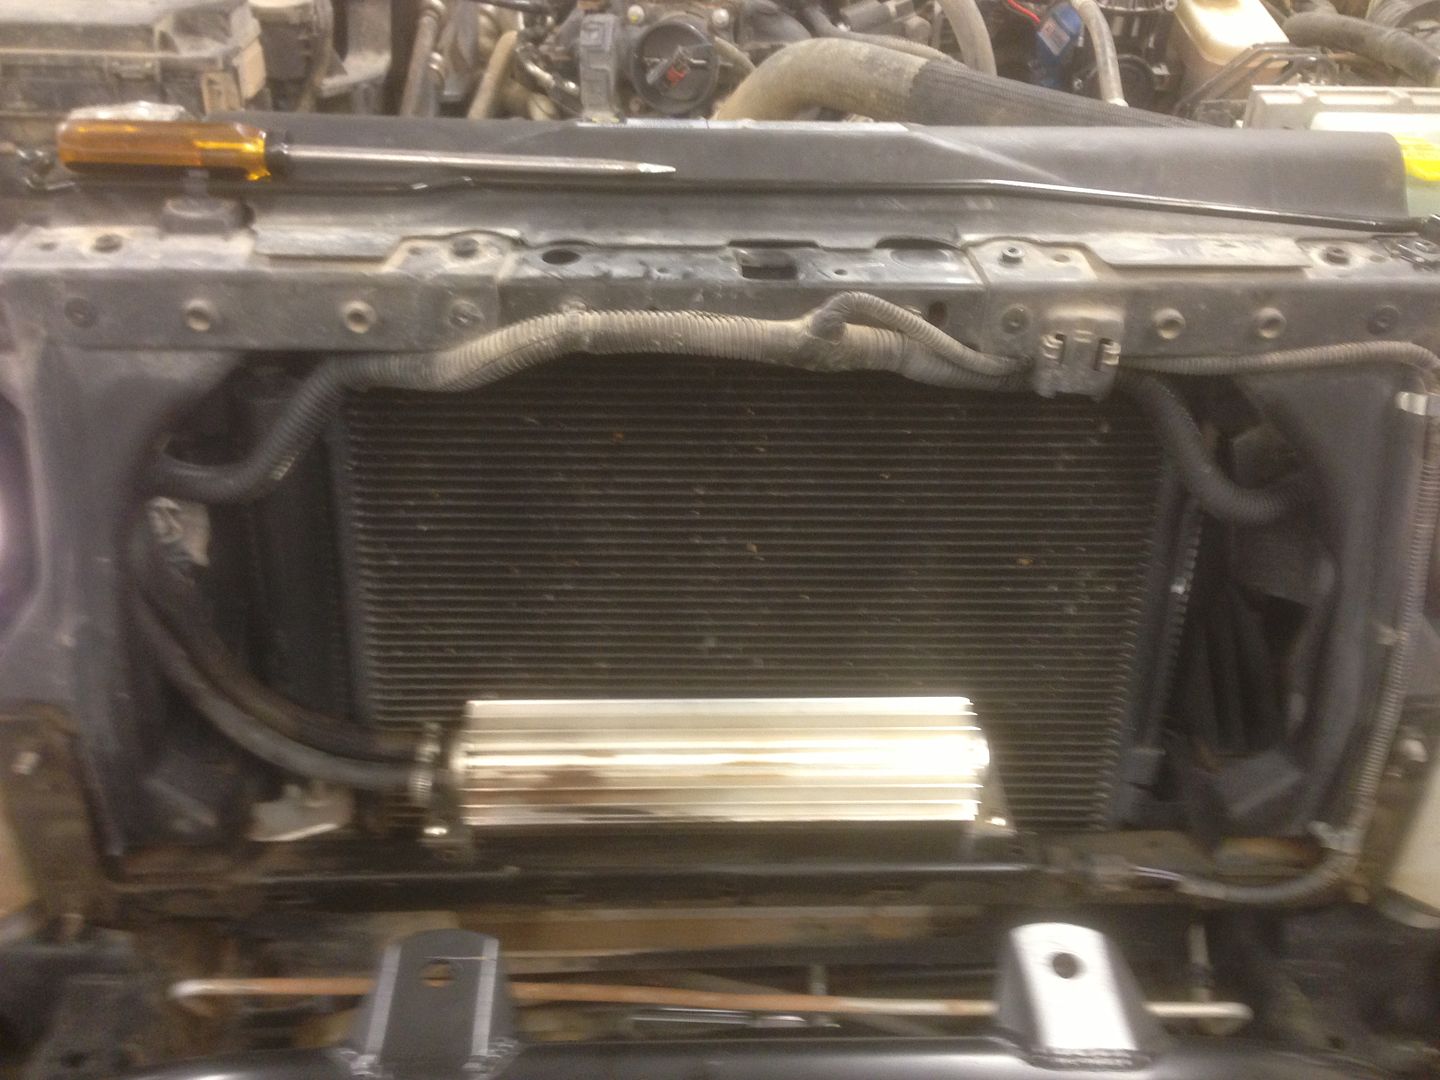
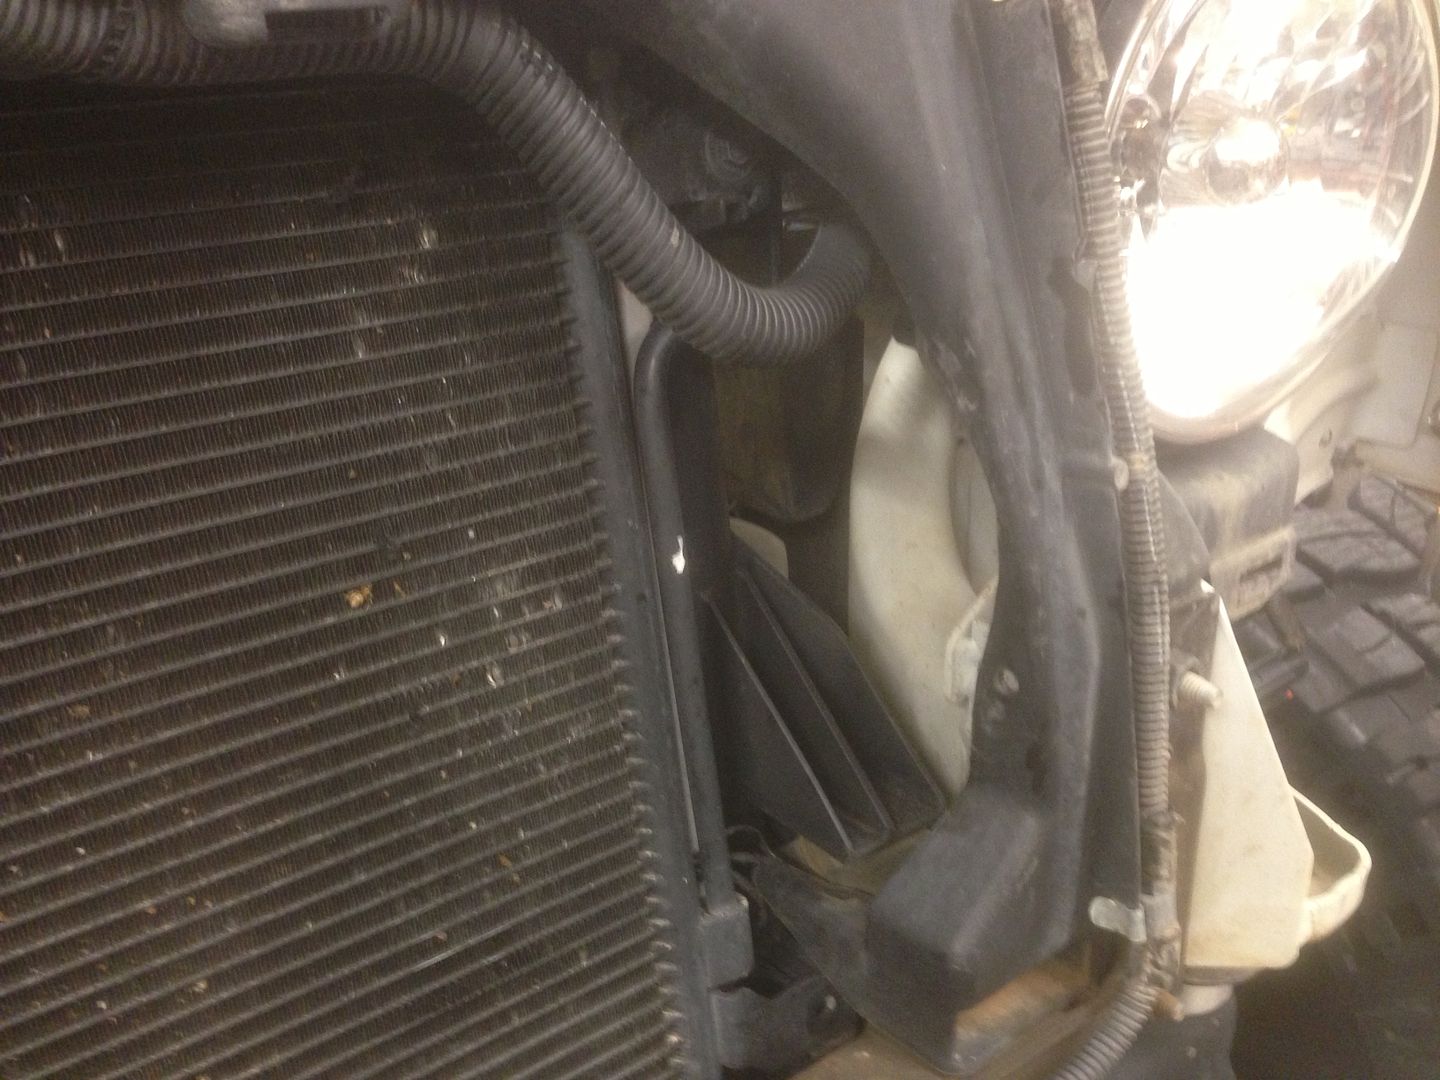
I trimmed the plastic piece that runs under the radiator, re-routed the hoses, and re-installed the cooler underneath the crossmember. With the 1" body lift, there is plenty of clearance between the metal hose/tube that runs under the crossmember and the relocated cooler. Still, I wrapped a little black duct tape around the hose/tube to protect it and to be able to check for any evidence of contact. If I ever remove the 1" body lift, I will need to relocate that hose/tube to allow more clearance.

Lower back still a little unhappy from bending over the engine for so long, I decided to skip ahead a few steps and trim the plastic to make clearance for the intercooler tubes. I removed the rubber flaps with a couple flat head screwdrivers and used RIPP's supplied template to mark and then use a dremel tool to trim the plastic.
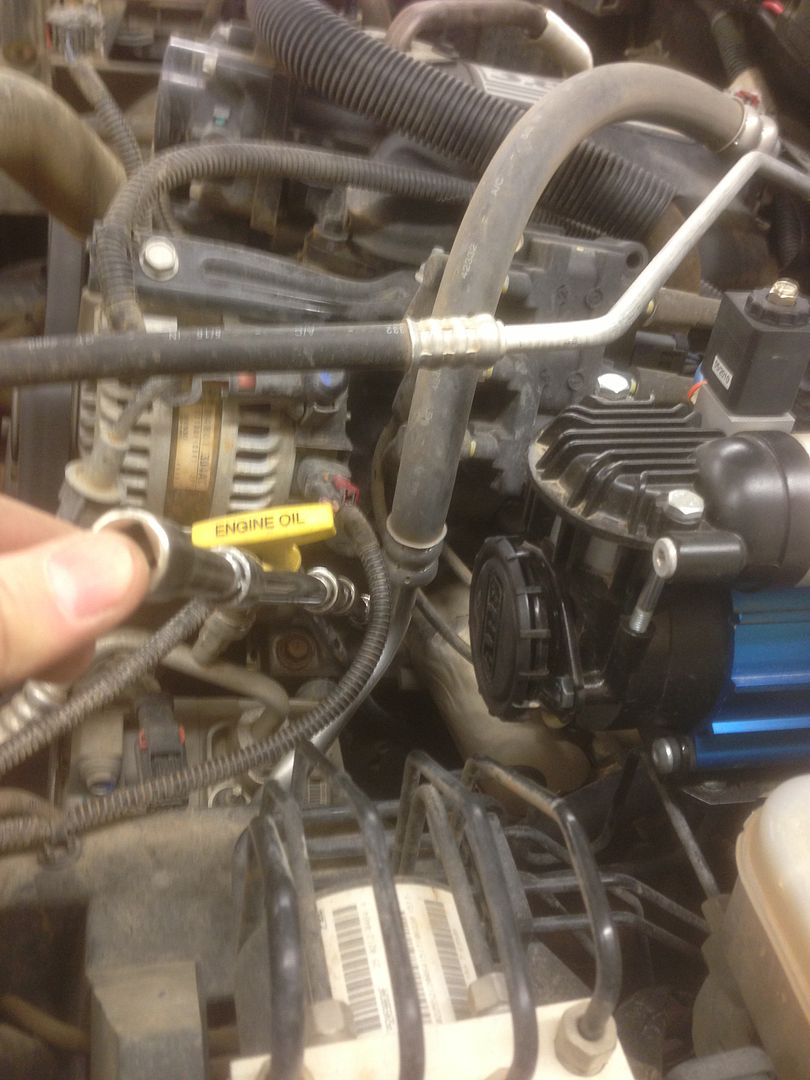
Then, after a break for dinner, I went back to the suggested order and installed the new one-way PCV valve (I removed about 1/2" of the tube to account for the addition of the PCV valve).
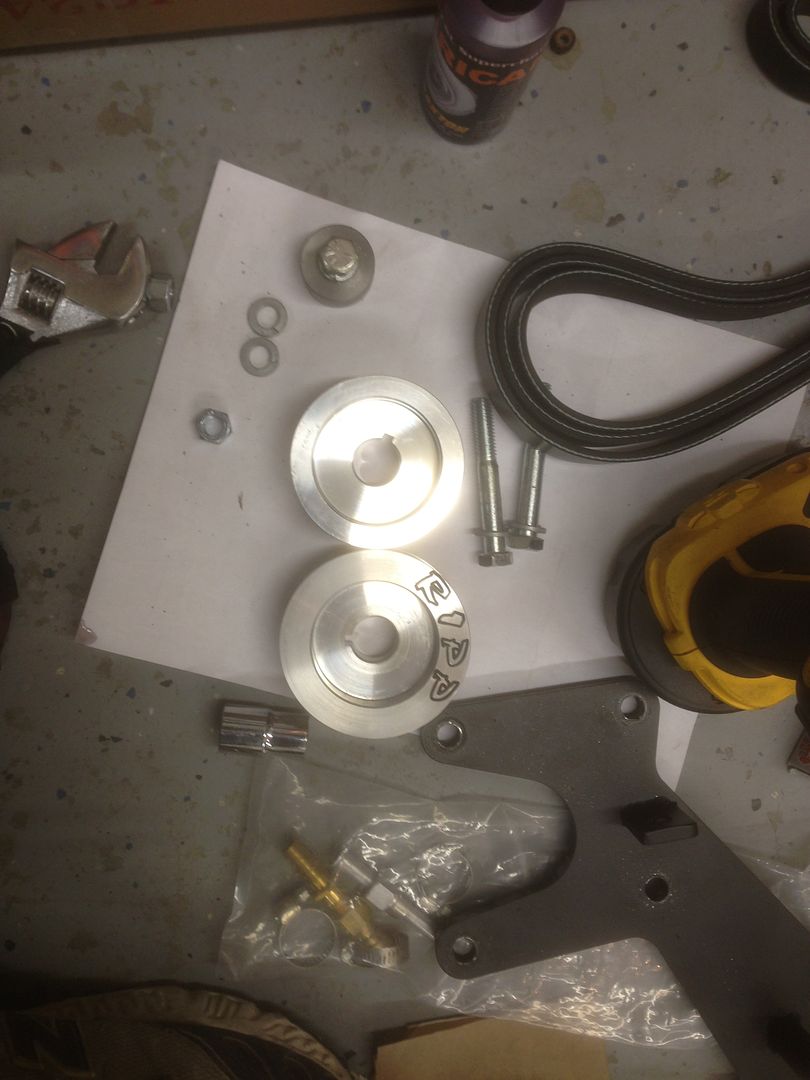
This is my new Vortech supercharger unit and the difference between the regular and the "high altitude" pulleys:
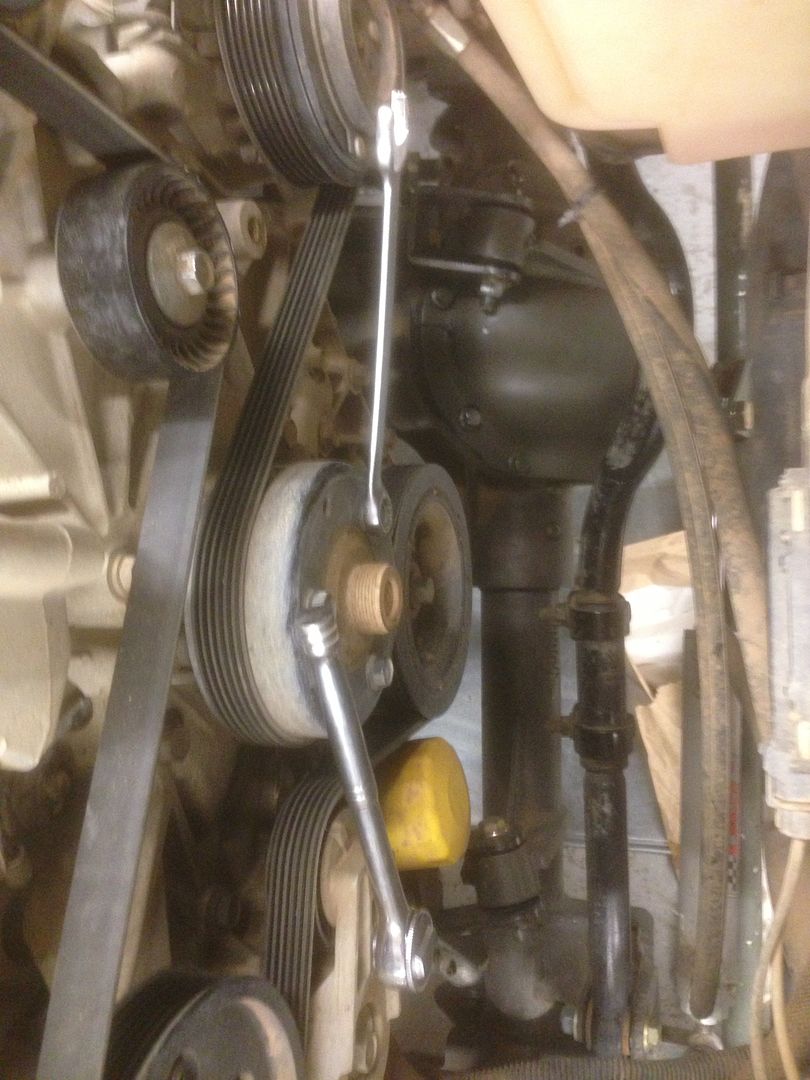
Use the tensioner to be able to remove the 13 mm bolts that attach the water pump pulley (see the gap in the engine bay where I could stand on the trackbar and the passenger side upper control arm).
My wife's 08 did not have the plug attached to this hole under the valve cover. Mine did, so I had to remove the plug.
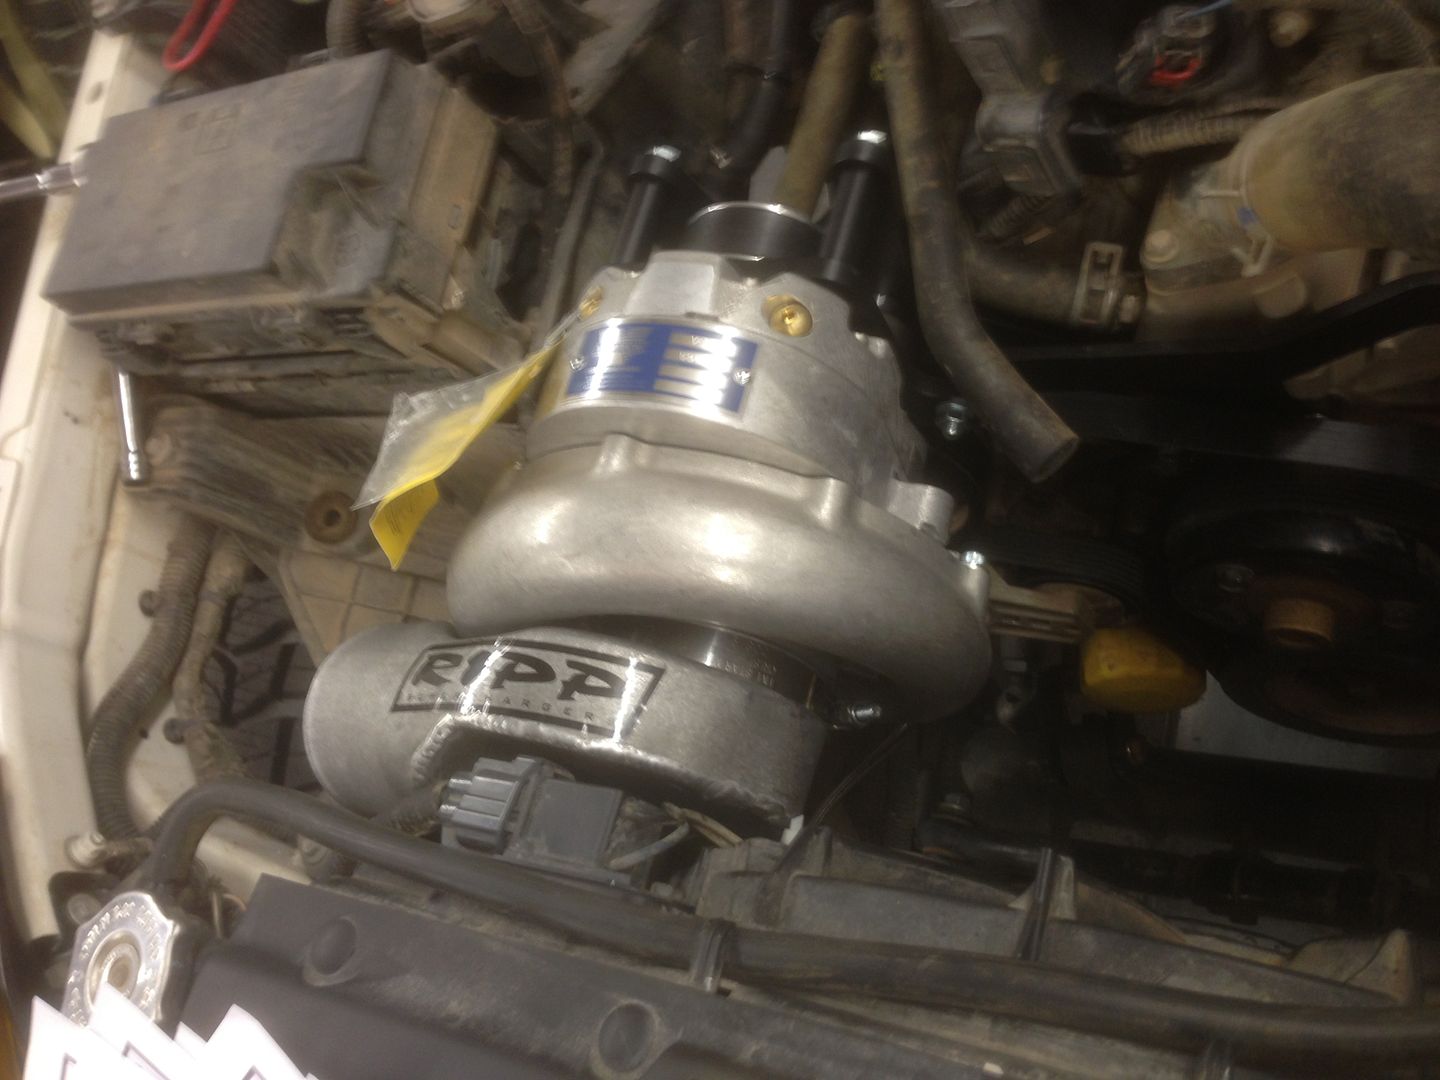
Using the supplied instructions remove the identified factory bolts, install the supercharger with a combination of supplied and factory bolts while being careful not to set it on the sensor at the upper passenger side of the radiator. (Hint: Save yourself some headache by detaching that sensor and setting it aside, and install the intake piece to the supercharger before you install the supercharger unit.)
I trimmed the plastic piece that runs under the radiator, re-routed the hoses, and re-installed the cooler underneath the crossmember. With the 1" body lift, there is plenty of clearance between the metal hose/tube that runs under the crossmember and the relocated cooler. Still, I wrapped a little black duct tape around the hose/tube to protect it and to be able to check for any evidence of contact. If I ever remove the 1" body lift, I will need to relocate that hose/tube to allow more clearance.
Lower back still a little unhappy from bending over the engine for so long, I decided to skip ahead a few steps and trim the plastic to make clearance for the intercooler tubes. I removed the rubber flaps with a couple flat head screwdrivers and used RIPP's supplied template to mark and then use a dremel tool to trim the plastic.
Then, after a break for dinner, I went back to the suggested order and installed the new one-way PCV valve (I removed about 1/2" of the tube to account for the addition of the PCV valve).
This is my new Vortech supercharger unit and the difference between the regular and the "high altitude" pulleys:
Use the tensioner to be able to remove the 13 mm bolts that attach the water pump pulley (see the gap in the engine bay where I could stand on the trackbar and the passenger side upper control arm).
My wife's 08 did not have the plug attached to this hole under the valve cover. Mine did, so I had to remove the plug.
Using the supplied instructions remove the identified factory bolts, install the supercharger with a combination of supplied and factory bolts while being careful not to set it on the sensor at the upper passenger side of the radiator. (Hint: Save yourself some headache by detaching that sensor and setting it aside, and install the intake piece to the supercharger before you install the supercharger unit.)
Last edited by planman; 01-24-2013 at 09:15 AM.
01-21-2013, 09:45 PM
#6
Forum Tech Advisor
Thread Starter
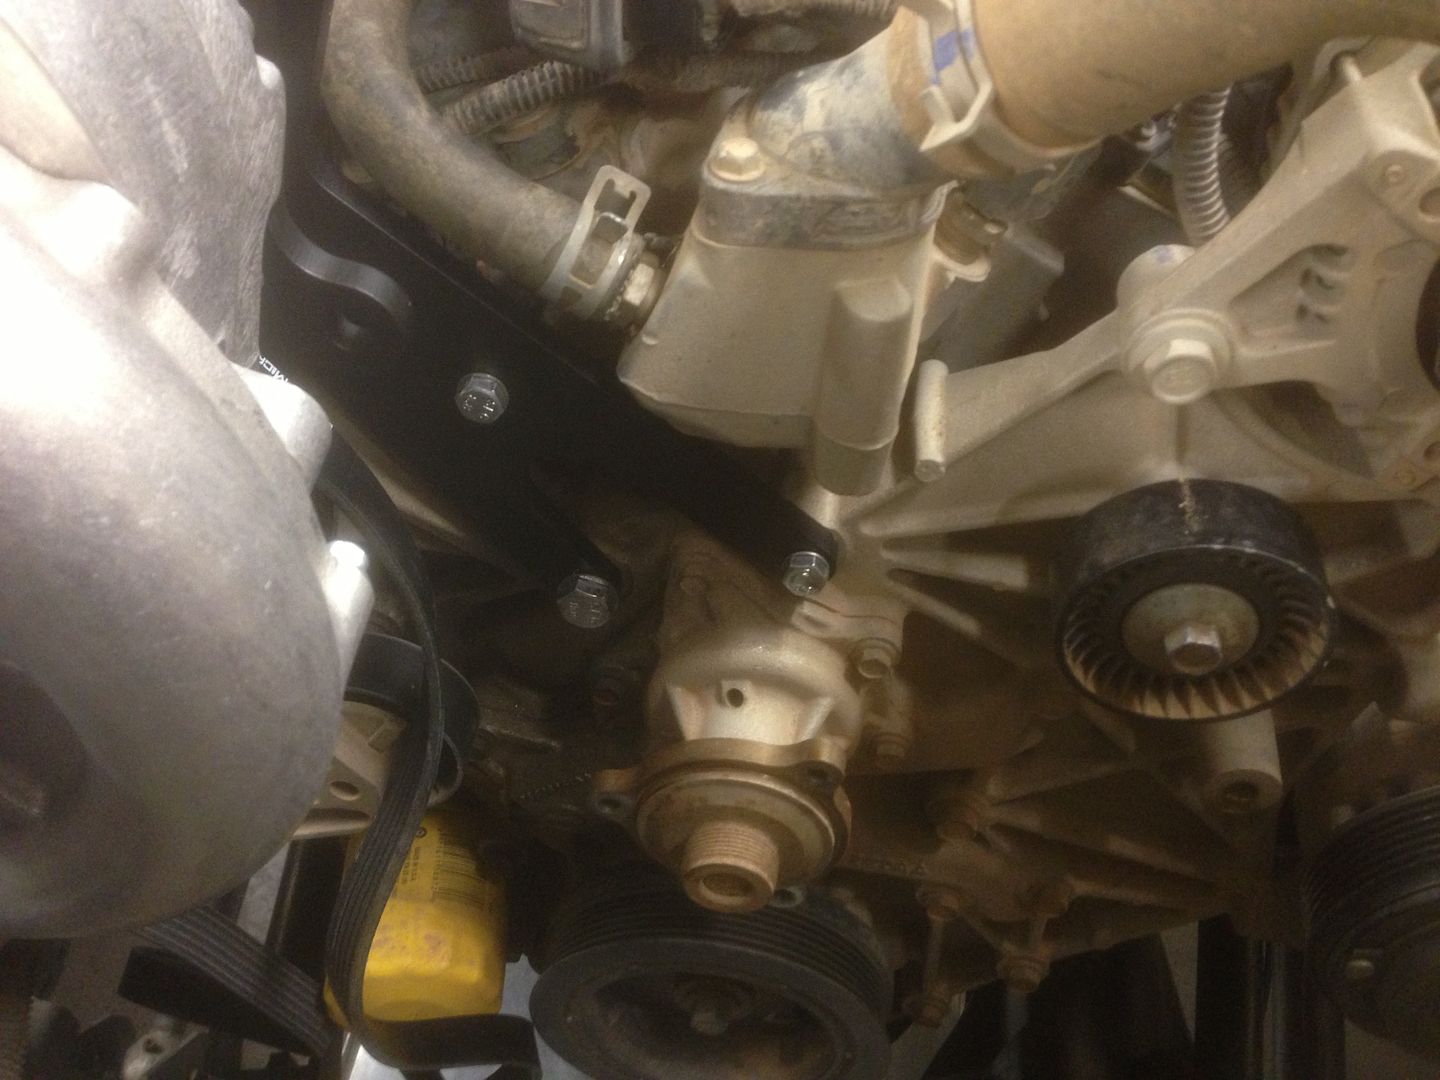
Install the front support bracket.
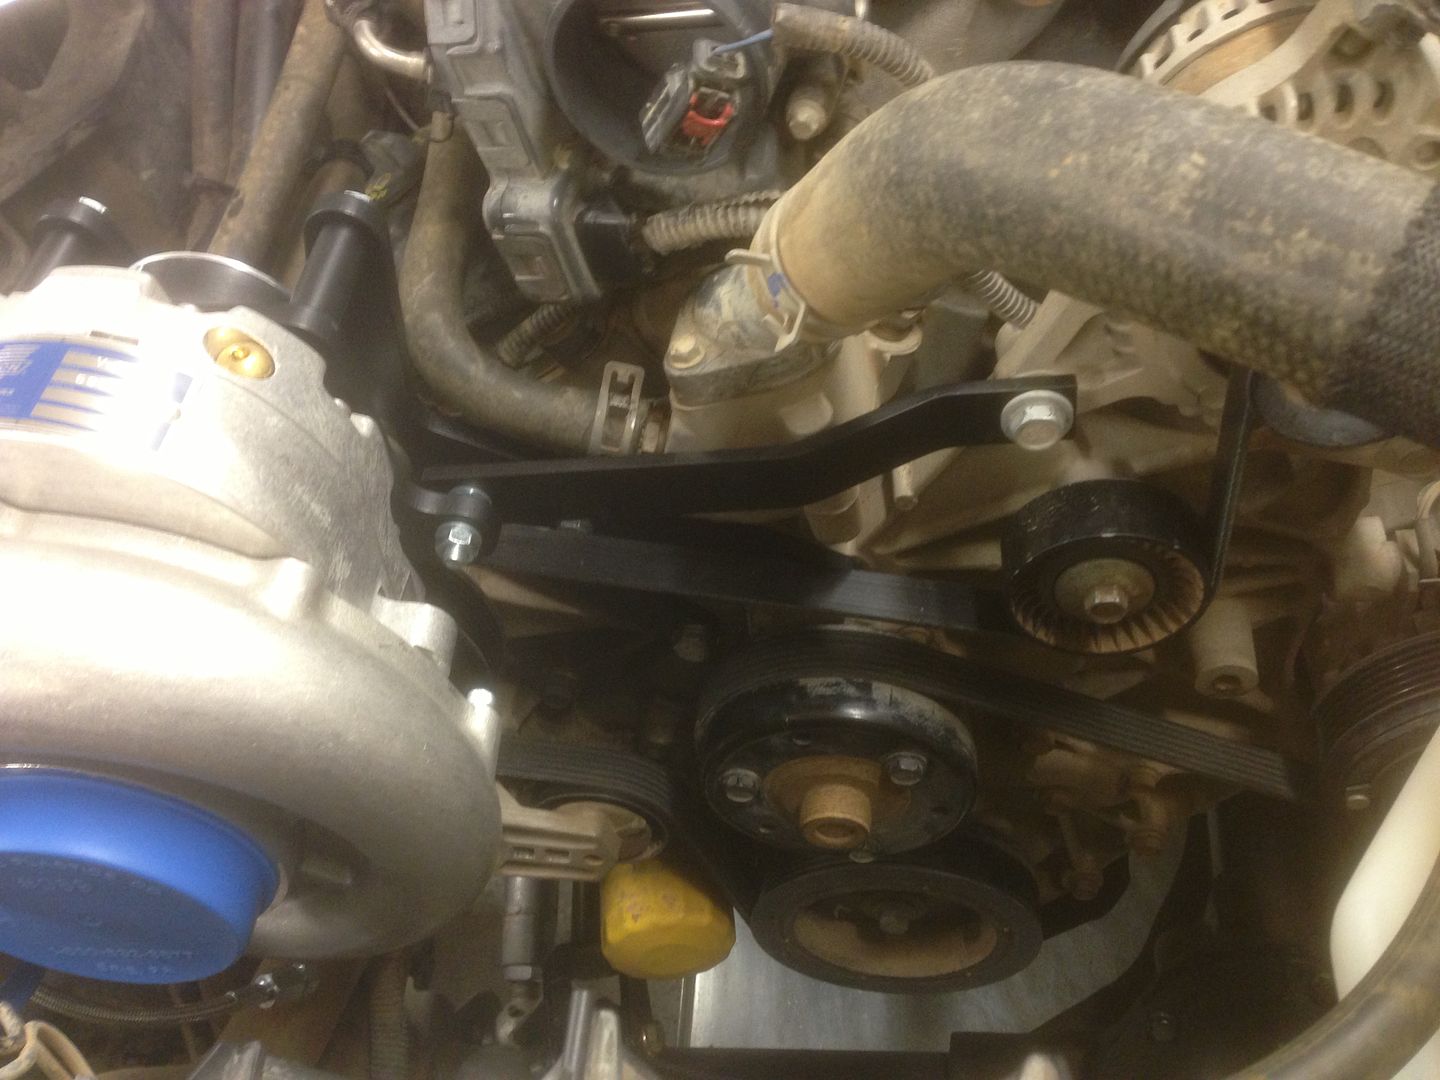
Install the rear support bracket with the supplied allen head bolt (6 mm) after removing the stock manifold bolt. Then, you will route the belt according to the diagram provided in the supplied instructions. Then, zip tie the braided supercharger oil drain line out of the way and for easy access for changing the supercharger oil.

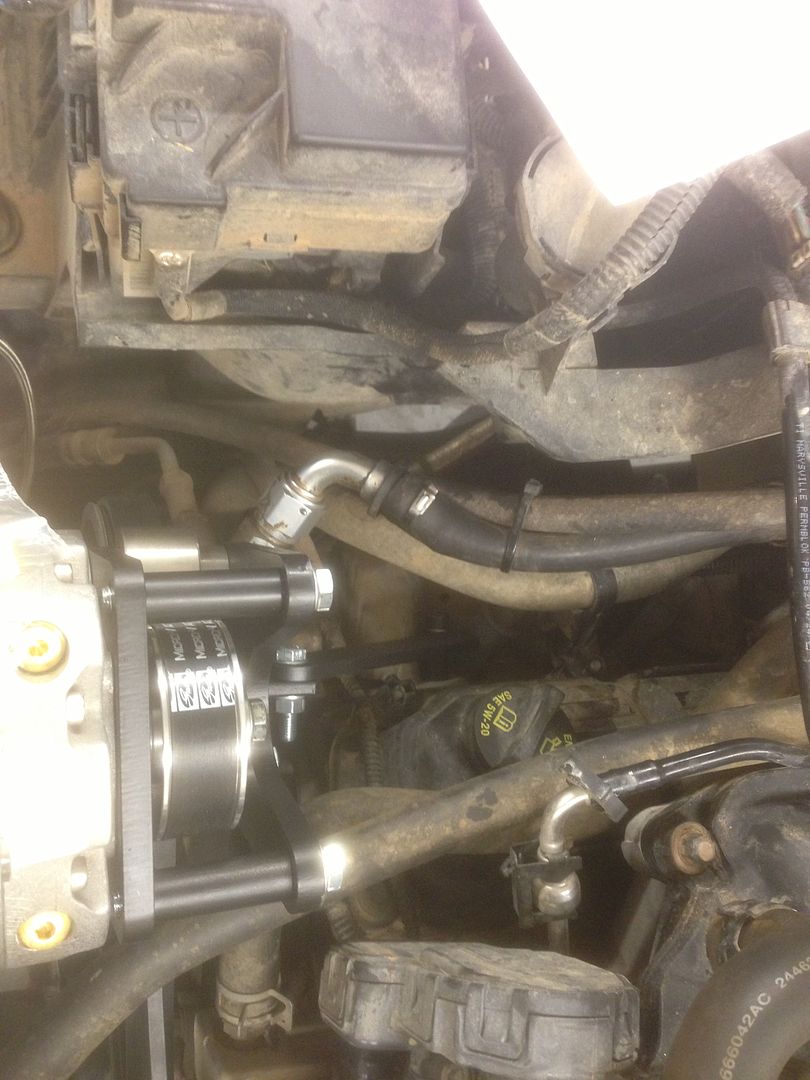
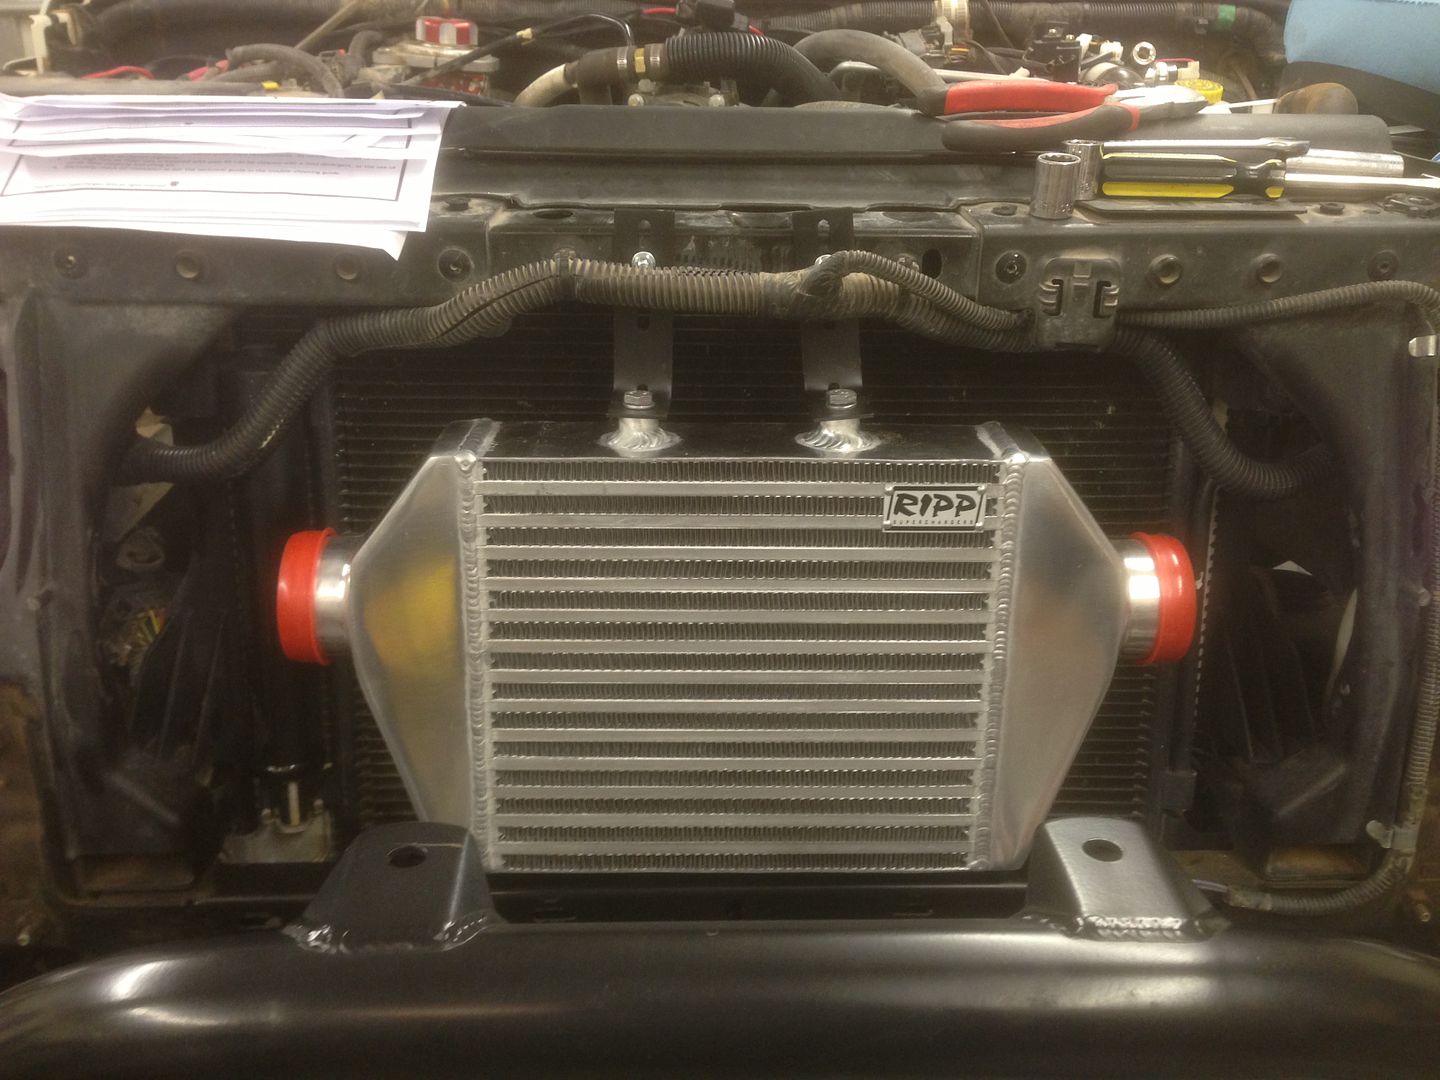
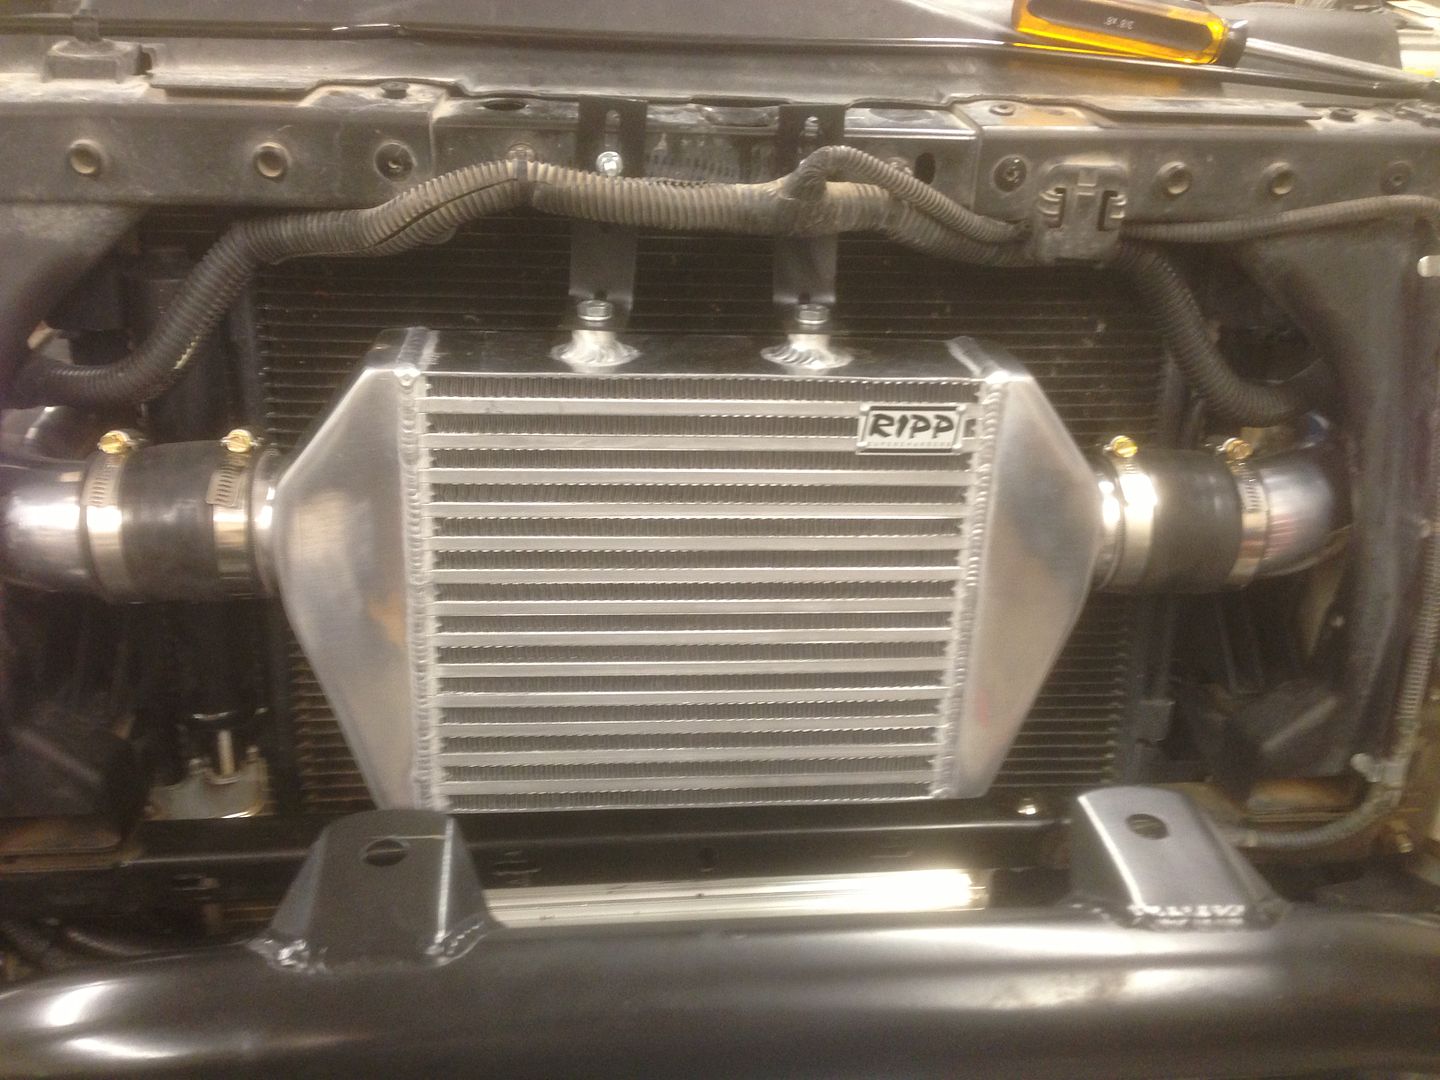
Loosely install the intercooler (you are going to need to move it around a little to be able to fit all the coupler tubes):
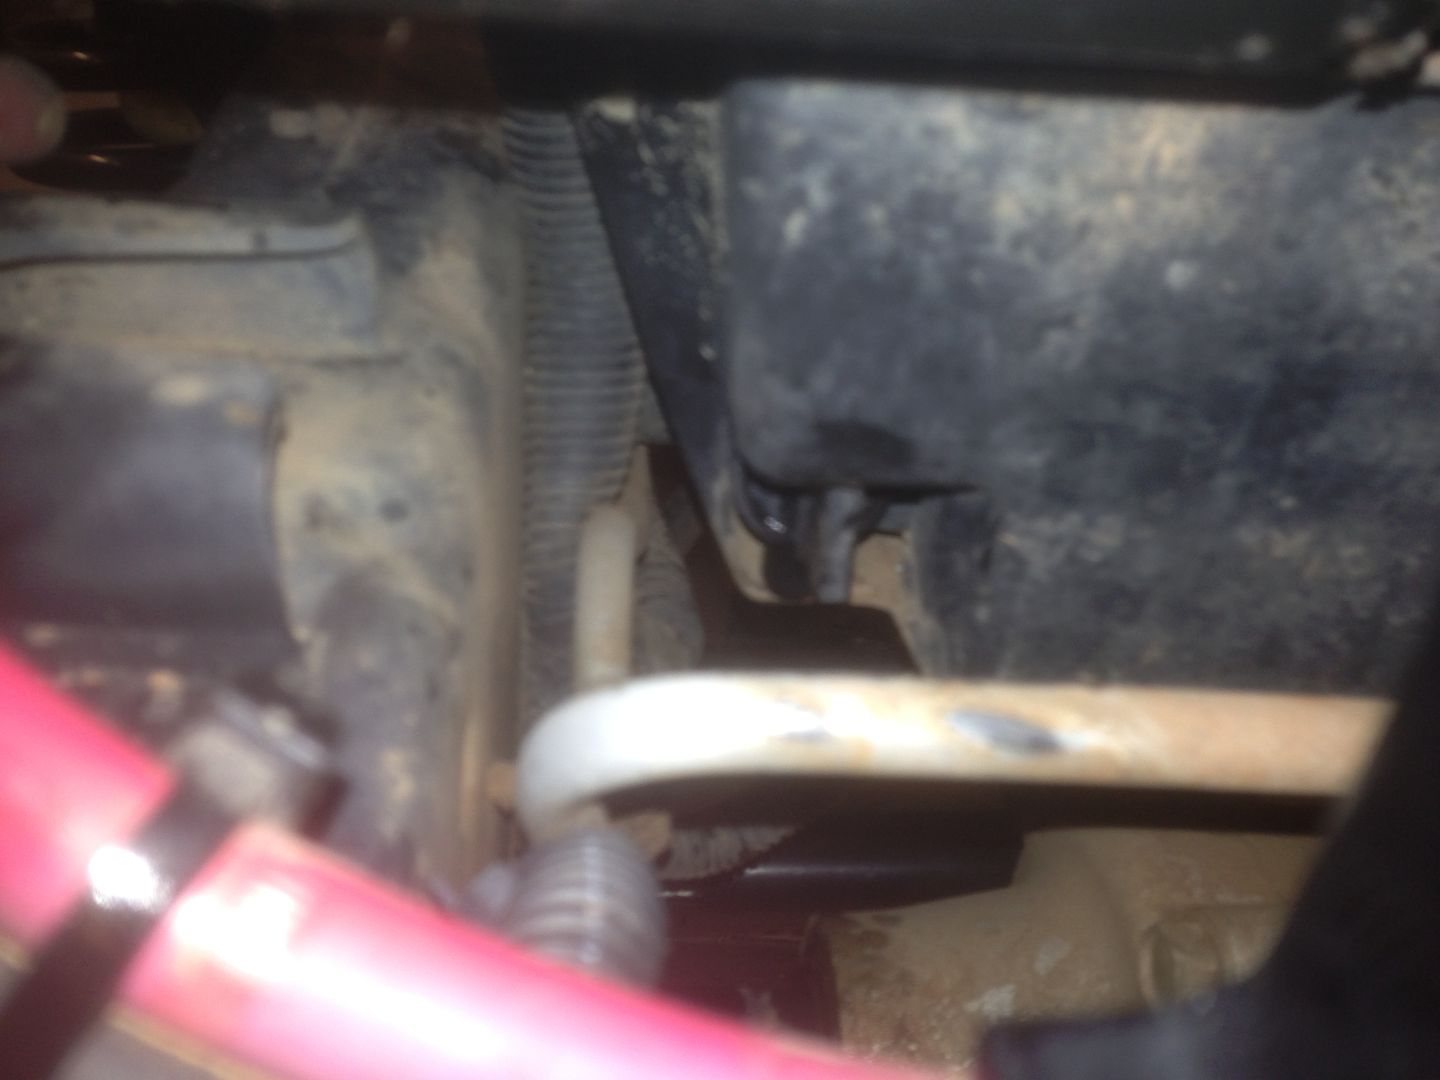
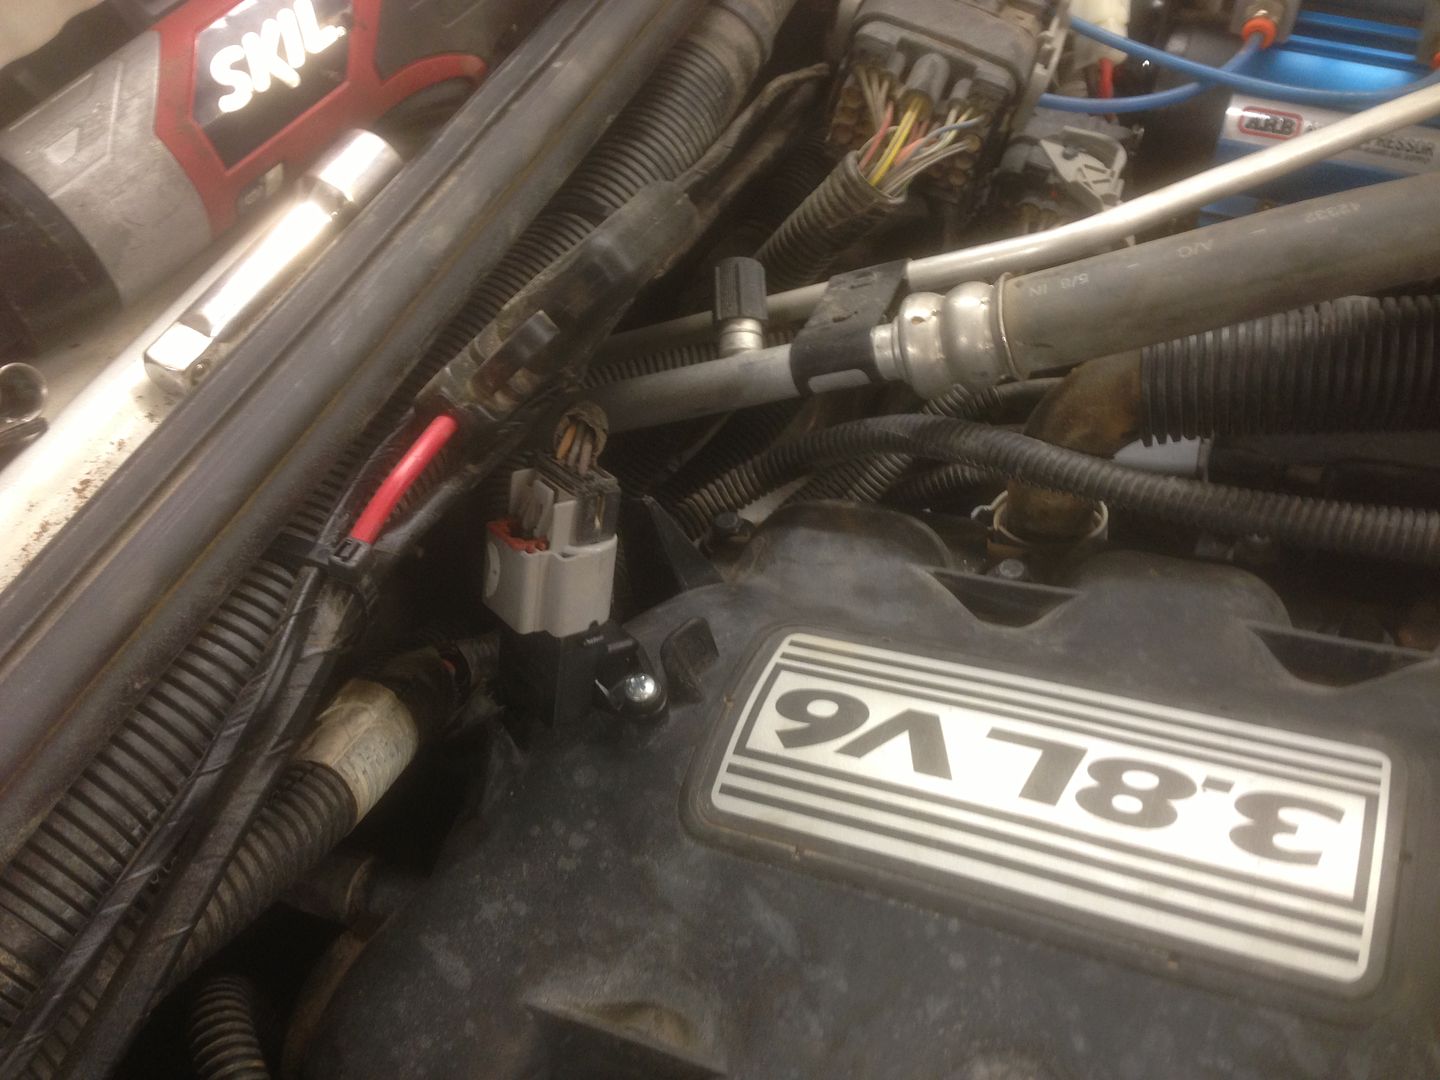
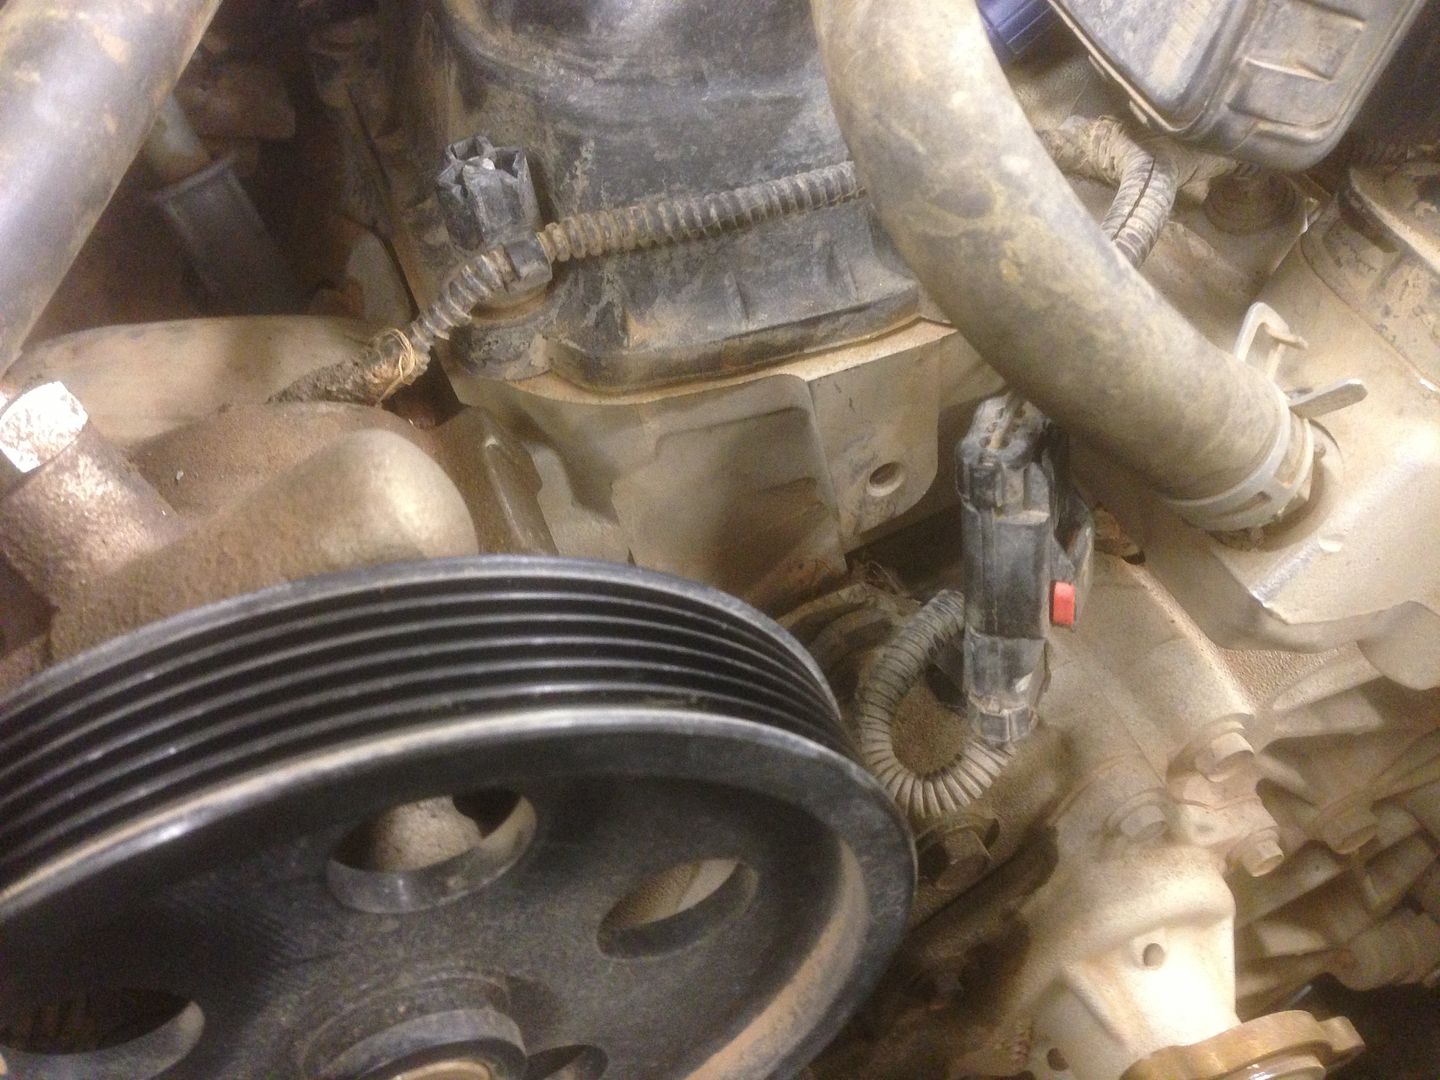
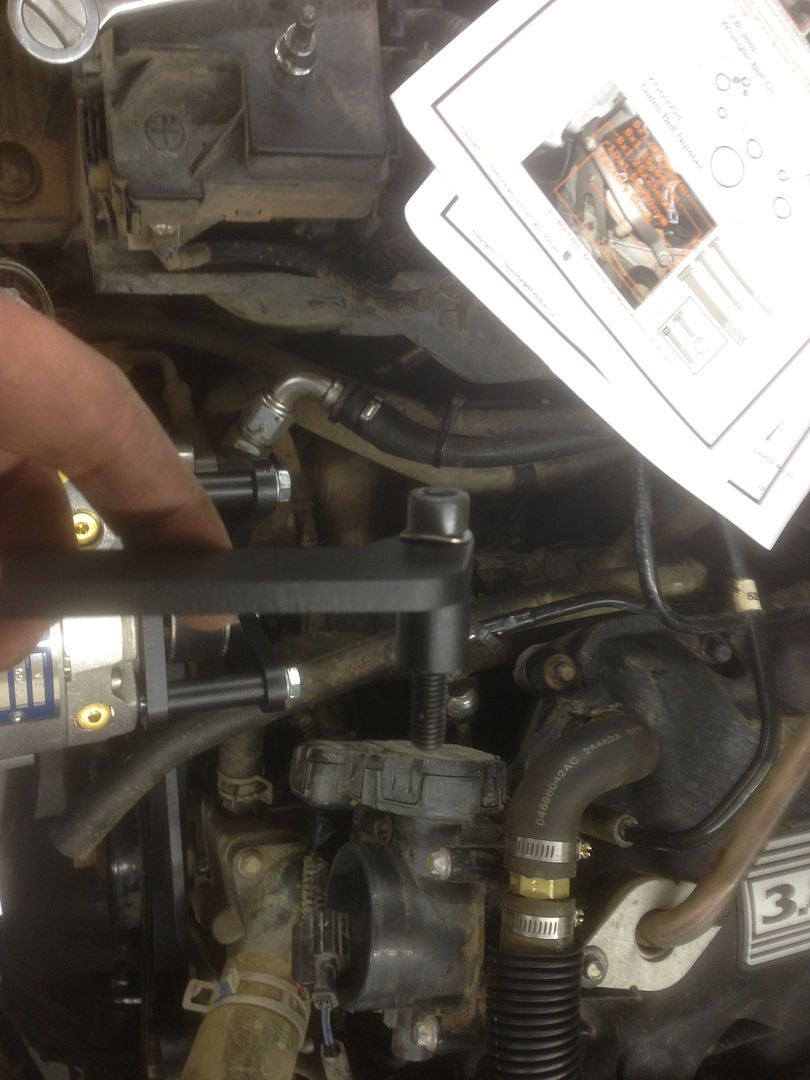
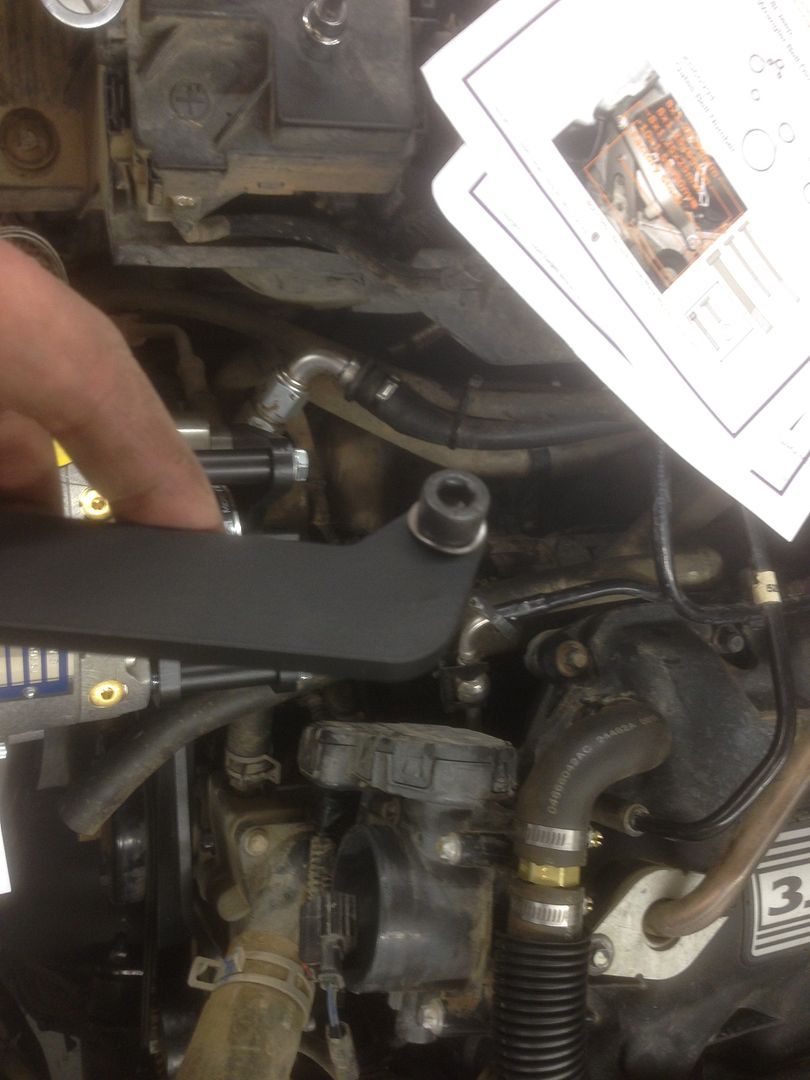
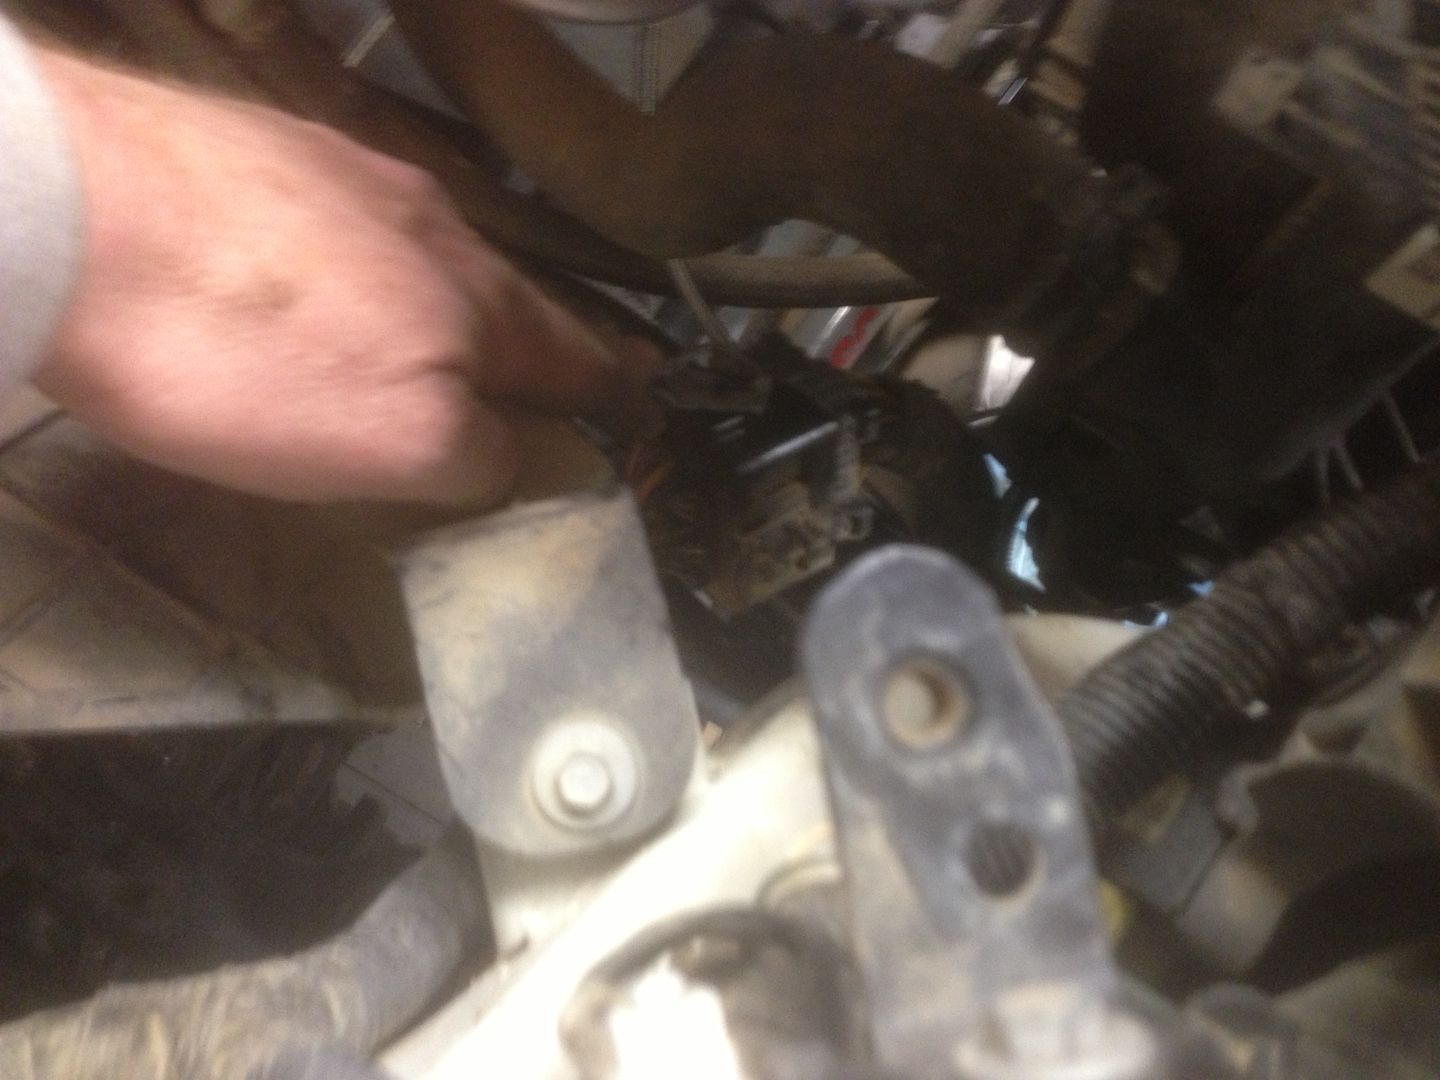
Rotate the lower radiator hose clip up and out of the way, and detach the plug assembly from the body (pictured below my fingers). (Also note that I did not need to move the factory power steering reservoir out of the way, due to the location of my PSC unit.)
Following the supplied instructions, route all the tubing and couplers, and then snug everything down.

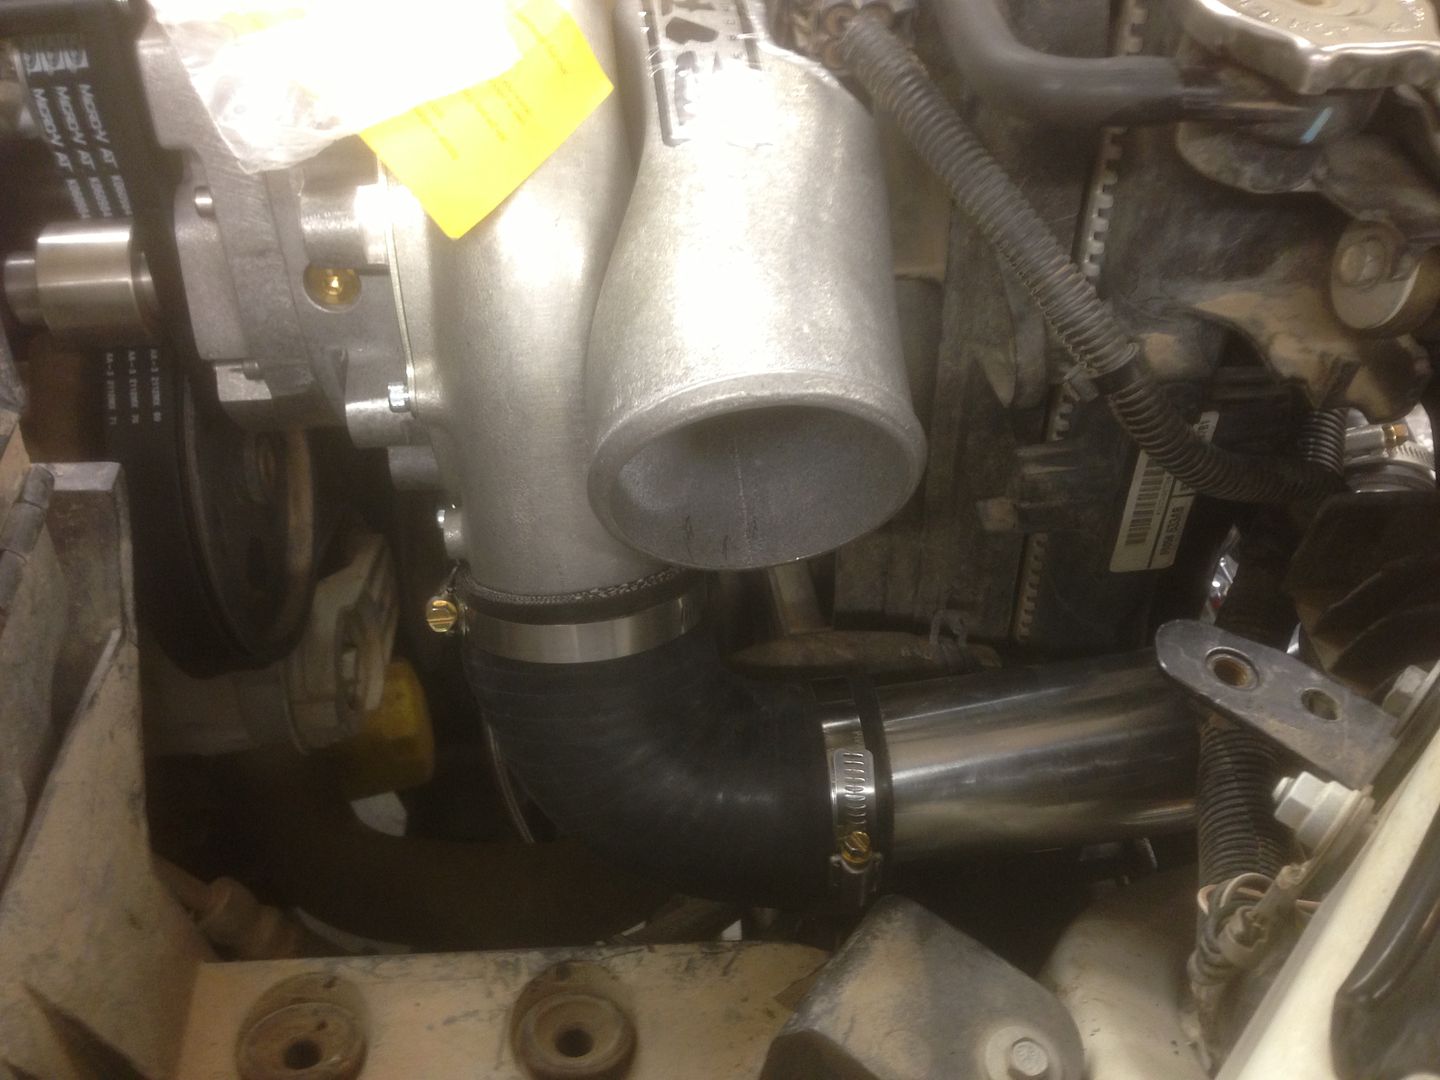
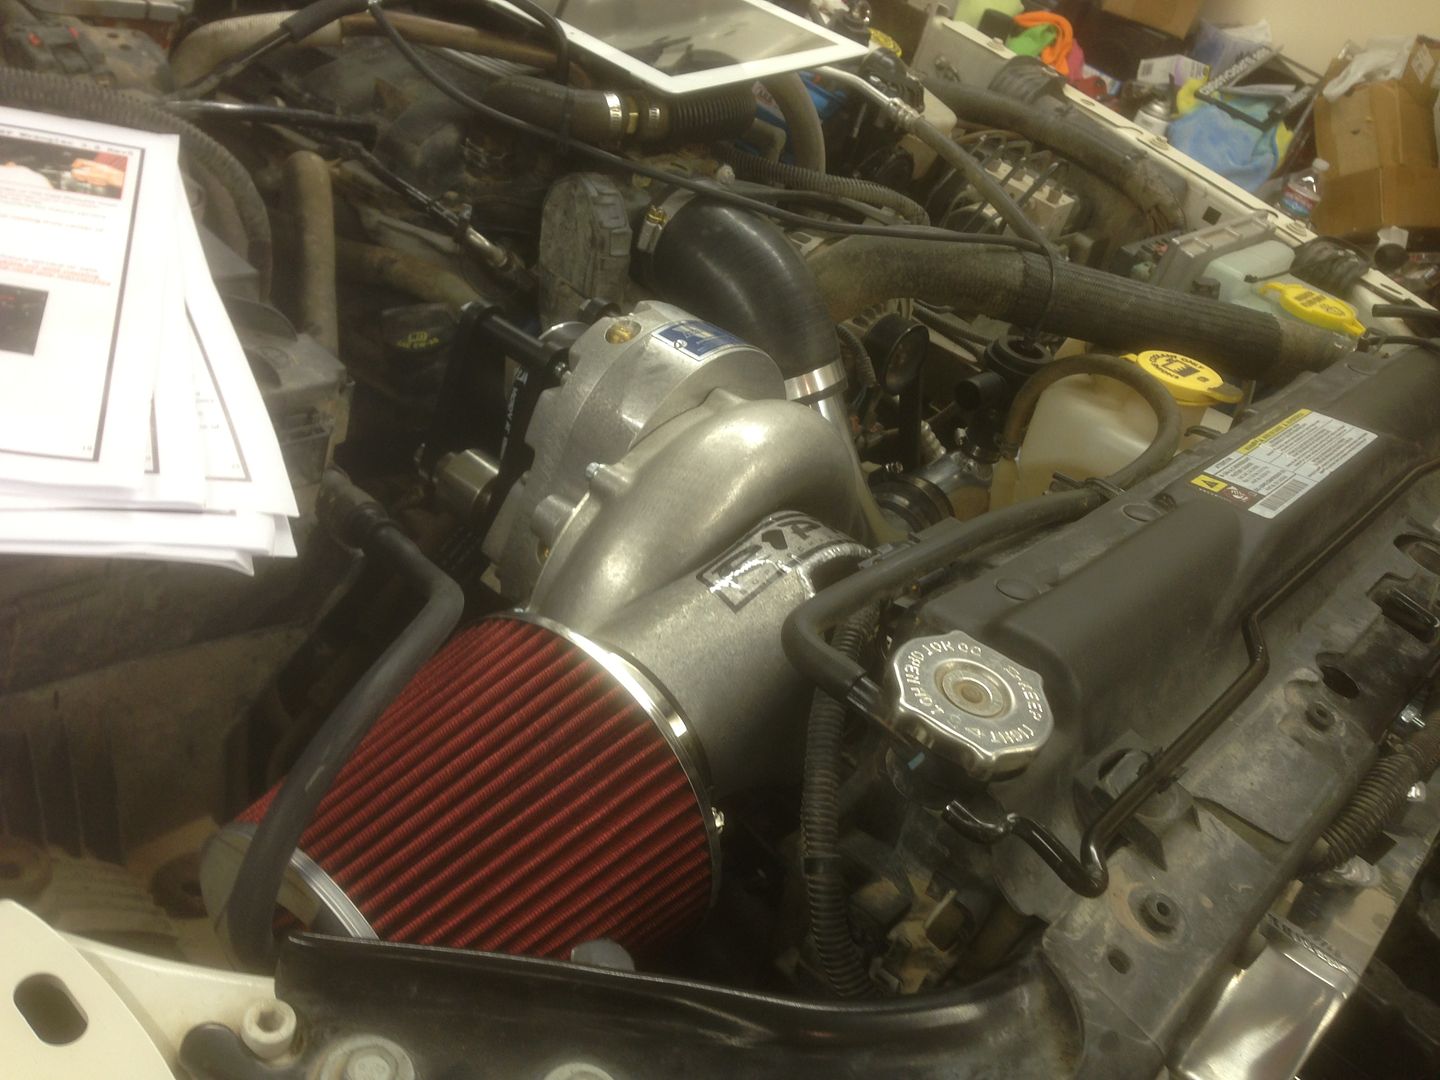
Install the blow off valve and resintall the stock air temp sensor. Notice the iPad on top of the engine that I used to watch the YouTube install video along the way:

Install the rear support bracket with the supplied allen head bolt (6 mm) after removing the stock manifold bolt. Then, you will route the belt according to the diagram provided in the supplied instructions. Then, zip tie the braided supercharger oil drain line out of the way and for easy access for changing the supercharger oil.
Loosely install the intercooler (you are going to need to move it around a little to be able to fit all the coupler tubes):
Rotate the lower radiator hose clip up and out of the way, and detach the plug assembly from the body (pictured below my fingers). (Also note that I did not need to move the factory power steering reservoir out of the way, due to the location of my PSC unit.)
Following the supplied instructions, route all the tubing and couplers, and then snug everything down.
Install the blow off valve and resintall the stock air temp sensor. Notice the iPad on top of the engine that I used to watch the YouTube install video along the way:
Last edited by planman; 01-24-2013 at 09:58 AM.
01-21-2013, 09:45 PM
#7
Forum Tech Advisor
Thread Starter
Install the Tee fitting to the stock vacuum line and route the hose out of the way to plug into the blow off valve. Then, install the air filter with the hose plugged into the end of the air filter and to the hose connection that comes out of the passenger side of the valve cover (zip tie the connection out of the way). Then, carefully follow the instructions regarding supercharger unit oil and gear case vent.
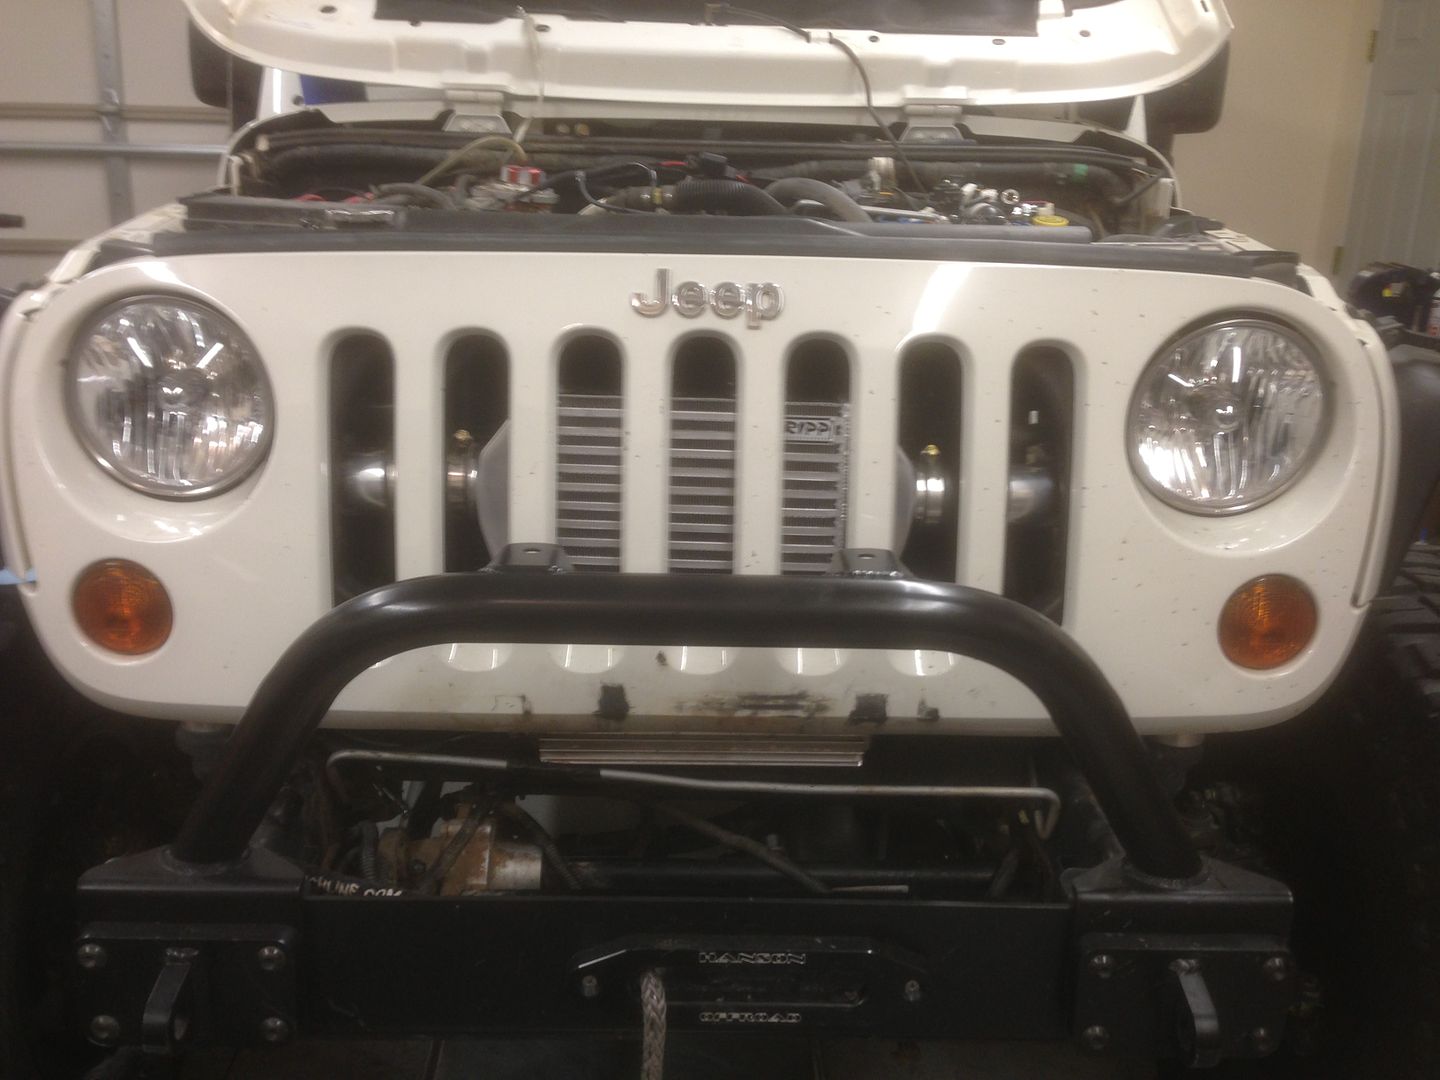
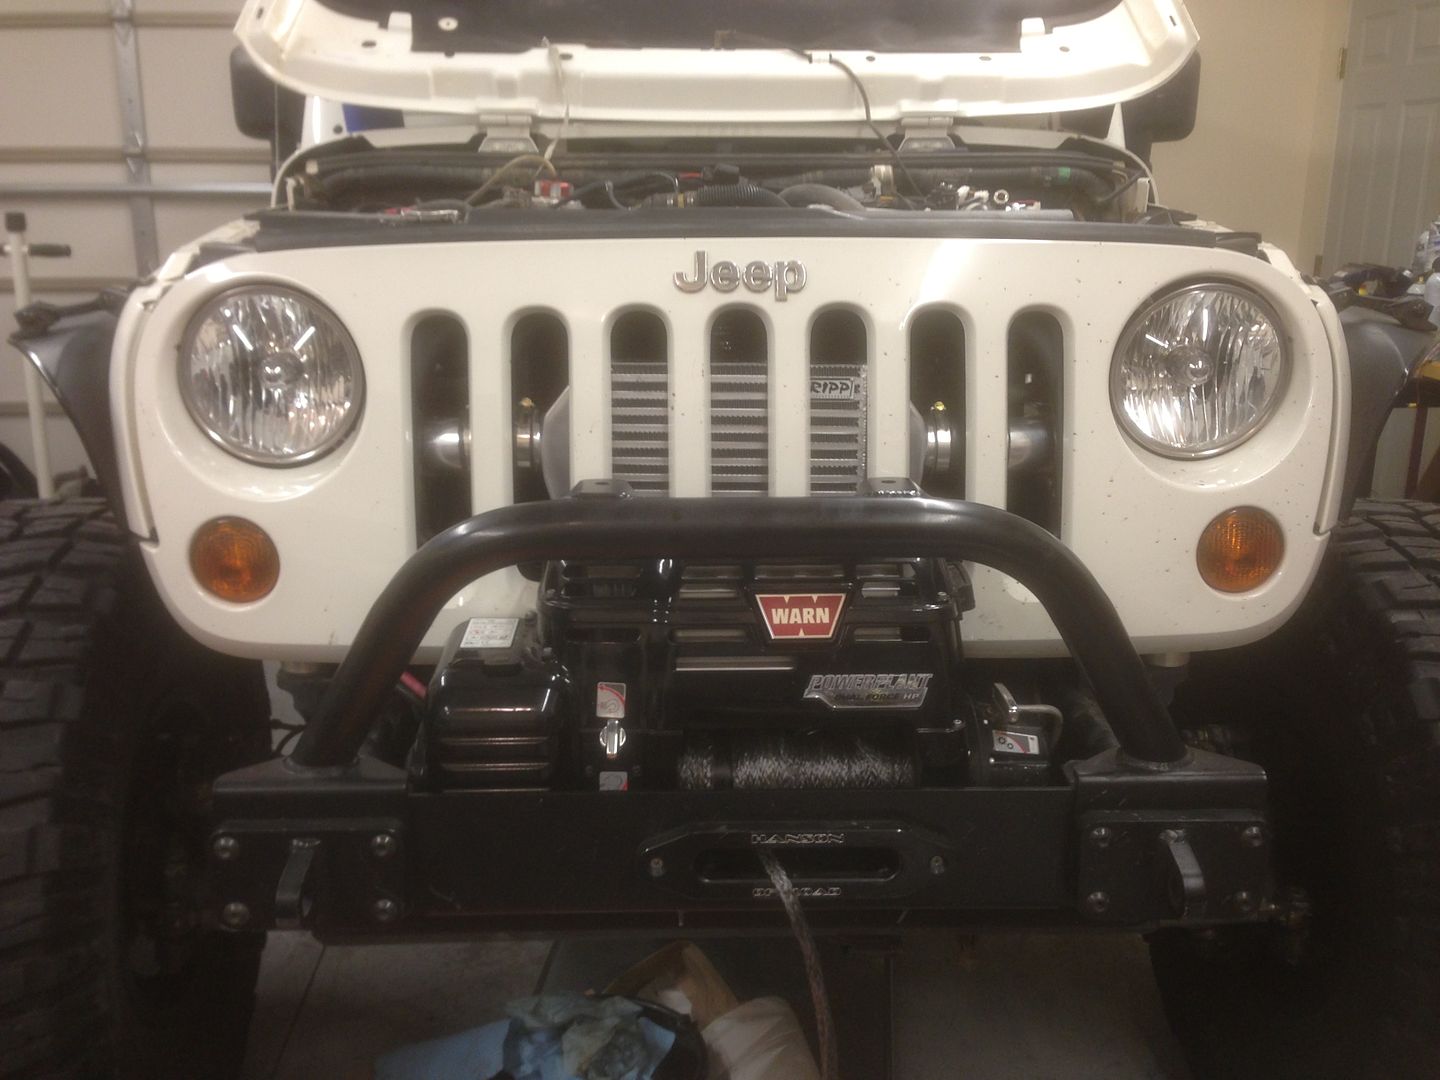
Refill coolant. Recheck all bolts, clamps, plugs, clips, etc., twice. Reconnect battery. Reinstall the front clip (use a file to add clearance to the front clip where needed with the intercooler).
I reinstalled my winch at this time.
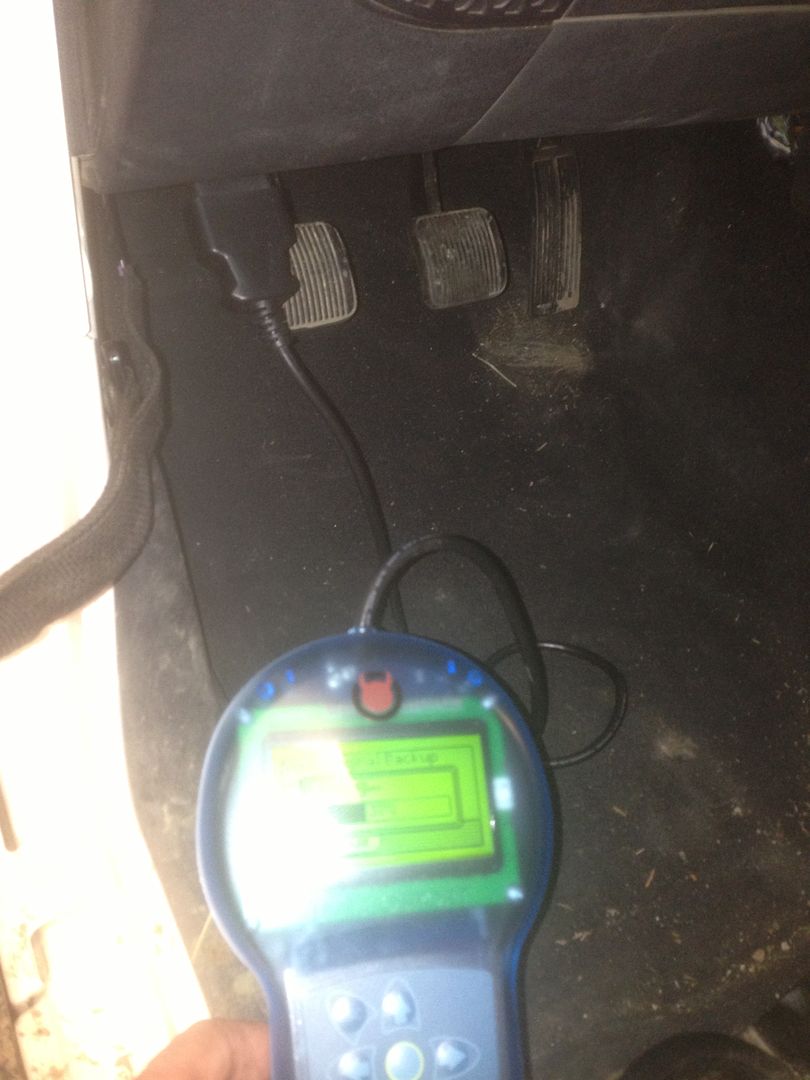
My Predator tuner already had the most up-to-date tune from RIPP installed. So, I followed the instructions to install the tune, set my tire size, etc.
Refill coolant. Recheck all bolts, clamps, plugs, clips, etc., twice. Reconnect battery. Reinstall the front clip (use a file to add clearance to the front clip where needed with the intercooler).
I reinstalled my winch at this time.
My Predator tuner already had the most up-to-date tune from RIPP installed. So, I followed the instructions to install the tune, set my tire size, etc.
Last edited by planman; 01-24-2013 at 09:17 AM.
Trending Topics
 01-21-2013, 10:06 PM
#9
Forum Tech Advisor
Thread Starter
On Wednesday, I'm headed to Winter on the Rocks near St. George, Utah, for 3 days of wheeling and fun. I'll report back more then.
I do have 5.38s with a Rubi 4:1. So, I don't really need much extra power for crawling in 1st gear, but I am interested to see the difference with the RIPP.
There is sand and there are plenty of hardcore rock crawling trails at the BLM Sand Hollow Recreation Area.
If you want to see pics where I'm going, check out winterontherocks.com
