SmittyBilt XCR Highlift Mount for less than $10
 09-10-2009, 06:19 PM
#1
JK Jedi
Thread Starter
And with no drilling! 
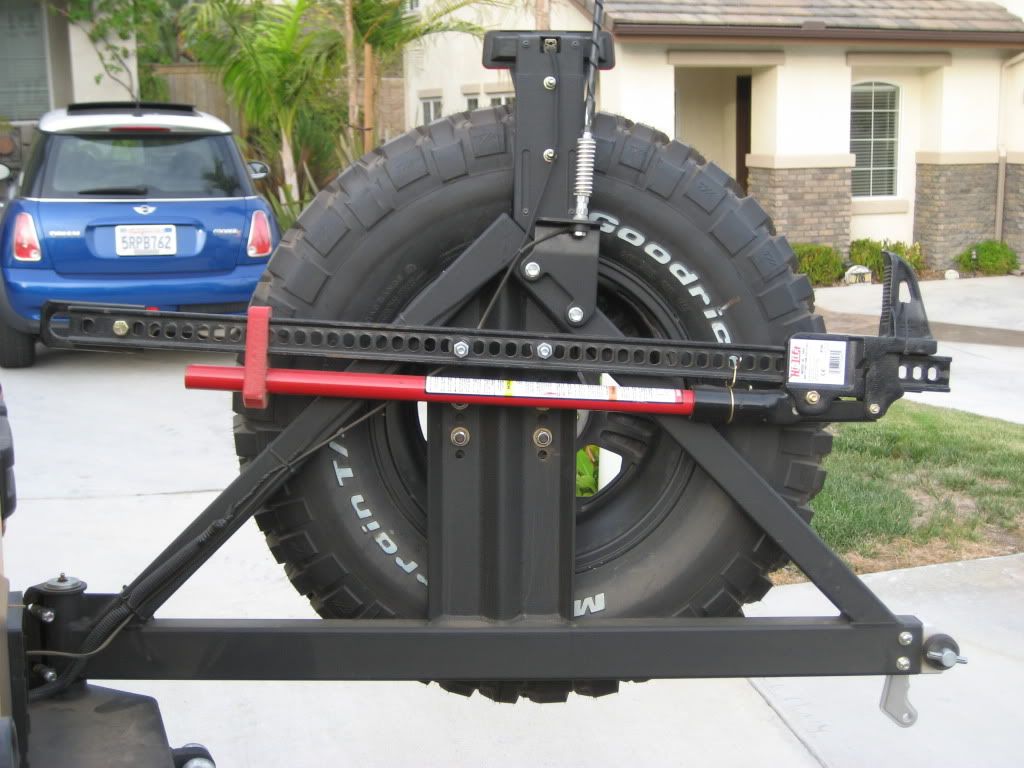
This is a really simple modification to allow for mounting a 48” highlift horizontally like mine or a 60” highlift if you mount at an angle. The parts used for this install are
2 – M12 Bolts 4” in length
2 – Lock Nuts
2 – Nuts
2 – Washers
No cutting!
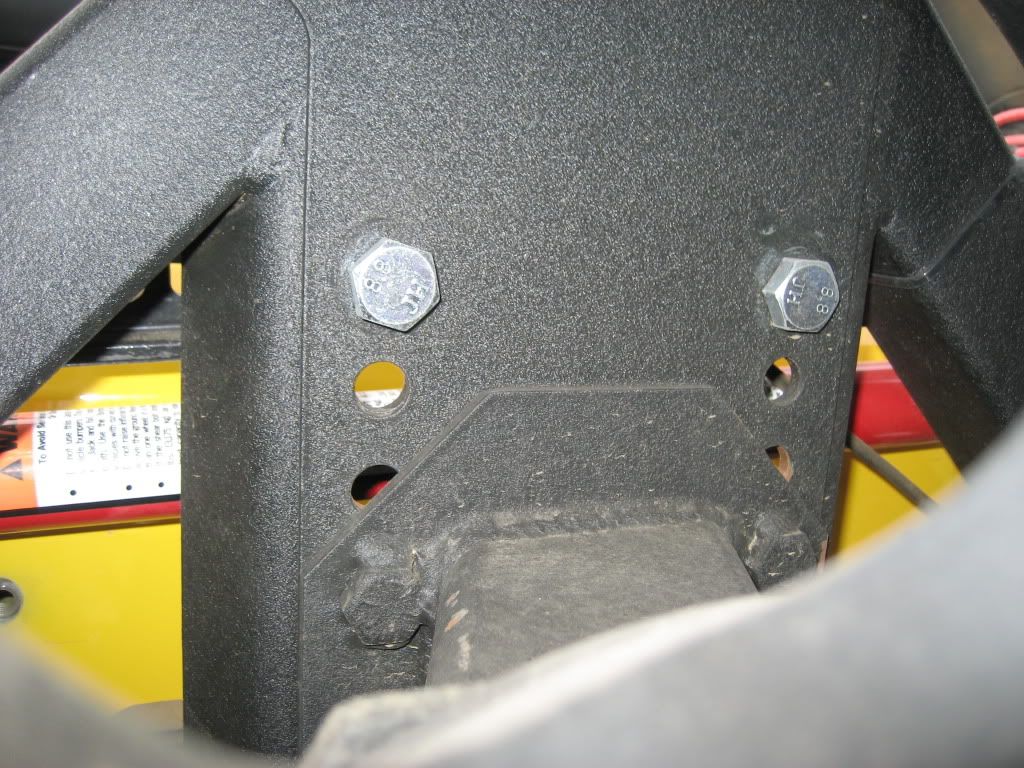
First you’ll have to remove the spare tire and you might have to move the mount down. I’m running 35” tire and had the mount sort of high which interfered with the holes in the spare mount plate. As you can see from this pic those holes (spare mounting plate) are used for the bolts.
This next part takes a few trail and error attempts to get the highlift in an area that will clear the tailgate. Not hard but the weight of the highlift makes it a little more difficult...not hard.

Now just insert the bolts and on the back side of the spare mount plate use a washer and the lock nut. You might need a rat tail file but I found you can insert the bolt with a little effort. I think that I might have used a ratchet wrench to power the bolt through the little bit of overlap that's in the way of the hole (you'll see what I mean when you get to this point)
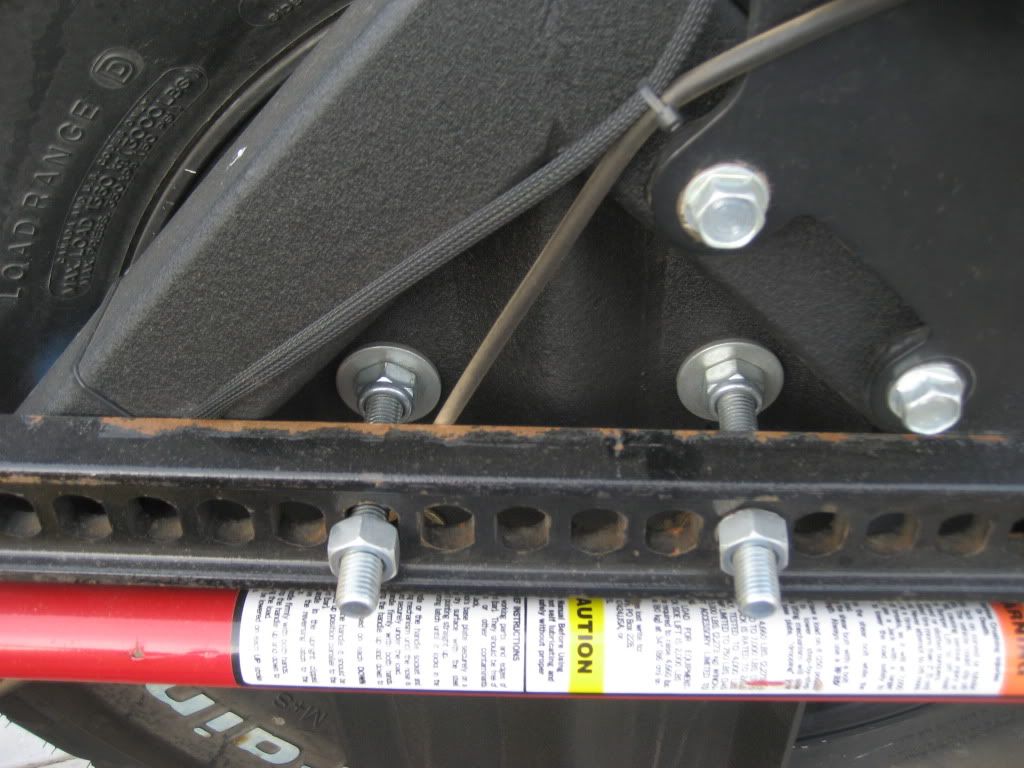
Now I said there's no drilling but this is the part that takes a little effort as the holes for the highlift and the holes in the spare mount plate are not perfectly aligned.
What I did was used a rubber mallot to move the bolts together but it's pretty close so if there was a second set of hands I would have been able to put the bolt through one of the highlift holes then pull it across to the other side...it's tight.
Next just screw the two nuts on and you're finished...a simple less than $10 way to mount that Highlift onto your Smittybilt XRC or SRC bumper.
This is a really simple modification to allow for mounting a 48” highlift horizontally like mine or a 60” highlift if you mount at an angle. The parts used for this install are
2 – M12 Bolts 4” in length
2 – Lock Nuts
2 – Nuts
2 – Washers
No cutting!
First you’ll have to remove the spare tire and you might have to move the mount down. I’m running 35” tire and had the mount sort of high which interfered with the holes in the spare mount plate. As you can see from this pic those holes (spare mounting plate) are used for the bolts.
This next part takes a few trail and error attempts to get the highlift in an area that will clear the tailgate. Not hard but the weight of the highlift makes it a little more difficult...not hard.
Now just insert the bolts and on the back side of the spare mount plate use a washer and the lock nut. You might need a rat tail file but I found you can insert the bolt with a little effort. I think that I might have used a ratchet wrench to power the bolt through the little bit of overlap that's in the way of the hole (you'll see what I mean when you get to this point)
Now I said there's no drilling but this is the part that takes a little effort as the holes for the highlift and the holes in the spare mount plate are not perfectly aligned.
What I did was used a rubber mallot to move the bolts together but it's pretty close so if there was a second set of hands I would have been able to put the bolt through one of the highlift holes then pull it across to the other side...it's tight.
Next just screw the two nuts on and you're finished...a simple less than $10 way to mount that Highlift onto your Smittybilt XRC or SRC bumper.
Last edited by sm_rubi; 09-11-2009 at 03:32 PM.

 09-11-2009, 03:50 PM
#7
JK Jedi
Thread Starter
Trending Topics
02-25-2010, 08:46 AM
#10
JK Jedi
Thread Starter
Thanks!
 Working on the next phase which is trail rack and jerry can holder for the XRC Bumper...it's actually finished but I don't have the pics and write up done.