
Volant Snorkel/CAI install write-up

Thread Starter
JK Super Freak
Joined: Jul 2010
Posts: 1,180
Likes: 1
From: Sinking Spring, PA
OK, here it is. I recently decided that, due to the conditions that I'm normally going to be wheeling in (i.e. mud and water), I needed to switch out my Airaid CAI for a snorkel. It's not that I didn't like the cold air intake, but I felt that it was too likely to suck in water and hydrolock the engine. I went with the Volant so I could have the best of both worlds, snorkel and a more free flowing intake. I know a lot of people don't like the look, but I really like it. I found the kit online for $556, which is a lot less than any of our vendors here. Anyway, on to the install.
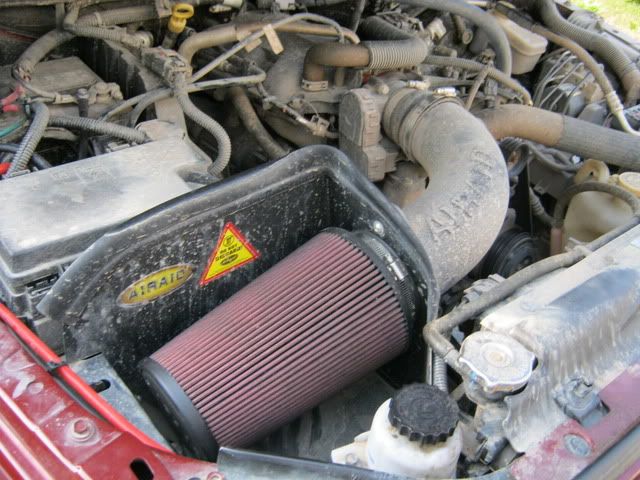
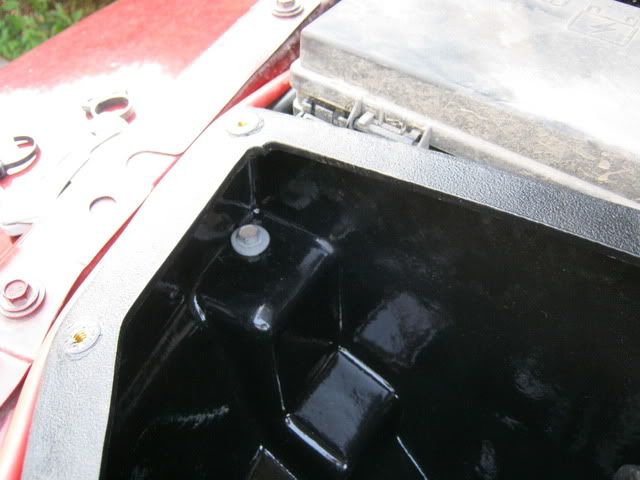
Here is a pic of what was in before.
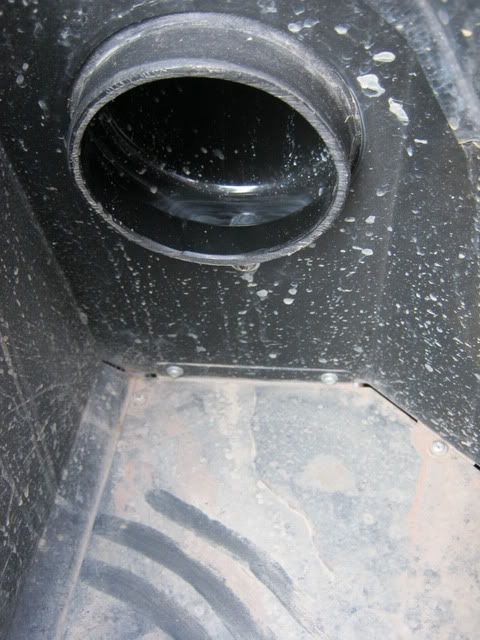
In these two, you can see that the Airaid was definitely being exposed to water when I was wheeling.
Airaid pulled out, ready for the Volant.
Here is everything that comes in the Volant kit #37738
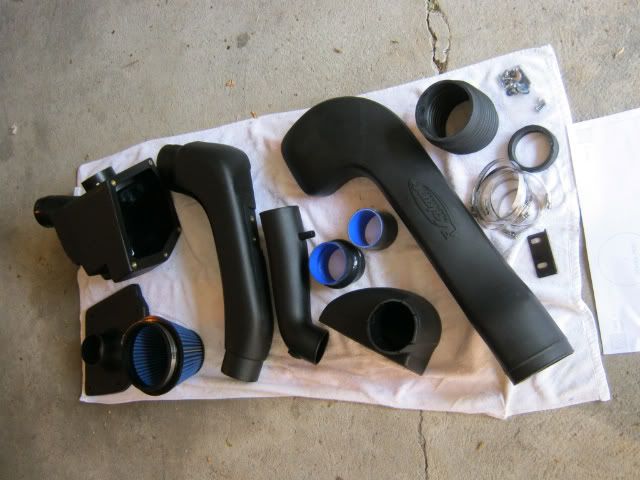
As you can see here, there are no real instructions on how to go about the install, so I just winged it.

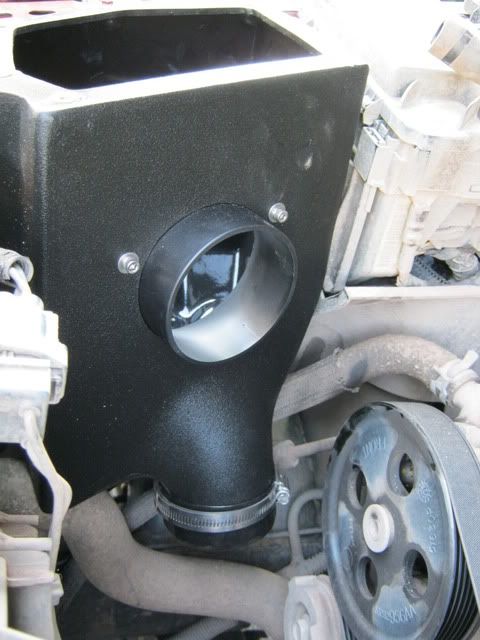
The first thing that I did was mount the new air box. It's held in by a single bolt that will be left over from your OEM air box. It's the one along the fender, directly in front of the fuse box. I know what your thinking. This can't possibly be held in with just one bolt! It is, and to tell you the truth, it is pretty sturdy.
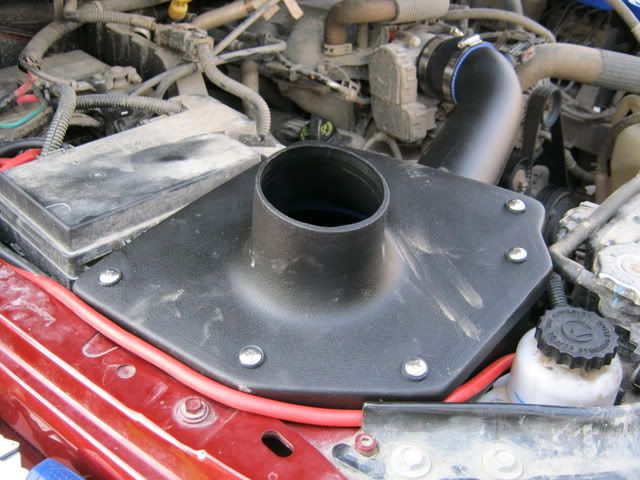
The next thing I did was install the cap onto the hole in the bottom of the intake box. I can only assume that the hole is there for those that just are using the CAI and not the snorkel.
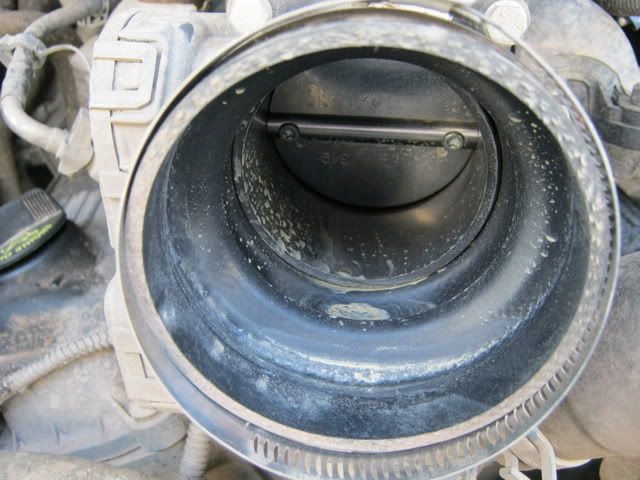
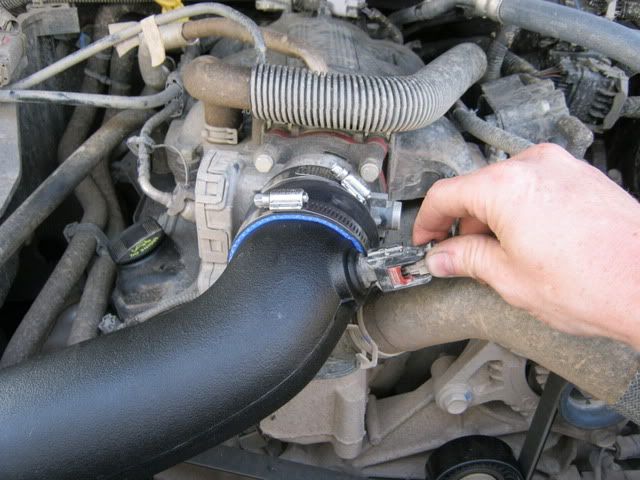
Next step is to install the intake tube from the air box to the throttle body using the included silicone couplings and hose clamps.

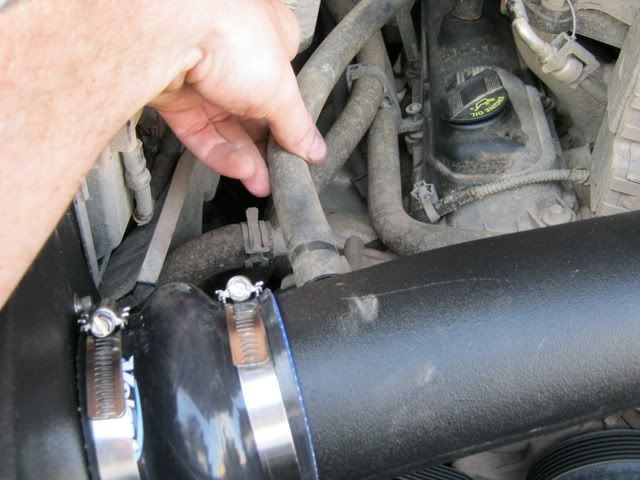
Now reattach the air hose and intake air sensor to the intake tube.
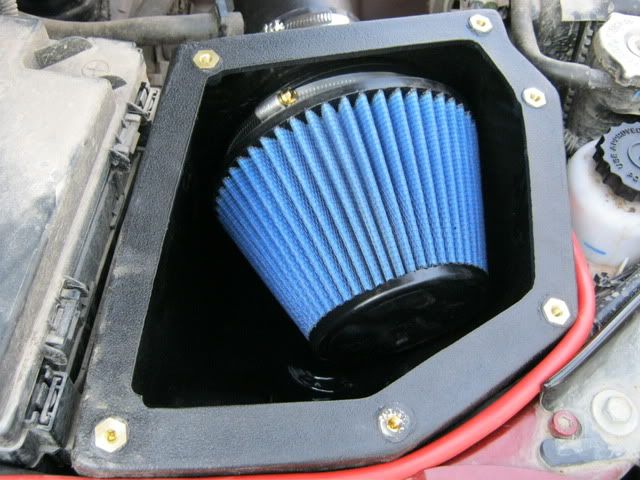
It's now time to install the filter and airbox cover. After that, put the rubber grommet onto the male portion of the airbox lid.
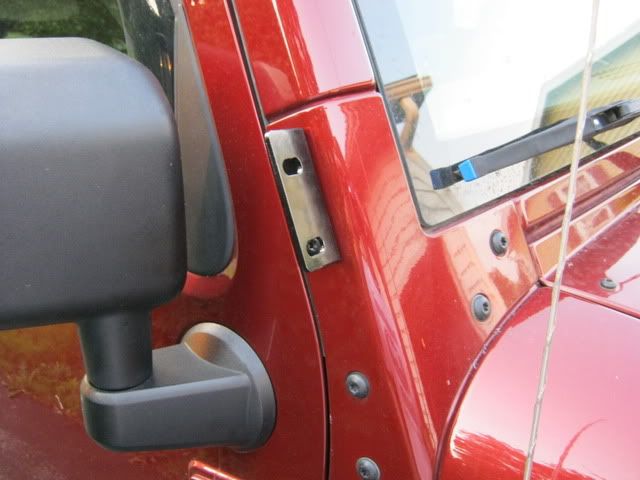
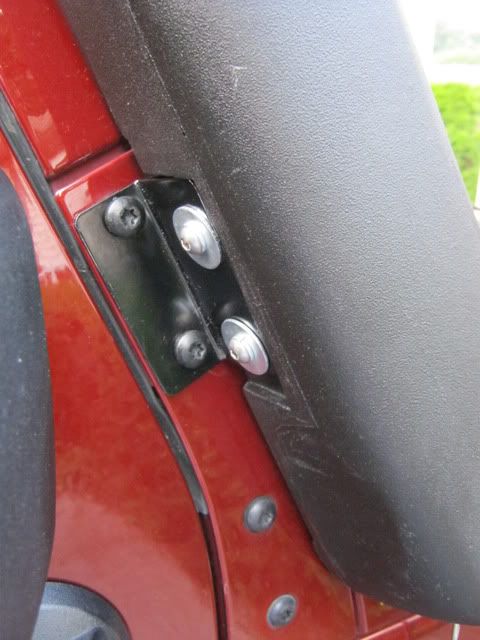
The next thing I did was to install the riser portion of the snorkel to the A-pillar. You'll understand why I skipped to this part later. First attach the mounting bracket to the pillar using the OEM bolts.
Next, mount the snorkel riser to the bracket and install ram air scoop using the included hose clamp.
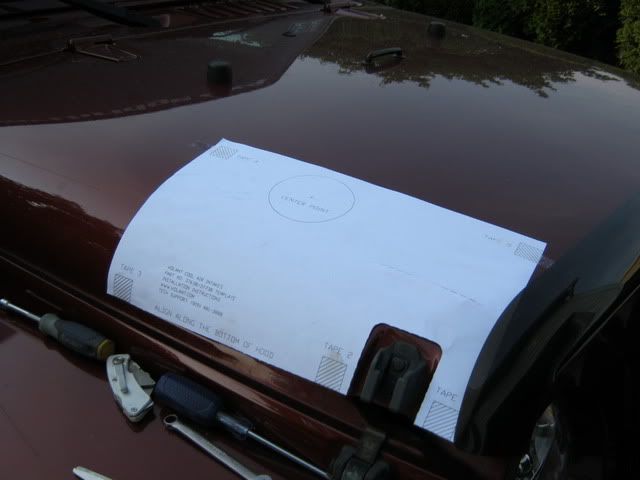
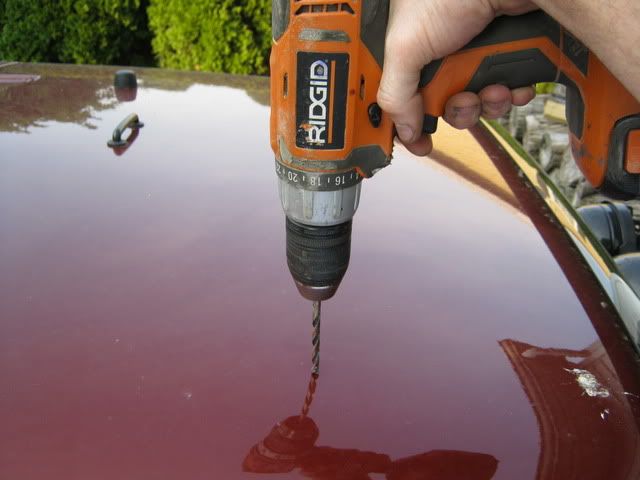
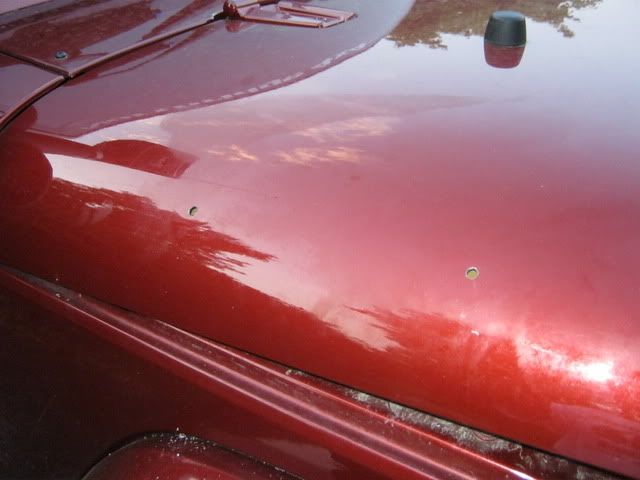
OK, here's where it gets interesting. You're going to have to drill into the hood of your Jeep a few times. First, tape the template onto your hood.
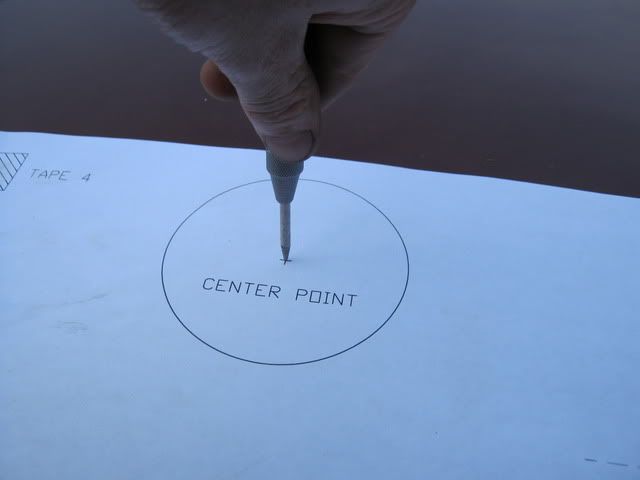
Use a center punch to mark where you need to drill.
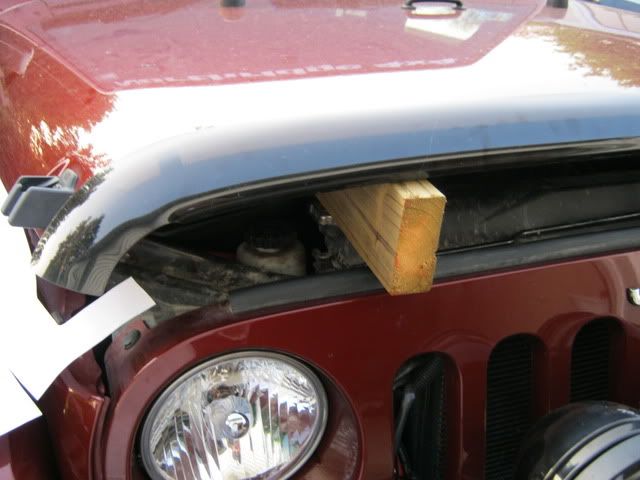
Remove the template and you're ready to drill. But first, place a piece of wood under the hood so you don't drill into anything important.
Take a deep breath and DRILL!!!!
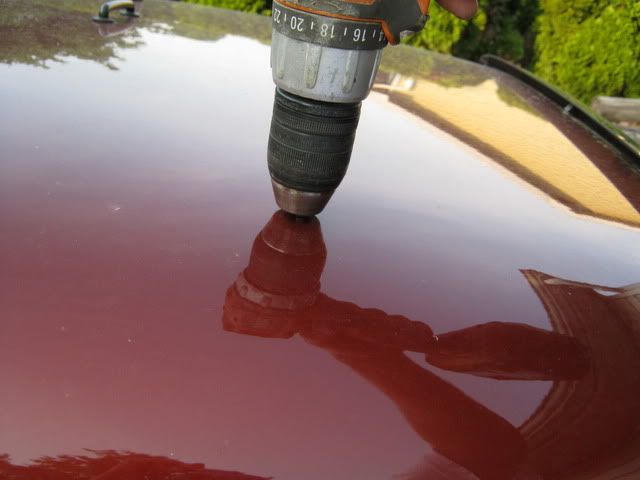
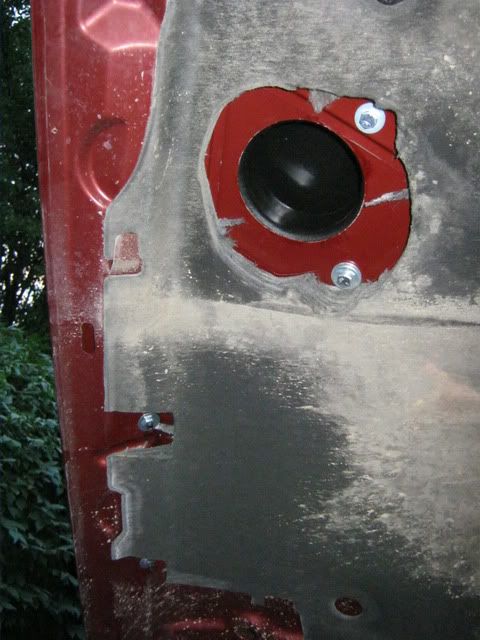
The next thing I did (and I forgot to take pictures of) is to remove the piece of wood and firmly push the hood down onto the rubber grommet that is on the air box. This will make a mark on the soundproofing on the underside of the hood. Then lift the hood and make sure that the pilot hole you drilled is centered in your mark. If it's not, redrill the pilot. Mine was NOT centered. It was off by about 3/4"
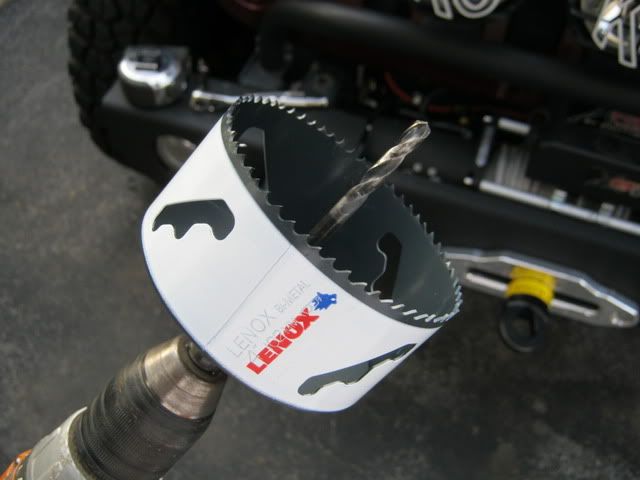
With the pilot hole in the correct spot, it's time to drill the big hole. Get yourself a brand new, sharp, 4" hole saw.
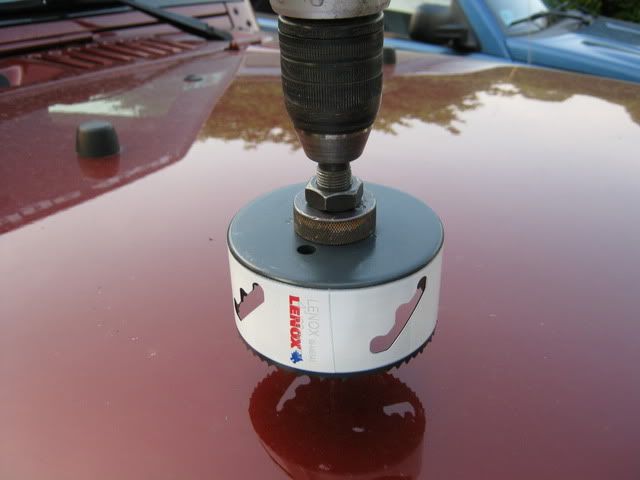
CAREFULLY drill the hole into your hood.
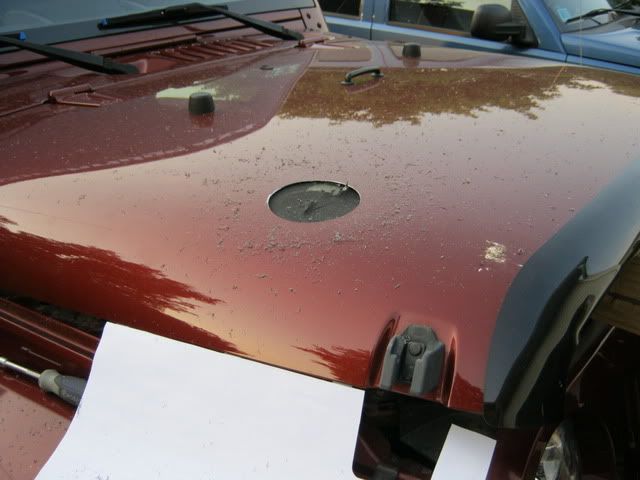
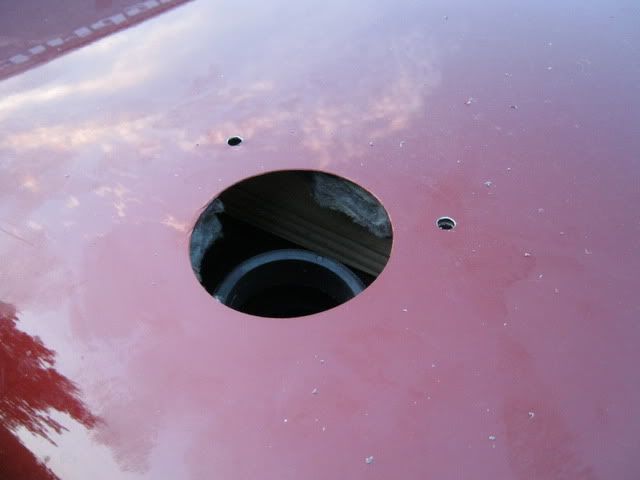
If you did everything right, it should look like this when you're done.
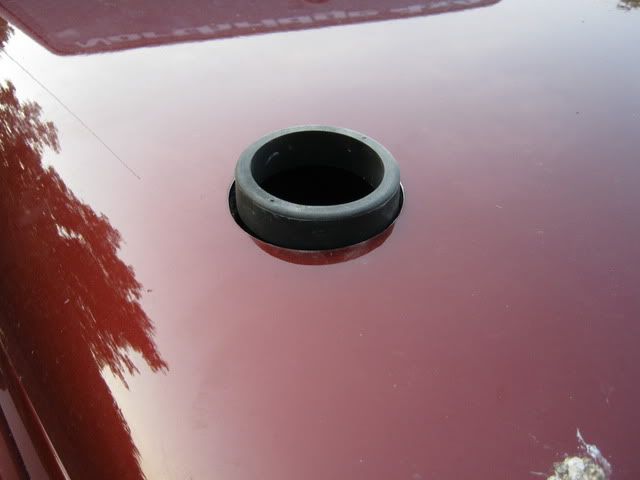
Now get some touch-up paint and seal the bare metal.
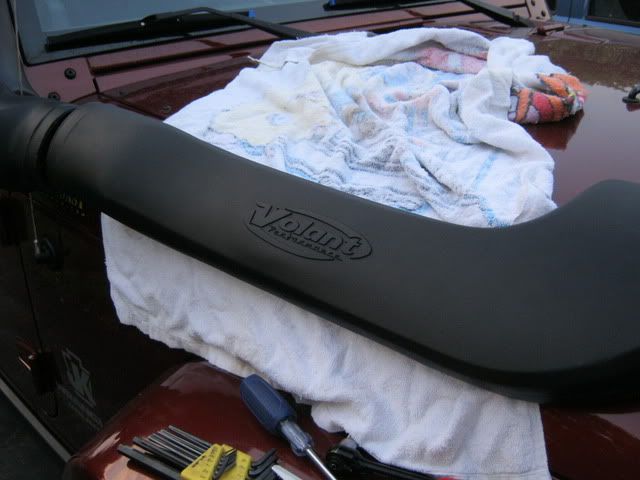
This is what the install should look like so far.
This is the tricky part. You will notice on the template that there are NO marking as to where to drill the holes to mount the snorkel body to the hood. There were however, two of these pointy set screw type things included in the hardware. I couldn't find anything else to use them for, so I assume they were meant to help locate the holes that need to be drilled.
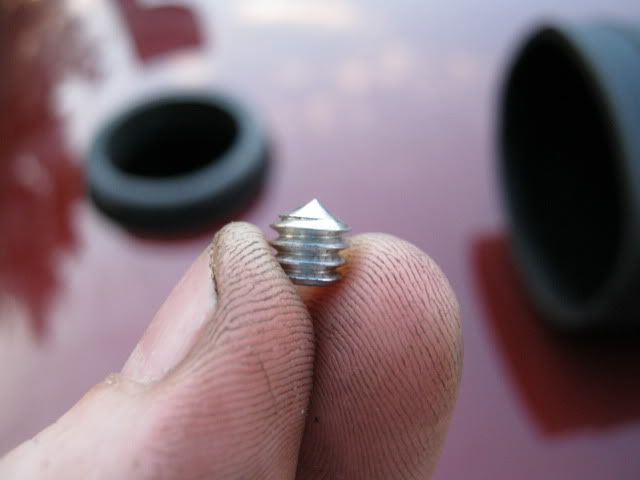
I threaded these into the two front holes of the snorkel body.

Next, I GENTLY installed the snorkel body onto the grommet and lined the back end up with riser that you had installed earlier. Then I gave the front of the snorkel body a nice firm smack, just enough for those pointy screws to make a mark on the hood. It's not pretty, but very effective.
Use your center punch of these two marks, then a 1/4" drill bit to make the final holes.
Take the two pointy screw things out of the front holes and install them into the two spots on the snorkel body that need drilled yet. Then wrap a towel around this part to keep them from scratching the hood while you perform the next step. Put the snorkel body onto the hood and loosely install the bolts through the two front holes that you just drilled. Line the snorkel body up with the riser and remove the towel. Again, give it a firm smack. Drill these two holes just like the first two.
Open your hood and cut away the soundproofing from all the holes that you drilled. Install the snorkel body and tighten down using the included hardware.
Here's another step that I didn't take a picture of, but it's pretty simple. Install the pleated rubber coupling between the snorkel body and the riser and tighten the hose clamps.
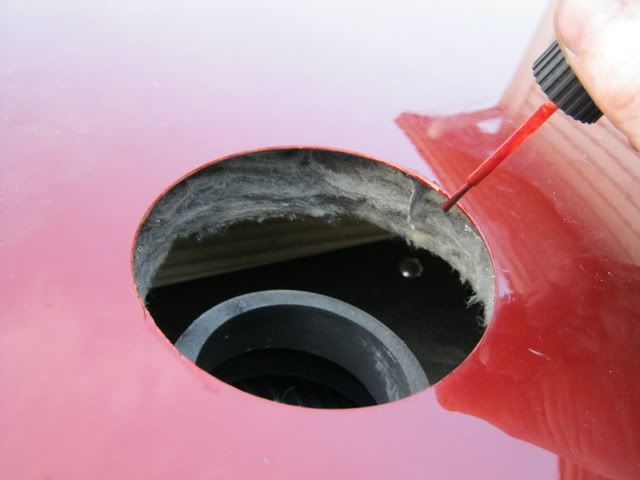
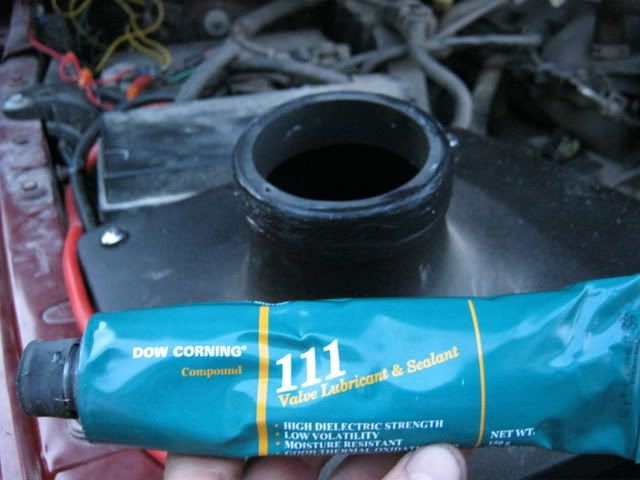
For some added protection, I smeared some Dow 111 silicone valve grease on the rubber grommet to ensure a water-tight seal.
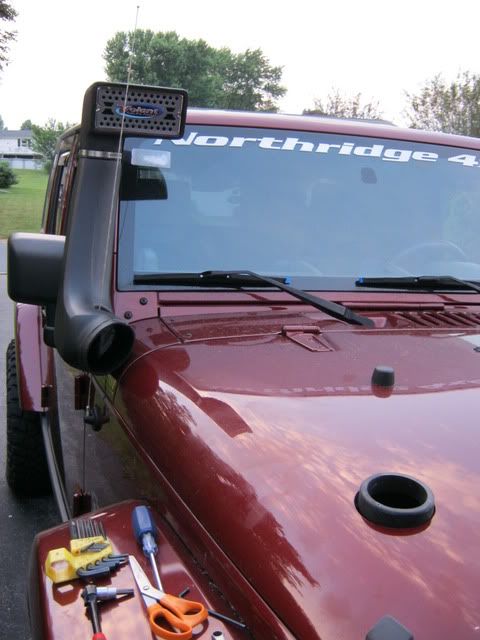
There you have it. All done and ready for the water. Don't forget to extend you breathers if you are plannig any serious water fording. It was dark by the time I finished everything up, so here are some pics of the finished product that were taken the next weekend during a little trail ride that I was part of.


If anyone has any questions, feel free to post them here. I will stay subscribed to this thread indefinitely. No need to PM me, that way everyone can see the questions and answers. Then I won't have to answer the same thing over and over again. Good luck and thanks for taking the time to read this post!
-Mike-
Anyway, on to the install.Here is a pic of what was in before.
In these two, you can see that the Airaid was definitely being exposed to water when I was wheeling.
Airaid pulled out, ready for the Volant.
Here is everything that comes in the Volant kit #37738
As you can see here, there are no real instructions on how to go about the install, so I just winged it.
The first thing that I did was mount the new air box. It's held in by a single bolt that will be left over from your OEM air box. It's the one along the fender, directly in front of the fuse box. I know what your thinking. This can't possibly be held in with just one bolt! It is, and to tell you the truth, it is pretty sturdy.
The next thing I did was install the cap onto the hole in the bottom of the intake box. I can only assume that the hole is there for those that just are using the CAI and not the snorkel.
Next step is to install the intake tube from the air box to the throttle body using the included silicone couplings and hose clamps.
Now reattach the air hose and intake air sensor to the intake tube.
It's now time to install the filter and airbox cover. After that, put the rubber grommet onto the male portion of the airbox lid.
The next thing I did was to install the riser portion of the snorkel to the A-pillar. You'll understand why I skipped to this part later. First attach the mounting bracket to the pillar using the OEM bolts.
Next, mount the snorkel riser to the bracket and install ram air scoop using the included hose clamp.
OK, here's where it gets interesting. You're going to have to drill into the hood of your Jeep a few times. First, tape the template onto your hood.
Use a center punch to mark where you need to drill.
Remove the template and you're ready to drill. But first, place a piece of wood under the hood so you don't drill into anything important.
Take a deep breath and DRILL!!!!
The next thing I did (and I forgot to take pictures of) is to remove the piece of wood and firmly push the hood down onto the rubber grommet that is on the air box. This will make a mark on the soundproofing on the underside of the hood. Then lift the hood and make sure that the pilot hole you drilled is centered in your mark. If it's not, redrill the pilot. Mine was NOT centered. It was off by about 3/4"
With the pilot hole in the correct spot, it's time to drill the big hole. Get yourself a brand new, sharp, 4" hole saw.
CAREFULLY drill the hole into your hood.
If you did everything right, it should look like this when you're done.
Now get some touch-up paint and seal the bare metal.
This is what the install should look like so far.
This is the tricky part. You will notice on the template that there are NO marking as to where to drill the holes to mount the snorkel body to the hood. There were however, two of these pointy set screw type things included in the hardware. I couldn't find anything else to use them for, so I assume they were meant to help locate the holes that need to be drilled.
I threaded these into the two front holes of the snorkel body.
Next, I GENTLY installed the snorkel body onto the grommet and lined the back end up with riser that you had installed earlier. Then I gave the front of the snorkel body a nice firm smack, just enough for those pointy screws to make a mark on the hood. It's not pretty, but very effective.
Use your center punch of these two marks, then a 1/4" drill bit to make the final holes.
Take the two pointy screw things out of the front holes and install them into the two spots on the snorkel body that need drilled yet. Then wrap a towel around this part to keep them from scratching the hood while you perform the next step. Put the snorkel body onto the hood and loosely install the bolts through the two front holes that you just drilled. Line the snorkel body up with the riser and remove the towel. Again, give it a firm smack. Drill these two holes just like the first two.
Open your hood and cut away the soundproofing from all the holes that you drilled. Install the snorkel body and tighten down using the included hardware.
Here's another step that I didn't take a picture of, but it's pretty simple. Install the pleated rubber coupling between the snorkel body and the riser and tighten the hose clamps.
For some added protection, I smeared some Dow 111 silicone valve grease on the rubber grommet to ensure a water-tight seal.
There you have it. All done and ready for the water. Don't forget to extend you breathers if you are plannig any serious water fording. It was dark by the time I finished everything up, so here are some pics of the finished product that were taken the next weekend during a little trail ride that I was part of.
If anyone has any questions, feel free to post them here. I will stay subscribed to this thread indefinitely. No need to PM me, that way everyone can see the questions and answers. Then I won't have to answer the same thing over and over again. Good luck and thanks for taking the time to read this post!
-Mike-
Thread Starter
JK Super Freak
Joined: Jul 2010
Posts: 1,180
Likes: 1
From: Sinking Spring, PA


Thread Starter
JK Super Freak
Joined: Jul 2010
Posts: 1,180
Likes: 1
From: Sinking Spring, PA

JK Enthusiast
Joined: Jan 2011
Posts: 363
Likes: 0
From: Norfolk, VA
would you mind taking a picture from the driver seat looking straight out and also from the passanger seat looking straight out. How is the vision and any noticeable gains or just another snorkel? Oh one other picture from straight on so I can see how this sits and looks. I like the beefy look of this one and plus I dont have my stock airbox anymore so looks like I will be getting this one really soon! Thanks man
Trending Topics
Thread Starter
JK Super Freak
Joined: Jul 2010
Posts: 1,180
Likes: 1
From: Sinking Spring, PA
would you mind taking a picture from the driver seat looking straight out and also from the passanger seat looking straight out. How is the vision and any noticeable gains or just another snorkel? Oh one other picture from straight on so I can see how this sits and looks. I like the beefy look of this one and plus I dont have my stock airbox anymore so looks like I will be getting this one really soon! Thanks man
I can get those pics for you, but it'll have to wait a day or two for this rain to let up. I've always heard that a snorkel will give you a slight LOSS of performance, but I haven't noticed any. Whether the CAI part of this system makes up for the snorkel restriction, or if was just a myth to begin with, I don't know. I did notice a bit more umph with the Airaid, but it's not there with this one. I'd say it's pretty close to stock performance-wise. As for it blocking any of your vision out the windshield, the only part that you really see is the actual intake opening itself. The vertical portion of the intake tube is wrapped more around the side of the pillar and is, for the most part, out of view. Anyway, I'll get those pics up for you as soon as I get a chance.