Jeep Wrangler JK: How to Repair Transfer Case Shift Linkage
One of the weak points of the Jeep JK Wrangler is the transfer case shift linkage. Learn how to fix it for good.
This article applies to the Jeep Wrangler JK (2007-Present).
One of the biggest complaints among Jeep JK owners is the inferior engineering and manufacturing that Jeep used in making the transfer case shift linkage. While this appears to be a trivial thing at first glance, this shift linkage will go out without warning and at the worst possible time. This will leave the driver either stuck in 2WD, 4WD or not moving at all and stuck in neutral. While there is no warning given as to when the linkage is going to fail, you can be prepared by learning ahead of time how to fix it and be rather quick about it. The great news is that this is a very cheap and easy fix to do on your own; however, a professional is going to charge you a pretty penny to do what you can easily do in your own garage. Save yourself a good deal of cash and learn how to do this fix yourself and avoid those hefty professional invoices.

Materials Needed
- Torx wrench and T30 bits
- Flat head screwdriver
- Pliers (if needed)
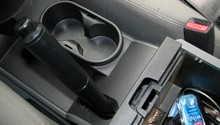
You will most likely only need to remove the center console, but to be sure, crawl under your Jeep and look for the linkage at the transfer case to make sure it is intact down below. The problems almost always occur at the shifter under the console.
Step 1 – Remove the console cover
- Using a Torx wrench, remove the four T30 bolts that secure the console cover at the 2WD-4WD shifter.
- Pull up on the hand brake as far as it will possibly go. You will have some difficulties getting the console cover up and over the emergency brake if the handle is not pulled up as far as it will go.
- Remove the transfer shifter knob by simultaneously twisting and pulling up on the knob.
- Pop off the panel in front of the shifter on the lower dash. There are two retaining clips that hold it in place. Take care with these that you don't snap them.
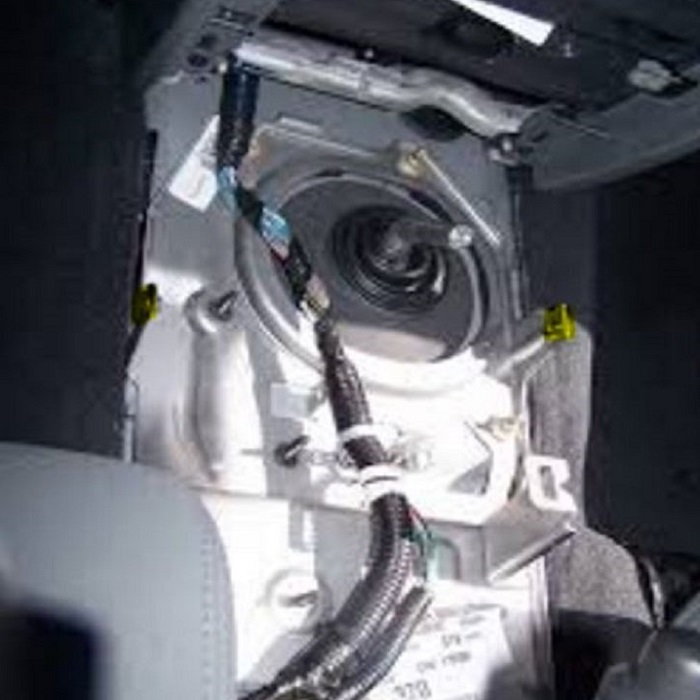
Figure 1. There are two T30 bolts on either side of the console cover. Remove all four. 
Figure 2. Remove transfer case shifter knob by turning and pulling up at the same time. 
Figure 3. Open and remove the lower dash cover plate in front of the gear shift.
- Use a flat head screwdriver to pop up the gear shift rubber boot from the bottom. Push the rubber boot into the cavity opened up when you removed the dash panel.
- Remove the top center black console cover to expose the wiring harness for the rear power windows.
- Disconnect the wiring harness.
- Remove the rest of the console unit by sliding it up and over the emergency brake handle. If you can't clear it, try pulling up further on the brake handle.
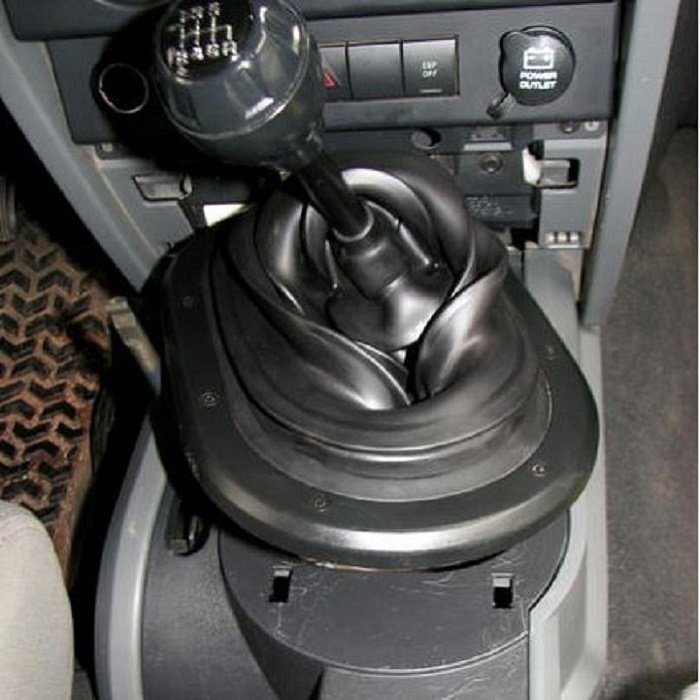
Figure 4. Use a flat head screwdriver to pry up the bottom of the gear shift boot. 
Figure 5. Pop up and remove the top center console cover to expose the rear power widow wiring harness. 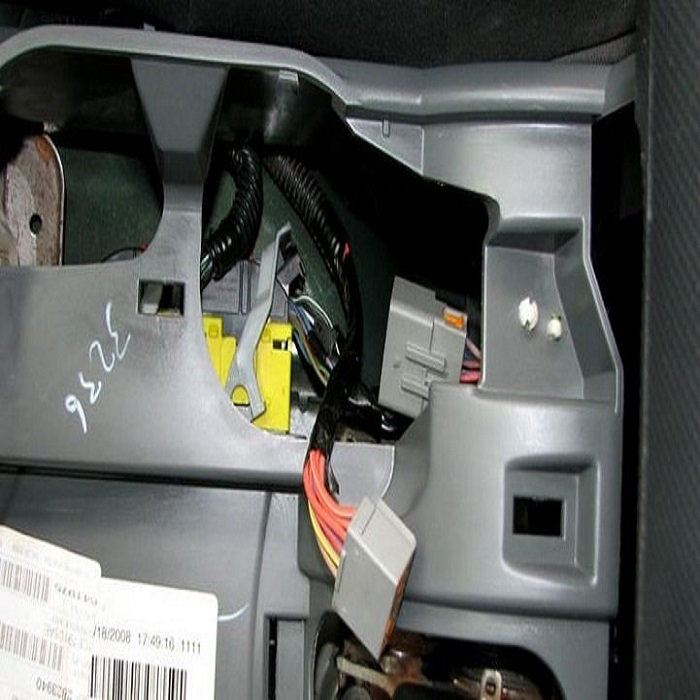
Figure 6. Disconnect the wiring harness for the rear power windows.
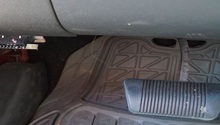
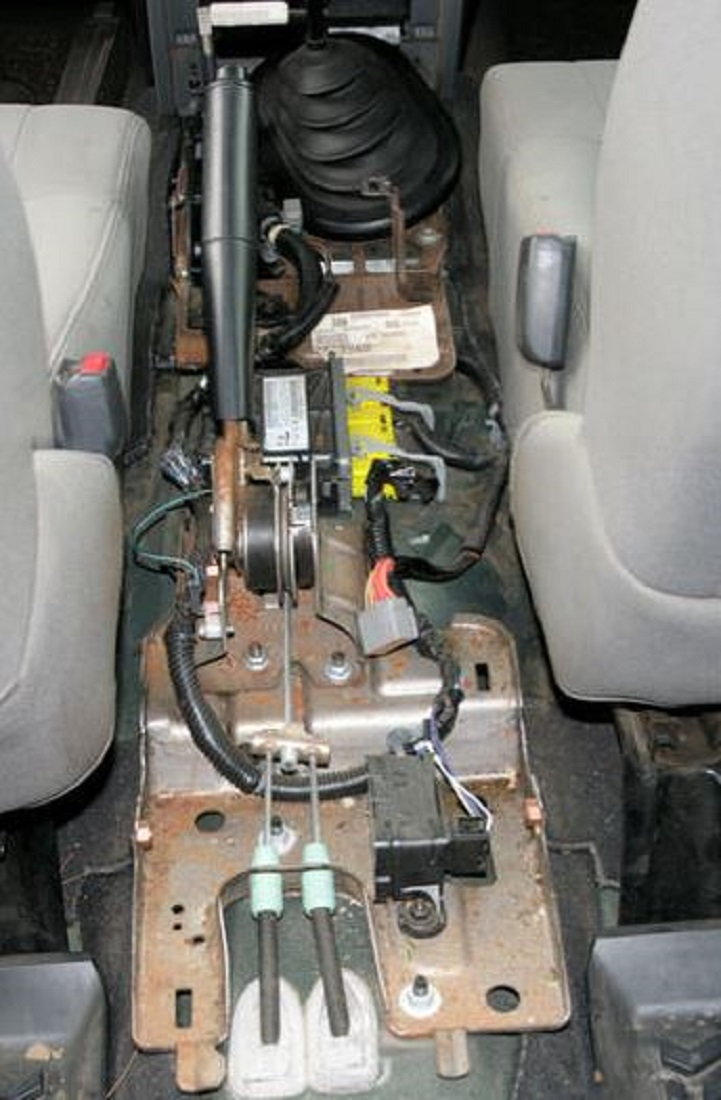
With all of that done, the center console should be free to be removed. You may have to rotate it up and around the e-brake handle to help clear it. The end result should leave your interior looking like the image below.
Step 2 – Remove or replace the bad transfer bushing
The problem you are experiencing is likely from a bad bushing on the transfer case shift linkage. Yours may be split, or completely missing because it crumbled away. Remove the broken pieces and replace with a new one. A new bushing will likely cost you less than a buck with tax.
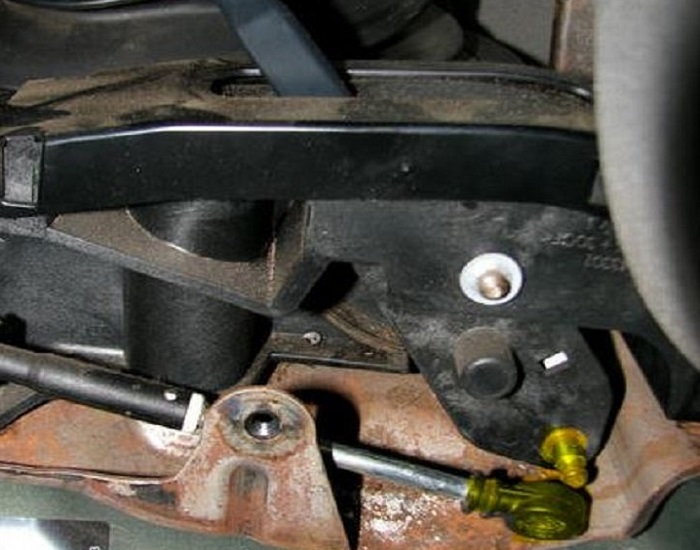
Figure 8. The bushing is completely missing in this picture. 
Figure 9. This is the plastic bushing that keeps breaking. 
Figure 10. The replacement bushing will set you back less than one dollar.
Step 3 – Install the new bushing
Hopefully you only have an issue with the bushing at the shifter and not underneath as well. You may want to be proactive and replace the lower linkage bushing as well. The lower linkage is well obstructed by the drive shaft and flange connection at the transfer case under the Jeep about at the midpoint of the driver's door. It is a real bear to get to, but luckily, this is not the common area of failure.

Figure 11. Clean up the old bushing debris from the working area and prepare to install the new bushing on the linkage arm first. 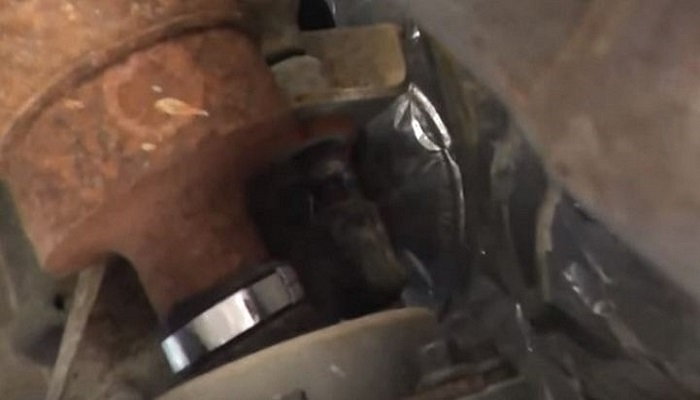
Figure 12. The lower linkage and bushing is well hidden behind the drive shaft and flange at the transfer case end under your Jeep.
The new bushing should snap right in place in the linkage arm without much fuss. If you don't feel and hear the click, you may need to use some pliers to snap it into place. Do the linkage arm first and then connect it to the pin.

Figure 13. Insert the new bushing in the linkage arm first. It should snap right in place without the use of any tools. 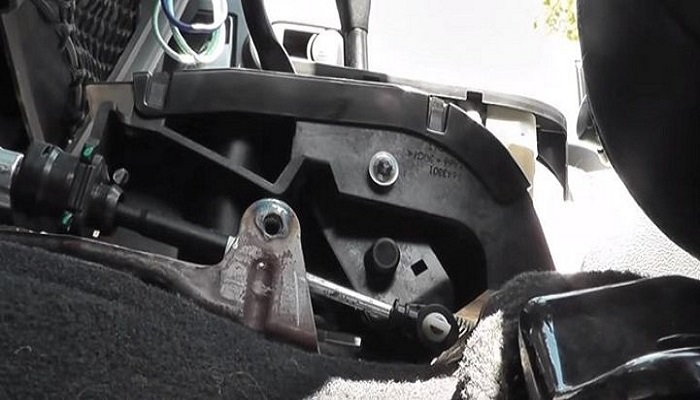
Figure 14. Once you have the bushing snapped into the linkage arm, the assembly should snap right into place on the pin or post.
Pro Tip
Because this is a common failure, many JK owners not only keep some replacement bushings in the glove box, they also will cut a flap in the side of the console cover to allow quick and easy access to the area. This will enable the repair to be completed in about five minutes.
Featured Video: Jeep Transfer Case Linkage Repair
Related Discussions
- Another Man's Shift Linkage Repair - JK-Forum.com
- Transfer Case Shifter Linkage Cable Retaining Clip NOT Retainer Bushing - JK-Forum.com
- Transfer Shifter Loose? - JK-Forum.com
- Transfer Case Linkage Issues - JK-Forum.com