Jeep Wrangler JK: How to Replace Air Filter
The Wrangler's air filter is easy to access. It's right up in front under the hood, and you can change the filter--even on a rocky trail--in 15 minutes.
This article applies to the Jeep Wrangler JK (2007-Present).
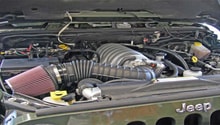
Your Jeep 3.8 EGH or 3.6 Pentastar engine is an efficient and powerful air pump. It draws air from under the upper-right front of the hood, mixes that air with gasoline and compresses as well as burns the volatile mixture. The vigorous combustion force drives the wheels and the hot, spent mixture is cleaned of contaminants and pumped out the exhaust. To protect the engine, the outside air is filtered. But when the filter begins to clog, it chokes off some of the incoming air; the combustion force is reduced and your Jeep loses power.
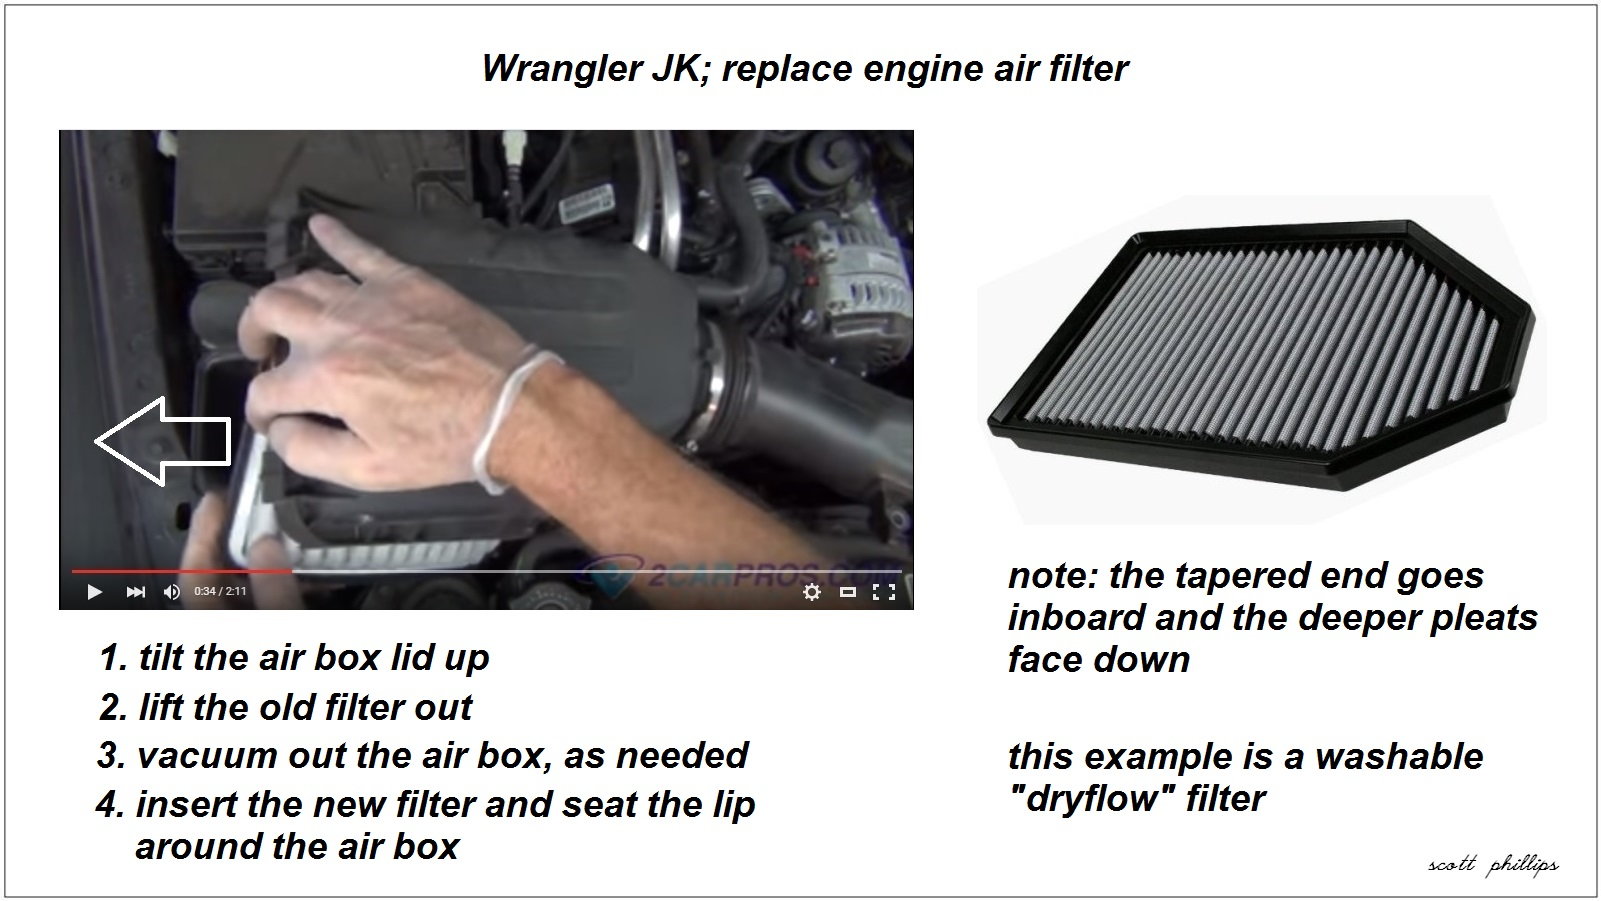
The Jeep's maintenance manual prescribes changing the filter every 30,000 miles, but dusty off-roading can clog the filter very quickly. The OEM Jeep filter is part number 68257791AA, and every auto parts store has several filter choices as well. Aftermarket filters may be made of disposable paper for economical single-use, or long-lasting, washable fabric. However, most Wrangler owners have found that the oiled, reusable filters clog very quickly in dust and dirt; and should be avoided for off-roading. Fortunately, there are several non-oiled "dryflow" filters on the aftermarket, which are of good quality and washable. In either case, look for a filter with a rubber lip to seal the air box tightly and keep out destructive dirt.


Materials Needed
- Engine air filter
- 10mm socket wrench
- Mechanic's gloves
- Shop vac (optional)
- Flashlight
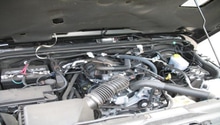
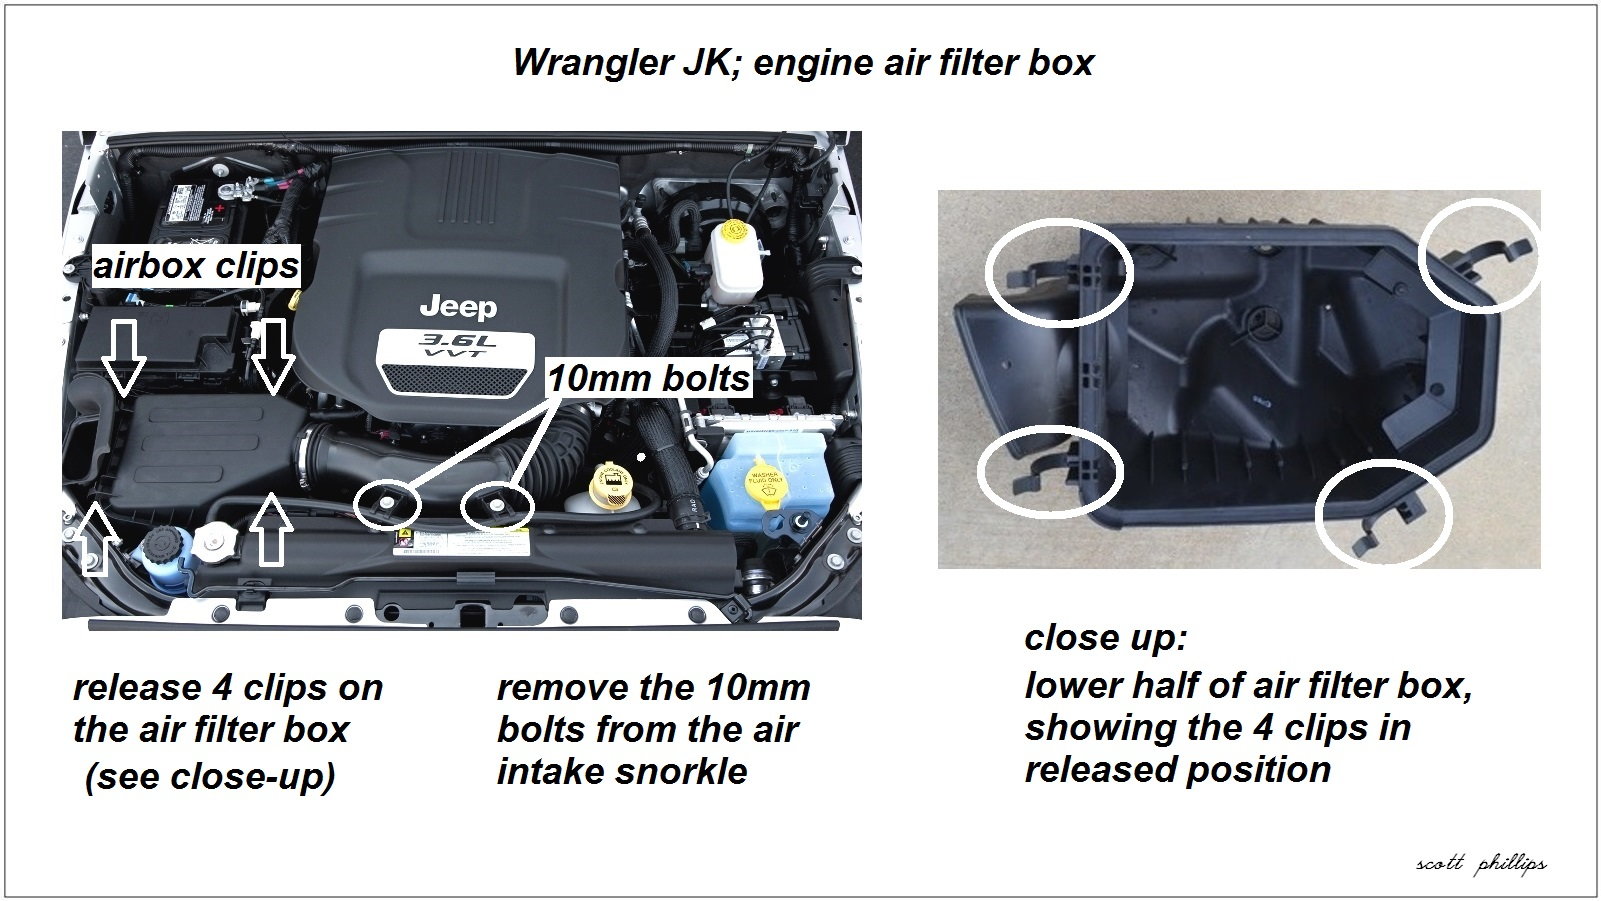
Step 1 – Open the engine air filter box
Caution: Do this work after the engine has cooled.
- Reach down around the four corners of the air box and unsnap the four clips that hold the top of the box on. Push the clips outwards at the top. See Figure 2 below for a close-up view of the clips.
- Use the 10mm wrench to remove the two bolts that fasten the air intake snorkle to the radiator shroud. This is to allow the air box lid greater movement.
Pro Tip
Wear mechanic's gloves to protect your hands from rough or sharp edges.
Step 2 – Remove and replace the air filter
- Lift the air box lid and tilt it upward by flexing the intake snorkle.
- Lift out the old air filter.
- Vacuum the dirt out of the bottom of the air box, if needed.
- Install the new air filter with the pleats facing down and the tapered end inboard.
- If the old filter appears fairly clean, perform the flashlight test in Step 3.
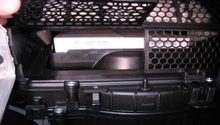
Step 3 – Air filter contamination flashlight test (optional)
Hold a bright LED flashlight under the new air filter and note how much light passes. Then do the same with the old filter and see how it restricts light passage. The light restriction is a fair comparison to the airflow it restricts and helps in judging how contaminated the filter is. In the picture below, see the comparison between the new filter and the very dirty filter. Note how the dirt and oil vapor change the bright blue-white LED to dim green.

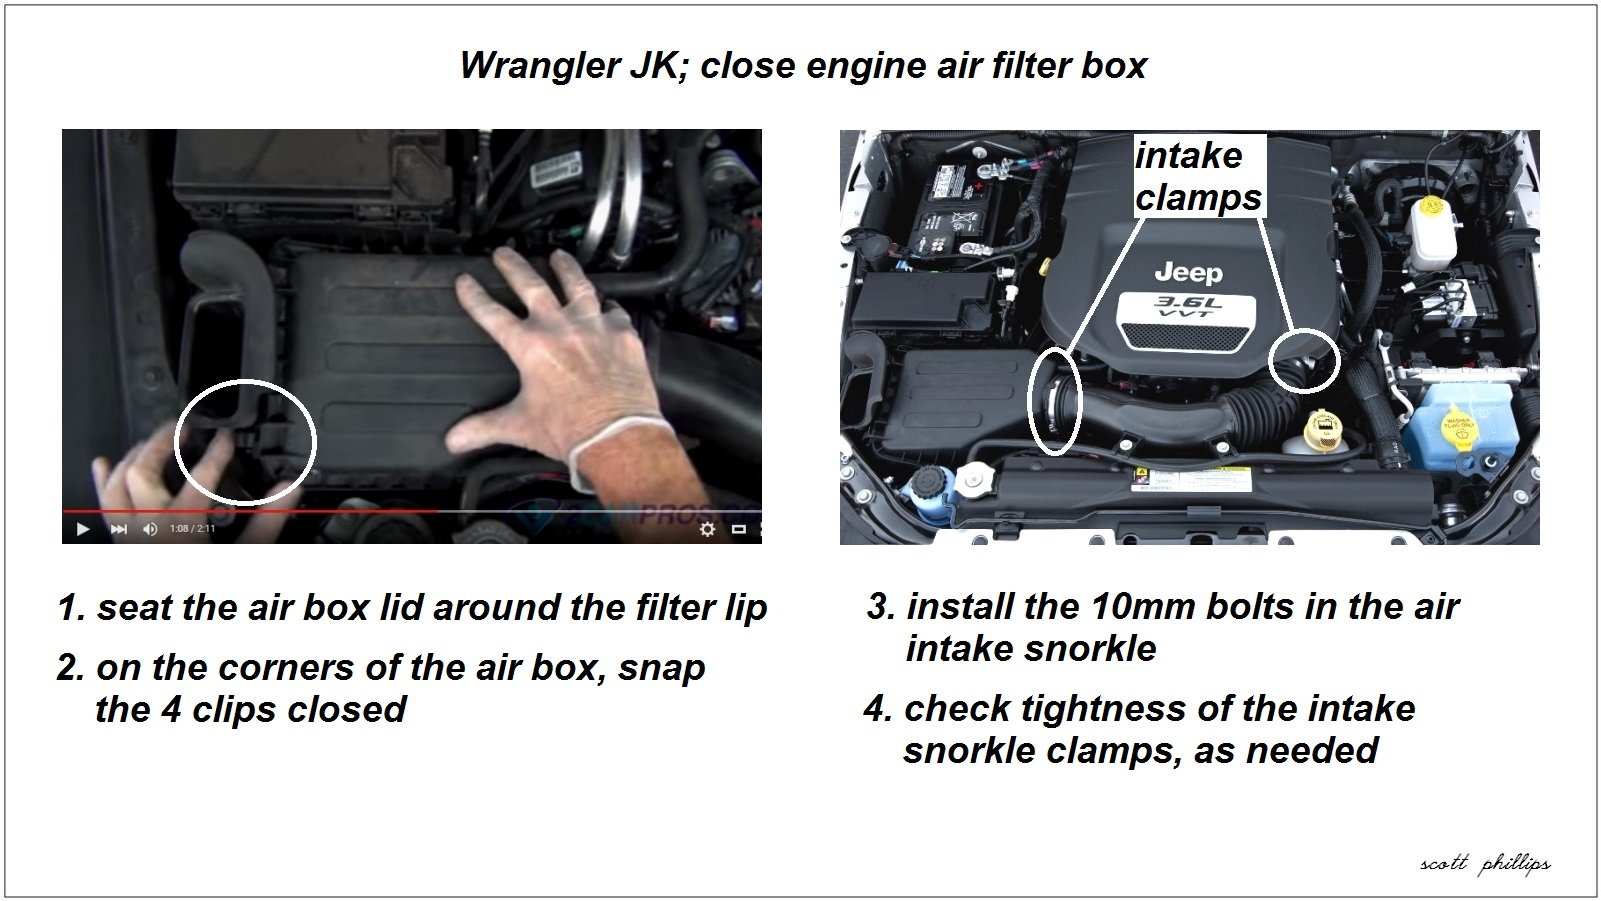
Step 4 – Close the engine air filter box
- Snug the air box lid down around the lip of the new air filter and ensure that it is seated.
- Close the four clips on the corners of the air box.
- Install the two bolts that fasten the intake snorkel to the radiator shroud.
- Using the 10mm wrench, check the tightness of the intake snorkle clamps.
Pro Tip
Tug lightly on the air box lid to test it for security and ensure that the four clips remain tight.
Step 5 – Air leak and MIL fault check
Start the engine and let it idle. Ensure the multi-function indicator lamp (MIL) is out. Then listen near the air box and intake duct for the whistle or hiss of an air leak. If you hear an air leak, recheck the seating of the filter's rubber bead in the air box and that the lid is on tight. Also, insure that the intake clamps are tight.
Pro Tip
An air leak may light the MIL. Once you fix the leak, the MIL can be cleared.
Featured Video: Air Filter Replacement
Related Discussions
- Changing Air Filter - JK-Forum.com
- Best Air Filter Available - JK-Forum.com
- New Air Filter for Pentastar Engine - JK-Forum.com