Jeep Wrangler JK: How to Repair and Replace Parking Brake
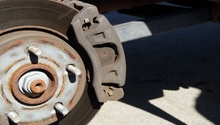
The emergency/parking brake serves as a way to keep your Jeep stationary while parked and as a back-up if a brake failure occurred. It uses a steel cable and brake shoes similar to drum brakes. The brake shoes can only be moved so far by the lever until it no longer contacts the rotor, leading to no braking.
This article applies to the Jeep Wrangler (2007-Present).
When you pull up on your emergency brake lever, the cable pulls the brake pads against the rotor. Like any brake pad, the friction material wears, increasing the distance the pad must move to contact the rotor. This is felt as free play in your emergency brake lever and indicates it's time to adjust or replace the emergency brake pads.

Pro Cost Breakdown
- Adjustment: $100
- Replacement: $200-300
- Parts: $20-100
Materials Needed
- Floor jack
- Jack stands (x2)
- Flat head screwdriver
- Drum brake spring removal tool or needle nose pliers (replacement only)
- 18mm wrench or ratchet/socket (replacement only)
- 19mm socket with 1/2 ratchet (replacement only)
- Flashlight (adjustment only)
- Bungee cord or wire (replacement only)
- Vice grips
- Slide hammer with axle puller attachment or pry bar (replacement only)
- 1/2" torque wrench
- Safety glasses
- Rubber gloves
The parking brake shoe adjustment can be done with only the rear wheel raised; although, the star adjusting wheel is difficult to reach.
The procedure to adjust the parking brake without wheel and brake caliper removal will be covered first.
The factory service manual lists the minimum pad thickness as 1/16" for bonded pads and 1/32" for riveted pads. The inner side of the rotor will have a stamped minimum thickness number that can be compared with a brake rotor micrometers measurement.
Use the following steps when only adjusting the parking brake. If your replacing the parking park shoes, move to Step 4.
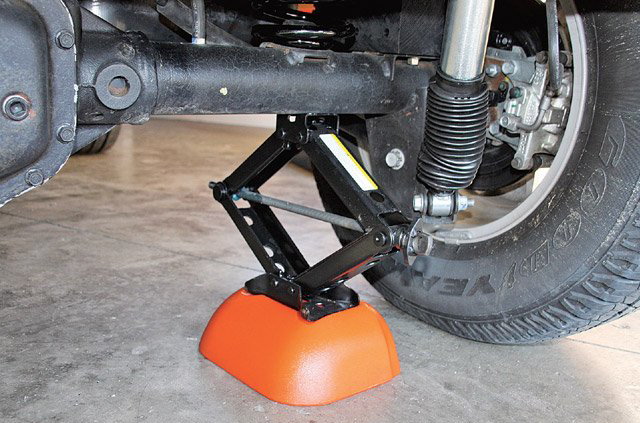
Step 1 – Raise the rear wheels off the ground
Raise the rear wheels with a floor jack using the factory jacking points under the axle tubes. Place jack stands under the jacking points before removing the wheels or crawling under your Jeep. Also, pull the wheels off the car for brake access.
Step 2 – Remove the star wheel access plug
On the back of the brake drum/hub assembly you will see the rubber access plug next to the ABS wheel speed sensor on the backing plate. You may need to disconnect the sway bar end link, depending on how much room you need to work. Remove the plug by prying it out of the backing plate with a pick or flat head screwdriver.
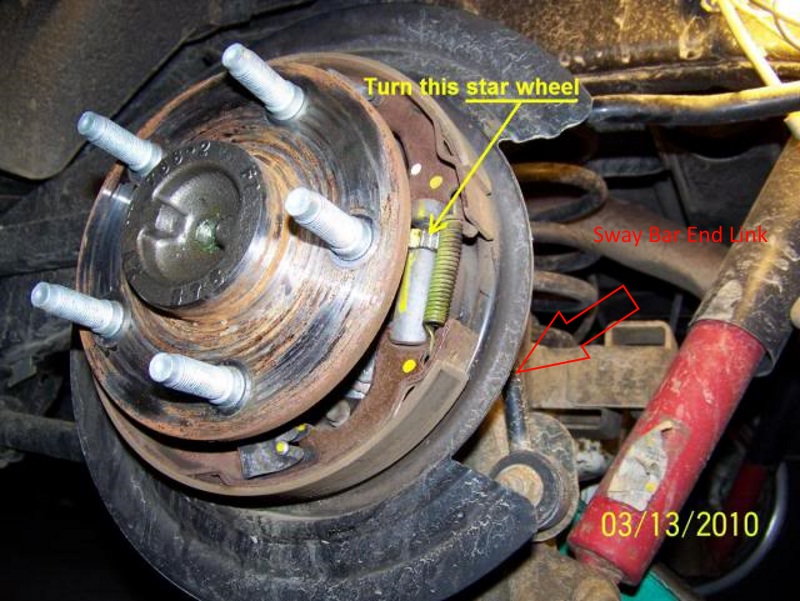
Step 3 – Adjust the star wheel
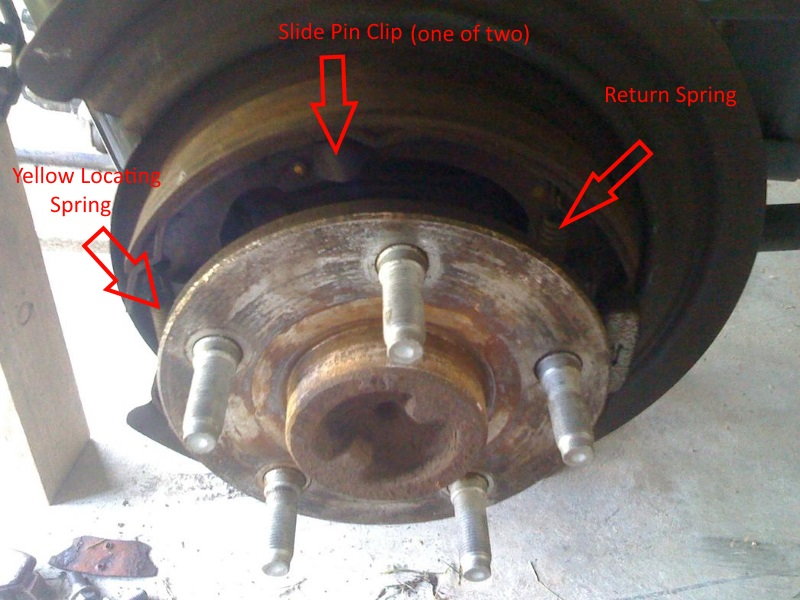
Use a flashlight to locate the star wheel (Figure 2) through the backing plate. You'll need to turn the star wheel with a flat head screwdriver or brake spoon.
These directions are provided assuming your facing towards the front of your Jeep. Adjust the passenger side by turning the star wheel counterclockwise. While turning, rotate your tire feeling for increased resistance. This is the brake shoes contacting the rotor. You'll want to get your brake shoes as close to the rotor as possible without rubbing. Continue adjusting the star wheel (counterclockwise to close the gap, clockwise to open) until the ideal point is reached. Repeat the process for the driver's side, but note that the you'll need to move the star wheel in the clockwise direction to open the gap and the counterclockwise direction to close the gap.
Once the adjustment at the wheels is finished, check the adjustment at your emergency brake handle. You want the parking brake to begin tightening and engage between four and eight clicks. Try moving the parking brake lever to this point, and place your transmission in reverse with your foot on the brake. Slowly release the brake. You should see the rear of your Jeep lift up and not move, indicating your parking brake is holding. Double check the adjustment using a hill.
If your parking brake lever is still out of adjustment (not within the four to eight click window), readjust the star wheel several clicks at each wheel in the appropriate direction. Make sure the brake shoes are not excessively dragging against the wheels. Continued in-operation of the parking brake lever may indicate worn/broken parking brake shoes, rotors, parking brake cable, or parking brake lever assembly.
Step 4 – Remove the caliper mounting bracket
If you do not have an impact wrench, you'll need to loosen the 19mm lug nuts a couple turns with the wheels on the ground. Follow Step 1 for the procedure. Two 18mm bolts hold the caliper mounting bracket to the spindle. Turn them counterclockwise to remove them. Once they're loose, support the brake caliper with a bungee cord or wire to keep pressure off the rubber brake hose.

Step 5 – Remove the brake rotor
The rotor is not fastened to the hub once the wheel lug nuts are removed. Pull outwards on the rotor to remove it. You may need to tap on the "hat" (raised inner section of the rotor) with a hammer to break loose any rust holding it to the wheel studs.

Step 6 – Remove the axle shaft flange
Begin removing the axle shaft flange by removing the four 18mm nuts holding the axle shaft backing plate to the housing. As you begin to remove the shaft, some differential fluid may leak from the axle tube. Raise the axle tube above parallel to the ground to prevent this. Grab the end of the emergency brake cable where it hooks to the eye loop through the backing plate and twist it free with vice grips. To remove the axle shaft from the axle tube, you'll need to pull outward on the axle shaft hub flange. This can be done by hand, with a slide hammer, or a pry bar. Be careful not to damage the tone wheel teeth. Pry in multiple positions against the hub flange to reduce binding in the axle tube and differential.
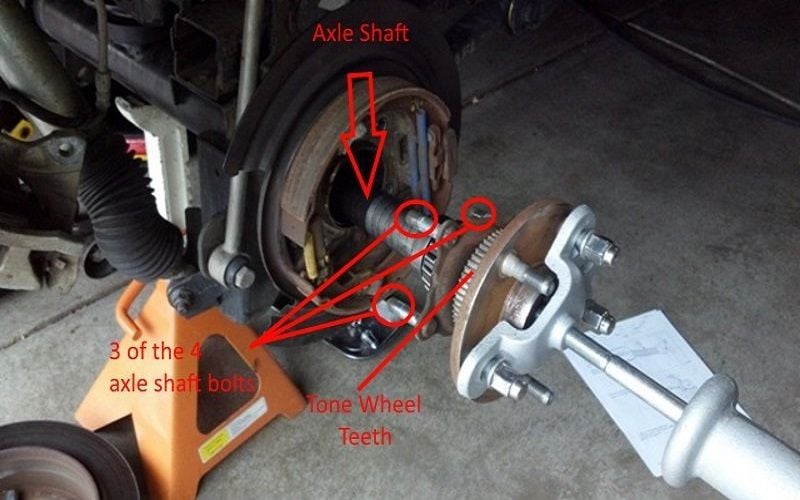
Figure 5. Removing the axle shaft with a slide hammer. 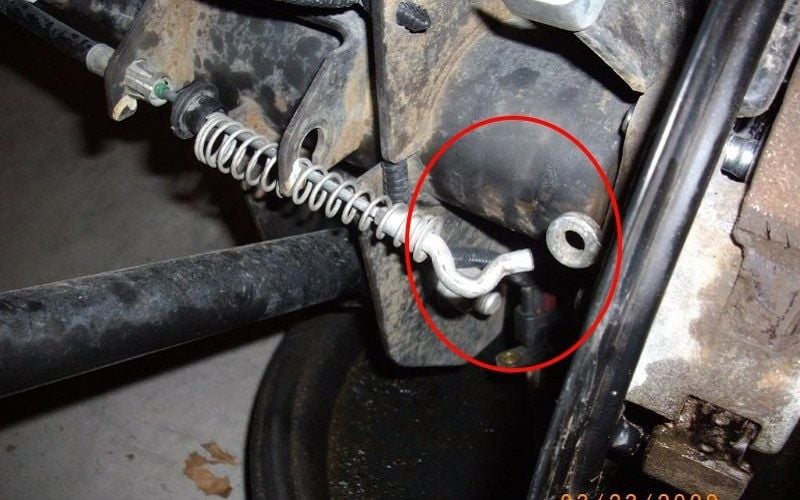
Figure 6. The emergency brake cable eye hook.
Step 7 – Remove the emergency brake pads
Referring back to Figure 2 and using Figure 7, you'll need to locate and remove the two slide pin clips, yellow locating spring, as well as the return spring on the opposite side. The clips can be pulled off the pins with a flat head screwdriver. The springs can be removed with needle nose pliers or a drum brake spring removal tool. Wiggle the pads free from the backing plate.
Step 8 – Install the new emergency brake pads
Set the new pads against the backing plate, making sure the pad notches fit into the star wheel adjustment mechanism and backing plate pad stop. Install the yellow locating spring, and then the return spring. Move the pads over the slide pins and install the clips.
Step 9 – Reinstall
Carefully slide the axle shaft back into the axle tube. Torque the four axle shaft nuts to 75 ft. lbs. Re-install the parking brake cable eye hook. Install the rotor back onto the axle, and then the caliper bracket. Torque the two caliper bracket bolts to 75 ft. lbs. Reinstall your wheel and torque the lug nuts to 100 ft. lbs.
Related Discussions
- Parking Brake Change - JK-Forum.com
- Have You Seen Inside of Your Parking Brake - JK-Forum.com
- Finally Found Parking Brake Adjustment - JK-Forum.com