
Project Delta

Thread Starter
JK Super Freak
Joined: Nov 2008
Posts: 1,680
Likes: 6
From: St. Louis, MO
Background
I've owned 4 Jeeps before my current JK. A '87 4 cylinder YJ, a 87' 6 cylinder YJ, a 1996 XJ Sport, and a 2008 JKU Rubicon. My Rubicon was the first time I did any seriously hard core mods to a Jeep. 2 1/2" Teraflex lift. ARB front bumper with winch. Expedition One rear bumper with tire carrier. 315/75R17 Goodyear Wrangler DuraTracs. I the vehicle just about tuned to perfection for my needs and loved every minute of owning it. Unfortunately about 4 years ago, almost to this week, I was involved in a head on collision that totaled out my JK. So now, I'm starting over and using what I learned to build a better Jeep.
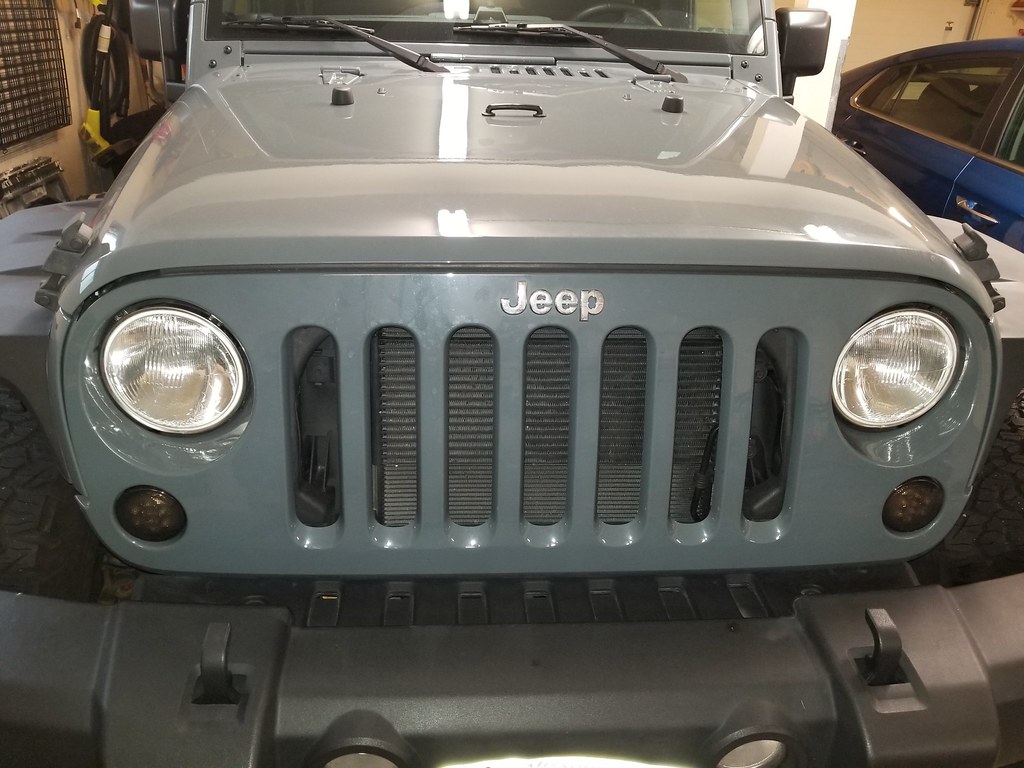
Project Delta Goals
As with any long term project it's a good idea to set clear and specific goals for it before you begin. My goals for this JK are to keep the ride as near factory as I can, keep my center of gravity low, and still be able to clear most parking garages. I want the parts I select to complement the look of the Jeep, not just draw attention. I also don't want to spend money for the same parts twice so I'm doing my best to be dilligant in slecting parts.
I also want to keep the Jeep as practical as possible as it is a daily driver. This means no extreme gear ratios, no giant tires, and a decent stereo system for long drives.
Components List
Items in red have been completed and installed.
Items in green are on order or awaiting installation.
Items in blue are planned.
Factory Equipment
2015 Wrangler JK Unlimited
- Rubicon Edition
- Anvil w/ Charcoal Interior
- 3.6L Pentastar
- Dana 44's Front and Rear with 3.73 Gears
- Heated Cloth Seats
- Remote Start
- Freedom Top
- Power Convience Group
Armor and Body
Rugged Ridge Tail Light Guards
MOPAR sill guards
Rugged Ridge Hurricane Flat Fenders
LoD Signature Mid-Width Front Bumper
LoD Destroyer Full Width Rear Bumper w/ Tire Carrier
Suspension, Tires, and Drive Train
TeraFlex Leveling Kit
TeraFlex Sport ST2 Suspension
Falcon 2.1 Monotube Shocks
Vision Raptor 17x9 -12mm Wheels
BF Goodrich 315/70R17 All Terrain KO2's
4.56 Yukon Gears Front and Rear
Electronics and Commo
Superchips TrailCal
Gentex 453 Autodimming Mirror
Apollointech 6 Switch Pod
Cobra 75 WXST CB
FireStik Firefly 4' Antenna
Car Audio
Pioneer AVIC-7100NEX Head Unit
Alpine PDX-V9 Amp
SiriusXM SXV300v1 Connect Vehicle Tuner
Focal PS165V Component Front Speakers
Focal PS165V Component Rollbar Speakers
JL Audio CP110LG-TW1 Subwoofer
SunroadTek CCD 18 LED Night Vision Backup Camera
iDataLink Maestro ADS-MRR Vehicle Interface Module
Rugged Ridge CB/AM/FM Antenna Mount Kit
Passenger Under-Seat Amp Rack
Recovery and Misc Parts
Seat belt anti-flapping mod
Rugged Ridge Front and Rear Floormats
MOPAR Trunk Mat
MOPAR Freedom Top carrier bag w/ carabineer mod
Rugged Ridge fire extinguisher rollbar mount w/ Kiddie Class A/B extinguisher
Rugged Ridge upper dash mount
Wild Boar style grab handles (front and rear)
Blindspot Mirrors
Tuffy Conceal and Carry Drawer
Custom Qi Wireless Charger on RAM Mount
JL Hood Latches
XG Cargo Gama Saddlebags
Badlands ZXR 12,000lbs Winch w/ Warn Interrupt Kit
I've owned 4 Jeeps before my current JK. A '87 4 cylinder YJ, a 87' 6 cylinder YJ, a 1996 XJ Sport, and a 2008 JKU Rubicon. My Rubicon was the first time I did any seriously hard core mods to a Jeep. 2 1/2" Teraflex lift. ARB front bumper with winch. Expedition One rear bumper with tire carrier. 315/75R17 Goodyear Wrangler DuraTracs. I the vehicle just about tuned to perfection for my needs and loved every minute of owning it. Unfortunately about 4 years ago, almost to this week, I was involved in a head on collision that totaled out my JK. So now, I'm starting over and using what I learned to build a better Jeep.
Project Delta Goals
As with any long term project it's a good idea to set clear and specific goals for it before you begin. My goals for this JK are to keep the ride as near factory as I can, keep my center of gravity low, and still be able to clear most parking garages. I want the parts I select to complement the look of the Jeep, not just draw attention. I also don't want to spend money for the same parts twice so I'm doing my best to be dilligant in slecting parts.
I also want to keep the Jeep as practical as possible as it is a daily driver. This means no extreme gear ratios, no giant tires, and a decent stereo system for long drives.
Components List
Items in red have been completed and installed.
Items in green are on order or awaiting installation.
Items in blue are planned.
Factory Equipment
2015 Wrangler JK Unlimited
- Rubicon Edition
- Anvil w/ Charcoal Interior
- 3.6L Pentastar
- Dana 44's Front and Rear with 3.73 Gears
- Heated Cloth Seats
- Remote Start
- Freedom Top
- Power Convience Group
Armor and Body
Rugged Ridge Tail Light Guards
MOPAR sill guards
Rugged Ridge Hurricane Flat Fenders
LoD Signature Mid-Width Front Bumper
LoD Destroyer Full Width Rear Bumper w/ Tire Carrier
Suspension, Tires, and Drive Train
TeraFlex Sport ST2 Suspension
Falcon 2.1 Monotube Shocks
Vision Raptor 17x9 -12mm Wheels
BF Goodrich 315/70R17 All Terrain KO2's
4.56 Yukon Gears Front and Rear
Electronics and Commo
Superchips TrailCal
Gentex 453 Autodimming Mirror
Apollointech 6 Switch Pod
Cobra 75 WXST CB
FireStik Firefly 4' Antenna
Car Audio
Pioneer AVIC-7100NEX Head Unit
Alpine PDX-V9 Amp
SiriusXM SXV300v1 Connect Vehicle Tuner
Focal PS165V Component Front Speakers
Focal PS165V Component Rollbar Speakers
JL Audio CP110LG-TW1 Subwoofer
SunroadTek CCD 18 LED Night Vision Backup Camera
iDataLink Maestro ADS-MRR Vehicle Interface Module
Rugged Ridge CB/AM/FM Antenna Mount Kit
Passenger Under-Seat Amp Rack
Recovery and Misc Parts
Seat belt anti-flapping mod
Rugged Ridge Front and Rear Floormats
MOPAR Trunk Mat
MOPAR Freedom Top carrier bag w/ carabineer mod
Rugged Ridge fire extinguisher rollbar mount w/ Kiddie Class A/B extinguisher
Rugged Ridge upper dash mount
Wild Boar style grab handles (front and rear)
Blindspot Mirrors
Tuffy Conceal and Carry Drawer
Custom Qi Wireless Charger on RAM Mount
JL Hood Latches
XG Cargo Gama Saddlebags
Badlands ZXR 12,000lbs Winch w/ Warn Interrupt Kit
Last edited by Skippman; Jul 20, 2020 at 11:55 AM. Reason: Updated Parts
Thread Starter
JK Super Freak
Joined: Nov 2008
Posts: 1,680
Likes: 6
From: St. Louis, MO
Car Audio Mods
The first thing I wanted to do to the JK was something I didn't do on my last build, namely replace the entire audio system. I decided against ordering the factory navigation or upgraded speakers this time around knowing in advance I'd be gutting it. Originally I attempted to use an off brand Android based head unit loving the flexibility of being able to install any app I wanted. Torque worked great, MP3 playback was fine, and it booted in a reasonable time.
Then I added an amp.
The outputs on the Android head unit were terribly noisy. Nothing we could do would fix this issue. We tried different RCA cables, different outputs, adjusting the gains... nothing would make the noise go away. Finally, I got fed up. The steering wheel integration was spotty, the menu's could be difficult to navigate whilst driving, and the noise was just a deal breaker.
So instead I opted to listen to mattk11 and go with a Pioneer AVIC-4100NEX. I opted to go one model higher than his recommendation (an AVIC-7100NEX) as I wanted GPS that wasn't cellphone dependent which has proven to be a good choice in some of the rural back areas of Missouri. This was mated to an iDataLink Maestro unit to allow me to retain my factory steering wheel controls. These work flawlessly. From the AVIC we connected a SiriusXM radio tuner and spliced in the factory satellite antenna rather than running a whole new one. This also has worked flawlessly.
For amplification I decided to go with an Alpine PDX V9, having had good luck with the PDX series in previous vehicles. This was mounted to an aluminum bracket under the passenger seat which also acts as a pseudo heat sync for amp. From the PDX we go out to matching sets of Focal PS165V 6 1/2" component speakers. These were installed in the factory locations which were dynamatted to stiffen the enclosures. Since my year JK has ditched the "tombstones" installing the tweeters was a snap.
For a subwoofer I chose to go with a JL Audio CP110LG-TW1 10" Subwoofer. I would have preferred to use one of Mattk11's underseat boxes but between my Tuffy security drawer and the amp rack there simply wasn't the room. I chose the JL sub because it came preinstalled in it's own tuned box and had sockets for banana plugs. I have mine in the trunk of the JK laying flat on the floor. If I need to remove it I simply disconnect the banana plugs, roll up the cable, and remove the subwoofer. I also added an Alpine base control knob under the dash to allow me to adjust the subwoofer for top off, windows open diving vs sealed up.
All in all I've been extremely happy with my setup. Audio quality is great, the steering wheel controls work, I can play back pretty much any type of media, and it's almost completely stealth, minus the subwoofer of course.
Thread Starter
JK Super Freak
Joined: Nov 2008
Posts: 1,680
Likes: 6
From: St. Louis, MO
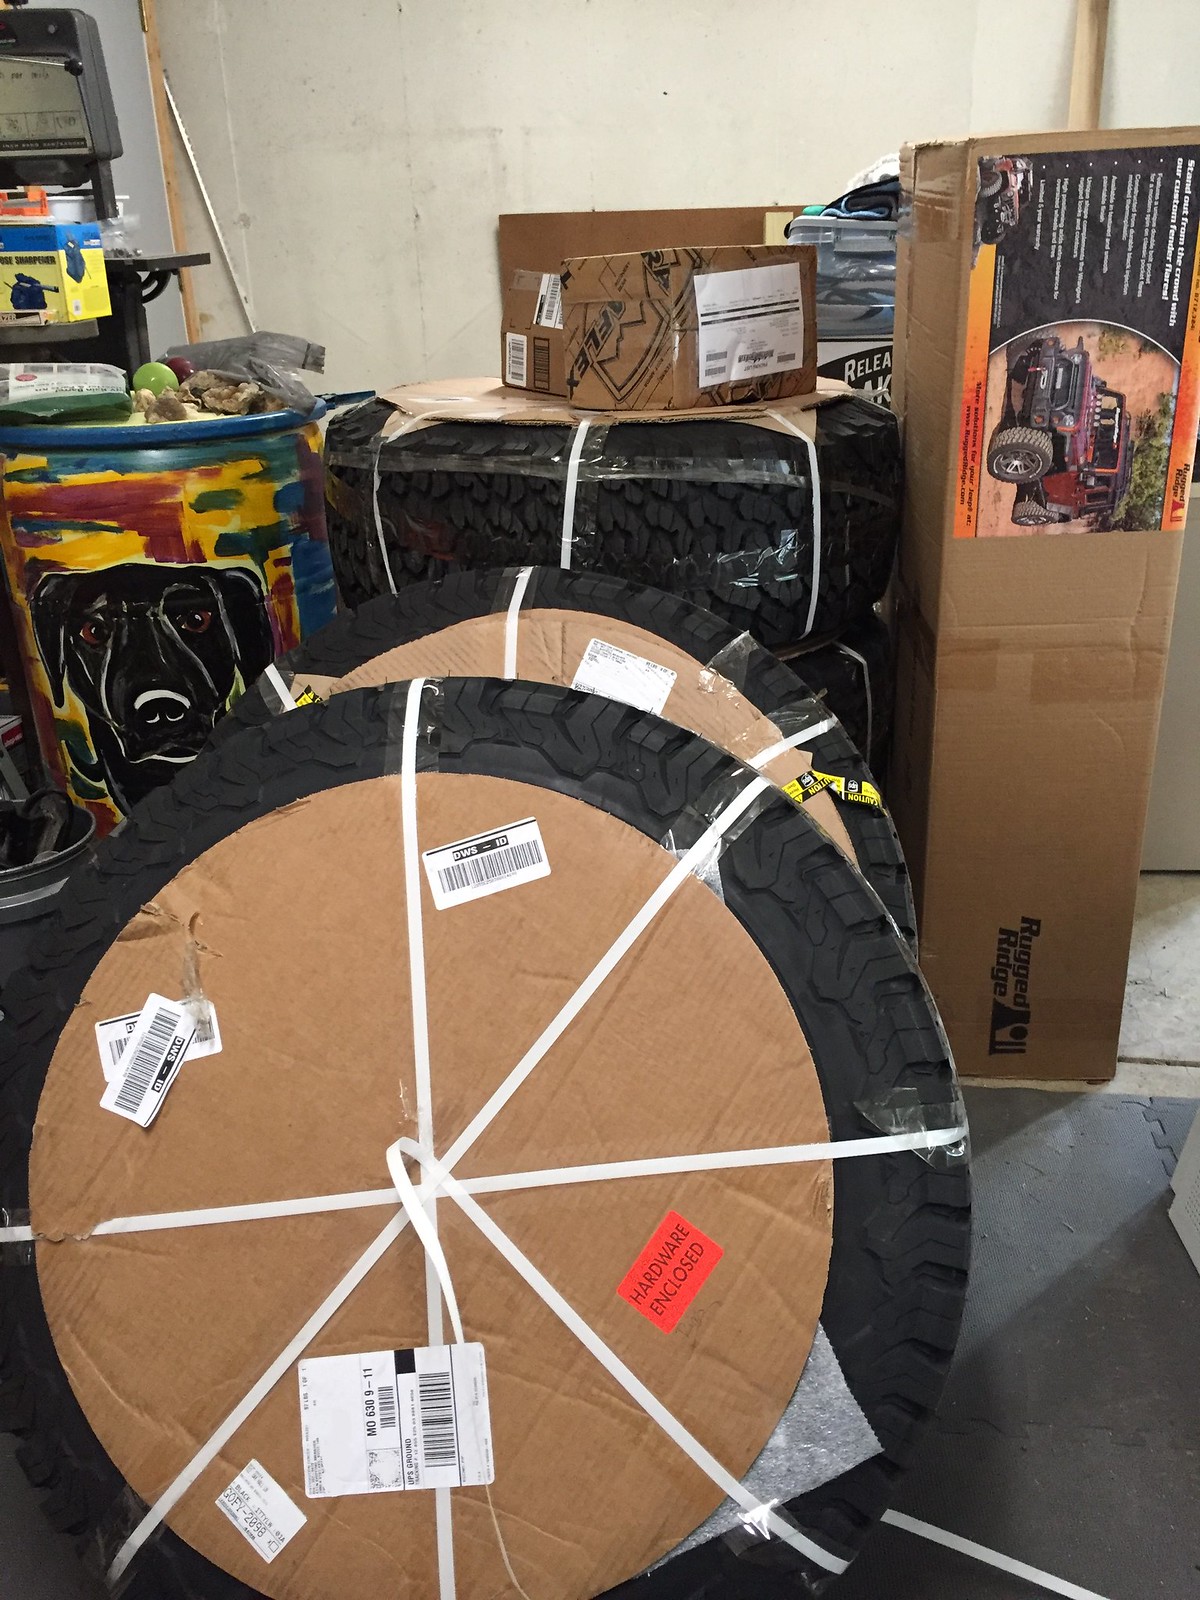
So it's starting to look like Jeepmas in the garage here at Casa-De-Skip.
5 x 315/70R17 BF Goodrich KO2's in load range C
5 x 17" Vision Raptor Wheels
20 x Gorilla Black Lugnuts
5 x Gorilla Black Locking Lugnuts
Teraflex JKU Leveling Kit
Rugged Ridge Hurricane Flat Fenders
MBRP 35" Spare Tire Relocation Bracket
Based on numerous conversations with forum members here as well as a couple other fellow Jeepers I've decided to go with a low center of gravity build. In order to clear my new 35" tires I've decided to go with a Teraflex leveling kit. This should give me 2" more clearance in the front and 1" more in the back. I know that's not enough to clear the tires at flex so I've also added in a set of Rugged Ridge Hurricane flat fenders. I love their look and they should allow me to clear at full flex.
I also added in a MBRP spare tire bracket to allow me to carry the spare on the factory carrier. This is a stop gap solution as I plan to eventually replace the rear bumper with a LoD Destroyer with tire carrier. I also need to order my Trail Dash 2 from Superchips to reprogram the ECU for the new tire size. I plan to start the install sometime around the 9th of June and should have the rest of the parts by then.
Last edited by Skippman; May 25, 2017 at 08:33 AM.
Thread Starter
JK Super Freak
Joined: Nov 2008
Posts: 1,680
Likes: 6
From: St. Louis, MO
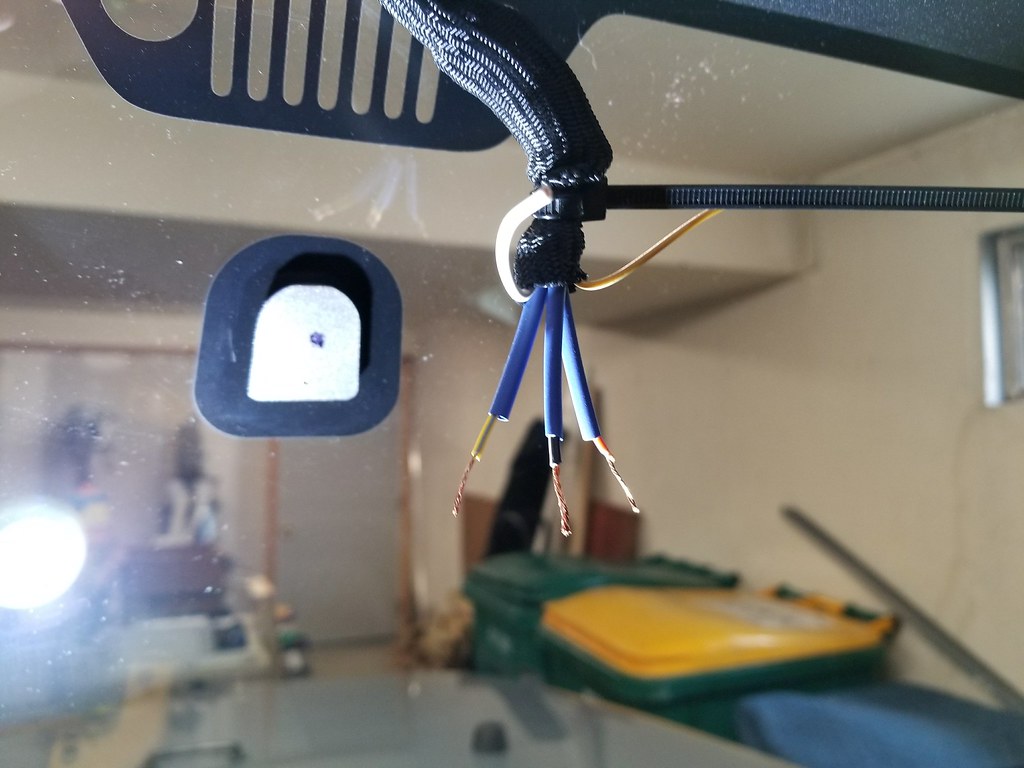
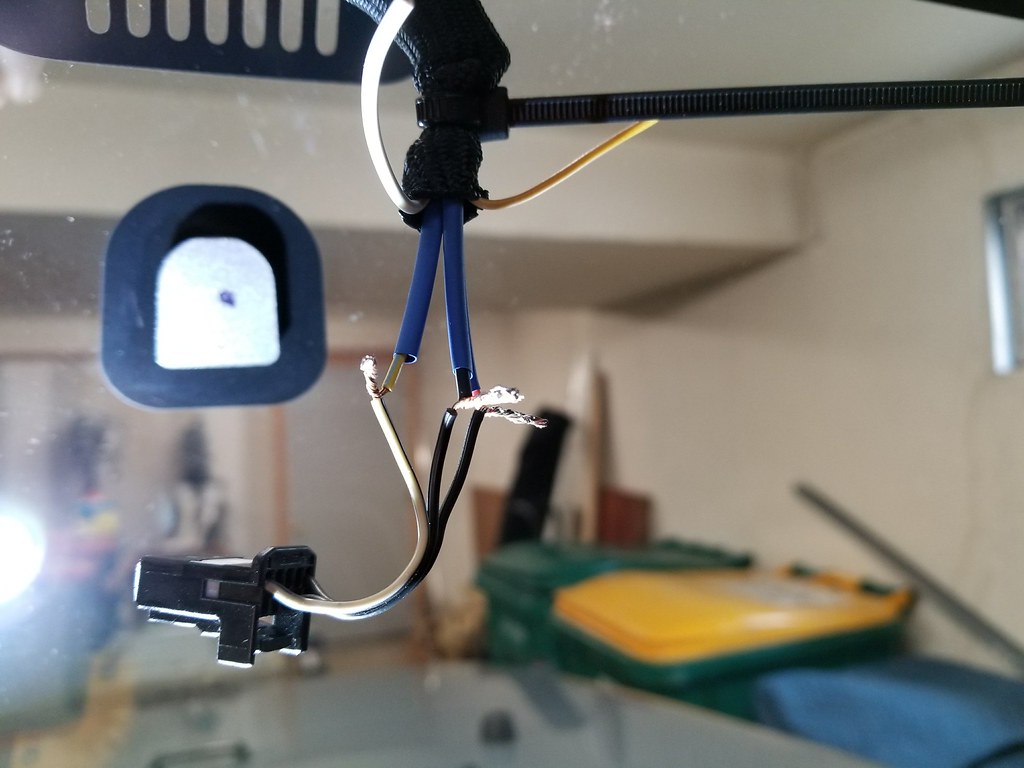
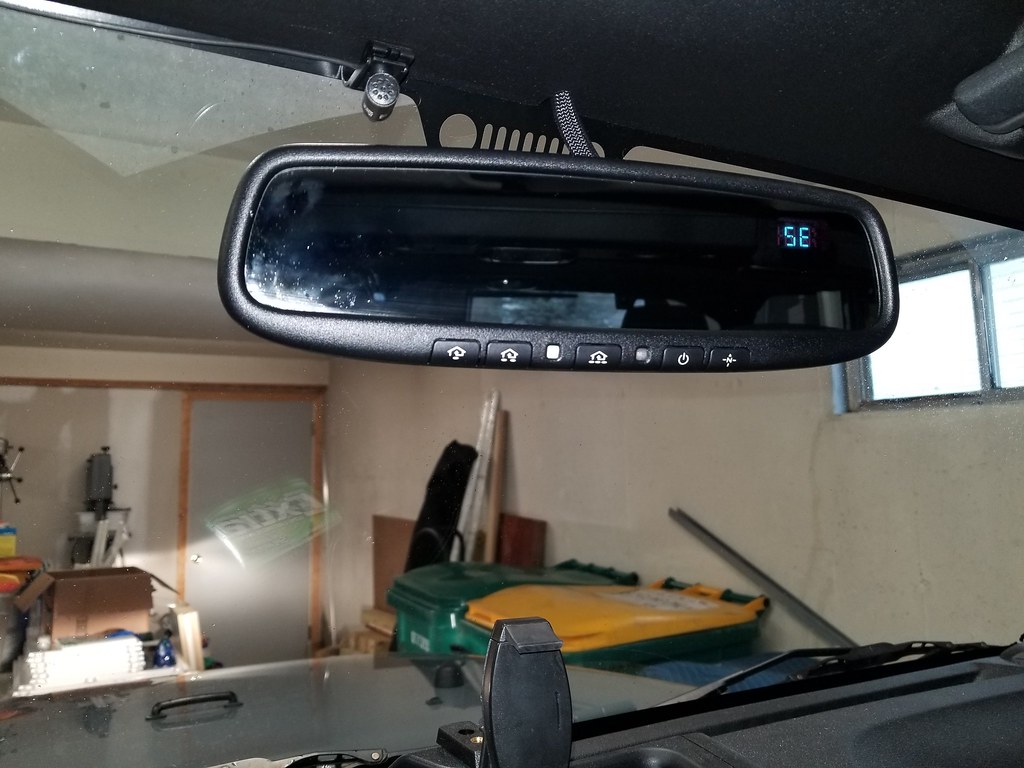
Here's a couple pics from some work I did on my JK last weekend. I removed the factory autodimming rearview mirror and replaced it with a Gentex 453 HomeLink autodimming mirror with compass.
I removed the factory mirror, cut the wiring harness and stripped back the leads. I put heat shrink over them and soldered on the new mirrors connections and heat shrunk them. I then pulled the factory expandable loom back down and tapped it closed.
I think I did a pretty decent job making it look factory.

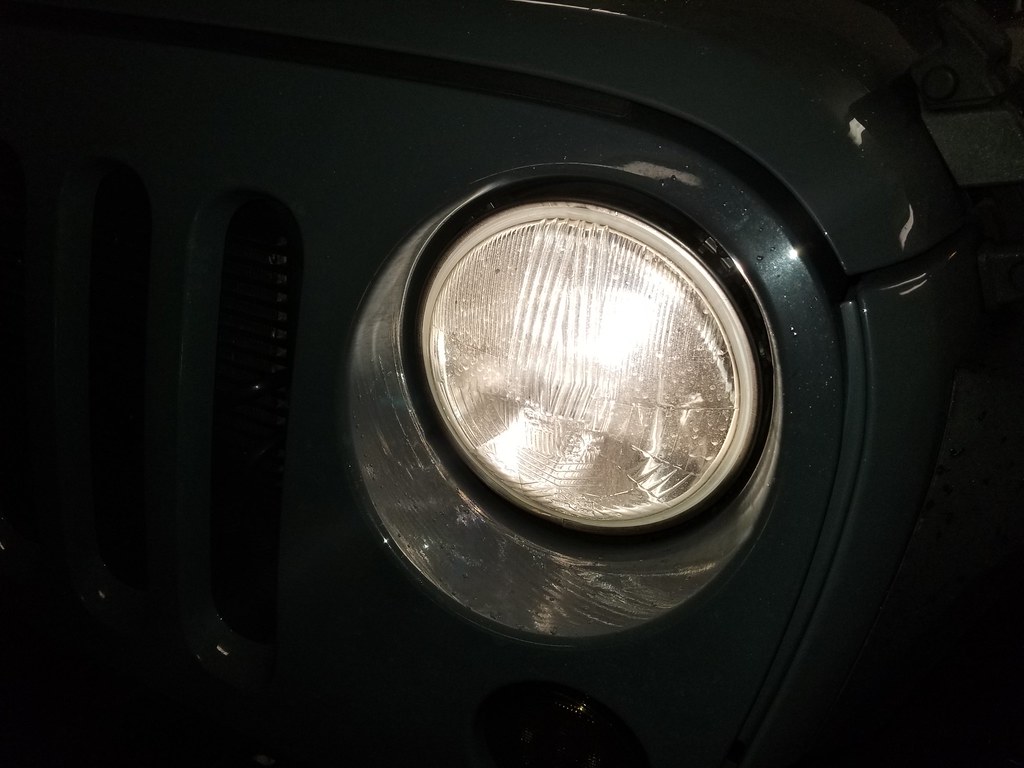
I also replaced my headlights. I'm now using Cibie lenses with Philips H4 bulbs. These are connected to the factory harness using a set of KC H12 to H4 adapter pigtails. I also added the MOPAR horizontal adjustment screws, which were a real bitch to put in. The light output is phenomenal and the eCode light pattern is amazing!

I removed the factory mirror, cut the wiring harness and stripped back the leads. I put heat shrink over them and soldered on the new mirrors connections and heat shrunk them. I then pulled the factory expandable loom back down and tapped it closed.
I think I did a pretty decent job making it look factory.
I also replaced my headlights. I'm now using Cibie lenses with Philips H4 bulbs. These are connected to the factory harness using a set of KC H12 to H4 adapter pigtails. I also added the MOPAR horizontal adjustment screws, which were a real bitch to put in. The light output is phenomenal and the eCode light pattern is amazing!
Thread Starter
JK Super Freak
Joined: Nov 2008
Posts: 1,680
Likes: 6
From: St. Louis, MO
So my new LoD Destroyer Full Width rear bumper with Tire Carrier came in the other day and has been sitting in my garage. I would have started the install a week ago but looking at the directions presented me with a concern. Namely that if I wanted to add backup lights I would ideally want to install them before mounting up the bumper to the rear of the JK due to how the light mouting plates attach to the bumper.
After doing quite a bit of searching, resarch, and reading I've decided to go with a set of 90deg LED flush mount pods from Super Bright LED's here in St. Louis. They come powder coated, are IP67 rated, throw 1440 lumens each, use 6 CREE LED's, and come prewired with DT connectors which should make them plug and play. Plus they're backing them with a lifetime warranty which I hopefully won't need.
Installing the lights made me consider how I wanted to power them, and how I wanted them to behave. I decided I wanted to be able to have them come on when the JK is put in reverse, I wanted to be able to manually turn them on, and I wanted to be able to disable them completely when I felt the need.
In order to simplify the wiring process I've come to the decision that I want to install a secondary fuse box in the rear of the Jeep rather than running a ton of wiring back to the front of the Jeep which would add points of failure.
Rear Aux Fuse Box
When designing the secondary fuse box I made certain to account for everything I could potentially want to install in the rear of the Jeep. I decided I would want a 12V DC outlet, a dual port USB charger, my reverse lights, and potentially a Viair or ARB compressor installed behind the passanger rear tail light. Based on the maximum calculated load I determined a 50 amp, four device sub-panel would be perfect. This panel will also contain two relays, one for the rear lights, and one for the future compressor. I plan them to be enclosed in a project box and installed behind the drivers side tail light in the void there, and powered by a 6 gauge positive and ground wire directly from the battery, run along the the drivers side of the vehicle.
Here is my wiring diagram.

I'm also planning to install a 50 amp breaker under the hood where it connects to the battery power so I can disable the circuit as needed, and have an extra level of protection in case of a short. This design should give me a common ground, a central place to wire things to in the rear, and give me maximum fault tolerance in the event of a short. I'm planning to start ordering parts to build the fuse panel later this week. Right now I'm planning to use the following:
Parts List
Blue Sea 5045 4 Circuit Compact Fuse Block (for power)
Blue Sea 2315 4 Pole 100A Mini Bus Bar (for ground)
Any thoughts or ideas are of course welcome!
After doing quite a bit of searching, resarch, and reading I've decided to go with a set of 90deg LED flush mount pods from Super Bright LED's here in St. Louis. They come powder coated, are IP67 rated, throw 1440 lumens each, use 6 CREE LED's, and come prewired with DT connectors which should make them plug and play. Plus they're backing them with a lifetime warranty which I hopefully won't need.
Installing the lights made me consider how I wanted to power them, and how I wanted them to behave. I decided I wanted to be able to have them come on when the JK is put in reverse, I wanted to be able to manually turn them on, and I wanted to be able to disable them completely when I felt the need.
In order to simplify the wiring process I've come to the decision that I want to install a secondary fuse box in the rear of the Jeep rather than running a ton of wiring back to the front of the Jeep which would add points of failure.
Rear Aux Fuse Box
When designing the secondary fuse box I made certain to account for everything I could potentially want to install in the rear of the Jeep. I decided I would want a 12V DC outlet, a dual port USB charger, my reverse lights, and potentially a Viair or ARB compressor installed behind the passanger rear tail light. Based on the maximum calculated load I determined a 50 amp, four device sub-panel would be perfect. This panel will also contain two relays, one for the rear lights, and one for the future compressor. I plan them to be enclosed in a project box and installed behind the drivers side tail light in the void there, and powered by a 6 gauge positive and ground wire directly from the battery, run along the the drivers side of the vehicle.
Here is my wiring diagram.
I'm also planning to install a 50 amp breaker under the hood where it connects to the battery power so I can disable the circuit as needed, and have an extra level of protection in case of a short. This design should give me a common ground, a central place to wire things to in the rear, and give me maximum fault tolerance in the event of a short. I'm planning to start ordering parts to build the fuse panel later this week. Right now I'm planning to use the following:
Parts List
Blue Sea 5045 4 Circuit Compact Fuse Block (for power)
Blue Sea 2315 4 Pole 100A Mini Bus Bar (for ground)
Any thoughts or ideas are of course welcome!
Thread Starter
JK Super Freak
Joined: Nov 2008
Posts: 1,680
Likes: 6
From: St. Louis, MO
Trending Topics
JK Junkie

Joined: Feb 2012
Posts: 3,068
Likes: 116
From: Bunnlevel, NC
Mostly because people tend to place a fuse on this item and when the compressor runs for a good bit of time and you then allow it to kick off... then it kicks on again, it can blow the fuse. A circuit breaker will keep you from melting wire (same as a fuse), but will deal with this scenario is a nicer way. Breaker might trip, but it'll reset in a second or two. I chose 30 amps based on you using a 30 amp relay. (assuming you've calculated the draw of the compressor and then used the right size wire for distance and the right size relay)
Thread Starter
JK Super Freak
Joined: Nov 2008
Posts: 1,680
Likes: 6
From: St. Louis, MO
Mostly because people tend to place a fuse on this item and when the compressor runs for a good bit of time and you then allow it to kick off... then it kicks on again, it can blow the fuse. A circuit breaker will keep you from melting wire (same as a fuse), but will deal with this scenario is a nicer way. Breaker might trip, but it'll reset in a second or two. I chose 30 amps based on you using a 30 amp relay. (assuming you've calculated the draw of the compressor and then used the right size wire for distance and the right size relay)