Custom modular JK hardtop
 07-20-2015, 12:12 PM
#431
JK Super Freak
Thread Starter

 07-20-2015, 12:15 PM
#432
JK Super Freak
Thread Starter
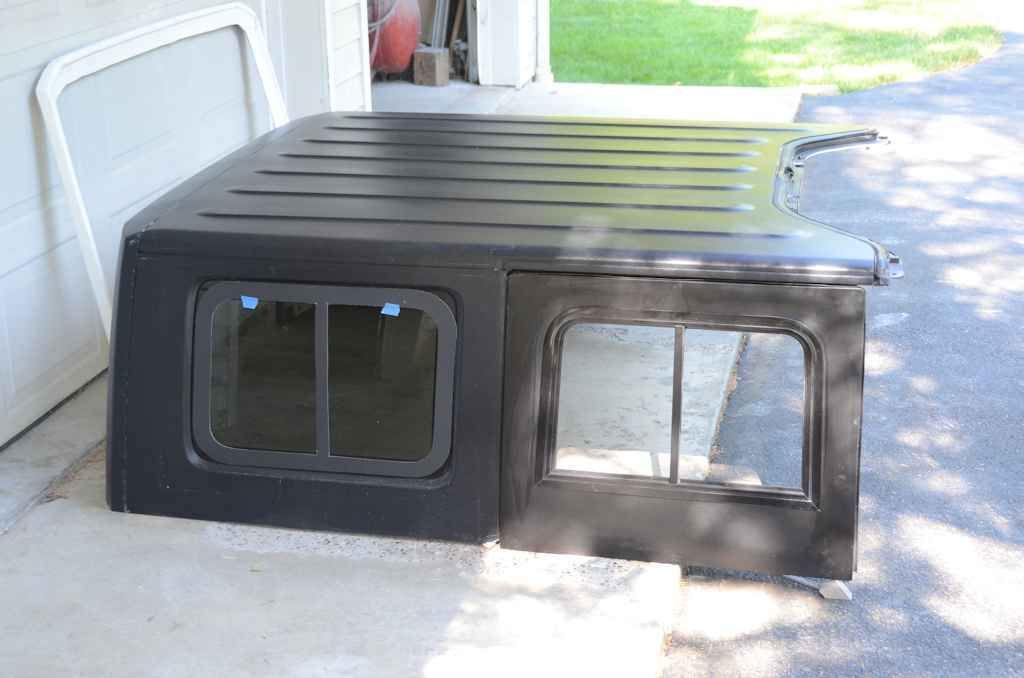
Another shot with the half door slider mocked up, this one also shows a template for the slider frame for retrofitting sliders into the hardtop. I'll be meeting with the window company within the next week about the hardtop retrofit sliders; I also expect to have a manufacturing cost estimate for the retrofit kit parts by then (the retrofit kit adapts the flat window to the curved window mounting surface of the hardtop).
07-22-2015, 04:54 AM
#434
JK Super Freak
Thread Starter
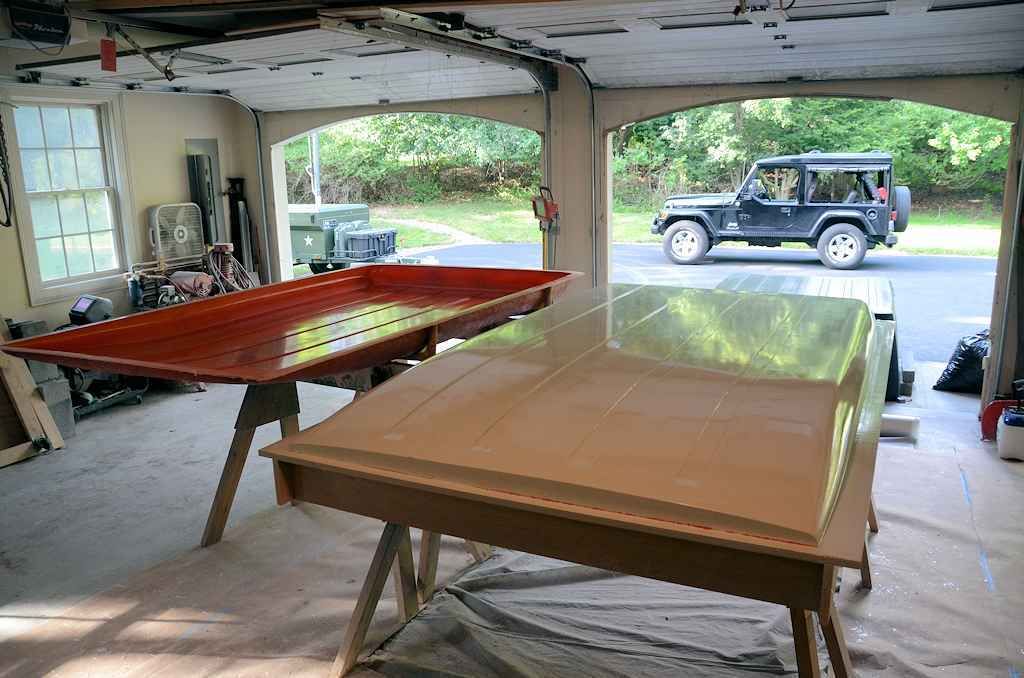
I'm making the roof mold today. Here's a photo of the setup. In the near bay is my cutting table (it's my Jeep-tub trailer, which has a hard cover and makes a great worktable). I do all of my fiberglass cutting on a large piece of linoleum and the cutting is done with a roller cutter. All of the fiberglass necessary to make the mold is cut beforehand, and laid out in sequence so it's easy to pick up the next piece when I'm in the middle of the messy work. In the far bay, my military trailer, which also has a hard cover, is serving as the fiberglass table - all of the parts I cut are laid out in sequence there. In the middle bay is the mold master, looking slightly green in this photo as a result of the several coats of mold release wax followed by several sprayed coats of PVA (polyvinyl acetate) mold release. PVA is a water-soluable mold release that will wash off the master and the mold later. The garage floor is covered with plastic and paper; fiberglass is a very messy affair.
When this photo was taken I had just sprayed the last coat of PVA on the master and I'm waiting for it to dry. The next step is to spray gelcoat on the mold. More photos of the process to come.
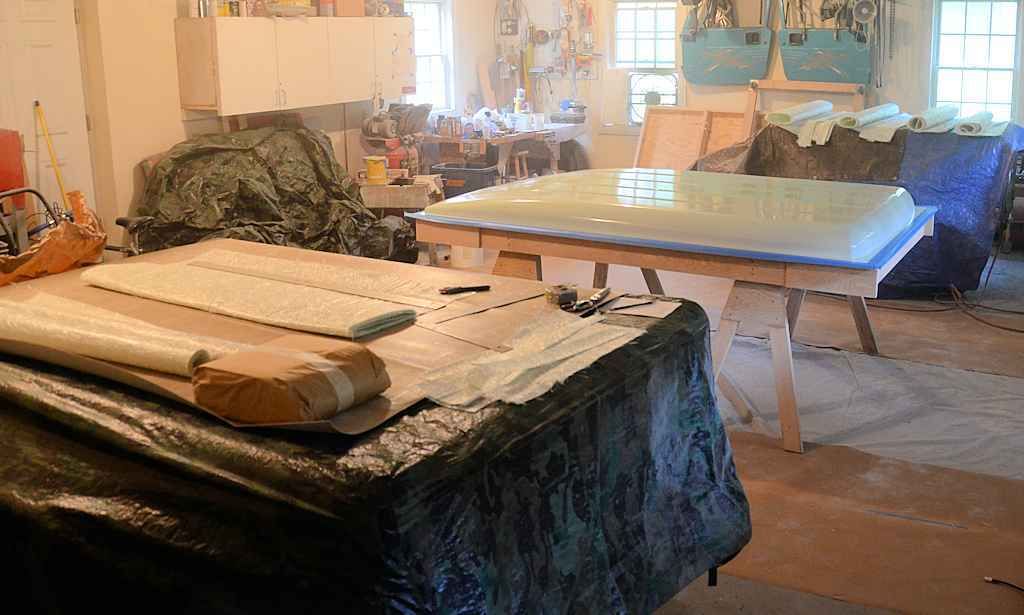
When this photo was taken I had just sprayed the last coat of PVA on the master and I'm waiting for it to dry. The next step is to spray gelcoat on the mold. More photos of the process to come.
07-22-2015, 05:53 AM
#435
JK Super Freak
Cutting the Fiberglass Mat with a roller cutter is a great tip, that would eliminate frayed edges . I used a straightedge , and a utility knife on formica counter, but getting clean edges , even with new blade, an Issue. Fiberglass cloth more so.
07-22-2015, 06:12 AM
#436
JK Super Freak
Thread Starter
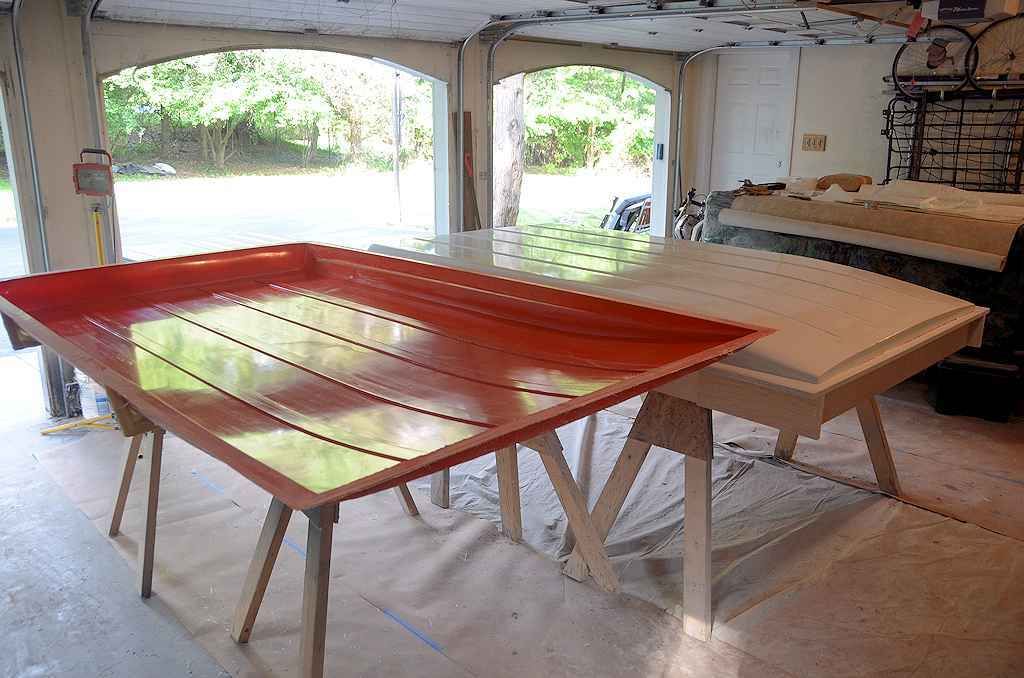
Once the PVA mold release dries, the next step is to spray the mold master with gelcoat. Gelcoat forms the working surface of the mold; it's a special resin formulated to make a very smooth and tough surface. It's orange because it's tooling gelcoat, which generally comes in orange and black and is forumlated for making molds. The color is so it will contrast with the color of the gelcoat that will be sprayed in the mold when making a part; the contrast helps you see when you've got an appropriate thickness of white (for example) gelcoat built up when making a part. Tooling gelcoat cures much harder than ordinary gelcoat, and it's very heat resistant to stand up to repeated cycles of parts being made in a mold and generating heat when they cure.
Gelcoat generally takes about 2 hours to cure to the point where the fiberglass layup can begin, so the next phase of the mold making work will happen right after lunch.
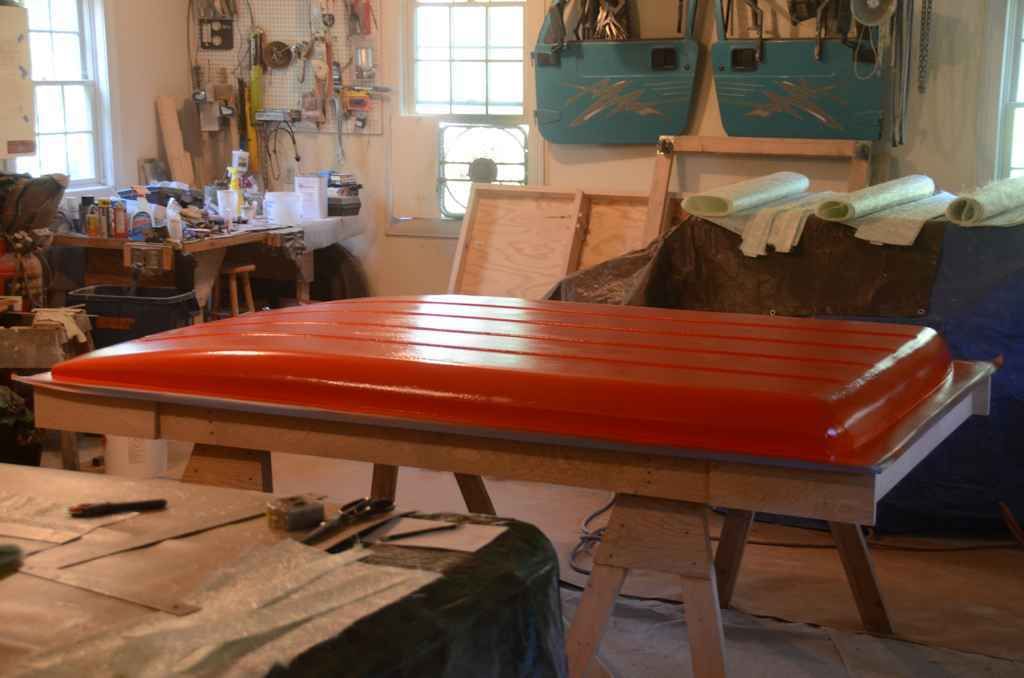
Gelcoat generally takes about 2 hours to cure to the point where the fiberglass layup can begin, so the next phase of the mold making work will happen right after lunch.
07-22-2015, 11:32 AM
#437
JK Super Freak
Thread Starter
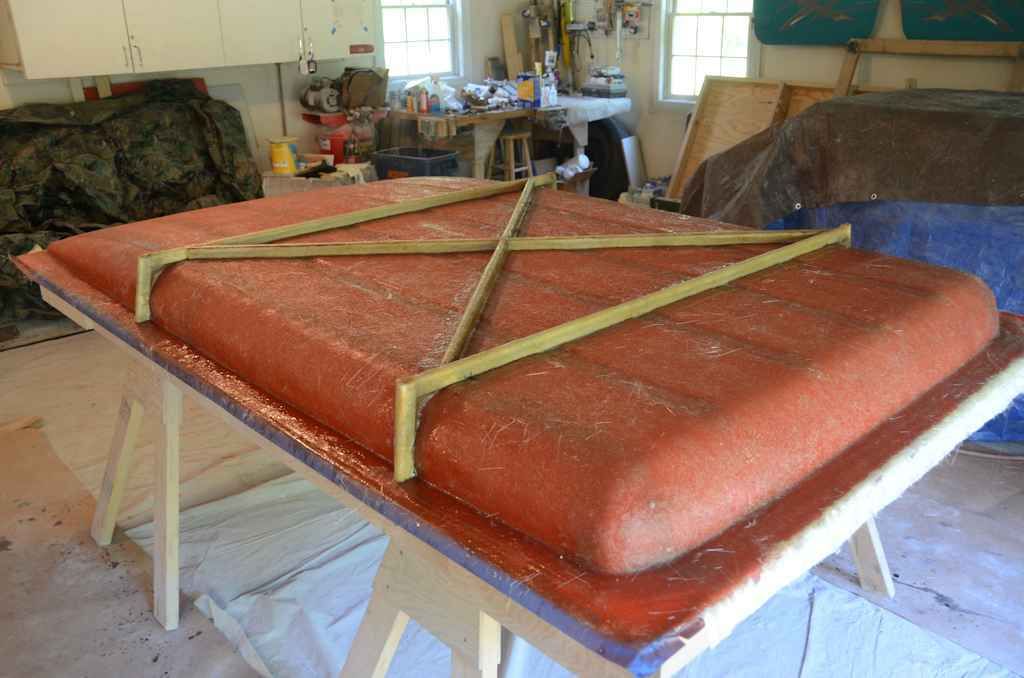
3 1/2 gallons of resin later... the first phase of the fiberglass layup of the mold is complete. I've applied 4 layers of fiberglass mat which will result in a mold thickness of about 3/16". That differs from a production mold, which might be 3/8" thick or more to stand up to the repeated and long-term use of molding parts, but for my use this thickness is fine, I'll be able to make all the roofs I ever want to make in this mold.
The mold isn't complete yet, tomorrow morning I'll add bracing to reinforce it. It's a good idea to do the bracing after the main part of the mold has cured - if you added the bracing before the main fiberglass had cured, the extra thickness of fiberglass where the bracing is would generate extra heat when curing and would "print through" to the surface - you'd be able to see a very faint outline of the bracing on smooth inside surface of the mold, and that outline would show up in any parts made in the mold. By waiting until the main mold has cured to add the bracing, that distortion doesn't happen. More photos tomorrow when the bracing has been added.

The mold isn't complete yet, tomorrow morning I'll add bracing to reinforce it. It's a good idea to do the bracing after the main part of the mold has cured - if you added the bracing before the main fiberglass had cured, the extra thickness of fiberglass where the bracing is would generate extra heat when curing and would "print through" to the surface - you'd be able to see a very faint outline of the bracing on smooth inside surface of the mold, and that outline would show up in any parts made in the mold. By waiting until the main mold has cured to add the bracing, that distortion doesn't happen. More photos tomorrow when the bracing has been added.
07-23-2015, 07:33 AM
#438
JK Super Freak
Thread Starter
I finished up the work on the roof mold this morning, adding a few braces to ensure the mold doesn't flex when molding a part in it. I'll let everything cure overnight, and tomorrow morning I'll pop the mold off the master and the mold will be ready to make parts.
07-24-2015, 05:17 AM
#440
JK Super Freak
Thread Starter
Here are a few photos right after I popped the mold off the mold master. All I've done so far is trim the ragged edges - that always gets done first because they can be very sharp and inflict nasty cuts.
I havent washed off the mold release yet, but even so it's possible to see that the mold has a very nice surface. Once I wash of the mold release and do a little buffing, the mold will have a mirror finish. This mold will make very nice roofs.
As you can see from these photos, the wooden mold master comes out of this process without damage, but now that the mold is made it's outlived its usefulness... I'll probably save it for a few weeks and then cut it up in small enough pieces for the trash guys can take it away.
I'll make the first roof in this mold on Thursday. I'm a little short on materials and the fiberglass I've ordered is scheduled to arrive on Wednesday.
Last edited by jscherb; 07-24-2015 at 05:23 AM.