
KevinMac's Semi-Budget Build...Project Deathstar

Thread Starter
JK Enthusiast
Joined: Jun 2013
Posts: 422
Likes: 24
From: The D, MI
My buddy who own's a '13 JKU Sahara came to visit for the weekend and came bearing gifts. Besides bourbon, he brought me some sweet adhesive film to wrap the sill plates so you don't scuff them with your shoe. This is above and beyond the sill plates I already put on as they just don't seem to cover enough. The film is 9 mil thick and crystal clear once applied. I cut the front door pieces to size of about 18"x2.75". The rear door was about 7"x2.75". Use plenty of soapy water when you apply it otherwise you will never get it on straight or get the bubbles out of it!

Also, I couldn't pass this decal up.

Costs:
* Kick Plate Film - Freebie!
* Decal - $4.25 on eBay

Also, I couldn't pass this decal up.

Costs:
* Kick Plate Film - Freebie!
* Decal - $4.25 on eBay
Last edited by KevinMac; Jul 23, 2013 at 05:29 AM.
Thread Starter
JK Enthusiast
Joined: Jun 2013
Posts: 422
Likes: 24
From: The D, MI
Prepare to ford! 
I started the installation of my new River Raider Breather Extension Kit. I read a bunch of threads on this topic and everyone agrees it is a good idea but everyone seems to have slightly different spin on the application. I took the easy way out and bought the kit, I'm lazy... What I did notice is that there appears to be some slight changes again for the 2013 model that I tried to capture here in photos:
Step 1 - Remove engine NVH cover. As you can see there is a breather running horizontally right there along the intake manifold. It's actually located pretty high up. Tracing it back I came to the part number in the 2nd photo. A quick Google of it told me that was the Automatic Transmission Breather!! Located just car rearward on the firewall you can see the breather for the Transfer Case. You can see this in the 3rd photo.


Step 2 - I made the connection into the stock airbox by splicing into the line running from the airbox to the engine. In this next photo you can also see that I spliced the Automatic Transmission line into that new trunk I created.

Step 3 - From here I deviated from most people's opinion and moved to the rear of the vehicle. I located the Rear Differential Breather in the passenger side rear wheel well. In the next photo you can see where I disconnected it from the push-pin as it was just snapped over it behind the wheel well liner shown.

Step 4 - I then made my connection to that Rear Differential Breather!

Step 5 - I then reattached the breather hose to the original push pin. You can also see there is a small metal clip there retaining the hose.

I started the installation of my new River Raider Breather Extension Kit. I read a bunch of threads on this topic and everyone agrees it is a good idea but everyone seems to have slightly different spin on the application. I took the easy way out and bought the kit, I'm lazy...
What I did notice is that there appears to be some slight changes again for the 2013 model that I tried to capture here in photos:Step 1 - Remove engine NVH cover. As you can see there is a breather running horizontally right there along the intake manifold. It's actually located pretty high up. Tracing it back I came to the part number in the 2nd photo. A quick Google of it told me that was the Automatic Transmission Breather!! Located just car rearward on the firewall you can see the breather for the Transfer Case. You can see this in the 3rd photo.


Step 2 - I made the connection into the stock airbox by splicing into the line running from the airbox to the engine. In this next photo you can also see that I spliced the Automatic Transmission line into that new trunk I created.

Step 3 - From here I deviated from most people's opinion and moved to the rear of the vehicle. I located the Rear Differential Breather in the passenger side rear wheel well. In the next photo you can see where I disconnected it from the push-pin as it was just snapped over it behind the wheel well liner shown.

Step 4 - I then made my connection to that Rear Differential Breather!

Step 5 - I then reattached the breather hose to the original push pin. You can also see there is a small metal clip there retaining the hose.

Last edited by KevinMac; Jul 23, 2013 at 06:46 AM.
Thread Starter
JK Enthusiast
Joined: Jun 2013
Posts: 422
Likes: 24
From: The D, MI
Step 6 - From there, I then began to run the main trunk line car foward. I tucked it in between the frame rail and body so that it is well protected on top of the fuel tank. It neatly fit in there, like it was designed that way.

Step 7 - When I got to the front of the vehicle, I lifted up this flap at the base of the passenger side wheel well and fed the hose up it.


Step 8 - The hose is now exposed in the engine comparment and ready for connection to the trunk I had already created on top of the engine. Now, the downside to this is that I will not have enough hose to make this connection, I will have to go to the parts store and buy another 2' or so. I will also need a couple of extra fittings.

This is as far as I got yesterday as I ran out of hose, time and daylight. I'll hopefully get back at it in the next day or so when I can pick up the additional parts I need. From there, I will make the Front Differential and Transfer Case connections!

Step 7 - When I got to the front of the vehicle, I lifted up this flap at the base of the passenger side wheel well and fed the hose up it.


Step 8 - The hose is now exposed in the engine comparment and ready for connection to the trunk I had already created on top of the engine. Now, the downside to this is that I will not have enough hose to make this connection, I will have to go to the parts store and buy another 2' or so. I will also need a couple of extra fittings.

This is as far as I got yesterday as I ran out of hose, time and daylight. I'll hopefully get back at it in the next day or so when I can pick up the additional parts I need.
From there, I will make the Front Differential and Transfer Case connections!
Last edited by KevinMac; Jul 23, 2013 at 06:48 AM.
Thread Starter
JK Enthusiast
Joined: Jun 2013
Posts: 422
Likes: 24
From: The D, MI
Got some birthday presents this week! 
Got a new 3 D cell LED Mag Light and holder which I promptly screwed to the drivers seat. Follow this tutorial for the specifics.
Mag Light Mounting


In addition to that, I also picked up the remaining bits needed to finish the breather extensions so I will finish that up this weekend too!
Finally, I got a second set of the Kicker replacement speakers for the dash. About an hour install...not too bad!! Once again, after some searching, I found this good guide:
Dash Speaker Installation on 2012+ JK

Cost:
* Mag Light and Brackets: Freebie!
* Speakers: $72
* Breather Extension Bits: $8
Last edited by KevinMac; Jul 26, 2013 at 04:59 PM.
JK Newbie
Joined: May 2013
Posts: 99
Likes: 0
From: Roanoke, Virginia
How easy were the rear speakers to put in? Also, are the front ones the same size as the rear? Thanks for keeping this thread up. It is an interesting read for me!
Edit...sorry just read through that thread you linked up. Good stuff there. Sounds like my two year old should be able to put in the sound bar ones!
Edit...sorry just read through that thread you linked up. Good stuff there. Sounds like my two year old should be able to put in the sound bar ones!
Last edited by bbudnick5001; Jul 26, 2013 at 05:22 PM.
Thread Starter
JK Enthusiast
Joined: Jun 2013
Posts: 422
Likes: 24
From: The D, MI
It's been slow going as far as modifications go as I've been traveling quite a bit for work and will continue to do so for the coming weeks. As an example, I'm making this post from Shanghai, China! 
Before I left though, I'd gotten a bunch of bday gifts that I tossed on before jumping on an airplane including:
- Drake 4WD Shifter Knob (to match my existing Drake Transmission Shifter) - Good quality and easy to install...once you've beat the old knob off with a hammer They look a lot better than the stock units, all the chrome is a bit of an eye sore to me!


K&N Air Filter - Reusable and cost effective, a no brainer

Smitybuilt Molle Tailgate Panel w/ Bags - My rig is evolving into more of a camping/expedition set up as I originally planned. Utlizing available space for stowage of gear will be an ongoing priority. Smitybuild doesn't have a great quality reputation, so I was a bit hesitant to order it. But upon receipt of it, it seems all right! The fit to the tailgate was good and any of you military guys know the Molle setup works real well (my ruck has a bunch of molle accessories too). It comes with 2 different size bags (1 is shown installed below) and I have a tear away First Aid Kit on order.


Rugged Ridge Fire Extinguisher Mount - Nice mount, hidden and out of the way. I'd rather have one and never need it than the other way around!

Costs:
* Drake 4WD Shifter Knob - Freebie
* K&N Air Filter - $38
* Smitybuilt Tailgate Molle Panel - $52
* Rugged Ridge Fire Extinguisher Mount - Freebie
* Fire Extinguisher - $18
Aside from that, I've started ordering parts to allow me to swap out the front bumper and add a winch setup. I've decided to go with the Rigged Ridge Aluminum XHD front bumper setup. It's light weight and looks pretty good. I haven't read any negative feedback on them so that's the direction I'm heading. I've also decided to go with a 10,000lb winch with synthetic line. It will be a couple of months until I have all the parts to do the install but Rome wasn't built overnight either!
Stay tuned!
Before I left though, I'd gotten a bunch of bday gifts that I tossed on before jumping on an airplane including:
- Drake 4WD Shifter Knob (to match my existing Drake Transmission Shifter) - Good quality and easy to install...once you've beat the old knob off with a hammer
They look a lot better than the stock units, all the chrome is a bit of an eye sore to me! 

K&N Air Filter - Reusable and cost effective, a no brainer

Smitybuilt Molle Tailgate Panel w/ Bags - My rig is evolving into more of a camping/expedition set up as I originally planned. Utlizing available space for stowage of gear will be an ongoing priority. Smitybuild doesn't have a great quality reputation, so I was a bit hesitant to order it. But upon receipt of it, it seems all right!
The fit to the tailgate was good and any of you military guys know the Molle setup works real well (my ruck has a bunch of molle accessories too). It comes with 2 different size bags (1 is shown installed below) and I have a tear away First Aid Kit on order.

Rugged Ridge Fire Extinguisher Mount - Nice mount, hidden and out of the way. I'd rather have one and never need it than the other way around!

Costs:
* Drake 4WD Shifter Knob - Freebie
* K&N Air Filter - $38
* Smitybuilt Tailgate Molle Panel - $52
* Rugged Ridge Fire Extinguisher Mount - Freebie
* Fire Extinguisher - $18
Aside from that, I've started ordering parts to allow me to swap out the front bumper and add a winch setup. I've decided to go with the Rigged Ridge Aluminum XHD front bumper setup. It's light weight and looks pretty good. I haven't read any negative feedback on them so that's the direction I'm heading. I've also decided to go with a 10,000lb winch with synthetic line. It will be a couple of months until I have all the parts to do the install but Rome wasn't built overnight either!
Stay tuned!
JK Enthusiast
Joined: Aug 2013
Posts: 338
Likes: 0
From: Elkton, Virginia
looking good man! I've done many of the same things myself. It's amazing how drastic of a change a few bucks can make on a Jeep if ya have the intestinal fortitude to just go for it!!
I saw where you mentioned an issue with your wheel paint. I had the same issue. When reading the paint can, it said my third coat should be a "medium wet coat". Hell, I'm no pro-painter, so I didn't know what a medium wet coat was. Google being my friend, i looked it up and it described it and I went back to the wheels and painted the hell of out of them. The medium wet coat is a REALLY wet coat, literally wet just to the point that it doesn't drip off. Once I did that, WOW... they turned out wonderfully! So nice, that i'm tossing up just keeping them and putting tires on them instead of new wheels and tires together. Even though i'm no fan of the cost of tires on the 18's.
Great work, keep us updated so I can steal some ideas!
Last edited by ouroborus2012; Aug 23, 2013 at 10:22 PM.
Thread Starter
JK Enthusiast
Joined: Jun 2013
Posts: 422
Likes: 24
From: The D, MI
looking good man! I've done many of the same things myself. It's amazing how drastic of a change a few bucks can make on a Jeep if ya have the intestinal fortitude to just go for it!!
I saw where you mentioned an issue with your wheel paint. I had the same issue. When reading the paint can, it said my third coat should be a "medium wet coat". Hell, I'm no pro-painter, so I didn't know what a medium wet coat was. Google being my friend, i looked it up and it described it and I went back to the wheels and painted the hell of out of them. The medium wet coat is a REALLY wet coat, literally wet just to the point that it doesn't drip off. Once I did that, WOW... they turned out wonderfully! So nice, that i'm tossing up just keeping them and putting tires on them instead of new wheels and tires together. Even though i'm no fan of the cost of tires on the 18's.
Great work, keep us updated so I can steal some ideas!
Thread Starter
JK Enthusiast
Joined: Jun 2013
Posts: 422
Likes: 24
From: The D, MI
Well, after a bit of a hiatus, I'm back. After my business trip to China I came down with Influenza-A that basically kicked my ass.  I was in bed for a week with a 102+F temperature while losing 12lb in the process. I'm back up and feeling much better but I don't wish the shit I had on my worst enemy!
So, we'll ease back into it. Back to the post previous to this, regarding the wheel paint. The paint on the wheels has held up great! The lugs nuts, not so much. Paint just doesn't like to stick to stainless. I gave up on the idea of touching them up every so often as that seemed like a lot of maintenance. I went the easy way out and ordered the black powdercoated lugs from Rugged Ridge. They are 1/2-20 in size and look/fit well.

Also, I went on a 3 hour road trip last week and the hood flutter finally got to be too much to bear. I went ahead and ordered the black powdercoated aluminum hood latches. They fit well and took care of the flutter issue. I will not lie though, they were kind of a pain in the ass to install.
To remove and then install the passenger side you need to remove the top of the air box and air inlet hose going to the throttle body. You then need to pull the lower air box out. Finally, you need to remove the 10mm electrical ground attached to the radiator support. This will give you access to the 13mm nut tucked inside the fender. The upper part of the latch is easy to remove, it's just (2) 10mm nuts on the inside of the hood.
The driver side is a bit easier, to access the 13mm nut inside the fender you need to remove the upper horn. It takes a 10mm wrench to get the horn out and then just unplug the (2) wires going to the horn.
Here's the before and afters...


Costs:
* Lug nuts (18 total) - $32
* Hood Latches - $80
I was in bed for a week with a 102+F temperature while losing 12lb in the process. I'm back up and feeling much better but I don't wish the shit I had on my worst enemy! So, we'll ease back into it. Back to the post previous to this, regarding the wheel paint. The paint on the wheels has held up great! The lugs nuts, not so much. Paint just doesn't like to stick to stainless. I gave up on the idea of touching them up every so often as that seemed like a lot of maintenance. I went the easy way out and ordered the black powdercoated lugs from Rugged Ridge. They are 1/2-20 in size and look/fit well.

Also, I went on a 3 hour road trip last week and the hood flutter finally got to be too much to bear. I went ahead and ordered the black powdercoated aluminum hood latches. They fit well and took care of the flutter issue. I will not lie though, they were kind of a pain in the ass to install.
To remove and then install the passenger side you need to remove the top of the air box and air inlet hose going to the throttle body. You then need to pull the lower air box out. Finally, you need to remove the 10mm electrical ground attached to the radiator support. This will give you access to the 13mm nut tucked inside the fender. The upper part of the latch is easy to remove, it's just (2) 10mm nuts on the inside of the hood.
The driver side is a bit easier, to access the 13mm nut inside the fender you need to remove the upper horn. It takes a 10mm wrench to get the horn out and then just unplug the (2) wires going to the horn.
Here's the before and afters...


Costs:
* Lug nuts (18 total) - $32
* Hood Latches - $80
Thread Starter
JK Enthusiast
Joined: Jun 2013
Posts: 422
Likes: 24
From: The D, MI
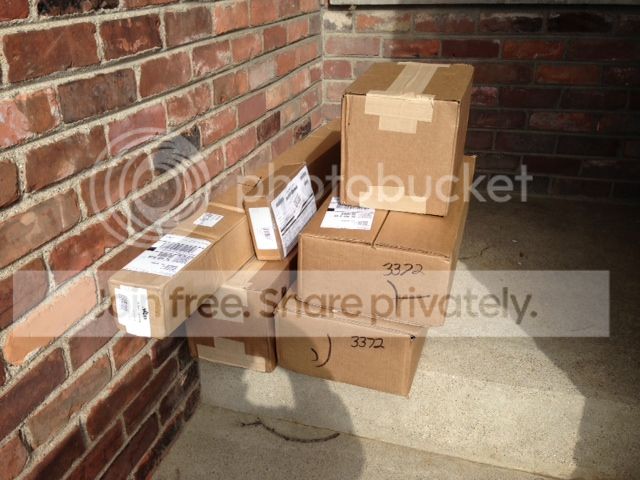
I just returned from a business trip to Frankfurt, Germany where I attended the Frankfurt Motor Show. Yes, I got to oogle at the diesal Polar Edition JKU...too bad it isn't coming here anytime soon.  But, when I got home I found presents sitting on the front porch as my 2.5" AEV lift kit had arrived! What's funny is that AEV is only a 30 minute drive from me but if I were to buy it direct I'd have to pay state sales tax. Therefore, I ended up ordering it from Northridge 4x4 since they offer free shipping!
Along with the 2.5" lift kit, I also found a set of AEV geomtery correction brackets from a member on here that lived local.
With that, I did a bit of reading on the install. I also did a bit of web combing as it seems the installation instructions are a little 'thin' in some areas. I found a couple of good resources and referred back to them often while installing.
I started off by doing a couple of quick measurements and both the front and rear of my JKU measure about 35.5" from the ground to the bottom of the fender. I measured this through the centerline of the wheel.

I then set to work last night on the rear portion. I have a well stocked garage when it comes to tools. With my impact wrench set for 'kill' I had the entire rear torn apart in a little over an hours time. The springs came out and went back in with no issue. The shocks were easy as were the bump stops and brake line relocation brackets. The track bar mount wasn't bad but probably the toughest part of the install was installing the new track bar and getting the holes to line up. After about 10 minutes of fussing with it I got it to go in though. The disassembly was much quicker than the reassembly though as it took a bit longer to properly torque all the fasteners I'd just installed. Start to finish I had the rear portion of the kit installed and the tires back on the ground in about 3 hours. Not too bad since it was the 1st time I'd installed a lift.

I will hopefully start work on the front end this evening after work and hope to have it done by the weekend as I have some prior committments I need to take care of this week. I like what I see so far though, my JKU has a definite rake now. The measurement I took after install showed it at about 39.5" vs the 35.5". I'd expect this to change a bit once I have the front installed so I'm excited to say the least!

Costs:
* AEV 2.5" Lift Kit - $959
* AEV Geometry Correction Brackets - $80
But, when I got home I found presents sitting on the front porch as my 2.5" AEV lift kit had arrived! What's funny is that AEV is only a 30 minute drive from me but if I were to buy it direct I'd have to pay state sales tax. Therefore, I ended up ordering it from Northridge 4x4 since they offer free shipping! 
Along with the 2.5" lift kit, I also found a set of AEV geomtery correction brackets from a member on here that lived local.
With that, I did a bit of reading on the install. I also did a bit of web combing as it seems the installation instructions are a little 'thin' in some areas. I found a couple of good resources and referred back to them often while installing.
I started off by doing a couple of quick measurements and both the front and rear of my JKU measure about 35.5" from the ground to the bottom of the fender. I measured this through the centerline of the wheel.

I then set to work last night on the rear portion. I have a well stocked garage when it comes to tools. With my impact wrench set for 'kill' I had the entire rear torn apart in a little over an hours time. The springs came out and went back in with no issue. The shocks were easy as were the bump stops and brake line relocation brackets. The track bar mount wasn't bad but probably the toughest part of the install was installing the new track bar and getting the holes to line up. After about 10 minutes of fussing with it I got it to go in though. The disassembly was much quicker than the reassembly though as it took a bit longer to properly torque all the fasteners I'd just installed. Start to finish I had the rear portion of the kit installed and the tires back on the ground in about 3 hours. Not too bad since it was the 1st time I'd installed a lift.

I will hopefully start work on the front end this evening after work and hope to have it done by the weekend as I have some prior committments I need to take care of this week. I like what I see so far though, my JKU has a definite rake now. The measurement I took after install showed it at about 39.5" vs the 35.5". I'd expect this to change a bit once I have the front installed so I'm excited to say the least!

Costs:
* AEV 2.5" Lift Kit - $959
* AEV Geometry Correction Brackets - $80

