
EVO rear no flare builder corners


Thread Starter
JK Newbie
Joined: Sep 2012
Posts: 33
Likes: 0
From: Clayton, Indiana
I take no responsibility for your installation and these are just the steps that worked for me. So I have been contacted by multiple members after seeing that I purchased EVO's no flare builder corners. I purchased these to cover up a dent on my driver side rear corner and well because they look freakin awesome. I'm not great at write ups and I wish I would have taken more pictures but here we go. First off I ordered these corners and they arrived on my driveway about a week later. No box needed lol!
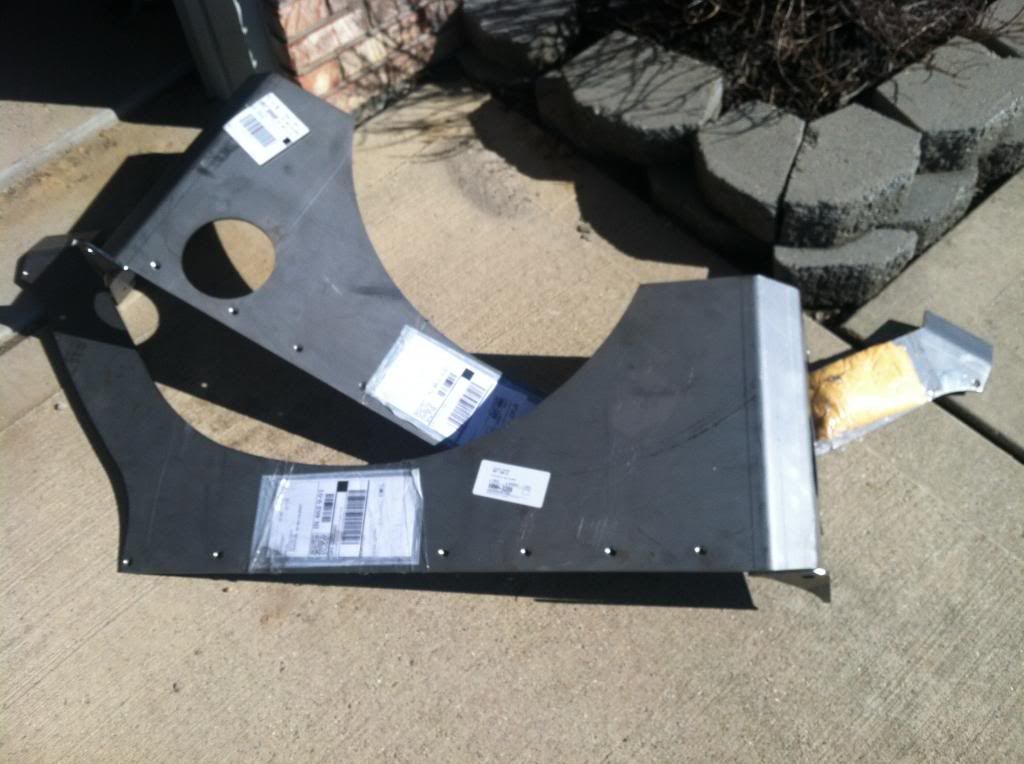
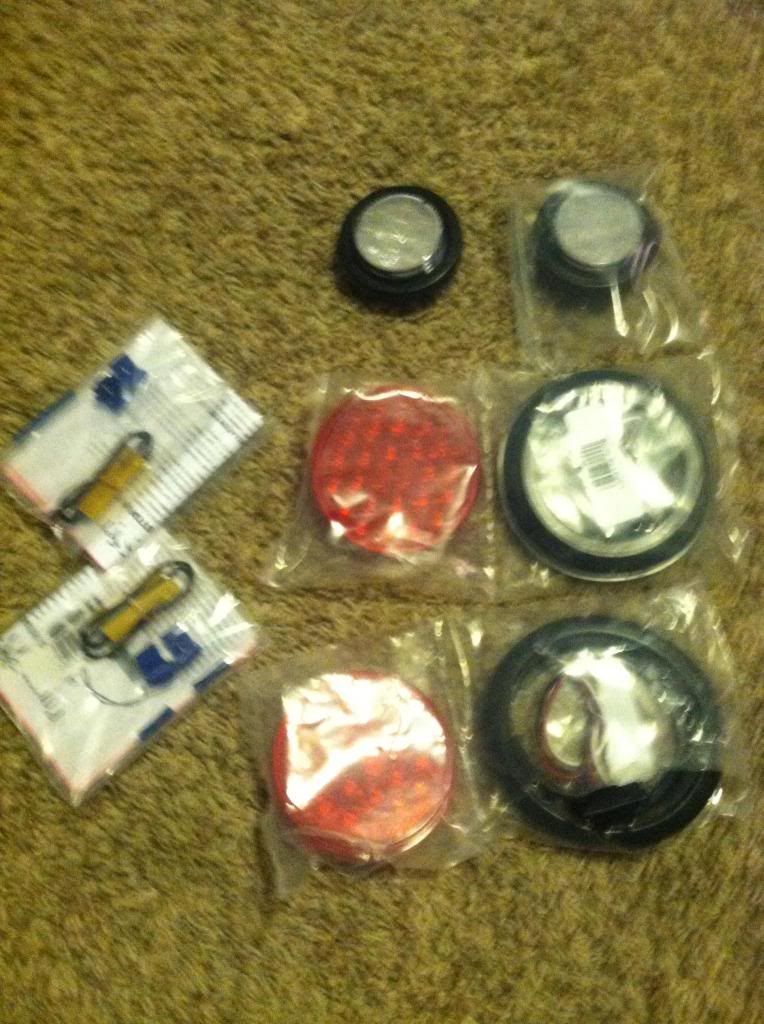
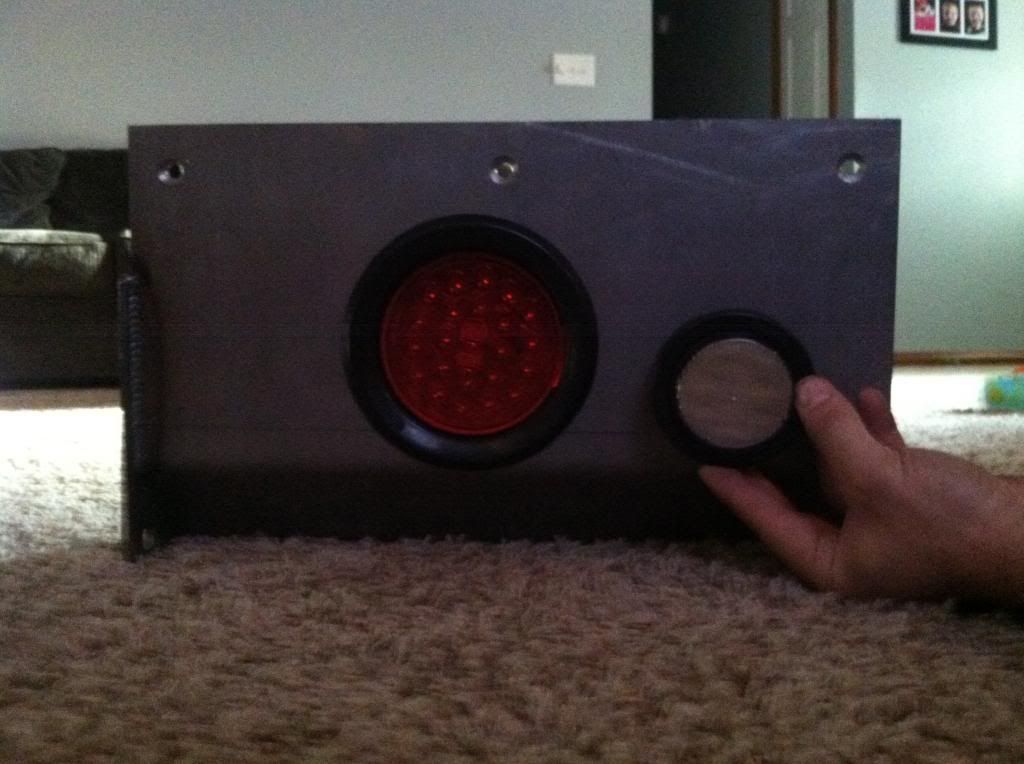
I also purchased poison spyder tail lights and back up lights. For the back up lights I drilled my own holes to fit them. I don't have a pic of the hole I drilled and I can't take one because the corners are at the powder coaters right now. Here is about what I ended up with.
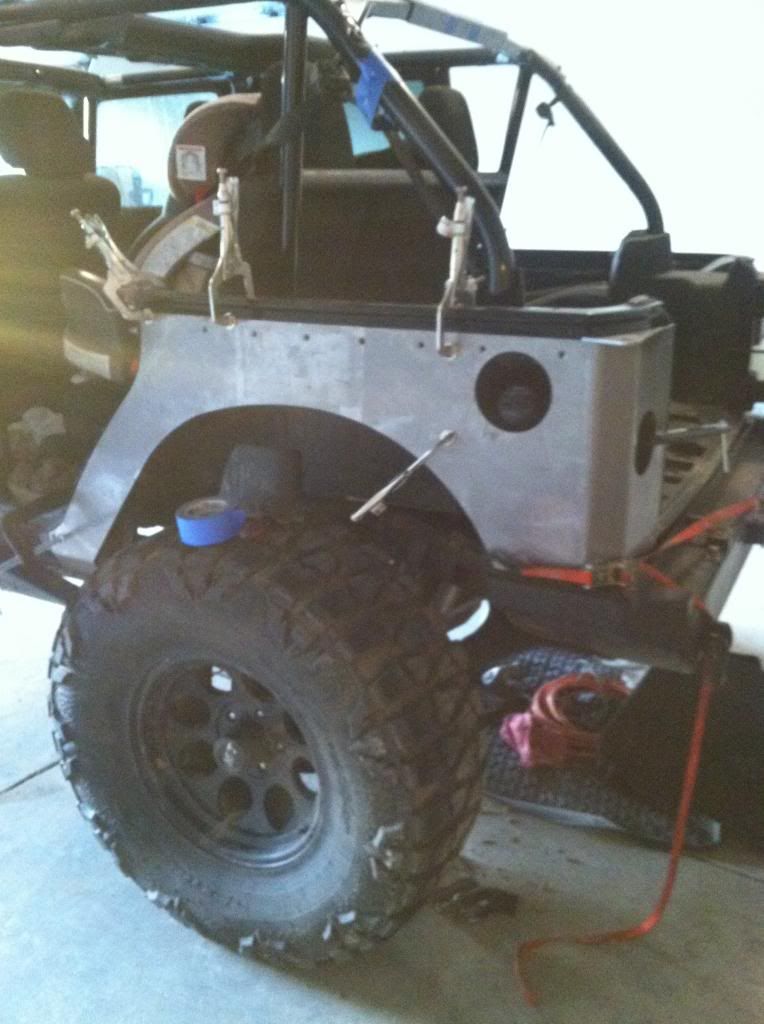
First steps are to remove your tail lights, License plate brackets, and fuel filler surround. The tail lights are removed with just two phillips head screws each and the fuel filler surround you need to reach in through the tail light hole to depress clips to remove. The inner part of the surround is rubber that just slides over the fuel fill tube.
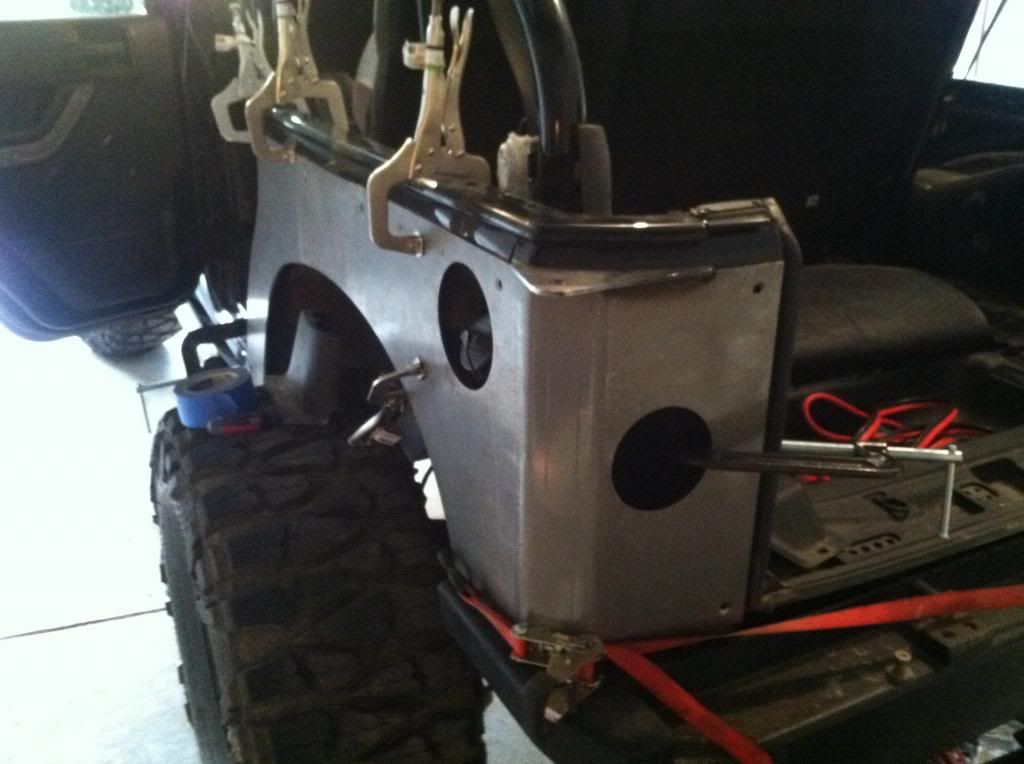
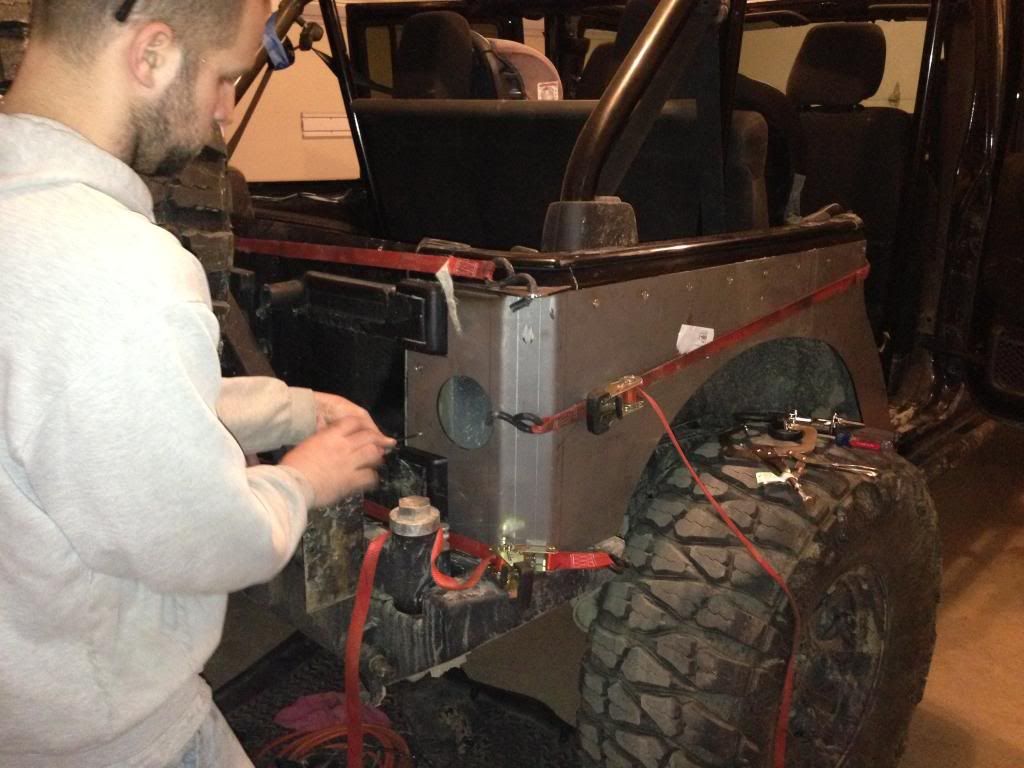
Now the fun begins, fitting the corners to your Jeep! I started with the driver side. I held the corners up to my Jeep and marked out a rough location of the new tail light and cut a hole larger that where they will go. This will helpbe allowing you to place a c-clamp in the hole to help suck the corner over a little later. I started a the fartherst forward part at the rocker panel and used a 6" c-clamp to hold the corner to my jeep lightly and rested the back on my bumper. I then started to line up the hoe in the new corner with the hole in the Jeep body for the fuel fill tube. I used 3 vice grips along the top edge of the corner and one in the wheel well. I then placed a 6" c clamp in the tail light hole and around the tail gate opening of the jeep to suck the corner in toward the tail gate opening. Doing this sucked it over wellbut made it crooked from top to bottom so I then added a ratchet strap attatched to the corner by the wheel well opening and ran it to my bumper on the passenger side. I added another one from the top plate of the corner that has a hole to my roll cage bar inside the Jeep ( did not get a picture of this). The ratchet straps were great because you can slowly ratchet the corners into place.
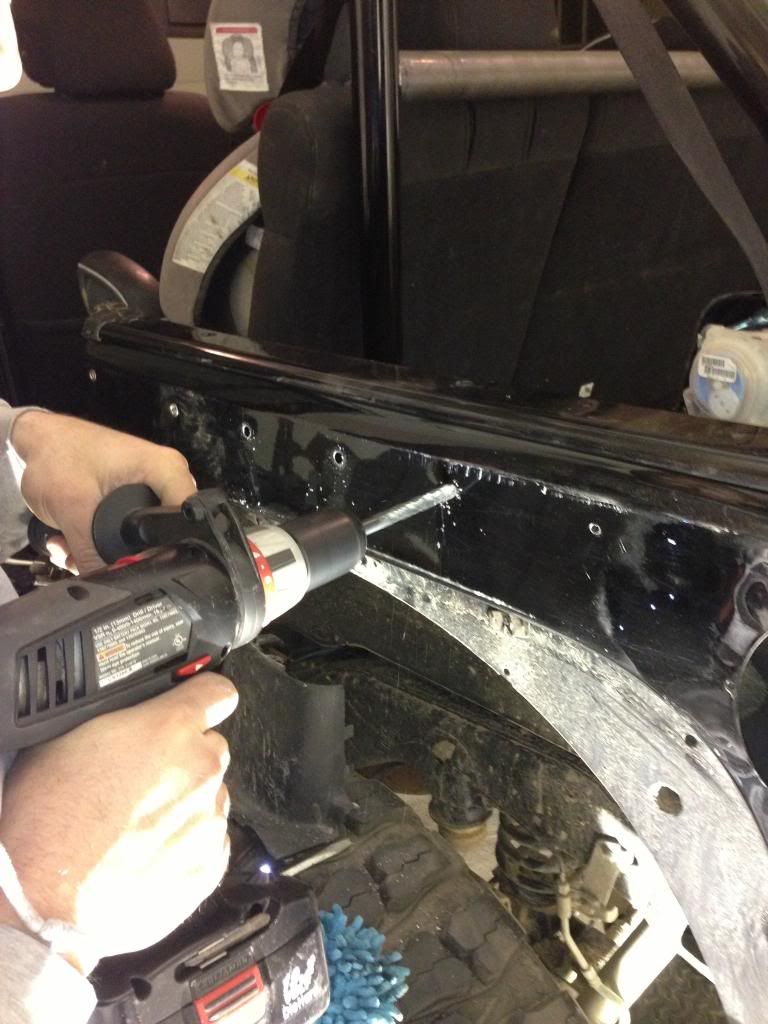
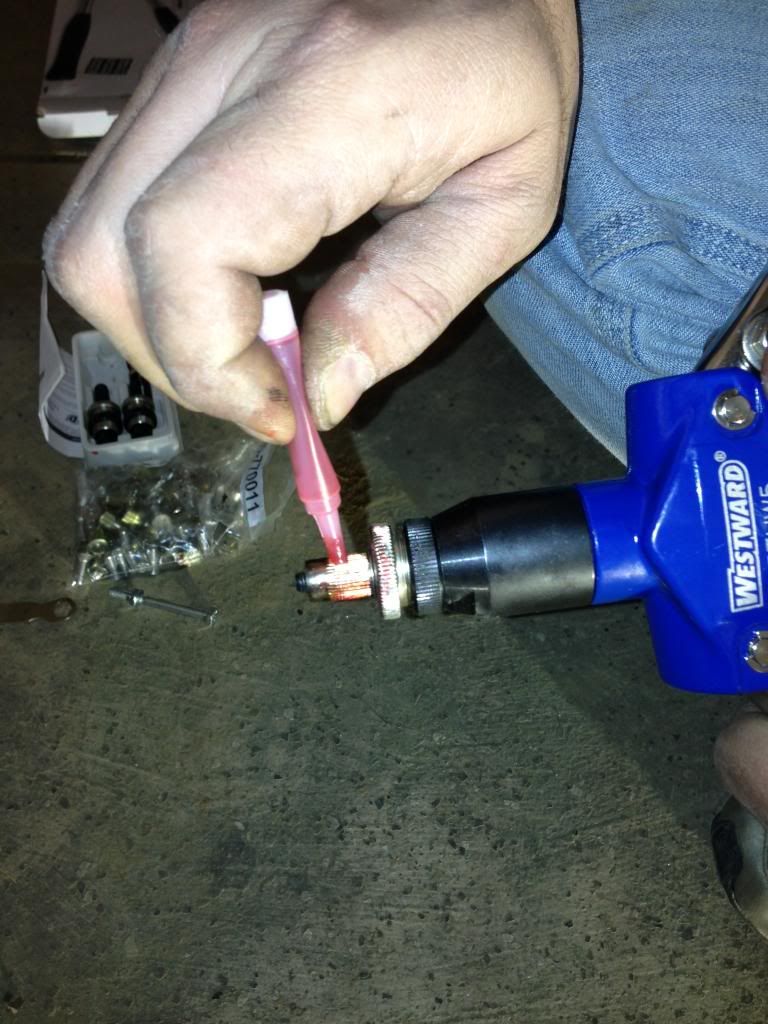
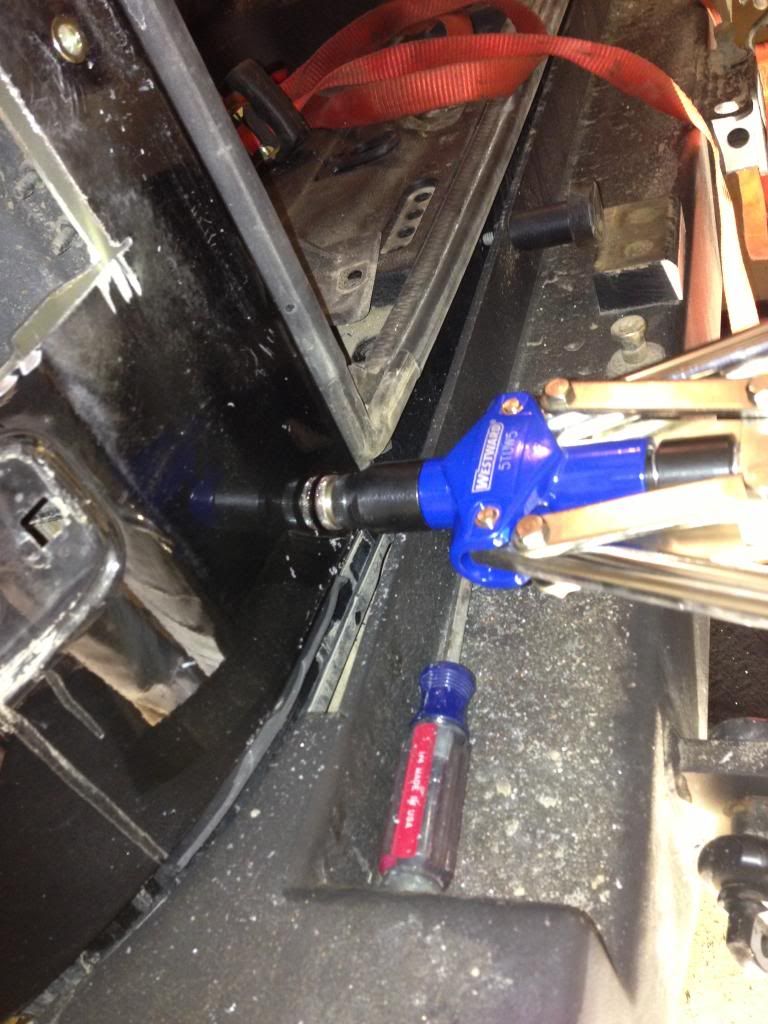
The next step entails drilling into your jeep with a 5/16" drill bit through the holes in your corner as it is clamped on where you want it. Once you drill all the holes remove the corner and redrill the hole to 25/64" ( EVO instructions say 3/8" but I found 25/64" to work better for me. 3/8" seemed too small and 25/64" the nut insert was a snug fit in the hole. I take no responsibility in you drilling the holes to this size and it not working.) Once allof your holes are drilled out larger cover the care metal with paint. I sprayed paint onto cardboard and applied with a q-tip to avoid any overspray. Next it is time to instal the nut inserts. I highly recommend investing in a decent tool. I went in on a tool with some other local Jeep guys to bring down the cost. We purchased the toolfom grainger for $110 and I installed all 24 nutserts without a single issue. When installing the nut inserts I covered the outside of it with red locktight prior to instal.
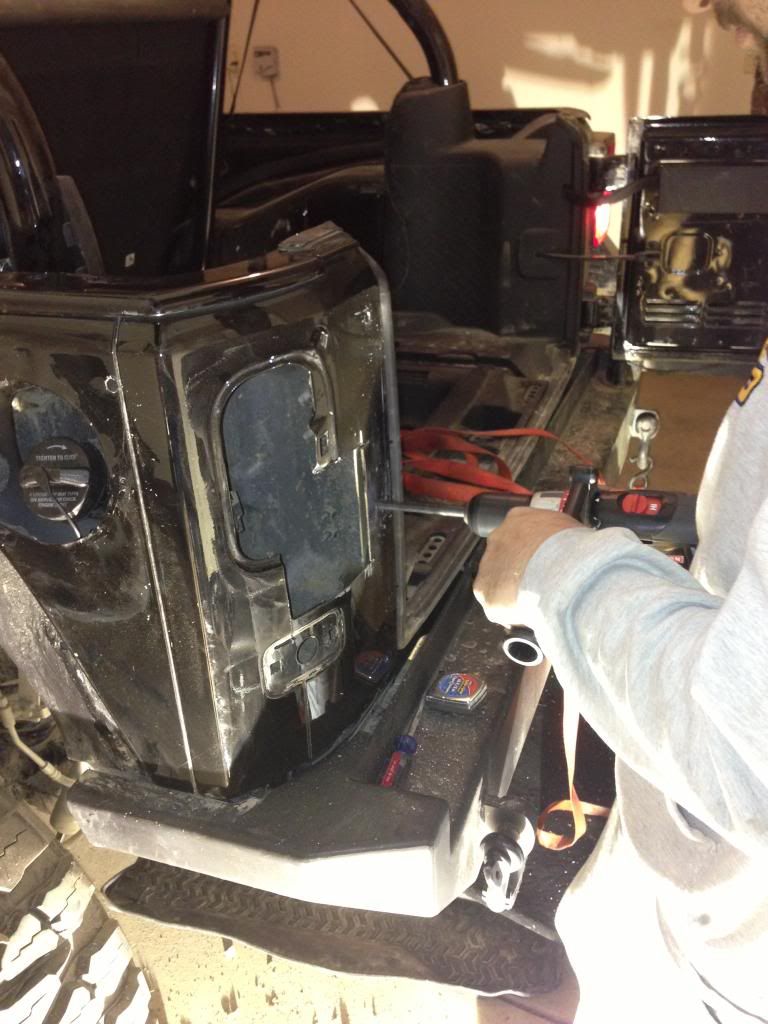
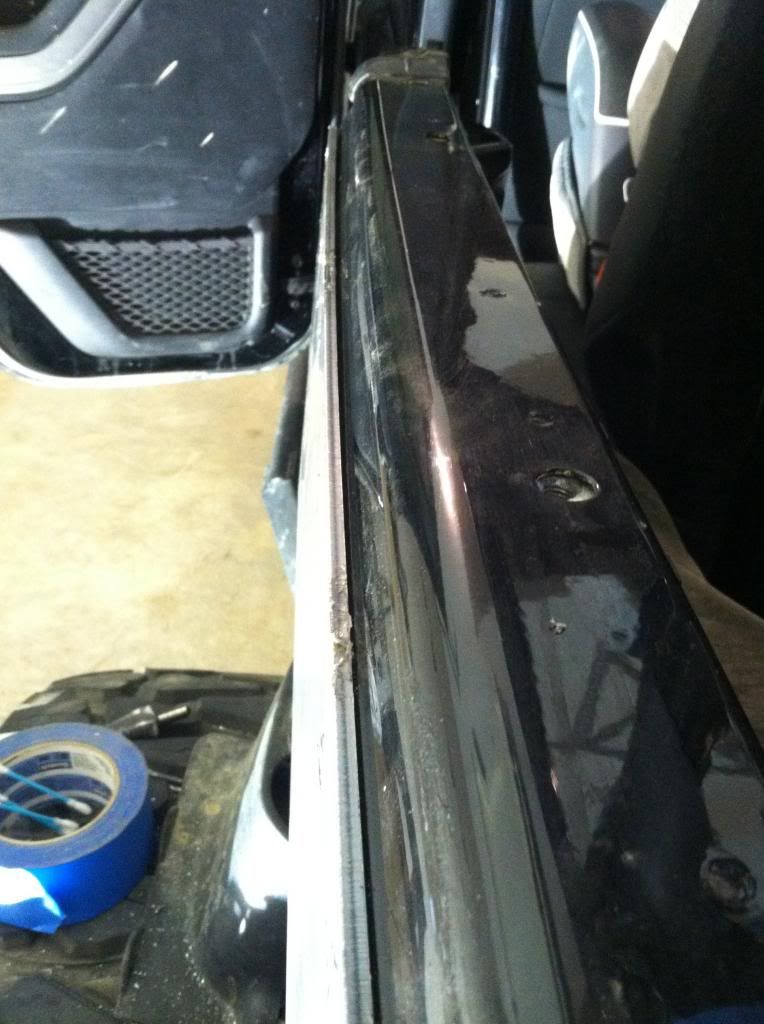
At this point all of your nutserts are in and its time to attatch your driver side corner back to the Jeep. I started with the farthest forward hole on the rocker panel and worked my way to the back of the Jeep installing the stainless bolts provided. Do not tighted just get the bolts started. When you get to the back you may have to ratchet strap or force the corner into place so that your holes line up. Do not cross thread any bolts by forcing them because your hole is a bit off, force it into place to where it lines upso your bolt easily threads into the nutsert. Once all bolts have been started you can tighten them down, step back and invision what they will look like once coated or painted.

Now it is time to work on the passenger side which is basically identical. On the passenger side I utilized ratchet straps instead of 2 but also used basically the same clamps in the same location. The third ratchet strap I used to pull the corner forward.
There were a few imperfections on the corners from shipping but I just hit them with a flap disk with a high number grit sand paper. It is also a good idea to use a scotch bright pad on the lazer cut edges to clean away the residue left behind. My powder coated still wanted to sand blast the laser cut edges to create a rougher surface for the powder to adhere to.
This is it so far, I will update this with finished product pictures when I get the corners back from being powder coated ( they estimated 2 weeks). Feel free to ask any questions you have and I can get detailed pictures per request when I get them back and installed.
I also purchased poison spyder tail lights and back up lights. For the back up lights I drilled my own holes to fit them. I don't have a pic of the hole I drilled and I can't take one because the corners are at the powder coaters right now. Here is about what I ended up with.
First steps are to remove your tail lights, License plate brackets, and fuel filler surround. The tail lights are removed with just two phillips head screws each and the fuel filler surround you need to reach in through the tail light hole to depress clips to remove. The inner part of the surround is rubber that just slides over the fuel fill tube.
Now the fun begins, fitting the corners to your Jeep! I started with the driver side. I held the corners up to my Jeep and marked out a rough location of the new tail light and cut a hole larger that where they will go. This will helpbe allowing you to place a c-clamp in the hole to help suck the corner over a little later. I started a the fartherst forward part at the rocker panel and used a 6" c-clamp to hold the corner to my jeep lightly and rested the back on my bumper. I then started to line up the hoe in the new corner with the hole in the Jeep body for the fuel fill tube. I used 3 vice grips along the top edge of the corner and one in the wheel well. I then placed a 6" c clamp in the tail light hole and around the tail gate opening of the jeep to suck the corner in toward the tail gate opening. Doing this sucked it over wellbut made it crooked from top to bottom so I then added a ratchet strap attatched to the corner by the wheel well opening and ran it to my bumper on the passenger side. I added another one from the top plate of the corner that has a hole to my roll cage bar inside the Jeep ( did not get a picture of this). The ratchet straps were great because you can slowly ratchet the corners into place.
The next step entails drilling into your jeep with a 5/16" drill bit through the holes in your corner as it is clamped on where you want it. Once you drill all the holes remove the corner and redrill the hole to 25/64" ( EVO instructions say 3/8" but I found 25/64" to work better for me. 3/8" seemed too small and 25/64" the nut insert was a snug fit in the hole. I take no responsibility in you drilling the holes to this size and it not working.) Once allof your holes are drilled out larger cover the care metal with paint. I sprayed paint onto cardboard and applied with a q-tip to avoid any overspray. Next it is time to instal the nut inserts. I highly recommend investing in a decent tool. I went in on a tool with some other local Jeep guys to bring down the cost. We purchased the toolfom grainger for $110 and I installed all 24 nutserts without a single issue. When installing the nut inserts I covered the outside of it with red locktight prior to instal.
At this point all of your nutserts are in and its time to attatch your driver side corner back to the Jeep. I started with the farthest forward hole on the rocker panel and worked my way to the back of the Jeep installing the stainless bolts provided. Do not tighted just get the bolts started. When you get to the back you may have to ratchet strap or force the corner into place so that your holes line up. Do not cross thread any bolts by forcing them because your hole is a bit off, force it into place to where it lines upso your bolt easily threads into the nutsert. Once all bolts have been started you can tighten them down, step back and invision what they will look like once coated or painted.
Now it is time to work on the passenger side which is basically identical. On the passenger side I utilized ratchet straps instead of 2 but also used basically the same clamps in the same location. The third ratchet strap I used to pull the corner forward.
There were a few imperfections on the corners from shipping but I just hit them with a flap disk with a high number grit sand paper. It is also a good idea to use a scotch bright pad on the lazer cut edges to clean away the residue left behind. My powder coated still wanted to sand blast the laser cut edges to create a rougher surface for the powder to adhere to.
This is it so far, I will update this with finished product pictures when I get the corners back from being powder coated ( they estimated 2 weeks). Feel free to ask any questions you have and I can get detailed pictures per request when I get them back and installed.
Last edited by blkindyjk; Mar 25, 2013 at 03:51 PM.
JK Freak
Joined: Jul 2011
Posts: 717
Likes: 0
From: Independence and Lexington, KY (depends on the time of year)
There were a few imperfections on the corners from shipping but I just hit them with a flap disk with a high number grit sand paper. It is also a good idea to use a scotch bright pad on the lazer cut edges to clean away the residue left behind. My powder coated still wanted to sand blast the laser cut edges to create a rougher surface for the powder to adhere to.
This is it so far, I will update this with finished product pictures when I get the corners back from being powder coated ( they estimated 2 weeks). Feel free to ask any questions you have and I can get detailed pictures per request when I get them back and installed.
This is it so far, I will update this with finished product pictures when I get the corners back from being powder coated ( they estimated 2 weeks). Feel free to ask any questions you have and I can get detailed pictures per request when I get them back and installed.
 Keep us posted!

JK Enthusiast
Joined: May 2012
Posts: 168
Likes: 0
From: Chandler, AZ
I've highlighted the area of concern in the picture. I'm guessing I'd need to cut/shave off quite a bit of this in order to with the Poison Spyder Rock Skins. Is there anything there that cannot be cut back to accommodate them?

Thread Starter
JK Newbie
Joined: Sep 2012
Posts: 33
Likes: 0
From: Clayton, Indiana
There is one nutsert down there attaching the lower part there. You would need to come up with a way to support the lower end of the corner. Could possibly drill a new hole farther back and adjust where you put the nutsert. There is not much body behind the part running along the door so there is no way to support higher up. I will look at it and get a close up shot of that area when I get the corners back. I can get a picture of the area where I mounted the corner tonight and judging on where my nutsert is you can get an idea of somewhere else to mount.
Thread Starter
JK Newbie
Joined: Sep 2012
Posts: 33
Likes: 0
From: Clayton, Indiana
They are 3/16" and I am very happy with the fit after hearing other people talk about having issues with that thick of corner armor. There is a gap at the bend in the back which is to be expected. That particular gap I believe was about 1/8". I will be using black silicone along the top and sides which will hide that gap. Looking down the sides you can see the armor curve to contour with the body, I credit that to using so many clamps when I drilled the holes. I paid $399 from Northridge 4x4.
Trending Topics

Thread Starter
JK Newbie
Joined: Sep 2012
Posts: 33
Likes: 0
From: Clayton, Indiana
As of right now I plan on not running a flare but they can always be added at a later date if I decide I like it better with flares. I am also going to clarify the gap question again. I am not sure the actual size of the gap at the bend on top but I know I was happy with the outcome and I can get a more accurate measurement when I get them back. I went into this reading reviews on thick corner armor fitting like garbage and people unhappy with the outcome so I knew that it wasn't going to just pop in place like the thinner compound bend corner like psc. If you take your time and keep adding clamps and tightening the ratchet straps you can get them to look great in my opinion but you will always have a small gap in the back on the top which I knew and was ok with before ordering these corners. I abuse my jeep a little too much so I wanted the strength of 3/16" and I also wanted a full corner so I have the option to run without flares. That left me two choices to my knowledge, EVO and river raiders. I chose EVO because I have had great luck with their products and have received awesome customer support from them in the past. Plus the price is a lot nicer!