
Rubicon Owners! Locker Modification!

Thread Starter
JK Junkie
Joined: Oct 2008
Posts: 2,008
Likes: 0
From: Fort St John B.C.
OK so I spent this afternoon making it so I don't have to be in 4lo to play with my lockers. With little rock crawling and more muddy trails with extreme holes I was finding the need to have the rear locker selectable while in 4HI. While I was doing it I figured I might as well do the front too
So the research started and a quick trip to Canadian Tire was in order.
SUPPLIES NEEDED:
I bought 2 switches with flip up covers
1 pack of female spade ends
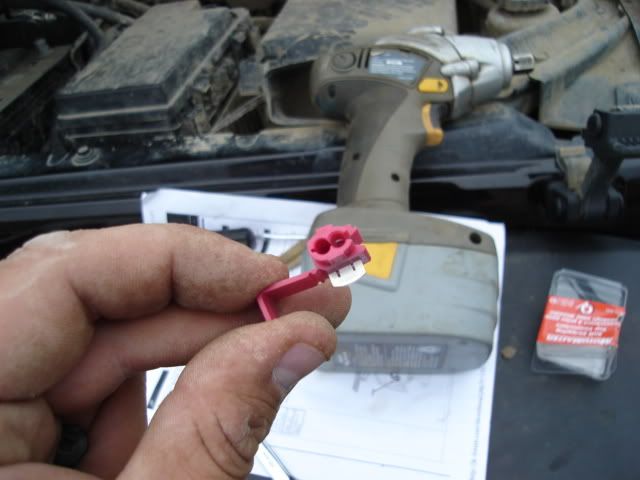
1 pack of... red wire splicer clip things that rock
and 7 feet of dual wire
Zap Straps
TOOLS NEEDED
10mm wrench
10mm socket and extention
Pliers
Drill with any size bit
Sharp Knife
Phillips screwdriver
Here is how it came together.
1) Use you 10mm wrench to undo the battery clamps
2) Use your ratchet extention and 10mm socket to pull the bolt from the battery hold down in front of the battery
3) Remove the battery
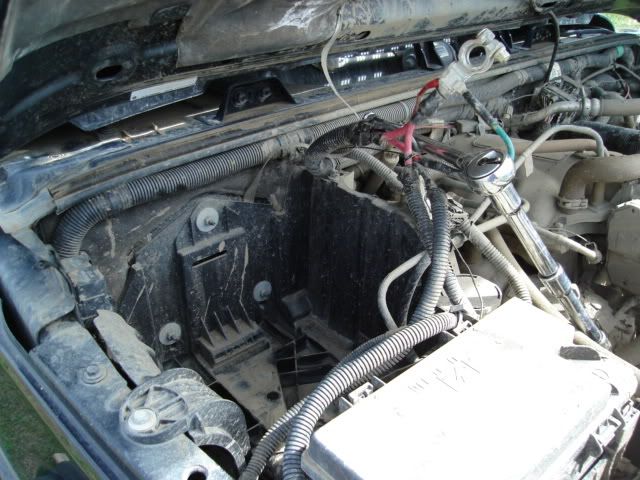
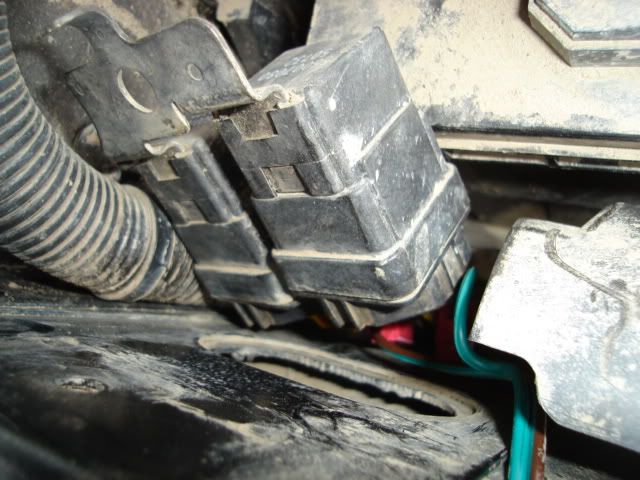
4) The locker solonoids are the two little black boxes hanging beside the battery on the passenger side. Use youe Phillips screwdriver to remove the little screw holding the 2 locker solonoids in place. When you remove the screw be sure to also remove the plastic clip it goes into so you don't loose it.
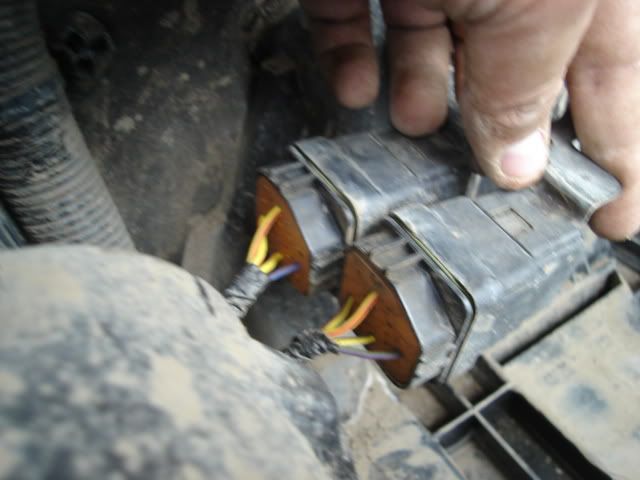
5) Pull off or carefully cut off the plastic wrapping that is on the wires under the solonoids. You will notice the solonoids do not move too far from there original location so it is a little awkward but it can be done. you need to remove enough so that you can get one of those snazzy red slicerclips in there, so about 2 Inches
This is the snazzy splicer clip thing..
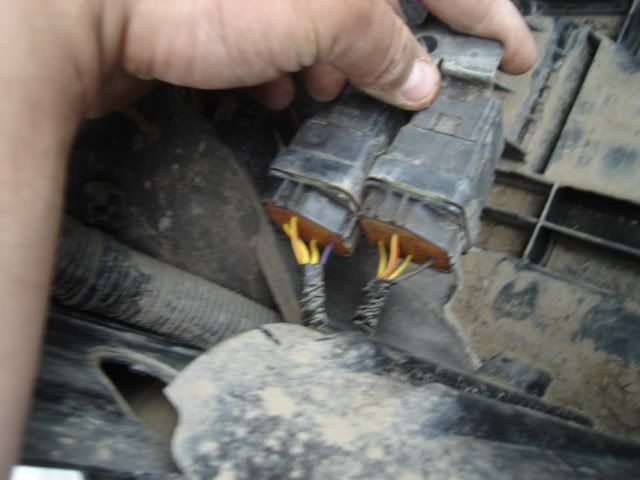
6) Each solonoid has a purple wire and 3 yellow wires.. the purple wires are the ones you want. the front locker is a purple with blue line and the rear locker is purple with a green line. Set one snazzy red clip thing onto both purple wires. Seperate your dual wire a little bit.. about 4" down but don't strip the ends.
7) Stick the ends of your dual wire into the its spot in the snazzy red clip. 1 wire for the front locker 1 wire for the rear locker. Use your pliers to close he clips and then reinstall the solonoids using the plasic holder and philips screw. Then reinstall your battery.
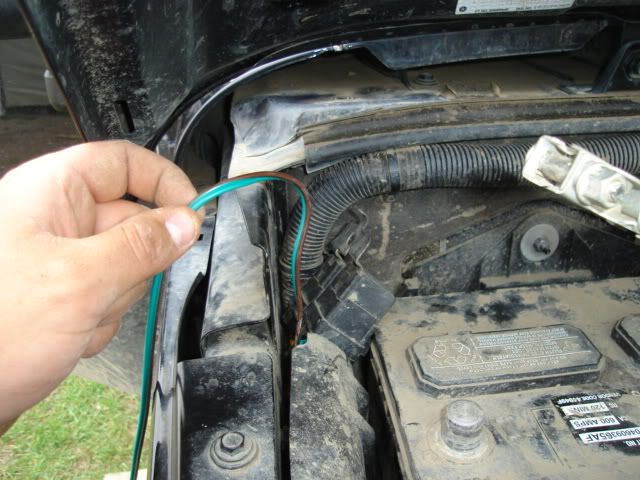
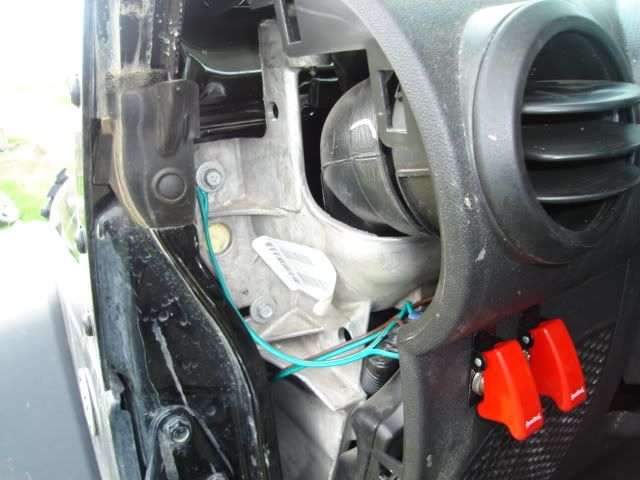
8) Run your wires across the back of your firewall to the rubber gromet on the drivers side. Poke a hole in the grommet and run your wires through into the cab. Zap strap your wires along the way under the hood so they can't move around while wheeling.
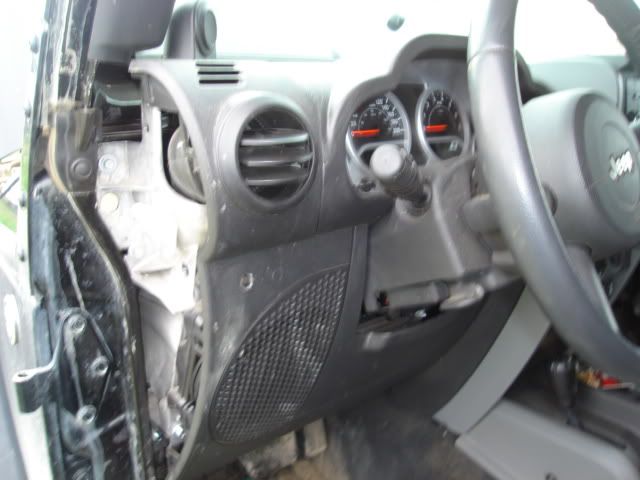
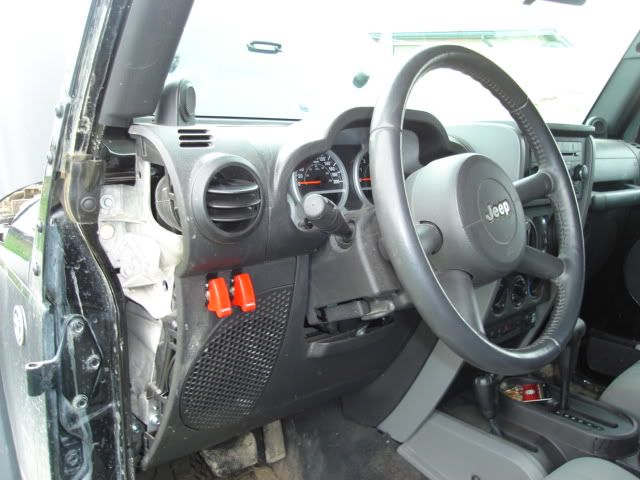
9) Take off your drivers door for easier access and pull off your side pannel of the dash. No tool is required jus pull on it.
10) Mark where you want to put the switches and use your drill to hollow out a hole the right size. Take your time and keep checking fitment.. you can always drill more out but it is hard to put some back.
11) If you like it so far.. drill another one right beside it and repeat step 10
12) Take a piece of your dual wire about 8" long off the end of your 7' chunck. Put the female spade ends on both wires comming out of the firewall and both wires at one end of the 8" chuck then strip the other two ends of the small chunk about 1" and twist them together.
13) Plug your spade ends from the solonoids to the top of your switches and plug the spade ends of the 8" chunk into the bottom of your switches.
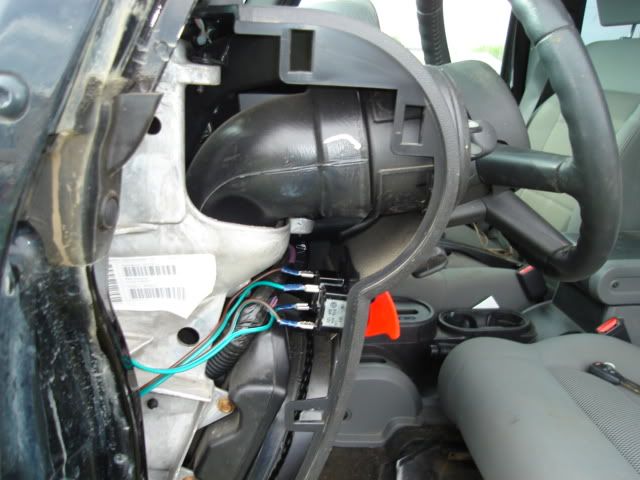
14) Take you 10mm socket and remove one bolt from the firewall behind the dash, this is a good ground, take the ends of the wire that are twisted together and put behind the bolt and retighten the bolt down snug.
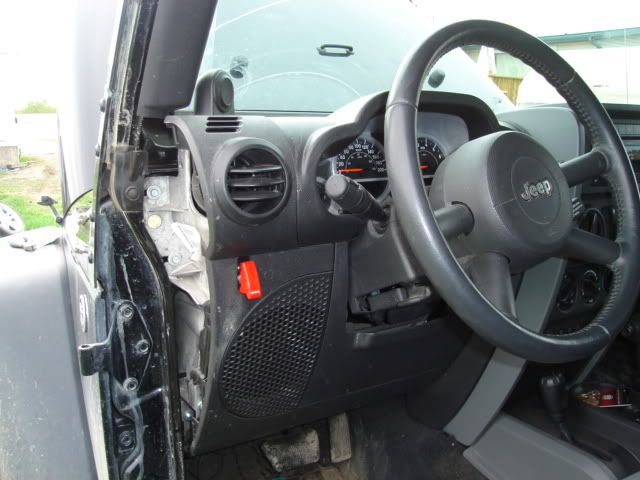
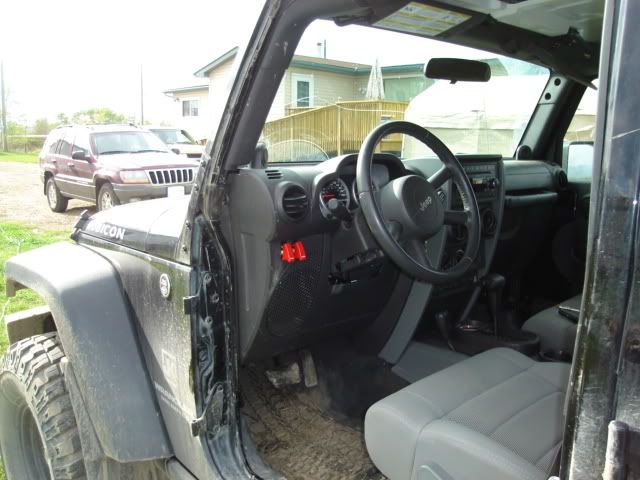
15) Put the panel back on the side of the dash and enjoy the freedom to use your lockers when you want.
When the switch is on the locker light will blink and never actually go steady but the locker will engage. when the switch is off everything will work as normal.
I don't recommend going fast while your locker is engaged but if you are like me and need the traction and the wheel speed but not the 4:1 Low range this is for you.
I have my ESP completely disabled so I don't know how those will work together, I would disengage it before you switched your lockers in while in 4HI.
Happy Wheeling Ladies and Gents!
So the research started and a quick trip to Canadian Tire was in order.
SUPPLIES NEEDED:
I bought 2 switches with flip up covers
1 pack of female spade ends
1 pack of... red wire splicer clip things that rock
and 7 feet of dual wire
Zap Straps
TOOLS NEEDED
10mm wrench
10mm socket and extention
Pliers
Drill with any size bit
Sharp Knife
Phillips screwdriver
Here is how it came together.
1) Use you 10mm wrench to undo the battery clamps
2) Use your ratchet extention and 10mm socket to pull the bolt from the battery hold down in front of the battery
3) Remove the battery
4) The locker solonoids are the two little black boxes hanging beside the battery on the passenger side. Use youe Phillips screwdriver to remove the little screw holding the 2 locker solonoids in place. When you remove the screw be sure to also remove the plastic clip it goes into so you don't loose it.
5) Pull off or carefully cut off the plastic wrapping that is on the wires under the solonoids. You will notice the solonoids do not move too far from there original location so it is a little awkward but it can be done. you need to remove enough so that you can get one of those snazzy red slicerclips in there, so about 2 Inches
This is the snazzy splicer clip thing..
6) Each solonoid has a purple wire and 3 yellow wires.. the purple wires are the ones you want. the front locker is a purple with blue line and the rear locker is purple with a green line. Set one snazzy red clip thing onto both purple wires. Seperate your dual wire a little bit.. about 4" down but don't strip the ends.
7) Stick the ends of your dual wire into the its spot in the snazzy red clip. 1 wire for the front locker 1 wire for the rear locker. Use your pliers to close he clips and then reinstall the solonoids using the plasic holder and philips screw. Then reinstall your battery.
8) Run your wires across the back of your firewall to the rubber gromet on the drivers side. Poke a hole in the grommet and run your wires through into the cab. Zap strap your wires along the way under the hood so they can't move around while wheeling.
9) Take off your drivers door for easier access and pull off your side pannel of the dash. No tool is required jus pull on it.
10) Mark where you want to put the switches and use your drill to hollow out a hole the right size. Take your time and keep checking fitment.. you can always drill more out but it is hard to put some back.
11) If you like it so far.. drill another one right beside it and repeat step 10
12) Take a piece of your dual wire about 8" long off the end of your 7' chunck. Put the female spade ends on both wires comming out of the firewall and both wires at one end of the 8" chuck then strip the other two ends of the small chunk about 1" and twist them together.
13) Plug your spade ends from the solonoids to the top of your switches and plug the spade ends of the 8" chunk into the bottom of your switches.
14) Take you 10mm socket and remove one bolt from the firewall behind the dash, this is a good ground, take the ends of the wire that are twisted together and put behind the bolt and retighten the bolt down snug.
15) Put the panel back on the side of the dash and enjoy the freedom to use your lockers when you want.
When the switch is on the locker light will blink and never actually go steady but the locker will engage. when the switch is off everything will work as normal.
I don't recommend going fast while your locker is engaged but if you are like me and need the traction and the wheel speed but not the 4:1 Low range this is for you.
I have my ESP completely disabled so I don't know how those will work together, I would disengage it before you switched your lockers in while in 4HI.
Happy Wheeling Ladies and Gents!

JK Enthusiast
Joined: Mar 2009
Posts: 348
Likes: 2
From: gilford, nh
That is excelent  . 1 recomendation... get rid of those "snazzy clips" and put on some heat shrink connectors. I am a marine tech. and those clips fail all the time!!! They will corrode and be no good.
. 1 recomendation... get rid of those "snazzy clips" and put on some heat shrink connectors. I am a marine tech. and those clips fail all the time!!! They will corrode and be no good.
Thread Starter
JK Junkie
Joined: Oct 2008
Posts: 2,008
Likes: 0
From: Fort St John B.C.
09rubicon, yes it is just a switchable ground so unfortunatly the lights dont work but no biggie.
Thanks redneck
NH4X4, if I still lived on the coast or anywhere with any humidity I would do it diffrent but up here in the dry and cold I have never had a problem with these clips.. that being said if I have a problem I know where to start
Thanks redneck
NH4X4, if I still lived on the coast or anywhere with any humidity I would do it diffrent but up here in the dry and cold I have never had a problem with these clips.. that being said if I have a problem I know where to start
Trending Topics
JK Jedi
Joined: Apr 2008
Posts: 5,168
Likes: 1
From: texarkana,tx
x2. I always like to solder and heat shrink where I can. Where I cannot I still heat shink and use that connector goo.
That looks awesome OP. I don't know why they don't come that way. You just made a great upgrade on your rig.
JK Jedi
Joined: Apr 2008
Posts: 5,168
Likes: 1
From: texarkana,tx
crazy! lol
You ever felt the need to go around a really tight corner in 4lo and want the rear locker engadged/or not/ or off and on because the ground is those little morble rocks? Or unlock the rear and just lock the front push on the brakes and gas with the wheels turned to change your line in a tight spot? I think some call it a "dig". Pulling a boat up a wet or gravel boat ramp? just having the rear in 4hi is great for that. IMO, it is pointless to have selectable lockers if you can not tell them exactly when you want them on or not.
You ever felt the need to go around a really tight corner in 4lo and want the rear locker engadged/or not/ or off and on because the ground is those little morble rocks? Or unlock the rear and just lock the front push on the brakes and gas with the wheels turned to change your line in a tight spot? I think some call it a "dig". Pulling a boat up a wet or gravel boat ramp? just having the rear in 4hi is great for that. IMO, it is pointless to have selectable lockers if you can not tell them exactly when you want them on or not.