


Ade's JK Build (2 Door)

Thread Starter
JK Enthusiast
Joined: Apr 2014
Posts: 479
Likes: 0
From: Alameda, CA
Thread Starter
JK Enthusiast
Joined: Apr 2014
Posts: 479
Likes: 0
From: Alameda, CA

The Rubicon Trip.
Was going great guns until after little sluice on the second day (running trail backwards from Tahoe to Loon). When all of a sudden bang, one broken rear axle shaft and then it was 3 wheel drive for the next 5 miles all the way to the Dam and cell phone coverage to get a flat bed to take the girl home.
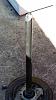
Also took out two valve stems on the trip. Time for some better wheels with backspacing
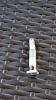
Back at base camp and time to get on the blower again to Northridge and sort out some Ten Factory replacements. (The monkey was spotting when the axle shaft went)
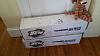
And the weekends work was set.
Was going great guns until after little sluice on the second day (running trail backwards from Tahoe to Loon). When all of a sudden bang, one broken rear axle shaft and then it was 3 wheel drive for the next 5 miles all the way to the Dam and cell phone coverage to get a flat bed to take the girl home.
Also took out two valve stems on the trip. Time for some better wheels with backspacing
Back at base camp and time to get on the blower again to Northridge and sort out some Ten Factory replacements. (The monkey was spotting when the axle shaft went)
And the weekends work was set.
Thread Starter
JK Enthusiast
Joined: Apr 2014
Posts: 479
Likes: 0
From: Alameda, CA
Time to install the ChroMoly Ten Factory's
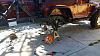
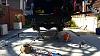
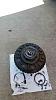
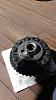
Digging out the spline from the Locker took some time, but finally came out with a large magnet. Inner bearing was completely eaten by the broken shaft rotating for 5 mile across the Rubicon. Only thing keeping it in place was the brake disk.
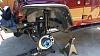
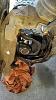
Fronts went on nicely, though I may change the unit bearings as they weren't looking their best. No play just looking old.
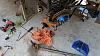
Digging out the spline from the Locker took some time, but finally came out with a large magnet. Inner bearing was completely eaten by the broken shaft rotating for 5 mile across the Rubicon. Only thing keeping it in place was the brake disk.
Fronts went on nicely, though I may change the unit bearings as they weren't looking their best. No play just looking old.
Last edited by ade; Oct 19, 2014 at 10:05 AM.
Thread Starter
JK Enthusiast
Joined: Apr 2014
Posts: 479
Likes: 0
From: Alameda, CA
The next step, some better lighting now that the nights are drawing in. Trucklite LED headlights.
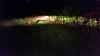
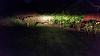
High and Low Beam on OEM lights
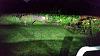
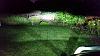
High and Low Beams on LEDs.
It's like night and day the difference. Don't know if I need a light bar now.
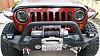
And I really like that smoky look lens.
High and Low Beam on OEM lights
High and Low Beams on LEDs.
It's like night and day the difference. Don't know if I need a light bar now.
And I really like that smoky look lens.
Last edited by ade; Oct 19, 2014 at 10:06 AM.
Thread Starter
JK Enthusiast
Joined: Apr 2014
Posts: 479
Likes: 0
From: Alameda, CA
Back to the undercarriage, and a Synergy Sector Shaft Brace with Front Track Bar Brace in case I run the Fox Stabilizer too many clicks round.
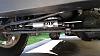
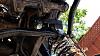
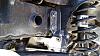
I really like this stabilizer. Have been playing around with the clicks to see how it affects road manners on the freeway. Started at about half way at 14 clicks past its softest and have slowly reduced it to between 8 - 9 giving the best results for steering response and straight line manners.
I really like this stabilizer. Have been playing around with the clicks to see how it affects road manners on the freeway. Started at about half way at 14 clicks past its softest and have slowly reduced it to between 8 - 9 giving the best results for steering response and straight line manners.
Last edited by ade; Mar 9, 2015 at 09:16 AM.
Thread Starter
JK Enthusiast
Joined: Apr 2014
Posts: 479
Likes: 0
From: Alameda, CA
So to the interior and in preparation for a sports cage, time for some additional switches and electrics. (Don't want to have to remove the cage A-pillars every time to run wiring).
1 set of Vision X LED Rock Lights.
1 sPOD with pressure gauge.
1 ARB Heavy Duty On-Board Air Compressor.
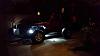
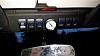
Don't have air lockers but planning on doing a D60 and 14 Bolt build next year so just ear marked the switches. Same with the light bar label.
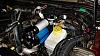
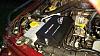
1 set of Vision X LED Rock Lights.
1 sPOD with pressure gauge.
1 ARB Heavy Duty On-Board Air Compressor.
Don't have air lockers but planning on doing a D60 and 14 Bolt build next year so just ear marked the switches. Same with the light bar label.
Thread Starter
JK Enthusiast
Joined: Apr 2014
Posts: 479
Likes: 0
From: Alameda, CA
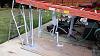
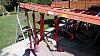
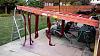
Back to the guys at Rockhard 4x4 and a couple of very large boxes later and one sports cage install is started.
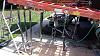
Cleaned and degreased.
Primed.
Painted.
and finally clear coated.
Cleaned and degreased.
Primed.
Painted.
and finally clear coated.
Thread Starter
JK Enthusiast
Joined: Apr 2014
Posts: 479
Likes: 0
From: Alameda, CA
The installation of the sports cage.
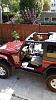
Doors off and let the work begin.
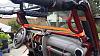
A-pillars in and dash member going in.
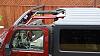
Didn't have to remove the hard top, just moved it back 4-5" to be able to drill holes for center sections.
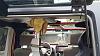
Axle stand on a 5 gallon can held rear center in place while bolting down. (Oh to not have 4 hands)
Doors off and let the work begin.
A-pillars in and dash member going in.
Didn't have to remove the hard top, just moved it back 4-5" to be able to drill holes for center sections.
Axle stand on a 5 gallon can held rear center in place while bolting down. (Oh to not have 4 hands)
