
Custom modular JK hardtop


Thread Starter
JK Super Freak
Joined: Jul 2012
Posts: 1,556
Likes: 37
From: Elmira, NY
I made up the overhead console section of the roof interior yesterday. It's got a console with overhead lights and a small storage compartment, a power outlet, and the switches for the power vent windows.
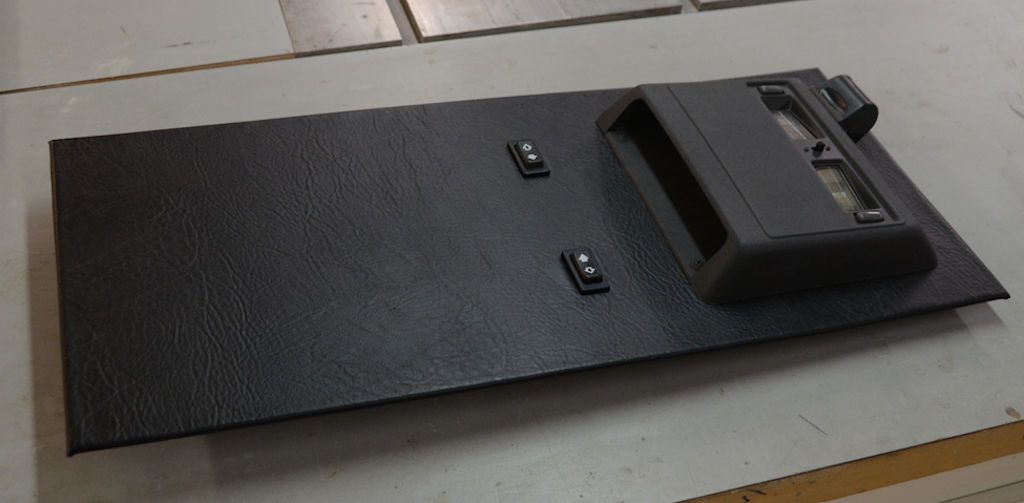
The small switch between the lights in the center of the console changes the behavior of the power outlet from unswitched power to switched power.
I've wired everything in this unit, so the only wiring I have left to do are the extensions that go from this to the plug that I've already installed at the back of the tub, and two extensions to go from here to the power vent window motors. All of that will be done and tested within the next few days.
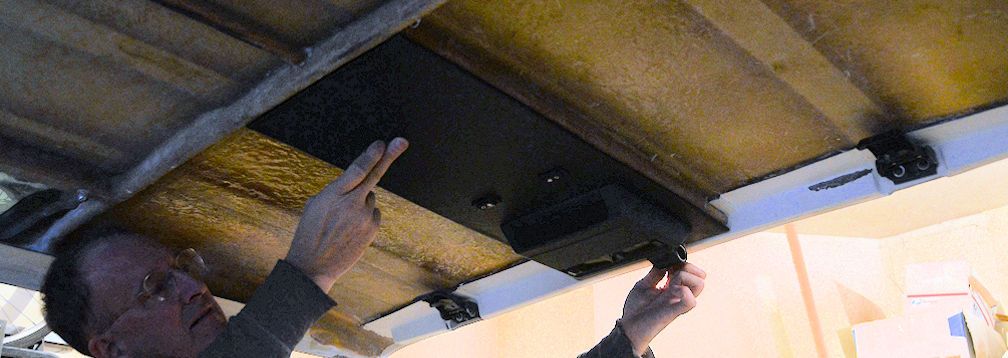
This next shot shows it being test fit it in the roof; the full headliner is still to be done.
The small switch between the lights in the center of the console changes the behavior of the power outlet from unswitched power to switched power.
I've wired everything in this unit, so the only wiring I have left to do are the extensions that go from this to the plug that I've already installed at the back of the tub, and two extensions to go from here to the power vent window motors. All of that will be done and tested within the next few days.
This next shot shows it being test fit it in the roof; the full headliner is still to be done.
JK Enthusiast
Joined: Dec 2011
Posts: 449
Likes: 0
From: Guilford CT
Thread Starter
JK Super Freak
Joined: Jul 2012
Posts: 1,556
Likes: 37
From: Elmira, NY
Thread Starter
JK Super Freak
Joined: Jul 2012
Posts: 1,556
Likes: 37
From: Elmira, NY
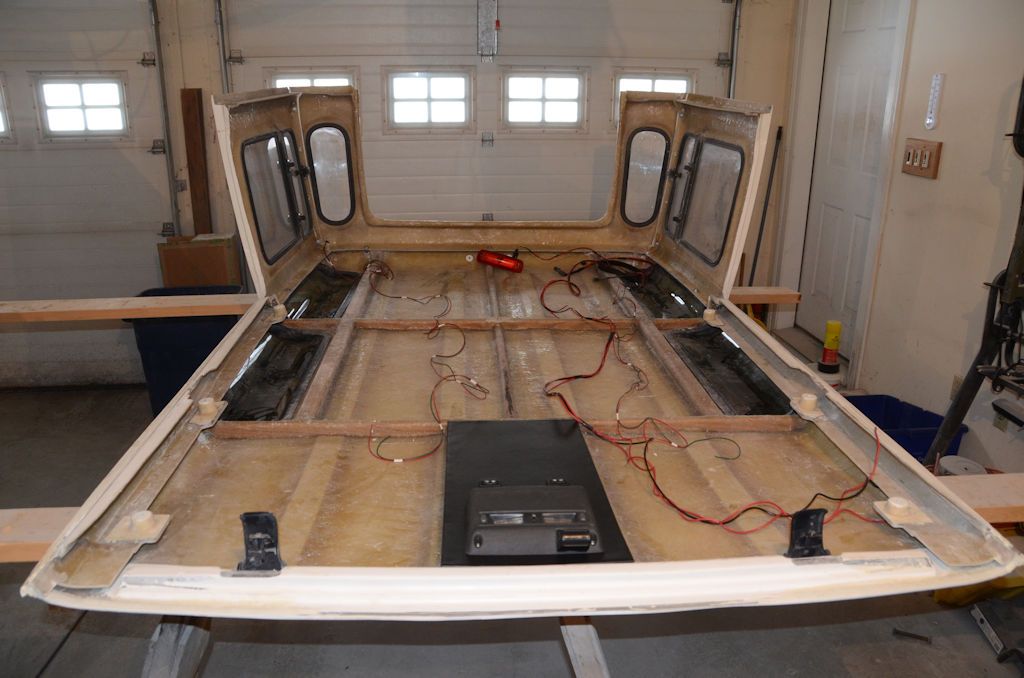
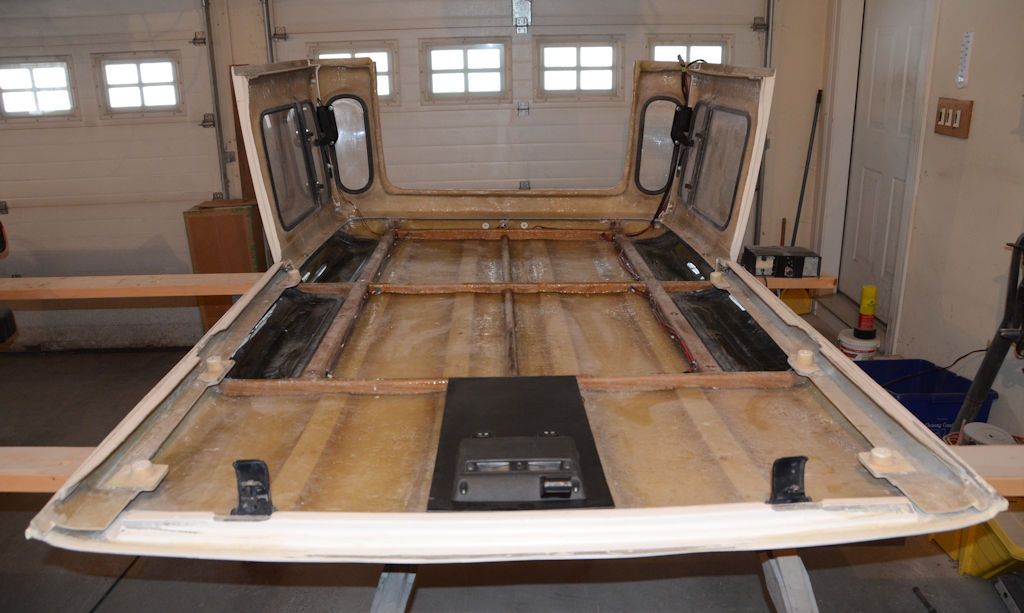
Wiring inside the hardtop is all done and all the wires are routed so they'll be under the headliner when the headliner is installed. The plugs to connect it to the Jeep are at the bottom passenger corner of the hardtop (top right in this photo since it's upside down). I've got it connected to a 12v power supply for testing, but the necessary wiring/plugs is all in the Jeep so when the hardtop goes back on it'll all plug in. The power vent motors are installed and working.
Here's a video showing to operation of the vent windows. Because of the lighting you may have to look closely to see the vents opening and closing...
http://www.youtube.com/watch?v=T2qHRWl7K8g
Here's a video showing to operation of the vent windows. Because of the lighting you may have to look closely to see the vents opening and closing...
http://www.youtube.com/watch?v=T2qHRWl7K8g
Thread Starter
JK Super Freak
Joined: Jul 2012
Posts: 1,556
Likes: 37
From: Elmira, NY
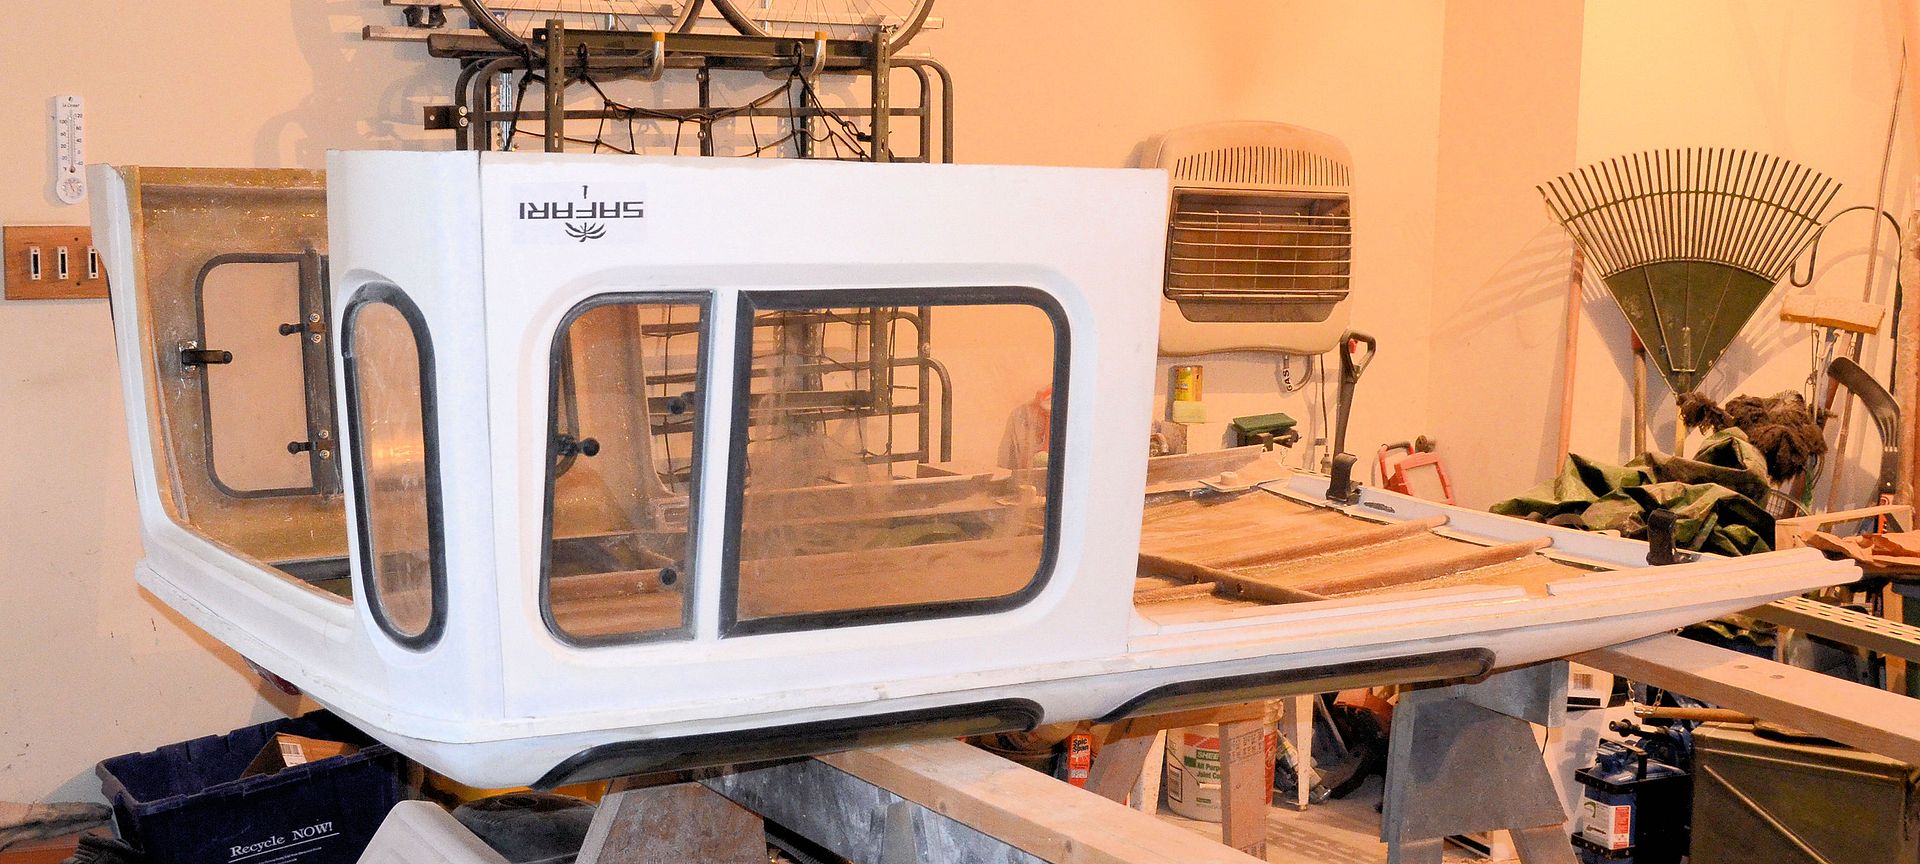
Since I've made a few minor adjustments to the fit of some of the parts, I'm verifying the fit once more of the alternate side options.
Cargo door side:
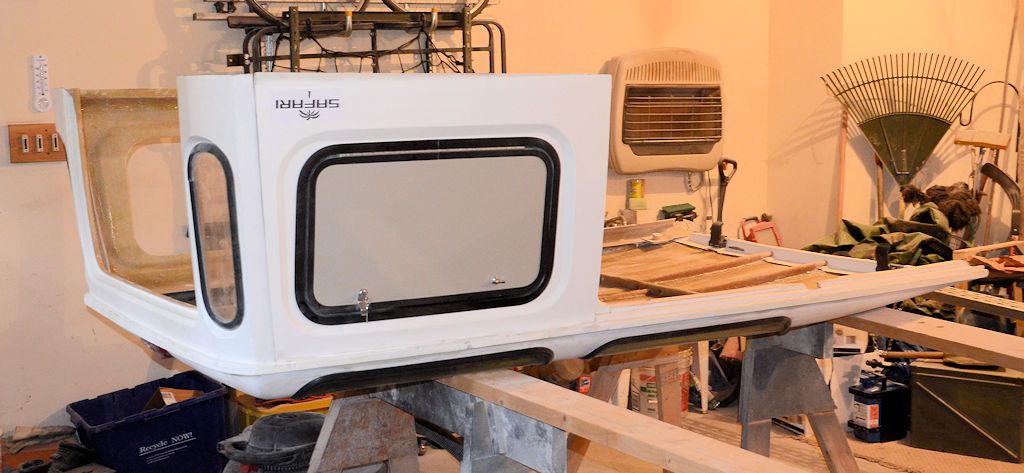
The rear door jambs for the soft sides (maybe I should call them "c-pillars"):
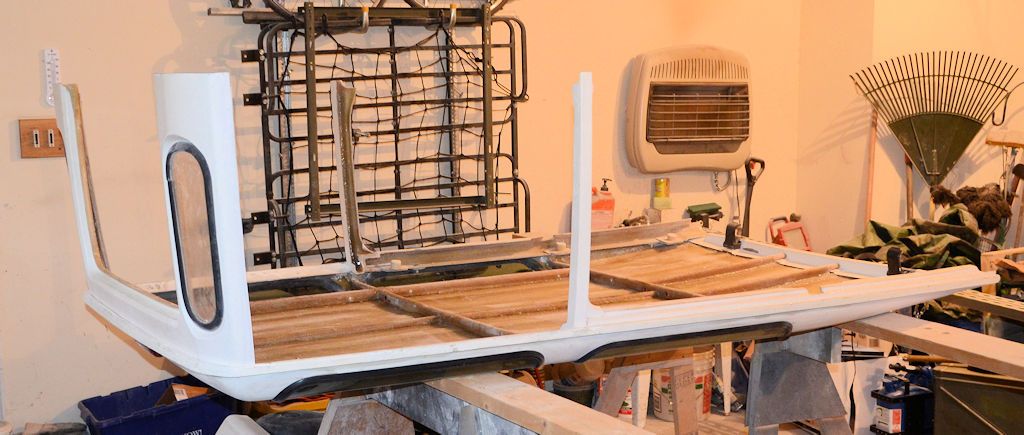
And back to the vent window sides.
Cargo door side:
The rear door jambs for the soft sides (maybe I should call them "c-pillars"):
And back to the vent window sides.
Last edited by jscherb; Feb 21, 2016 at 05:06 AM.
Thread Starter
JK Super Freak
Joined: Jul 2012
Posts: 1,556
Likes: 37
From: Elmira, NY
I've done all of the Safari Cab work solo so far, including installing/removing it multiple times. It isn't too hard to do singlehandedly, but the roof panel is a bit awkward for one person to handle. Here's how I do it... I've hung a pair of Superstrut channels (available at Lowes) from my garage door rails, so I drive the Jeep into that bay, unbolt the roof, and hang it a few inches above the Jeep with chains. Once the roof is off, the rest of the modular components are very easily handled.
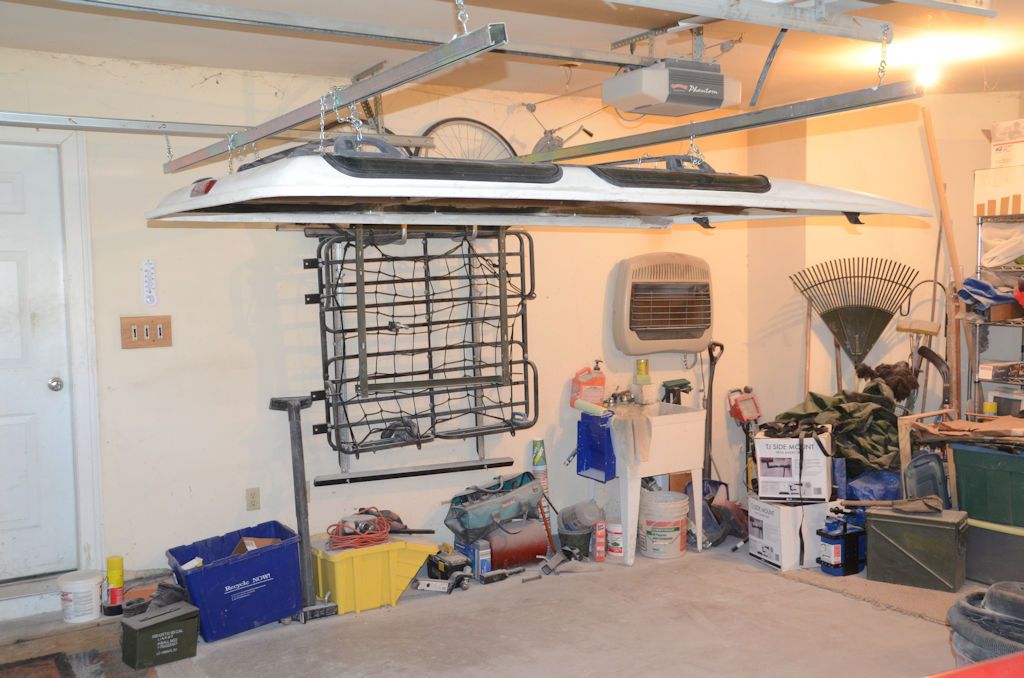
Once the Jeep is out from under the roof, if I want to move the roof elsewhere I can let it down to the floor using the chains.
Once the Jeep is out from under the roof, if I want to move the roof elsewhere I can let it down to the floor using the chains.
Thread Starter
JK Super Freak
Joined: Jul 2012
Posts: 1,556
Likes: 37
From: Elmira, NY
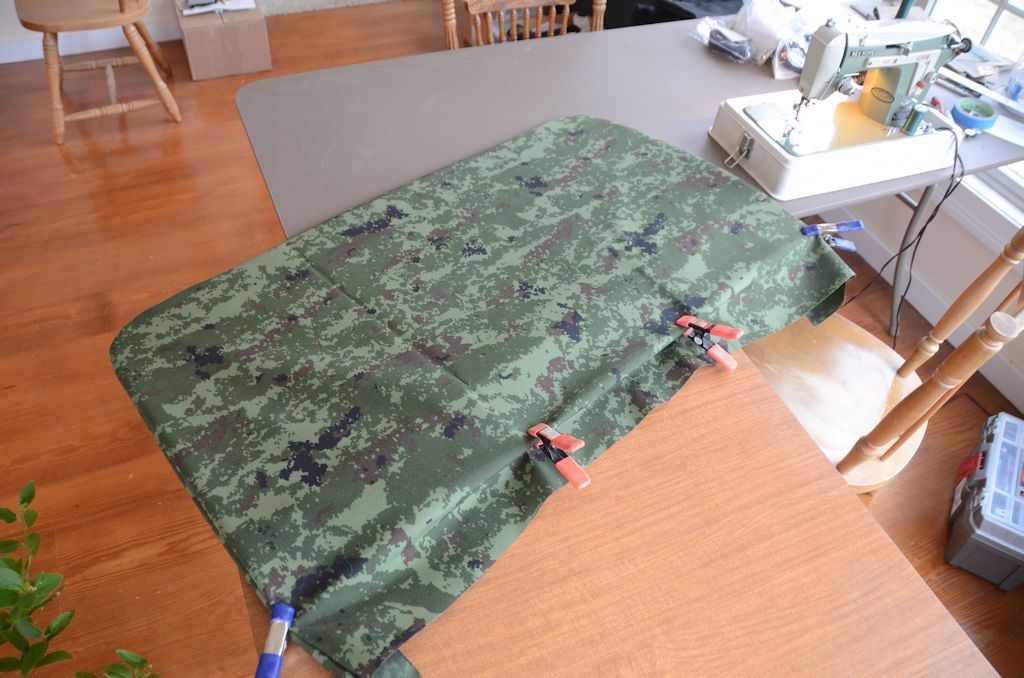
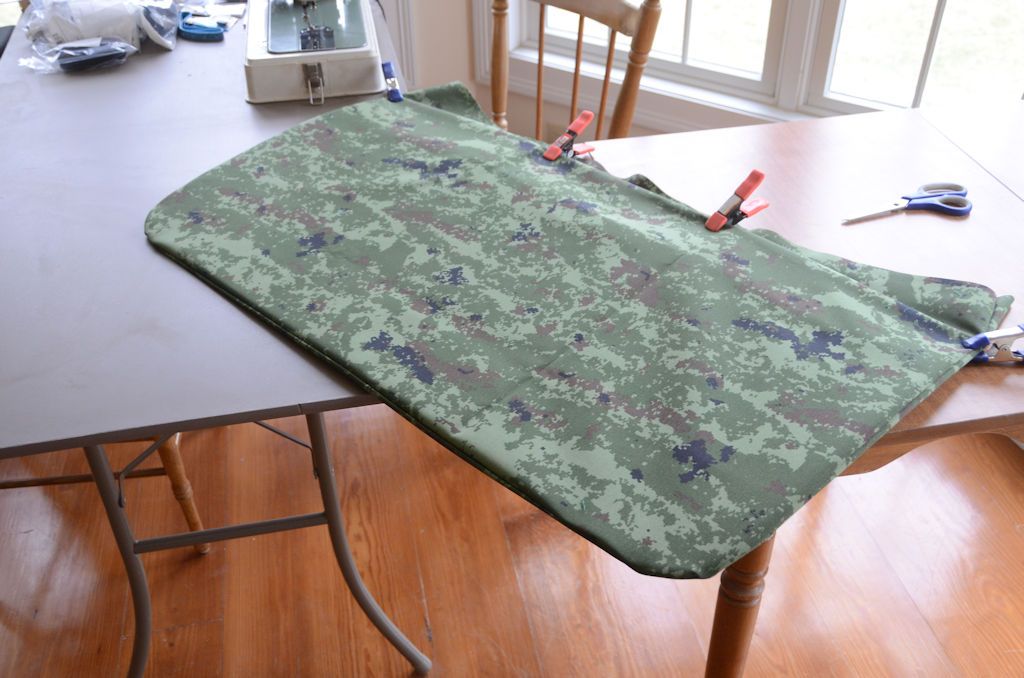
I started sewing a prototype skin for the soft barn door today. Since it's a prototype, I'm using fabric I had on hand instead of the more expensive soft top material, so that's why it's camo. This material is actually perfectly fine for this application, except that camo isn't the look I'm going for. I only had time to get the basic shell started; it slides over the metal frame like a sock. It's still a bit loose, but the way it's sewn it's very easy to tighten it up, which I'll do tomorrow. In case you're wondering, the window is the last thing that gets done, and the window hole isn't cut out yet because having the fabric in one piece to stretch over the frame makes it easier to get a perfect fit, so first I'll get the shell fitting perfectly and tightened up with zippers and velcro and then I'll cut the window hole.

Thread Starter
JK Super Freak
Joined: Jul 2012
Posts: 1,556
Likes: 37
From: Elmira, NY
The basic shell of the prototype soft barn door is complete, here is it sitting in the rear door opening:
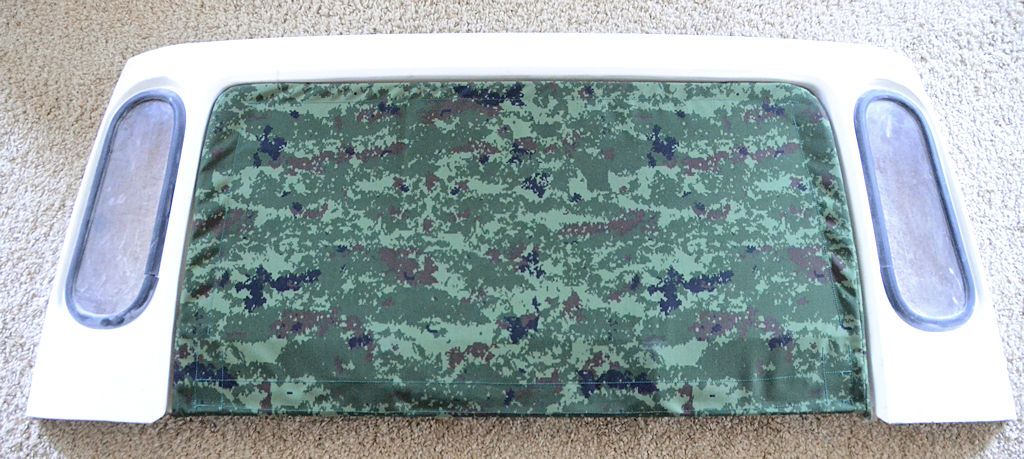
The ensure a tight fit, I secured the top and sides with zippers - pretty much all soft upper doors (except the JK factory uppers) use only velcro to secure the skins in place, but I wanted something with a more reliably tight and precise fit, so I used zippers.
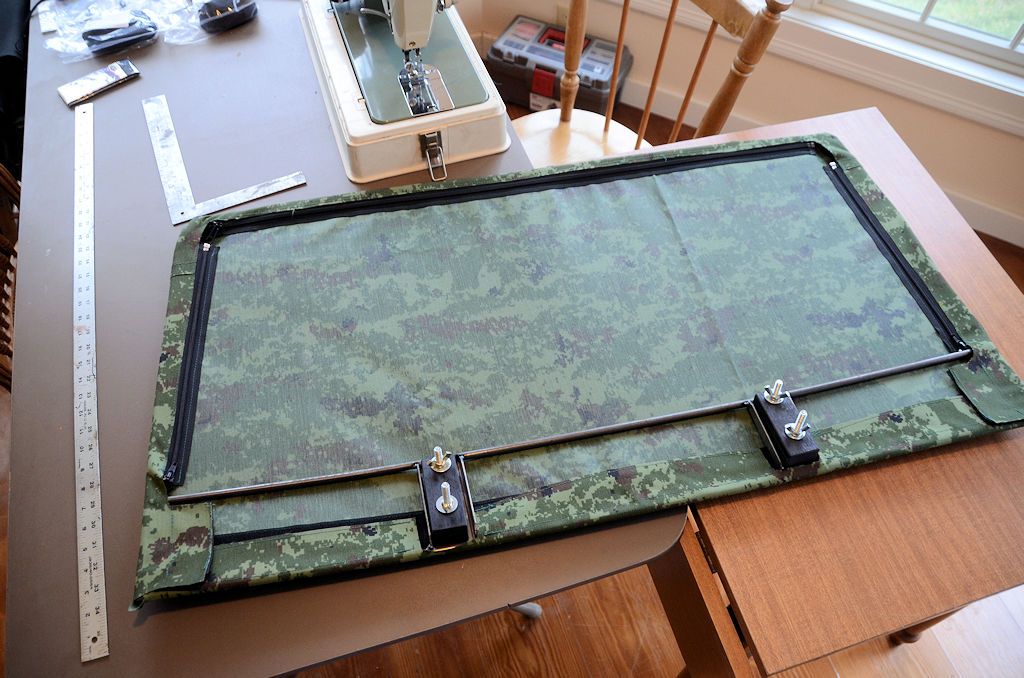
There are a few minor fit adjustments I'll make, then the next step is to install the window in it.
The ensure a tight fit, I secured the top and sides with zippers - pretty much all soft upper doors (except the JK factory uppers) use only velcro to secure the skins in place, but I wanted something with a more reliably tight and precise fit, so I used zippers.
There are a few minor fit adjustments I'll make, then the next step is to install the window in it.
Last edited by jscherb; Feb 24, 2016 at 10:45 AM.

