
Daystar Dash Panel Mod - Complete Write-Up

Thread Starter
JK Enthusiast
Joined: Oct 2010
Posts: 120
Likes: 0
From: Clearwater, FL
Let me begin with apologies to "SJG" - This is in no means meant to step on his toes, and I have to give full credit to him for posting this idea first... The original post can be found here: https://www.jk-forum.com/forums/show...dash-panel-mod
I made a few tweaks, and wanted to document the mod a little better for those attempting it.
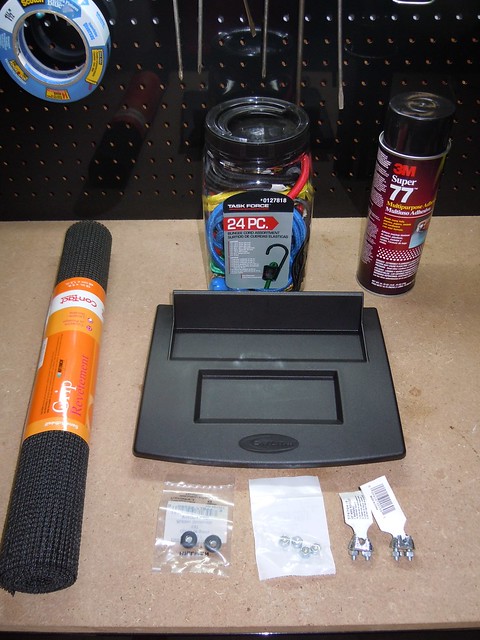
Items Needed:
Materials Needed:
Tools Needed:
Let's Begin:
1. Here's what I started with:
2. In the Bungee Cord pack you will find this cord, if you are like me, it will be at the bottom of the can, never getting used:

3. Using the needle nose pliers, pull the knot out of the back of the plastic ball...
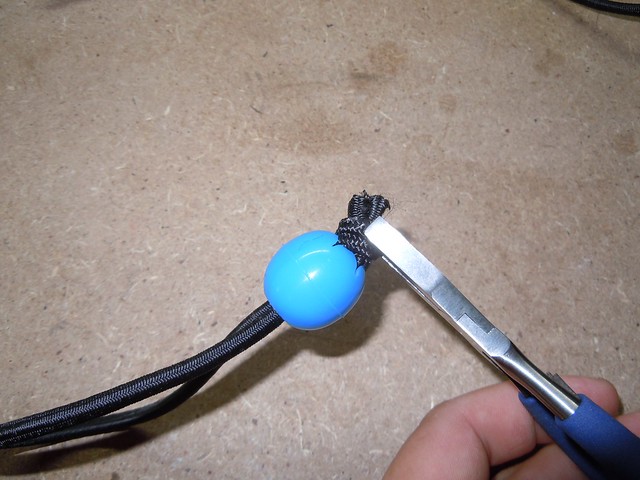
4. Then cut the knot off the ball.

5. As you can see this is the perfect color and length:

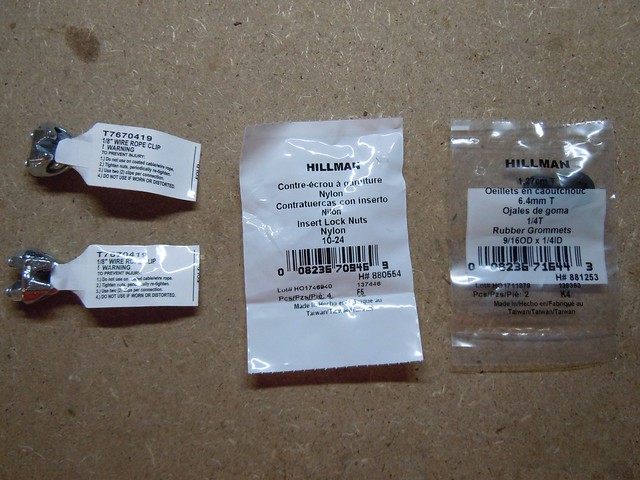
6. Here is the hardware I used:
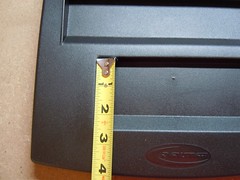
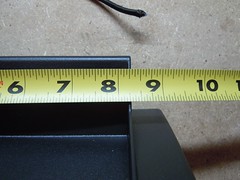
7. The dimensions for the inserts are as follows:
8. Using your straight Edge ruler, cut to the dimensions... I did not glue them at this time, but here is how they look placed in it.

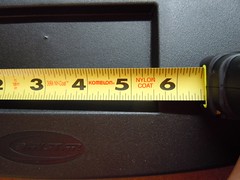
9. The backsplash measurements are as such:

I made a few tweaks, and wanted to document the mod a little better for those attempting it.
Items Needed:
- Daystar JK Dash Panel
- Bungee Cord variety pack (Bought at Lowe's)
- Black Anti-Slip Drawer Liner (Purchased at Target)
- Rubber Grommets (9/16 OD x 1/4 OD, Lowe's)
- (2) 1/8" Wire Rope Clips (Lowe's)
- (4) 10/24 Nuts with Nylon inserts (Lowe's)
Materials Needed:
- Spray Glue (I used the 3M Super 77)
- Masking or Electrical tape (to put on drill bit)
- Paper Towels
Tools Needed:
- Sharp Razor Blade (knife or raw blade)
- straight edge ruler
- Pick Set
- Flat Screwdriver
- Phillips screwdriver
- needle nose pliers
- socket set
- lighter
- Drill and drill bits
Let's Begin:
1. Here's what I started with:
2. In the Bungee Cord pack you will find this cord, if you are like me, it will be at the bottom of the can, never getting used:
3. Using the needle nose pliers, pull the knot out of the back of the plastic ball...
4. Then cut the knot off the ball.
5. As you can see this is the perfect color and length:
6. Here is the hardware I used:
7. The dimensions for the inserts are as follows:
Bottom Insert: 2" x 5 1/2"
Top Insert: 2" x 8 1/4"
8. Using your straight Edge ruler, cut to the dimensions... I did not glue them at this time, but here is how they look placed in it.
9. The backsplash measurements are as such:
Back Splash: 8 1/4" x 1 3/4"
Last edited by VJR021; Nov 19, 2010 at 08:11 AM. Reason: additional text
Thread Starter
JK Enthusiast
Joined: Oct 2010
Posts: 120
Likes: 0
From: Clearwater, FL
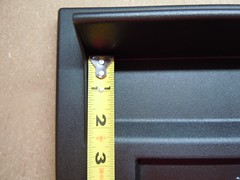
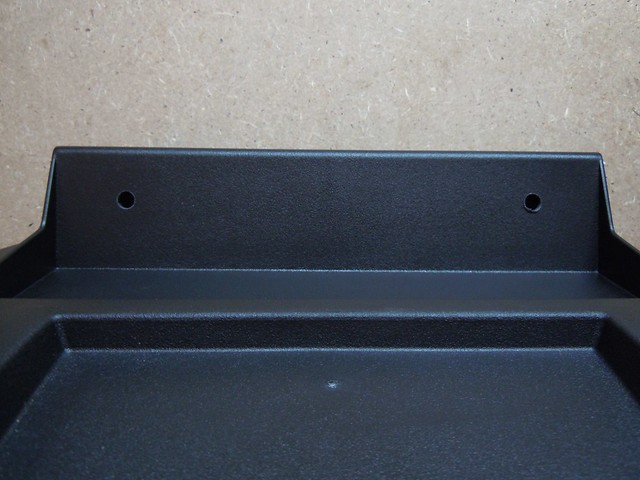
10. I used the width of my small ruler and went in 1" on either side, marking the location with a straight pick.

11. Using your tape, section off the drill bit (I used a small one to start and went up to 5/8" for final hole) This is to prevent you drilling through the back of the back splash, which will really piss you off!!!

12. Result:
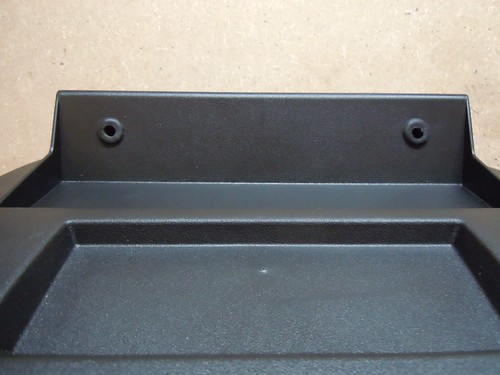
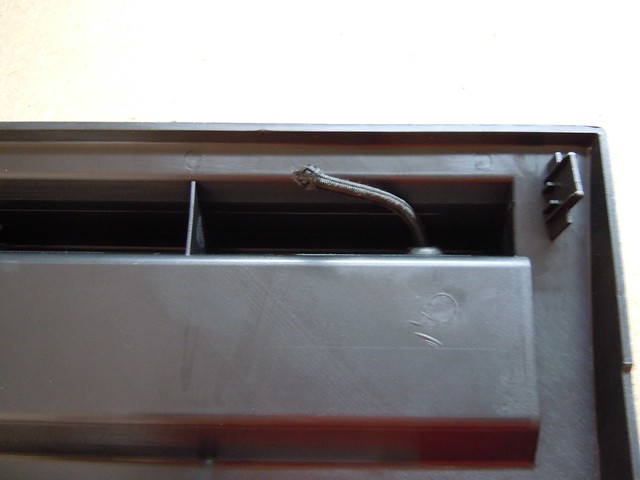
13. Now work the rubber grommet into the holes, be sure to check the back, sometimes the edges get bunched up, this will cause the grommet to not lay correctly. Here's how it looked:
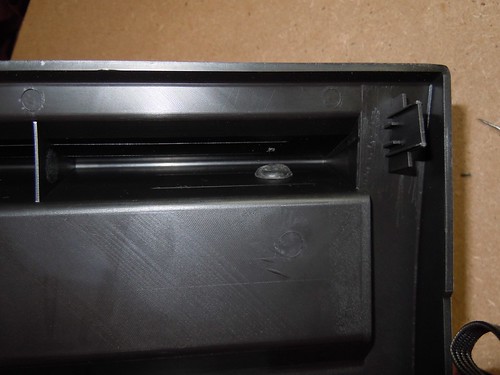
13. Pull the bungee through one of the holes, and lightly singe the ends with a lighter, this is to prevent them from falling apart.
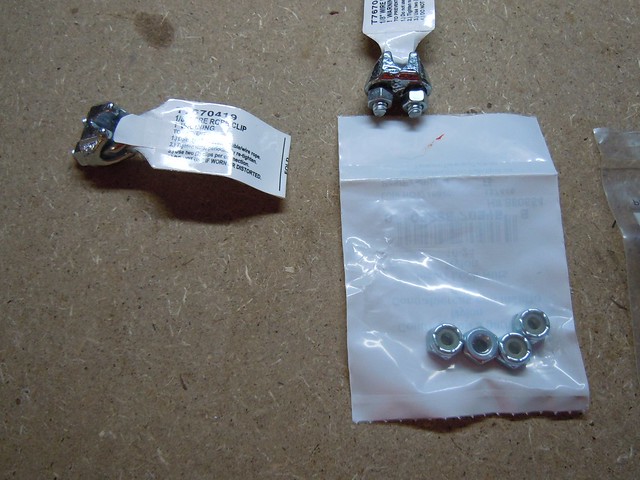
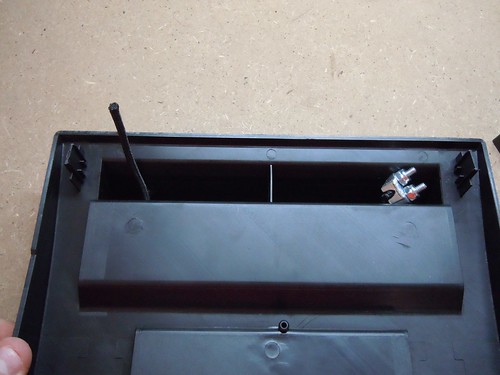
14. With the rope clamps, I threw out the included nuts and went with the nylon inserted ones, this is to prevent the nuts from loosening up due to use and vibrations later one.
The fitment is tight, but they will go on, you might not be able to use your sockets to fully tighten them down, I had to use my pliers at the end.


11. Using your tape, section off the drill bit (I used a small one to start and went up to 5/8" for final hole) This is to prevent you drilling through the back of the back splash, which will really piss you off!!!
12. Result:
13. Now work the rubber grommet into the holes, be sure to check the back, sometimes the edges get bunched up, this will cause the grommet to not lay correctly. Here's how it looked:
For me, this was the biggest change, as I could not locate the grommets SJG used, and I thought the black rubber looked better, IMHO
13. Pull the bungee through one of the holes, and lightly singe the ends with a lighter, this is to prevent them from falling apart.
14. With the rope clamps, I threw out the included nuts and went with the nylon inserted ones, this is to prevent the nuts from loosening up due to use and vibrations later one.
The fitment is tight, but they will go on, you might not be able to use your sockets to fully tighten them down, I had to use my pliers at the end.
Thread Starter
JK Enthusiast
Joined: Oct 2010
Posts: 120
Likes: 0
From: Clearwater, FL
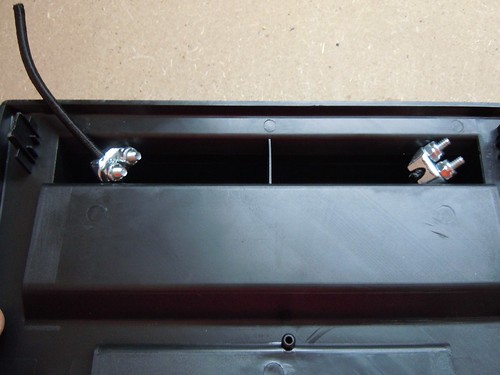
15. This si the tricky part... You have to pull some tension in the cord when clamping on the other side... this will allow you to clamp the cord about 1.5 inches out from the hole, giving you some room to work. When you let the tension out of the cord, it will spring back and suck the clamp in the space...
16. Next I laid out some paper towels and sprayed one side of the liners. Let dry for about 15 seconds, then place on the panel.

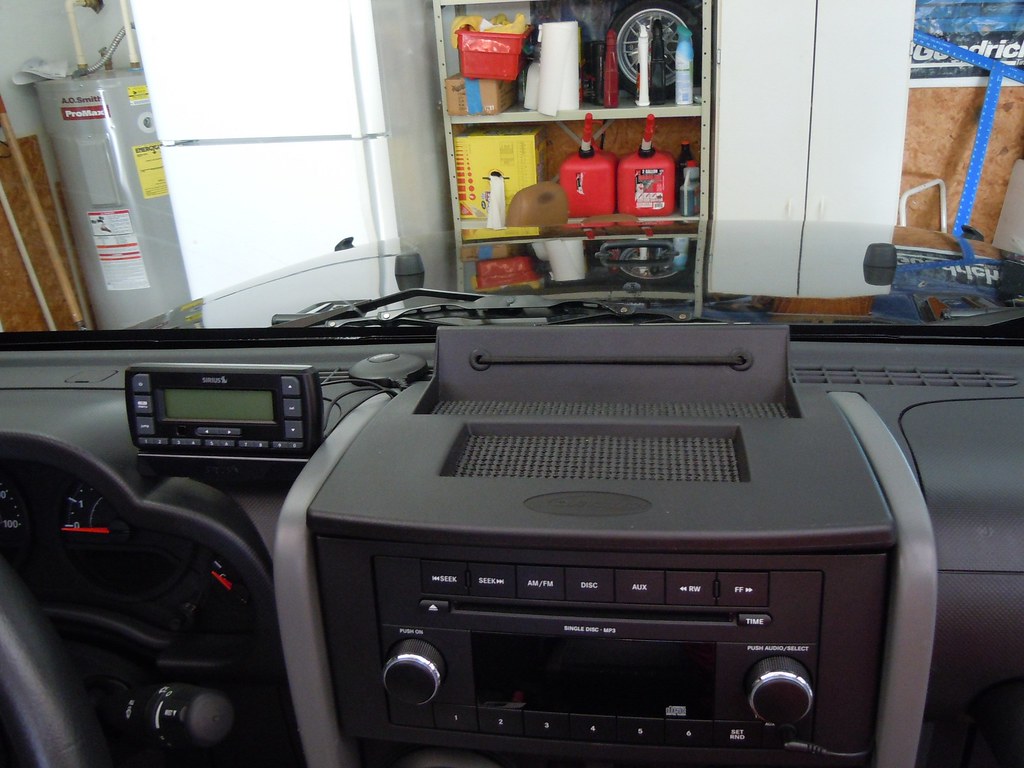
17. DONE!!

18. Follow the install instructions Daystar provided and here is the result:
Before:

After:
16. Next I laid out some paper towels and sprayed one side of the liners. Let dry for about 15 seconds, then place on the panel.
17. DONE!!
18. Follow the install instructions Daystar provided and here is the result:
Before:
After:

Trending Topics

JK Enthusiast
Joined: Jun 2008
Posts: 236
Likes: 0
From: Chicago, IL
It's been over two years or so, and everything with this mod is holding up great except the rubber mat/liner. I'm going to replace it with a different material I found for tool box liners (tuff stuff). Nice write up!

