
Fuel Door Installation

JK Enthusiast
Joined: Dec 2006
Posts: 494
Likes: 0
From: Spokane WA

JK Enthusiast
Joined: Sep 2006
Posts: 344
Likes: 0
From: lake worth fl
I got my black door installed today, but not before I made a trip to the hardware store.
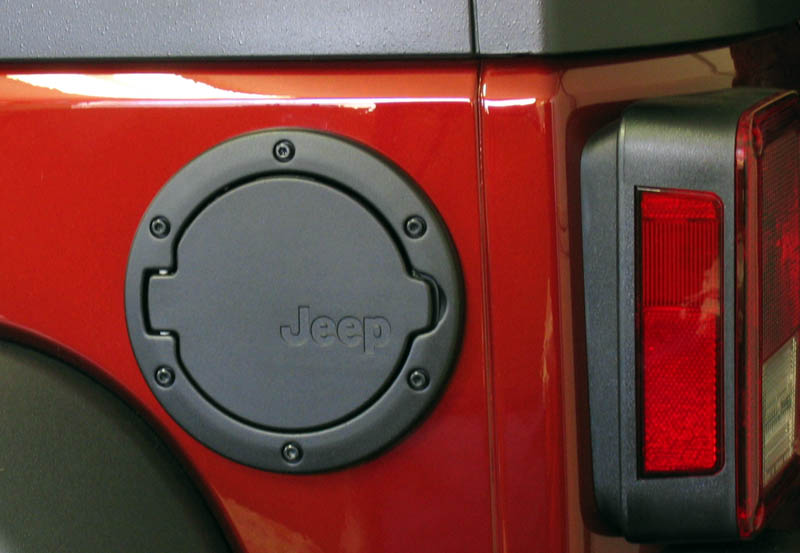
The screws are not "chrome", they are polished aluminum with a low profile head, 5mm x .8mm pitch.
I found stainless replacements, but not with a short head, and I couldn't find them as short as the stock screws, but they were easy to grind to length.
The top and bottom static screws also have aluminum nuts which got replaced with stainless counterparts as well. What were they thinking?
I for one do not like the look of silver screws on the black door, my JK is black with the exception of the wheels. I did however find this site http://www.fastener-express.com/inde...S&Category=218 that carries black, gold and red aluminum metric socket head cap screws in 5mm x .8. I'll be ordering some black ones soon and will have lots of extras (44 to be exact), so if anyone is interested in black replacements let me know. I'll even cut them to the correct length for ya
John L


JK Newbie
Joined: Aug 2006
Posts: 96
Likes: 0
From: Carrollton, TX.
A couple of things to go along with the installation instructions:
1) It is easier to poke the gasket around the filler next through (down) rather than trying to pry it up (away) from the back of the old plastic cup.
2) There are two different screws holding the tail lens assempbly to the body. The thicker two screws go on the OUTSIDE of the body, the two thinner ones go on the inside. Shows you how much attention I paid when taking them out.
3) Use a long screwdriver to poke the two plastic latches. If you are half blind like I am, use a strong light to see them. It really is not that difficult. As said before, once you get the two you can see, twist and wiggle the plastic cup and the third one will release.
4) I felt better stuffing a small rag into the open filler neck when removing the old assembly/poking the gasket out of the cup. YMMV
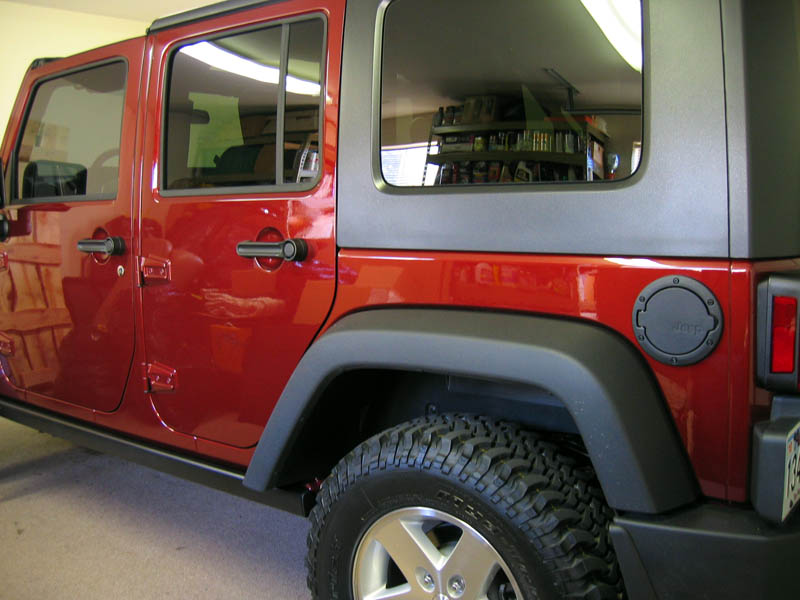
Thanks to all who have gone before. Even with almost cross threading one screw (there is always one), it still only took 20 minutes or so. And I think it makes a large improvement to the appearance. I will get some flat black later and paint the screws.
1) It is easier to poke the gasket around the filler next through (down) rather than trying to pry it up (away) from the back of the old plastic cup.
2) There are two different screws holding the tail lens assempbly to the body. The thicker two screws go on the OUTSIDE of the body, the two thinner ones go on the inside. Shows you how much attention I paid when taking them out.
3) Use a long screwdriver to poke the two plastic latches. If you are half blind like I am, use a strong light to see them. It really is not that difficult. As said before, once you get the two you can see, twist and wiggle the plastic cup and the third one will release.
4) I felt better stuffing a small rag into the open filler neck when removing the old assembly/poking the gasket out of the cup. YMMV
Thanks to all who have gone before. Even with almost cross threading one screw (there is always one), it still only took 20 minutes or so. And I think it makes a large improvement to the appearance. I will get some flat black later and paint the screws.
Last edited by jocrazy0; Mar 7, 2007 at 05:41 PM.

