
Hard Top removal - ALONE!

JK Newbie
Joined: Aug 2016
Posts: 3
Likes: 0
From: Nj
First thanks to the OP for sharing this idea. Made one today. Took about 4 hours with my almost embarrassing carpentry skills and cost about $80 for all materials and a saw blade. Added a few extra braces and its rock solid. Once all the screws were out it took only a minute to slide the top off. Haven't put the top back on yet and am wondering how hard its going to be to line up the jeep to the stand and get close enough.
Any suggestions?
Any suggestions?
JK Newbie
Joined: Aug 2016
Posts: 3
Likes: 0
From: Nj
Put the hardtop back on. Backing right up to the table was no problem. Just lined up the highmount middle brake light with the middle of the top and was dead on center. I couldn't believe how super fast and so easy it was. The hardtop slide effortlessly along the table and right onto the jeep.
Thanks again to Sgt P. Any time you can get a top off easier it's a good thing.
Thanks again to Sgt P. Any time you can get a top off easier it's a good thing.

JK Newbie
Joined: Jan 2016
Posts: 66
Likes: 1
From: Palm Bay, FL
Great job on the hardtop removal but I am wondering about that hi lift jack mount. Does the hi lift jack fit on the mounting with the top on and is it something being sold by someone or did you just strap it on to the roll bar?

JK Newbie
Joined: Apr 2017
Posts: 2
Likes: 1
From: Capitol Heights, MD
I added the wheels to the side and attached handles for easy lifting
Here's an easy way to get the Hard Top off by yourself. This is for those of us without garages or carports for hoists and pulleys...
A couple of assumptions:
1. You don't have a bad back.
2. You can lift 100 lbs over your head.
3. Doing this wrong can lead to bad things (dropped top, scratched paint, bad back or knees, etc.)
With that out of the way...
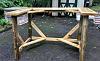
First I built a table the same height as the top of the tailgate using 4x4 legs, 2x12 tabletops, and 2x4 cross braces.
I went 6" longer/wider than the top in any direction. Also the U-shape allows plenty of room to manipulate the top:


I added a caster to the rear of the back leg, about an inch off the ground.
This makes it easy to tilt the table back and roll around.

I painted the top and edges with a Plastic Coating paint. Weather protection and a little protection against rubbing...
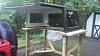
Backed up the Jeep to the table:

I got in the back of the Jeep and facing the rear. I get on my knees and find the balance point of the top with my hands spread as far as possible without losing lifting strength.
Practice the lift, this is where the scratches or dropping could happen.
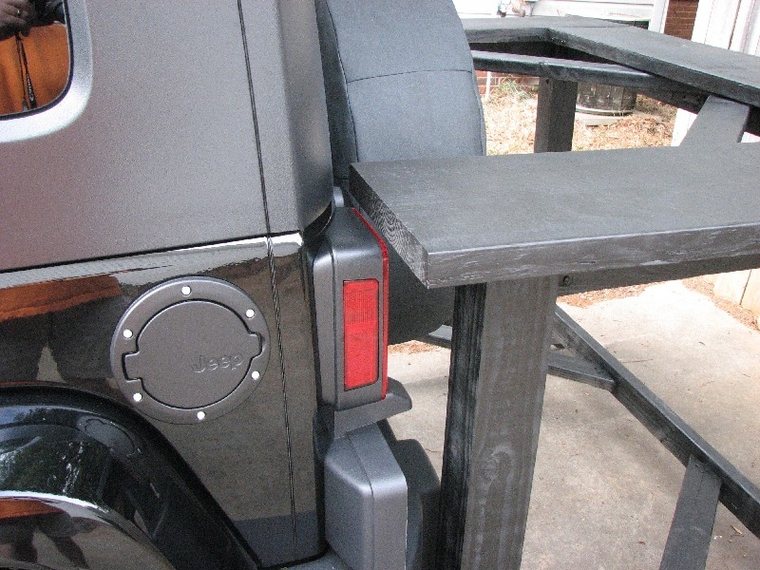
I lift and move the top toward the table a few inches at a time:


Watch the "posts" as you move to the rear. That part of the top is wider than the rear, so scratching and/or losing the balance of the top is possible.


When more of the Hardtop is on the table than on the Jeep, I "climb" into the middle of the U-shaped table and lift to the final resting spot. Climbing in is easy due to the wide areas between cross braces.
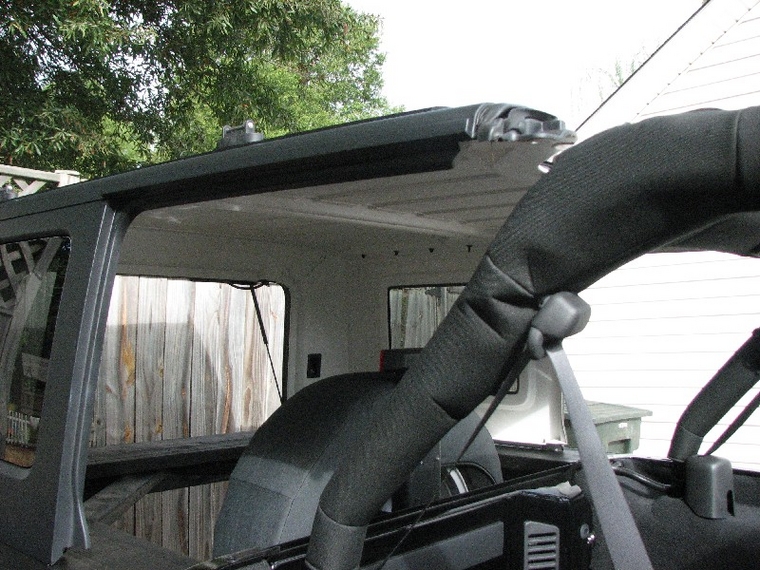


When done the top should have 6" on all sides.

This will also make it easy to clean the interior of the top, etc...
Wood logic: 2x4's are not 2"x4", now for some measurements...
The U-Shaped "table top" is 2x12's (1.5"x 11.25") :
(2) sides - 48" long
(1) back - 48.5" long (probably could have done another 48", but that's how it worked out)
back measurement = 71" across the "bottom of the U" (11.25" + 48.5" + 11.25")
(4) legs - 44.5" tall (this dependes on your tailgate height!) 44.5+1.5"top=46"tall
The legs are "centered" on the top. Approx 4" (3.87"exact) from the edges.
The 2x4 braces lengths are dependant on your leg placement. And the angled pieces can be just about any length as long as they are cut to a 45 degree...
Most importantly, Gunner approves!

A couple of assumptions:
1. You don't have a bad back.
2. You can lift 100 lbs over your head.
3. Doing this wrong can lead to bad things (dropped top, scratched paint, bad back or knees, etc.)
With that out of the way...
First I built a table the same height as the top of the tailgate using 4x4 legs, 2x12 tabletops, and 2x4 cross braces.
I went 6" longer/wider than the top in any direction. Also the U-shape allows plenty of room to manipulate the top:
I added a caster to the rear of the back leg, about an inch off the ground.
This makes it easy to tilt the table back and roll around.
I painted the top and edges with a Plastic Coating paint. Weather protection and a little protection against rubbing...
Backed up the Jeep to the table:
I got in the back of the Jeep and facing the rear. I get on my knees and find the balance point of the top with my hands spread as far as possible without losing lifting strength.
Practice the lift, this is where the scratches or dropping could happen.
I lift and move the top toward the table a few inches at a time:
Watch the "posts" as you move to the rear. That part of the top is wider than the rear, so scratching and/or losing the balance of the top is possible.
When more of the Hardtop is on the table than on the Jeep, I "climb" into the middle of the U-shaped table and lift to the final resting spot. Climbing in is easy due to the wide areas between cross braces.
When done the top should have 6" on all sides.
This will also make it easy to clean the interior of the top, etc...
Wood logic: 2x4's are not 2"x4", now for some measurements...
The U-Shaped "table top" is 2x12's (1.5"x 11.25") :
(2) sides - 48" long
(1) back - 48.5" long (probably could have done another 48", but that's how it worked out)
back measurement = 71" across the "bottom of the U" (11.25" + 48.5" + 11.25")
(4) legs - 44.5" tall (this dependes on your tailgate height!) 44.5+1.5"top=46"tall
The legs are "centered" on the top. Approx 4" (3.87"exact) from the edges.
The 2x4 braces lengths are dependant on your leg placement. And the angled pieces can be just about any length as long as they are cut to a 45 degree...
Most importantly, Gunner approves!
JK Newbie
Joined: Apr 2017
Posts: 2
Likes: 1
From: Capitol Heights, MD
Finally completed it with a few modifications. I no longer need help removing the hardtop! So easy to take on and off. Decided to make a door cart too. Took the top and the doors off for a drive and was able to put everything back on in no time. Awesome idea!


JK Newbie
Joined: Oct 2017
Posts: 1
Likes: 0
From: Uruma, Okinawa
I have started building mine using 2x4 basics shelflinks and so far so good. I had a bunch of them lying around and some excess treated 2x4's from another project. One side done and will finish the other side once the typhoon passes us. I do not have the room for the original design so I figured the 2x4 Basics would work great. I love K.I.S.S. design. There was no way my wife was going to allow me to spend over $800 on something to remove the top. Well done Marine.

JK Newbie
Joined: Jun 2015
Posts: 11
Likes: 0
From: Fayetteville, Arkansas
I would like to do this project, but with 2x6's for the top. This where it gets hairy...I'm not really good at woodworking AND I left all my tools in storage when I moved across the country to Seattle,WA. So if anyone can send me dimensions of each piece, I'd appreciate it greatly. This way, I can purchase the wood, have lowes or home depot cut it, then assemble! I have a drill, so I am sure I can get it done from there.

