
Six-dollar dash upgrade


JK Freak
Joined: Mar 2009
Posts: 747
Likes: 0
From: Arvada, CO
Thought I would add my pictures of the 6 dollar dash upgrade in blue.


Thanks for the ideas guys!
ETA - Color was Duplicolor Auto, DSGM440, Bright Aqua Metallic CC
Thanks for the ideas guys!
ETA - Color was Duplicolor Auto, DSGM440, Bright Aqua Metallic CC
Last edited by rickyj; May 12, 2010 at 08:36 PM.

JK Freak
Joined: May 2009
Posts: 608
Likes: 0
From: USA
[QUOTE=hx15537;1645958]
X2 here! It looks AWESOME, having a black exterior, makes the inside a little rough on the detailing like the others do with the colors, but having that whole console done in the black really makes it POP! I'm just so afraid of not getting it back in, the way that it came out!
JJG
I had done the AC rings and then went nuts and tore the whole center dash apart because the light gray bothered me that much... I have no idea why it's the only thing in the entire Jeep that was that color but it's not anymore.

It looks good. How long did it take you to take it apart? I've been thinking about doing something similar
It looks good. How long did it take you to take it apart? I've been thinking about doing something similar
JJG

JK Newbie
Joined: Dec 2009
Posts: 22
Likes: 0
From: Edmonton
Many were asking but no one seemed to post how. So....
It takes all of about 4 minutes to completely take apart the instrument cluster and even less to put it back together. I was going to take pics of the process but I found a website that actually sells different color instrument faces and they had pics so I "borrowed" them.
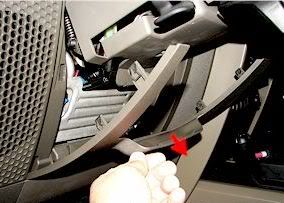
1: Remove plastic cover below steering wheel.
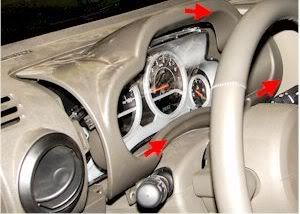
2. Remove 2 x 7MM Cluster Cover Screws

3. Remove Cluster Cover
4. Remove 4 x 7MM Cluster Screws (seen below with the lense and face already removed)
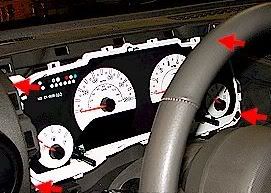
5. Pull Cluster out, pull out 3 electrical connectors in the rear, then remove and then separate the cluster � Just look at it and it will make complete sense.

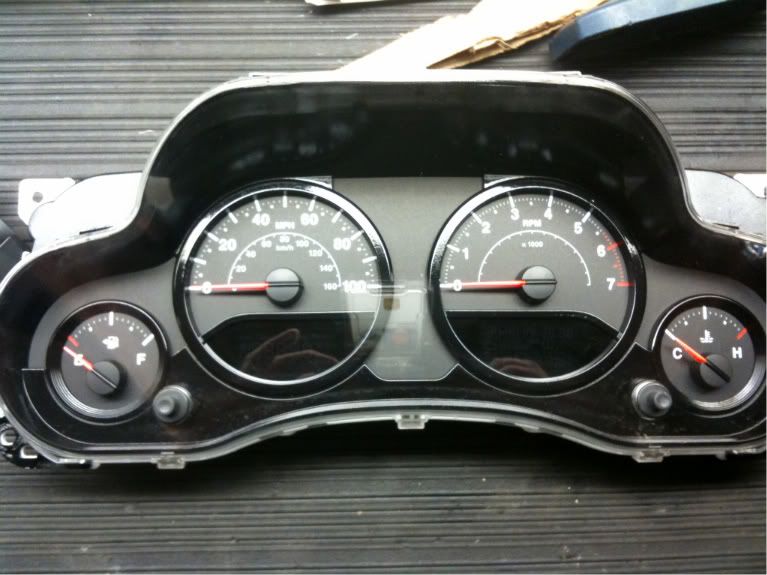
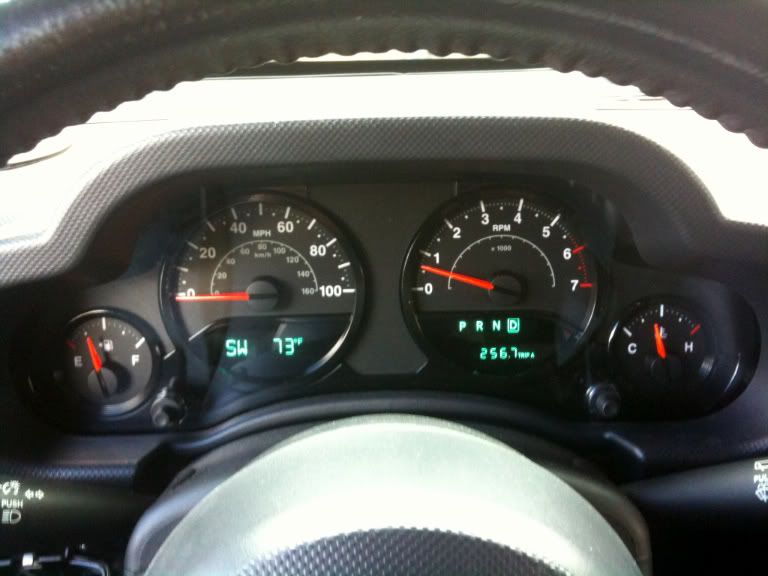
6. Take Cluster Face unit and repaint. I used Krylon Fusion black. 3 coats and it�s done! My finished product:
It takes all of about 4 minutes to completely take apart the instrument cluster and even less to put it back together. I was going to take pics of the process but I found a website that actually sells different color instrument faces and they had pics so I "borrowed" them.
1: Remove plastic cover below steering wheel.
2. Remove 2 x 7MM Cluster Cover Screws
3. Remove Cluster Cover
4. Remove 4 x 7MM Cluster Screws (seen below with the lense and face already removed)
5. Pull Cluster out, pull out 3 electrical connectors in the rear, then remove and then separate the cluster � Just look at it and it will make complete sense.
6. Take Cluster Face unit and repaint. I used Krylon Fusion black. 3 coats and it�s done! My finished product:
Thanks bud! Will be doing that as soon as my jeeps' back from the shop!
JK Enthusiast
Joined: Dec 2009
Posts: 323
Likes: 0
From: Port Hope, Ontario
Finally got mine done... had the paint for over a month  I love it and think it looks awesome, unless you look too close
  Next will be the gauge surround at some undefined time in the future. Enjoy.


I love it and think it looks awesome, unless you look too close Next will be the gauge surround at some undefined time in the future. Enjoy. JK Enthusiast
Joined: Jan 2010
Posts: 374
Likes: 0
From: Great Lakes
Looks great!! I was hoping someone would do it to their deep water blue. What paint did you use?
JK Enthusiast
Joined: Dec 2009
Posts: 323
Likes: 0
From: Port Hope, Ontario

JK Newbie
Joined: Nov 2009
Posts: 11
Likes: 0
From: Edmonton,AB Canada
Thanks for the pictures and instruction on how to do the instrument panel. With the pictures I had it open and apart in under 5 min. !
Just waiting for the black paint in the cluster to dry and see if it turns out anywhere near as good as yours!
Just waiting for the black paint in the cluster to dry and see if it turns out anywhere near as good as yours!