
Trigger Pulled - JSS Hemi Swap

Thread Starter
JK Enthusiast

Joined: Apr 2009
Posts: 313
Likes: 0
From: San Antonio, TX
So I finally decided to pull the trigger and go ahead and attempt the Hemi swap. So far:
Main Pieces:
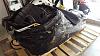
I bought the a used 2016 5.7 w/transmission+TC off ebay for $4000 with 1000 miles on it. I hope to be able to sell the newer 8 speed transmission and transfer case to get some back on the swap project.
Hemi 5 7L Engine Motor 8 Speed Auto Trans VVT 2016 Dodge Transfer Case 4x4 RAM | eBay
I bought a used 2010 Ram 545RFE (23K miles on it) - from a Salvage yard from car-part.com
I decided to go with the JSS Hemi kit after talking to Todd. I am a little concerned about how soon I am getting the actual parts in, as I've seen several previous posts not being very happy with Todd's customer service/shipping times, but I have faith that they will come through for me.
Wish me luck!

**Update 10/8/2016
It's alive!! VIDEO: https://goo.gl/photos/pjsMmcSynNSqr5JK6
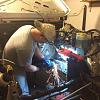
So I finally got the Hemi installed! Holy crap! I wasn't sure what to expect with the Hemi, but it is pretty amazeballs! I'm not a mechanic, so for anyone out there that is considering it... if I can do it, so can you! If you are going to do a body-on swap you're going to need two people some times. Luckily my dad is ALMOST as mechanically inclined as I am, so I flew him into town to help me throw the Hemi in. Definitely need two people in some cases... unless you're like my father who keeps telling me stories of installing transmissions off of his chest when he was younger.
 When I say *I* did something, it was probably a mix of me and him arguing about the right way to do it then compromising.
Will try to fill in some of the information that I couldn't find in other places. For the most part I used the following build threads as a guide and the AEV kit instructions for reference.
Da20captain's thread - https://www.jk-forum.com/forums/modi...dsheet-332076/
86CJ-07Rubi's thread - My 2009-2011 Truck Hemi Install w/Jeep Speed Shop kit! - JKowners.com : Jeep Wrangler JK Forum
thebigtman's thread - 5.7 Hemi swap - JKowners.com : Jeep Wrangler JK Forum
An older BOR Guide - http://www.scribd.com/full/46979740?...w6ns0ny2r5hmdk
AEV Guide - http://www.aev-conversions.com/ishee...tion_Guide.pdf
JSS Video Gallery - Videos - Jeep Speed Shop
Let me be frank here. If it wasn't for the support of some of the people on this forum my experience would have been pretty miserable. Major props to Da20captain who allowed me to text, call, and annoy him every few days as I was in the middle of the swap. I'm going to attempt to follow the format of his thread with the information to as it was structured very well and easy to track down what I was looking for. JSS/Todd does not have an install guide per say, but he does have videos on how to do some of the steps albeit some of the videos suffer from poor viewing angle and a lack of part numbers. JSS/Todd are pretty much unreachable most of the time. This is probably in part due to having such a small staff (Todd + 2).
So I will try to fill in the blanks here as I get a chance, just to try and share information about my experience with the JSS Kit.
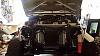
I did the install of my Hemi in my two car garage with the body on with a Harbor Freight engine hoist. Unfortunately my driveway is an incline which made me have to use almost all of the space in the garage because I would be unable to push the Jeep up and down the ramp when I needed to. Trust me, you will end up utilizing most of the space to move the hoist around with the other engine/transmission/parts laying about so make sure you clear out everything that you possibly can if you're going the garage + body-on install route.
I'm sure there are a lot of people out there in this forum with a much vaster knowledge base than I when it comes to doing mechanic work. Even though I feel like I can get by fairly well, I do not have any professional training or experience as a mechanic. If something seems a little obvious or I did something incorrectly, please don't hesitate to mention it! I made several mistakes, and I don't mind admitting them if it saves someone else a headache and some trouble!
For the sake of posterity--tools that I remember using:
Craftsman Mechanics Toolbox - Had pretty much all the wrench's and sockets I needed
Pipe Wrench & Crescent Wrench
Large Socket driven Torx Set *see Oil Filter adapter
Torque Wrench in/lbs & ft/lbs
Dremel with cutting blades and grinder tips
Various Screwdrivers
Baggies and Sharpies for days - You will need these - or some type of method of identifying where all the bolts go.
Cordless Craftsman Drill & Cordless Craftsman Impact Wrench
Harbor Freight Grinder -- The grinder can be used as a cutting wheel by using cutting blades.
Harbor Freight 180amp MIG Welder
Harbor Freight Engine Hoist & Leveler - The leveler sucks, it can get the job done but is pretty difficult to use. Suggest welding a nut where the handle is and using an impact.
Worklights - The little magnetic ones are pretty useful
Magnetic Tray & Magnetic Pickup Tool - For those bolts that you drop over and over
Floor Jack & Jack Stands
STEERING PUMP Pulley Puller (Rental from Autozone- Not to be confused with their large pulley puller)- If you're going to reuse the 3.8 P/S Pump this makes it easy to pull the pulley.
Side Clip Shears - For cutting off plastic retainers and pretty much everything
Hammer (Or as I call them--Motivators)
Harbor Freight Hardwood dolly's ($12) - Used these to put the transmissions on and move them around the garage--Saved my back.
Spreadsheet:
I've made a spreadsheet (following in the footsteps of Da20captain) of the total cost. I tried to include every small part I had to use for the kit in the list. Still looking at receipts. I had a couple set backs with the transmission and ended up buying a rebuilt one which cost me a pretty penny. The spreadsheet also does not reflect the spare parts that I have left over that I need to offload (3.8 Engine/Trans & 2016 Ram Transmission/Tx Case/Shafts)
**I will update the spreadsheet image when I'm done with the thread--until then, the Google Sheet link can be viewed at it's latest version.
Image format

Downloadable Spreadsheet Link - https://docs.google.com/spreadsheets...it?usp=sharing
I'm going to try and cover things that I couldn't find info on in other threads and show the link and sources that I used to install my Hemi.
General Notes:
1. It is highly recommended that you remove your black plastic intake manifold, before install. Yes it can be damaged. Ask me how I know. I had to JB weld a small crack up. That black plastic manifold is very expensive. If you can find one on ebay - $300-400 otherwise the dealership is - $1200. I used a piece of threaded rod with 4 nuts on it between the two back chains, and one on the front to keep the chains from hitting the engine. You will hit the engine with the chains if you are doing a body-on install due to the angle of the engine/transmission during install.
2. I had a two car garage, but a lot of space is used up when you have a Jeep and a couple of engines/transmissions and parts laying around. Plan accordingly!
3. I suggest replacing all of the clamps for hoses with new ring type clamps instead of reusing the 3.8 tension-type clamps.
4. Fluids
Per the 2016 Dodge Ram Owners Manual
Engine Oil 5.7 - SAE 5W-20 - 7 Quarts
ATF+4 Transmission Fluid - 8 Quarts - (Not if you have a new rebuild transmission)
Mopar Oil Filter - MO 339 - 4892339AA
Engine Coolant - We recommend you use MOPAR Antifreeze/Coolant 10 Year/150,000 Mile
***2014+ 5.7 Dodge Vehicles are supposed to use OAT fluid. 2013 and older use the HOAT fluid. Don't mix. Google it. Bad things happen.
Pulling out the Engine
I used this, it's the only thing you get from JSS as far as a document.
JSS Install Guide - JK V8 HEMI Instruction Guide - Jeep Speed Shop
Excited right? WOO! Calm down. Take your time. Be careful with a lot of these electrical plugs. They are brittle and will break fairly easily. Make sure that you are actually pulling the engine out that you are careful with the purge line, you will end up reusing it. Don't throw anything away or sell anything until you are done with the swap. If you are doing a body-on swap, it's very hard to see behind the engine at the firewall. I used the Harbor Freight hoist with the body-on approach and had to come at the engine from the front. If you are utilizing the Harbor Freight hoist, you will have to use the 1/4 ton length setting to reach far enough over the engine, because the hoist will be bumping against the front crossmember. I attached the leveler to two bolts on the timing cover/accessory plate, and two bellhousing bolts. It was a chore getting the oil pan to clear the front cross member, but it will eventually come out. Lots of shimmying and wiggling.
Power Steering Pump Modification
Power Steering Pump
JSS Videos:
Source: https://youtu.be/snG3o84l4Cs
Source: https://youtu.be/W6dlLeenWww
I reused the 3.8 P/S pump.
Things you will need
Pulley Bushing (included in kit)- If Todd did not send you one, then try and call him to get the info on it. It can probably be sourced locally.
Buy - Genuine Chrysler 53013688AB Power Steering Pump Pulley (Bought mine from Amazon) - (Not included in JSS Kit)
Buy - 3 new bolts/washers that are longer than the originals - 8MM-1.25x70mm - Got them at Home Depot. (Not included in JSS Kit)
Rent: Autozone POWER STEERING PUMP PULLEY PULLER - The specific small set for steering pumps.
I got this part number by pausing Todd's video and looking at the stamped number on the pulley itself. He never mentions the part number which is kinda frustrating, but so far this pulley has worked. So far so good. I think it may go to a Grand Cherokee. I emphasize that the Pulley Puller is the POWER STEERING PUMP PULLER; because there is more than one type of puller set, and this one makes it a cinch.
My 2016 Ram Hemi came without a steering pump. If I remember correctly this is the case I believe from 2012+ Ram on. I ended up reusing the 3.8 Pump instead of buying an older model truck pump.
1. Remove the pump from the 3.8 first, then used a rented STEERING PUMP PULLEY PULLER (it's a one specific for the steering pump) from Autozone to pull off the pulley. If you don't know how to use one, hit youtube.. The puller made it very easy to pull the OLD original 3.8 pulley off.
2. Before putting the NEW pulley on the pump, take a drill bit the same size as the pump mounting holes and drill out the threads. This will allow the new bolts to slide freely through the pump to mount the P/S pump to the timing cover/accessory plate threads of the Hemi engine.
3. Take the bushing that JSS/Todd supplies and put it into the front side of the NEW pulley. You will know which side of the pulley is the front, because the pulley will say front on it. I did not use a press for this. I tapped it *lightly* with a hammer to get it started STRAIGHT, and then used a piece of 2 x 4 wood as a buffer and the hammer to sink it in the rest of the way.
4. You can then use the pulley puller set to install the new pulley with bushing back onto the P/S pump. (FRONT SIDE TO FRONT--Sounds obvious doesn't it?)
**Important** I believe it is possible to mount the pulley too far onto the pump spindle (I did not test this). I tightened down the pulley until I thought it was close and then would hold it against the Hemi engine and using a straight edge to see if the pulley is in alignment with the other pulleys. If there is a different way then I do not know it. When using the calipers, the end of of the spindle was approximately 8mm from being flush with the inside edge of the pulley mounting hole/bushing. By the looks of the JSS video, this is the way he intended.


Power Steering Reservoir/Hoses
1. Reservoir - I reused the 3.8 reservoir; it was ugly and dirty but it cleaned up well. On the inside there was some buildup in the screen, to clean this, I used brake cleaner. Initially I was going to use a new one I bought from Amazon--a Cardone brand one, but even though it was OE replacement, the neck at the bottom was too long. Install is easy, remove alternator bolt-add bracket-reinstall alternator bolt. You will have to use a small piece of hose and two clamps to connect the reservoir with the pump. Pretty easy.
2. Hoses - Not so easy. Not difficult, but a pain to get to when routing hoses through and around the A/C hoses. Be sure to replace the O-rings.
Exhaust Manifolds - Pretty straight forward. My engine was very new, so the Hemi truck manifolds came off very easy. I reused the manifold gaskets that were already on the Hemi (they looked fairly new). Just for FYI the outlet on the Grand Cherokee manifolds are smaller than the truck Hemi manifolds--How much this affects performance? I am not sure. Install the new Grand Cherokee manifolds; if you have an older engine, consider replacing manifold bolts and cleaning the threads into the heads. Torque the bolts down to 18 ft/lbs (src:da20captain thread).

Capacitor - From my research the capacitor is to reduce RFI from the engine into the radio and electronics--could be mistaken; It is attached via a stud into the back of the driver side cylinder head. p/n - 56041889AA (src:da20captain thread)
Wiring Harness - Pretty simple - Everything is labeled very well. I started by putting the bulk of the wiring harness on top of the Hemi engine behind the passenger side cylinder head and started plugging in the injector plugs while the engine was still hanging from the hoist. When in doubt--you can google sensor locations. I put loom on all my wiring after I got the harness connected. I spoke to Chris at Hotwire (maker of JSS wiring harnesses) about it, and he said it isn't necessary as long as you keep the wires pulled away from heat sources. After I got the wires connected it looked a little sloppy to me so I went ahead and loomed the wires with plastic wire loom and added the head shielding tape for for the wires that go past or near the exhaust. I used a good bit of 3/8" loom and also some 3/4" loom. Also I purchased "Pro Tie B8FTPM100 8-Inch Fir Tree Push Mount Cable Tie, UV Black Nylon, 100-Pack" From Amazon. These are the zip ties that have the Xmas/Fir Tree push in mounting clips to attach your wires/wiring harness into the holes in the transmission and inside the engine bay. They worked pretty good. The throttle sensor wire will have to route around the right side of the engine (passenger). I thought that it would reach around the left, and loomed it on this side; after the engine was in the bay I had to cut the loom and run the wire around the other side. Annoying to do after you've taped everything up.
Sensors
1. Crankshaft Position Sensor Once I had everything done and installed; The engine would crank but not start--my dad noticed that the RPM gauge wasn't moving during the cranking and so we figured the Crankshaft Position Sensor was bad--On the way to get the new sensor, I reached out to Chris at Hotwire and he said for sure that the newer Hemi (2014+) have to have the CPS swapped out to CPS from a 2010 Ram Hemi engine. He gave me p/n 5149230AA. Stuck the CPS sensor in. Voila! Hemi Jeep is born!

2. O2 Sensors - **Update - Spoke to JSS; All four sensors should be Jeep JK downstream sensors. JSS BOM list (56029049AA). -- Whenever I tried to run the upstream JK sensors; the PCM was giving me a high O2 sensor voltage DTC. Use four downstream JK sensors all around. No DTC's. You can reuse the ones in your JK--I decided to run 4 new ones.
3. Intake Sensor - The Intake Air Temperature Sensor (Mopar name: 2015/2016 Ram 5.7 SENSOR Charge Air Temp Mopar Part #5149279AC ) is found in the hose from the Air Box/filter to the throttle body. My 2016 did not come with the hose, so I had to buy a sensor - I do not believe you have to have a 2016 Hemi Sensor; you can probably use one from a 2010+ Ram (Not validated)- The reason why I say this, is the 2016 probably does the same exact thing as the 2010-2013 and may look slightly different but it is probably much more easily sourced from store/dealership. None of the parts stores had a 2016 sensor, and only one dealership in San Antonio had the part on hand. You will need a grommet to install the intake sensor into the Air Filter Box that JSS sends you. The hole is on the underside of the tube coming from the box. I bought a "Dorman Help! Check Valve and Grommet" p/n 80191 from Oreilly's Auto Parts and pushed the IAT sensor through the grommet and it fit perfectly around both the sensor and in the Intake Air Filter Box hole. Be careful with the temperature filament, it looks like it would be easy to damage on mine.
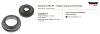
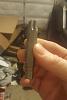
Oil Filter Adapter
Things you will need:
1 - Oil Filter Adapter (Chrysler Part #: 53013680AD)
3 - Oil Filter Adapter Bolts (Chrysler Part #: 06102041AA)
1 - Oil Filter Adapter O-Ring - Outer (Chrysler Part #: 53021661AA)
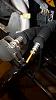
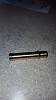
You need to remove the oil filter bung that is on the Hemi and replace it entirely with the oil filter adapter. Why? I have no idea. My oil filter actually is shorter than the oil pan, so the adapter isn't really there to protect the filter itself. Maybe to protect the engine during suspension compression? I can only assume that this is there to potentially protect the engine itself and not something specific to the oil filter protection or accessibility, as it sticks out and downwards. Todd suggests welding a nut to the oil filter bung and then using that with a pull bar to get the bung out. I used a large torx /allen bit and a socket and pull bar. Again, my engine is fairly new. It may be much more difficult on an older engine. I can't remember which size I used. Once I change the oil in a month or so, I'll check and see which one fit in there. I've included a pic of the type of bit/driver that I used to get it out. Not sure which size yet. **Don't forget the O-ring.
Frame-Motor Mounts
Source: JSS - Video https://www.youtube.com/watch?v=h-KleobqddM&app=desktop
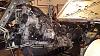
1. Cutting the old mounts off - I did not have a plasma cutter, but what I do have is the Harbor Freight 4 1/2" Grinder. You can use the HF 4 1/2" cut off wheels on the grinder to use it as a cutting tool. Worked very well. Just start cutting into them, make sure that you don't cut into the frame itself, just the mounts. Put the grinding wheel back on it to use it as a grinder again to smooth up the frame and clean it up. Eye/hand protection and a mask is a must. You will be sitting/crouching inside the engine back when you are cutting at it from different angles and the ground steel powder will get everywhere. Including your nose. It actually wasn't very difficult at all. It takes a little time, but after you get going, you will see it's pretty easy. Make sure to smooth up the frame rails and grind the paint off of the areas where you will be welding the mounts. I will tell you one thing I did find out... I am not a great welder. My welds are pretty ugly (and so are my dads), but after watching some youtube videos and purchasing the Harbor Freight 190amp MIG welder, I can at least say I got the job done. The install position for the 5.7 Hemi starts at 02:00 on the JSS video. Double..Triple.. check the positions based on the video prior to welding. "Measure twice, weld once". For the truck Hemi engines, the mounts are in the forward position (see video).

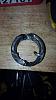
2. Mounting the new WK Engine Mounts to the Frame Mounts
Source: JSS Video - https://m.youtube.com/watch?v=0fXRsrZiBBE -
Just to point out a couple of things--the same as da20captain's says in his thread, the you cannot use the label as a reference to which side goes up and which side goes down. In fact, my mounts that I got from Quadratec did not have any stickers at all on them. Watching the video, this can be a little confusing. **The driver side is the longer one (from engine mount base)with the THREE holes pointing upwards--The passenger side is the shorter one and will have TWO holes on top side. At least this is the way I installed them. Do not install the engine mounts until after you get the engine IN the bay from underneath. I didn't believe this myself, so I put one on anyway. Which I promptly took off once I started trying to fit the engine into the frame. I read that you can reuse the JK mount bolts, for some reason the un-threaded shoulder on mine was too long when put through the mount. I ended up getting new bolts from Fastenall to put through the mounts.
Transmission/Transmission Adapter
Source: JSS Video - https://m.youtube.com/watch?v=J-Xniw1qzak
Source: https://www.jk-forum.com/forums/modi...dsheet-332076/
Source: My 2009-2011 Truck Hemi Install w/Jeep Speed Shop kit! - JKowners.com : Jeep Wrangler JK Forum
1. Transmission - (5)45RFE
Source: JSS Video - https://m.youtube.com/watch?v=J-Xniw1qzak
Source: My 2009-2011 Truck Hemi Install w/Jeep Speed Shop kit! - JKowners.com : Jeep Wrangler JK Forum
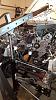
So for me the transmission was probably the most frustrating part. I purchased the first one with 23K miles on it from Elmers Auto Salvage via car-parts.com. It was no bueno! It wouldn't mate up to the engine--the dowel pins would not go together. I at first thought it was a compatibility issue with the 2016 engine but it ended up just being damaged. I used the first transmission as a core for a rebuilt one from a local shop which cost me a pretty penny. The rebuilt one bolted up perfectly.
Neither the salvage transmission nor the rebuilt one came with transmission lines, dipstick, or a flex plate.
When I researched the transmission lines, there seemed to me multiple variations of the transmission lines for the 2010 Dodge Ram. I ended up getting 55056859AD - The lines ended up being the perfect length to the front of the JK for the transmission cooler, plus the cooler-side end of them are rubber hoses with quick disconnects, and I was able to find a transmission fitting to make it a snap to install the cooler and keep it looking clean up front (See Transmission Cooler)
** If you get a Transgo Shift Kit put into your 545RFE; Do not use the kit with the resistor. The Diablo tuned PCM that JSS provides already has the shift points set up, if you use the resistor, it will shift too hard.
The 2016 Hemi 5.7 came with a 8 speed transmission attached to it. Whenever I took the 8 speed off, the 8 speed flex plate is not compatible with the 545RFE, so I had to get a new one with the correct alignment holes for the 545RFE torque converter. Also, because of the 8 speed transmission, there was spacer in the end of the crankshaft where the torque converter pilot sits. This was a nightmare getting out. It does not have a large enough lip on the inside face of the spacer to get a puller on. We ended up using a dremel to remove it and then pull it out. This was a bitch to deal with. Also be careful there are different variations on which length bolts to use on the torque converter. The ones I ended up having to use on the 545RFE were shorter than the bolts that were on the 8 speed torque converter. Make sure you have the right ones.

2. Transfercase Adapter- The transfercase adapter that you will need to use is on the BOM list from JSS. The 545RFE from the 2010 Dodge Ram 4x4 that I got from the salvage yard had a transfercase adapter on it, it looked nearly identical to the one I bought based on the list, except for one difference. Inside the adapter where the output shaft from the transmission comes through on the one from the BOM list there is a bearing that the transmission output shaft will sit inside. On the one from the salvage yard, it did not have this bearing. Can you use either one? No idea. I went with the one with the bearing, makes sense that it would need some kind of support for shaft with that much HP. You will have to either modify the transfer case adapter to fit the shifter cable bracket. Keep hacking away at it until you get to the point where the bracket is flush against the holes and it lines up with a couple of bolts stuck through it. I didn't grind it well enough and had to grind some more once I got the transmission in JK. Kinda annoying. **Also I saw on a different set of instructions/thread where someone cuts the bracket to fit around the adapter, unfortunately I didn't see this until it was too late. This actually seems to make more sense since you are not hacking your transmission up. If I can find the pics of the cuts again, I'll post them here.
3. Mounting Transmission inside
Source: https://www.jk-forum.com/forums/modi...dsheet-332076/
Use the transmission bracket/mount diagram that is provided by JSS/AEV. When you are doing the body-on install, you will have to install the Engine/Transmission first, then install the transfer case afterwards from underneath.
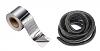
Fuel Line - The JSS kit no longer comes with fuel line adapters. According to JSS they have had known occurrences of the adapter coming off. With my kit, I was sent a nylon fuel line that is long enough to connect directly to the fuel rail all the way back to the fuel line coming from the gas tank. Very straight forward. You will not reuse the Hemi Fuel line any longer. Suggest replacing the plastic retainer clips while you are it.
Purge Line/EGR Solenoid - Reuse the 3.8 Purge Line and Solenoid. It will mount onto the battery tray.
Vacuum Lines - There are three vacuum lines on the black plastic intake manifold. One goes to the PCV valve at the back of the intake manifold, the other two are utilized by the EGR Solenoid and the brake boost.
A/C Compressor/AC Lines
Source: https://m.youtube.com/watch?v=D3G6Hrw9MBQ
Source: https://youtu.be/18Y9Kiajhhw
Source: My 2009-2011 Truck Hemi Install w/Jeep Speed Shop kit! - JKowners.com : Jeep Wrangler JK Forum
1. A/C Compressor - The 2014+ A/C Compressors will not work, not due to clearance issues, but because they come with a second connector on the back that does not work with the JSS harness. I bought a compressor for a 2010 Dodge Ram - GPD 9623373 from Rockauto. Be sure to get the combo deal that comes with the O-rings, gaskets, and dryer cylinder. The A/C Compressor modification is pretty easy. I had more room than I thought I would in the end, but I hope I never have to take it off. **On the 2016, instead of a long bolt to hold the compressor onto the engine, it is held on by a threaded stud and a nut. You will want to remove this stud/nut and replace it with appropriate size bolts instead.
2. A/C Lines - JSS will send you two lines that will attach to the firewall. You will reuse the line from the JK that has the transducer electrical plug in it. With body-on install; install the firewall attached lines before you install the engine into the bay. Just fair warning, it will be annoying trying to deal with the hoses of the A/C lines and the steering reservoir in that little space, but it can be done! The A/C lines will only fit one way with each hose. You will end up having to bend your A/C lines to get them to cooperate with the tight space.
Steering Shaft/Plate Modification
Source: https://www.jk-forum.com/forums/modi...dsheet-332076/
Source: My 2009-2011 Truck Hemi Install w/Jeep Speed Shop kit! - JKowners.com : Jeep Wrangler JK Forum
This is pretty straightforward. Remember to tie your steering wheel down before disconnecting the steering shaft. Try and hold the plate up to firewall to get an idea of the direction and distance you need to grind the hole out. "The 2007-2010 the pillow bearing is on the inside of the firewall so that is where you will need to mount the adapter plate. On the 2011 and up the pillow bearing is on the outside of the firewall, therefor the adapter plate will go on the outside." (src:da20captain thread). I used black RTV sealant with the plate to seal it up.
Battery Box/TIPM Mount/Air Box
Source: https://m.youtube.com/watch?v=zAFPylHSmKU
I installed mine after I installed the engine in the bay. It was a pain in the ass to get these to seat correctly. The large wire thats coming around and down the passenger side fender well will have to be released from it's clips and run along the top of the engine bay/battery tray, and then down and under the TIPM.
I feel like it may be easier with a body-on install to install the Battery Tray/TIPM prior to installing the engine. It's going to be tight any way, but I think it will be much less of a headache and dealing with the wiring harnesses that go under the TIPM and the routing of the wires along the edge of the fender. Again, this is not what I did, but thinking back, I think installing them first would be easier. Your call. =)
JSS Radiator/Shroud/Condenser/Fan
Before installing the heater lines to the engine--I used a water hose to flush the old coolant out (HOAT).. as the newer Hemi used OAT fluid. Don't mix them. Bad things.
1. JSS Radiator/Shroud/A/C Condenser - I bought a new JK A/C condenser because my old one was busted up from a tree limb. Install the A/C condenser and the A/C dryer cylinder to the radiator, then install the radiator to the front clip with original JK bolts. Then install the front clip. If you use the JSS Radiator and Shroud, the hoses listed in the JSS BOM will not fit. I ended up going to Autozone and Oreilly's and asking to look at their hose stock to find a couple that were pretty close to the shape that I would need and I still had to use a pair of scissors to cut them down some. To make them easier to install, apply a little bit dish detergent/water to piece that your hose is mounting on to. Should slide on pretty easy.
2. Fan/Clutch - I used an 18 inch fan Flex-a-lite fan and the Derale Fan Clutch. This manual fan clutch is non-thermal and will run all the time--Remember the threads on it are in reverse. You will have to cut off a piece of the black intake manifold, and bend the fan blades forward to make sure it clears the other pulleys. Do not install the fan clutch or the fan until after you have the engine mounted in the bay if you are doing a body-on install. You will have tilt the Hemi engine/trans at a very steep angle to get them in and over the front cross member, if you already have the fan/clutch installed, it will bang against the hoist. No bueno.
3. Transmission Cooler
Source: NEW JK Transmission cooler mounts - JKowners.com : Jeep Wrangler JK Forum
The JK Transmission cooler is pretty easy to install. JSS will send you the bolts and nutserts to install his brackets to the front clip, but you will need to get four more small bolts to install the cooler to the bracket. Install the brackets on the cooler with 4 bolts/washers/nuts. These were not provided to me by JSS. I used the same size bolts that he sent with his brackets, purchased from Autozone. (They are standard by the way, not metric). After the brackets are installed on the cooler, hold up the cooler up to the radiator/frame and you will see two circles that line up with the top two holes of the cooler brackets. Use a drill bit slightly smaller than the nutserts to drill out the circles on the frame. Thread the bolts into the nutserts and then ever so elegantly use a hammer to install the nutserts into the frame. Remove bolts from nutserts--install cooler bracket with the top bolts... now you can use the bottom holes to punch/mark where the bottom holes will need to be drilled. Repeat drill/hammer process. Install transmission cooler w/bracket.
**If you have the transmission lines with the quick disconnects at the end, you can use two Hayden 397 transmission fittings to plug into the quick disconnects and then cut the hoses to length to the end of the transmission lines and use ring clamps to tighten them down. The quick disconnects make it look nice and clean up front.
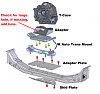
Throttle Body Adapter
Source: https://www.jk-forum.com/forums/modi...dsheet-332076/
The JSS kit moves the throttle body from the intake manifold to the passenger side for a cold air intake type setup. JSS provided the bolts for the adapter. It's pretty straight forward. Just like da20captain's thread mentions, you will be required to get a coupler hose and two clamps to go between the Intake Adapter and the Air Filter Mount/box. The diameter is 3 1/2"'.
If I'm missing something let me know. Probably will make another couple of updates to it.
I may not die a happy man, but at least I'll die a Hemi man. .. My dad groaned at this.
Main Pieces:
I bought the a used 2016 5.7 w/transmission+TC off ebay for $4000 with 1000 miles on it. I hope to be able to sell the newer 8 speed transmission and transfer case to get some back on the swap project.
Hemi 5 7L Engine Motor 8 Speed Auto Trans VVT 2016 Dodge Transfer Case 4x4 RAM | eBay
I bought a used 2010 Ram 545RFE (23K miles on it) - from a Salvage yard from car-part.com
I decided to go with the JSS Hemi kit after talking to Todd. I am a little concerned about how soon I am getting the actual parts in, as I've seen several previous posts not being very happy with Todd's customer service/shipping times, but I have faith that they will come through for me.
Wish me luck!
**Update 10/8/2016
It's alive!! VIDEO: https://goo.gl/photos/pjsMmcSynNSqr5JK6
So I finally got the Hemi installed! Holy crap! I wasn't sure what to expect with the Hemi, but it is pretty amazeballs! I'm not a mechanic, so for anyone out there that is considering it... if I can do it, so can you! If you are going to do a body-on swap you're going to need two people some times. Luckily my dad is ALMOST
as mechanically inclined as I am, so I flew him into town to help me throw the Hemi in. Definitely need two people in some cases... unless you're like my father who keeps telling me stories of installing transmissions off of his chest when he was younger. When I say *I* did something, it was probably a mix of me and him arguing about the right way to do it then compromising. Will try to fill in some of the information that I couldn't find in other places. For the most part I used the following build threads as a guide and the AEV kit instructions for reference.
Da20captain's thread - https://www.jk-forum.com/forums/modi...dsheet-332076/
86CJ-07Rubi's thread - My 2009-2011 Truck Hemi Install w/Jeep Speed Shop kit! - JKowners.com : Jeep Wrangler JK Forum
thebigtman's thread - 5.7 Hemi swap - JKowners.com : Jeep Wrangler JK Forum
An older BOR Guide - http://www.scribd.com/full/46979740?...w6ns0ny2r5hmdk
AEV Guide - http://www.aev-conversions.com/ishee...tion_Guide.pdf
JSS Video Gallery - Videos - Jeep Speed Shop
Let me be frank here. If it wasn't for the support of some of the people on this forum my experience would have been pretty miserable. Major props to Da20captain who allowed me to text, call, and annoy him every few days as I was in the middle of the swap. I'm going to attempt to follow the format of his thread with the information to as it was structured very well and easy to track down what I was looking for. JSS/Todd does not have an install guide per say, but he does have videos on how to do some of the steps albeit some of the videos suffer from poor viewing angle and a lack of part numbers. JSS/Todd are pretty much unreachable most of the time. This is probably in part due to having such a small staff (Todd + 2).
So I will try to fill in the blanks here as I get a chance, just to try and share information about my experience with the JSS Kit.
I did the install of my Hemi in my two car garage with the body on with a Harbor Freight engine hoist. Unfortunately my driveway is an incline which made me have to use almost all of the space in the garage because I would be unable to push the Jeep up and down the ramp when I needed to. Trust me, you will end up utilizing most of the space to move the hoist around with the other engine/transmission/parts laying about so make sure you clear out everything that you possibly can if you're going the garage + body-on install route.
I'm sure there are a lot of people out there in this forum with a much vaster knowledge base than I when it comes to doing mechanic work. Even though I feel like I can get by fairly well, I do not have any professional training or experience as a mechanic. If something seems a little obvious or I did something incorrectly, please don't hesitate to mention it! I made several mistakes, and I don't mind admitting them if it saves someone else a headache and some trouble!
For the sake of posterity--tools that I remember using:
Craftsman Mechanics Toolbox - Had pretty much all the wrench's and sockets I needed
Pipe Wrench & Crescent Wrench
Large Socket driven Torx Set *see Oil Filter adapter
Torque Wrench in/lbs & ft/lbs
Dremel with cutting blades and grinder tips
Various Screwdrivers
Baggies and Sharpies for days - You will need these - or some type of method of identifying where all the bolts go.
Cordless Craftsman Drill & Cordless Craftsman Impact Wrench
Harbor Freight Grinder -- The grinder can be used as a cutting wheel by using cutting blades.
Harbor Freight 180amp MIG Welder
Harbor Freight Engine Hoist & Leveler - The leveler sucks, it can get the job done but is pretty difficult to use. Suggest welding a nut where the handle is and using an impact.
Worklights - The little magnetic ones are pretty useful
Magnetic Tray & Magnetic Pickup Tool - For those bolts that you drop over and over
Floor Jack & Jack Stands
STEERING PUMP Pulley Puller (Rental from Autozone- Not to be confused with their large pulley puller)- If you're going to reuse the 3.8 P/S Pump this makes it easy to pull the pulley.
Side Clip Shears - For cutting off plastic retainers and pretty much everything
Hammer (Or as I call them--Motivators)
Harbor Freight Hardwood dolly's ($12) - Used these to put the transmissions on and move them around the garage--Saved my back.
Spreadsheet:
I've made a spreadsheet (following in the footsteps of Da20captain) of the total cost. I tried to include every small part I had to use for the kit in the list. Still looking at receipts. I had a couple set backs with the transmission and ended up buying a rebuilt one which cost me a pretty penny. The spreadsheet also does not reflect the spare parts that I have left over that I need to offload (3.8 Engine/Trans & 2016 Ram Transmission/Tx Case/Shafts)
**I will update the spreadsheet image when I'm done with the thread--until then, the Google Sheet link can be viewed at it's latest version.
Image format
Downloadable Spreadsheet Link - https://docs.google.com/spreadsheets...it?usp=sharing
I'm going to try and cover things that I couldn't find info on in other threads and show the link and sources that I used to install my Hemi.
General Notes:
1. It is highly recommended that you remove your black plastic intake manifold, before install. Yes it can be damaged. Ask me how I know. I had to JB weld a small crack up. That black plastic manifold is very expensive. If you can find one on ebay - $300-400 otherwise the dealership is - $1200. I used a piece of threaded rod with 4 nuts on it between the two back chains, and one on the front to keep the chains from hitting the engine. You will hit the engine with the chains if you are doing a body-on install due to the angle of the engine/transmission during install.
2. I had a two car garage, but a lot of space is used up when you have a Jeep and a couple of engines/transmissions and parts laying around. Plan accordingly!
3. I suggest replacing all of the clamps for hoses with new ring type clamps instead of reusing the 3.8 tension-type clamps.
4. Fluids
Per the 2016 Dodge Ram Owners Manual
Engine Oil 5.7 - SAE 5W-20 - 7 Quarts
ATF+4 Transmission Fluid - 8 Quarts - (Not if you have a new rebuild transmission)
Mopar Oil Filter - MO 339 - 4892339AA
Engine Coolant - We recommend you use MOPAR Antifreeze/Coolant 10 Year/150,000 Mile
***2014+ 5.7 Dodge Vehicles are supposed to use OAT fluid. 2013 and older use the HOAT fluid. Don't mix. Google it. Bad things happen.
Pulling out the Engine
I used this, it's the only thing you get from JSS as far as a document.
JSS Install Guide - JK V8 HEMI Instruction Guide - Jeep Speed Shop
Excited right? WOO! Calm down. Take your time. Be careful with a lot of these electrical plugs. They are brittle and will break fairly easily. Make sure that you are actually pulling the engine out that you are careful with the purge line, you will end up reusing it. Don't throw anything away or sell anything until you are done with the swap. If you are doing a body-on swap, it's very hard to see behind the engine at the firewall. I used the Harbor Freight hoist with the body-on approach and had to come at the engine from the front. If you are utilizing the Harbor Freight hoist, you will have to use the 1/4 ton length setting to reach far enough over the engine, because the hoist will be bumping against the front crossmember. I attached the leveler to two bolts on the timing cover/accessory plate, and two bellhousing bolts. It was a chore getting the oil pan to clear the front cross member, but it will eventually come out. Lots of shimmying and wiggling.
Power Steering Pump Modification
Power Steering Pump
JSS Videos:
Source: https://youtu.be/snG3o84l4Cs
Source: https://youtu.be/W6dlLeenWww
I reused the 3.8 P/S pump.
Things you will need
Pulley Bushing (included in kit)- If Todd did not send you one, then try and call him to get the info on it. It can probably be sourced locally.
Buy - Genuine Chrysler 53013688AB Power Steering Pump Pulley (Bought mine from Amazon) - (Not included in JSS Kit)
Buy - 3 new bolts/washers that are longer than the originals - 8MM-1.25x70mm - Got them at Home Depot. (Not included in JSS Kit)
Rent: Autozone POWER STEERING PUMP PULLEY PULLER - The specific small set for steering pumps.
I got this part number by pausing Todd's video and looking at the stamped number on the pulley itself. He never mentions the part number which is kinda frustrating, but so far this pulley has worked. So far so good. I think it may go to a Grand Cherokee. I emphasize that the Pulley Puller is the POWER STEERING PUMP PULLER; because there is more than one type of puller set, and this one makes it a cinch.
My 2016 Ram Hemi came without a steering pump. If I remember correctly this is the case I believe from 2012+ Ram on. I ended up reusing the 3.8 Pump instead of buying an older model truck pump.
1. Remove the pump from the 3.8 first, then used a rented STEERING PUMP PULLEY PULLER (it's a one specific for the steering pump) from Autozone to pull off the pulley. If you don't know how to use one, hit youtube.. The puller made it very easy to pull the OLD original 3.8 pulley off.
2. Before putting the NEW pulley on the pump, take a drill bit the same size as the pump mounting holes and drill out the threads. This will allow the new bolts to slide freely through the pump to mount the P/S pump to the timing cover/accessory plate threads of the Hemi engine.
3. Take the bushing that JSS/Todd supplies and put it into the front side of the NEW pulley. You will know which side of the pulley is the front, because the pulley will say front on it. I did not use a press for this. I tapped it *lightly* with a hammer to get it started STRAIGHT, and then used a piece of 2 x 4 wood as a buffer and the hammer to sink it in the rest of the way.
4. You can then use the pulley puller set to install the new pulley with bushing back onto the P/S pump. (FRONT SIDE TO FRONT--Sounds obvious doesn't it?)
**Important** I believe it is possible to mount the pulley too far onto the pump spindle (I did not test this). I tightened down the pulley until I thought it was close and then would hold it against the Hemi engine and using a straight edge to see if the pulley is in alignment with the other pulleys. If there is a different way then I do not know it. When using the calipers, the end of of the spindle was approximately 8mm from being flush with the inside edge of the pulley mounting hole/bushing. By the looks of the JSS video, this is the way he intended.
Power Steering Reservoir/Hoses
1. Reservoir - I reused the 3.8 reservoir; it was ugly and dirty but it cleaned up well. On the inside there was some buildup in the screen, to clean this, I used brake cleaner. Initially I was going to use a new one I bought from Amazon--a Cardone brand one, but even though it was OE replacement, the neck at the bottom was too long. Install is easy, remove alternator bolt-add bracket-reinstall alternator bolt. You will have to use a small piece of hose and two clamps to connect the reservoir with the pump. Pretty easy.
2. Hoses - Not so easy. Not difficult, but a pain to get to when routing hoses through and around the A/C hoses. Be sure to replace the O-rings.
Exhaust Manifolds - Pretty straight forward. My engine was very new, so the Hemi truck manifolds came off very easy. I reused the manifold gaskets that were already on the Hemi (they looked fairly new). Just for FYI the outlet on the Grand Cherokee manifolds are smaller than the truck Hemi manifolds--How much this affects performance? I am not sure. Install the new Grand Cherokee manifolds; if you have an older engine, consider replacing manifold bolts and cleaning the threads into the heads. Torque the bolts down to 18 ft/lbs (src:da20captain thread).
Capacitor - From my research the capacitor is to reduce RFI from the engine into the radio and electronics--could be mistaken; It is attached via a stud into the back of the driver side cylinder head. p/n - 56041889AA (src:da20captain thread)
Wiring Harness - Pretty simple - Everything is labeled very well. I started by putting the bulk of the wiring harness on top of the Hemi engine behind the passenger side cylinder head and started plugging in the injector plugs while the engine was still hanging from the hoist. When in doubt--you can google sensor locations. I put loom on all my wiring after I got the harness connected. I spoke to Chris at Hotwire (maker of JSS wiring harnesses) about it, and he said it isn't necessary as long as you keep the wires pulled away from heat sources. After I got the wires connected it looked a little sloppy to me so I went ahead and loomed the wires with plastic wire loom and added the head shielding tape for for the wires that go past or near the exhaust. I used a good bit of 3/8" loom and also some 3/4" loom. Also I purchased "Pro Tie B8FTPM100 8-Inch Fir Tree Push Mount Cable Tie, UV Black Nylon, 100-Pack" From Amazon. These are the zip ties that have the Xmas/Fir Tree push in mounting clips to attach your wires/wiring harness into the holes in the transmission and inside the engine bay. They worked pretty good. The throttle sensor wire will have to route around the right side of the engine (passenger). I thought that it would reach around the left, and loomed it on this side; after the engine was in the bay I had to cut the loom and run the wire around the other side. Annoying to do after you've taped everything up.
Sensors
1. Crankshaft Position Sensor Once I had everything done and installed; The engine would crank but not start--my dad noticed that the RPM gauge wasn't moving during the cranking and so we figured the Crankshaft Position Sensor was bad--On the way to get the new sensor, I reached out to Chris at Hotwire and he said for sure that the newer Hemi (2014+) have to have the CPS swapped out to CPS from a 2010 Ram Hemi engine. He gave me p/n 5149230AA. Stuck the CPS sensor in. Voila! Hemi Jeep is born!
2. O2 Sensors - **Update - Spoke to JSS; All four sensors should be Jeep JK downstream sensors. JSS BOM list (56029049AA). -- Whenever I tried to run the upstream JK sensors; the PCM was giving me a high O2 sensor voltage DTC. Use four downstream JK sensors all around. No DTC's. You can reuse the ones in your JK--I decided to run 4 new ones.
3. Intake Sensor - The Intake Air Temperature Sensor (Mopar name: 2015/2016 Ram 5.7 SENSOR Charge Air Temp Mopar Part #5149279AC ) is found in the hose from the Air Box/filter to the throttle body. My 2016 did not come with the hose, so I had to buy a sensor - I do not believe you have to have a 2016 Hemi Sensor; you can probably use one from a 2010+ Ram (Not validated)- The reason why I say this, is the 2016 probably does the same exact thing as the 2010-2013 and may look slightly different but it is probably much more easily sourced from store/dealership. None of the parts stores had a 2016 sensor, and only one dealership in San Antonio had the part on hand. You will need a grommet to install the intake sensor into the Air Filter Box that JSS sends you. The hole is on the underside of the tube coming from the box. I bought a "Dorman Help! Check Valve and Grommet" p/n 80191 from Oreilly's Auto Parts and pushed the IAT sensor through the grommet and it fit perfectly around both the sensor and in the Intake Air Filter Box hole. Be careful with the temperature filament, it looks like it would be easy to damage on mine.
Oil Filter Adapter
Things you will need:
1 - Oil Filter Adapter (Chrysler Part #: 53013680AD)
3 - Oil Filter Adapter Bolts (Chrysler Part #: 06102041AA)
1 - Oil Filter Adapter O-Ring - Outer (Chrysler Part #: 53021661AA)
You need to remove the oil filter bung that is on the Hemi and replace it entirely with the oil filter adapter. Why? I have no idea. My oil filter actually is shorter than the oil pan, so the adapter isn't really there to protect the filter itself. Maybe to protect the engine during suspension compression? I can only assume that this is there to potentially protect the engine itself and not something specific to the oil filter protection or accessibility, as it sticks out and downwards. Todd suggests welding a nut to the oil filter bung and then using that with a pull bar to get the bung out. I used a large torx /allen bit and a socket and pull bar. Again, my engine is fairly new. It may be much more difficult on an older engine. I can't remember which size I used. Once I change the oil in a month or so, I'll check and see which one fit in there. I've included a pic of the type of bit/driver that I used to get it out. Not sure which size yet. **Don't forget the O-ring.
Frame-Motor Mounts
Source: JSS - Video https://www.youtube.com/watch?v=h-KleobqddM&app=desktop
1. Cutting the old mounts off - I did not have a plasma cutter, but what I do have is the Harbor Freight 4 1/2" Grinder. You can use the HF 4 1/2" cut off wheels on the grinder to use it as a cutting tool. Worked very well. Just start cutting into them, make sure that you don't cut into the frame itself, just the mounts. Put the grinding wheel back on it to use it as a grinder again to smooth up the frame and clean it up. Eye/hand protection and a mask is a must. You will be sitting/crouching inside the engine back when you are cutting at it from different angles and the ground steel powder will get everywhere. Including your nose. It actually wasn't very difficult at all. It takes a little time, but after you get going, you will see it's pretty easy. Make sure to smooth up the frame rails and grind the paint off of the areas where you will be welding the mounts. I will tell you one thing I did find out... I am not a great welder. My welds are pretty ugly (and so are my dads), but after watching some youtube videos and purchasing the Harbor Freight 190amp MIG welder, I can at least say I got the job done. The install position for the 5.7 Hemi starts at 02:00 on the JSS video. Double..Triple.. check the positions based on the video prior to welding. "Measure twice, weld once". For the truck Hemi engines, the mounts are in the forward position (see video).
2. Mounting the new WK Engine Mounts to the Frame Mounts
Source: JSS Video - https://m.youtube.com/watch?v=0fXRsrZiBBE -
Just to point out a couple of things--the same as da20captain's says in his thread, the you cannot use the label as a reference to which side goes up and which side goes down. In fact, my mounts that I got from Quadratec did not have any stickers at all on them. Watching the video, this can be a little confusing. **The driver side is the longer one (from engine mount base)with the THREE holes pointing upwards--The passenger side is the shorter one and will have TWO holes on top side. At least this is the way I installed them. Do not install the engine mounts until after you get the engine IN the bay from underneath. I didn't believe this myself, so I put one on anyway. Which I promptly took off once I started trying to fit the engine into the frame. I read that you can reuse the JK mount bolts, for some reason the un-threaded shoulder on mine was too long when put through the mount. I ended up getting new bolts from Fastenall to put through the mounts.
Transmission/Transmission Adapter
Source: JSS Video - https://m.youtube.com/watch?v=J-Xniw1qzak
Source: https://www.jk-forum.com/forums/modi...dsheet-332076/
Source: My 2009-2011 Truck Hemi Install w/Jeep Speed Shop kit! - JKowners.com : Jeep Wrangler JK Forum
1. Transmission - (5)45RFE
Source: JSS Video - https://m.youtube.com/watch?v=J-Xniw1qzak
Source: My 2009-2011 Truck Hemi Install w/Jeep Speed Shop kit! - JKowners.com : Jeep Wrangler JK Forum
So for me the transmission was probably the most frustrating part. I purchased the first one with 23K miles on it from Elmers Auto Salvage via car-parts.com. It was no bueno! It wouldn't mate up to the engine--the dowel pins would not go together. I at first thought it was a compatibility issue with the 2016 engine but it ended up just being damaged. I used the first transmission as a core for a rebuilt one from a local shop which cost me a pretty penny. The rebuilt one bolted up perfectly.
Neither the salvage transmission nor the rebuilt one came with transmission lines, dipstick, or a flex plate.
When I researched the transmission lines, there seemed to me multiple variations of the transmission lines for the 2010 Dodge Ram. I ended up getting 55056859AD - The lines ended up being the perfect length to the front of the JK for the transmission cooler, plus the cooler-side end of them are rubber hoses with quick disconnects, and I was able to find a transmission fitting to make it a snap to install the cooler and keep it looking clean up front (See Transmission Cooler)
** If you get a Transgo Shift Kit put into your 545RFE; Do not use the kit with the resistor. The Diablo tuned PCM that JSS provides already has the shift points set up, if you use the resistor, it will shift too hard.
The 2016 Hemi 5.7 came with a 8 speed transmission attached to it. Whenever I took the 8 speed off, the 8 speed flex plate is not compatible with the 545RFE, so I had to get a new one with the correct alignment holes for the 545RFE torque converter. Also, because of the 8 speed transmission, there was spacer in the end of the crankshaft where the torque converter pilot sits. This was a nightmare getting out. It does not have a large enough lip on the inside face of the spacer to get a puller on. We ended up using a dremel to remove it and then pull it out. This was a bitch to deal with. Also be careful there are different variations on which length bolts to use on the torque converter. The ones I ended up having to use on the 545RFE were shorter than the bolts that were on the 8 speed torque converter. Make sure you have the right ones.
2. Transfercase Adapter- The transfercase adapter that you will need to use is on the BOM list from JSS. The 545RFE from the 2010 Dodge Ram 4x4 that I got from the salvage yard had a transfercase adapter on it, it looked nearly identical to the one I bought based on the list, except for one difference. Inside the adapter where the output shaft from the transmission comes through on the one from the BOM list there is a bearing that the transmission output shaft will sit inside. On the one from the salvage yard, it did not have this bearing. Can you use either one? No idea. I went with the one with the bearing, makes sense that it would need some kind of support for shaft with that much HP. You will have to either modify the transfer case adapter to fit the shifter cable bracket. Keep hacking away at it until you get to the point where the bracket is flush against the holes and it lines up with a couple of bolts stuck through it. I didn't grind it well enough and had to grind some more once I got the transmission in JK. Kinda annoying. **Also I saw on a different set of instructions/thread where someone cuts the bracket to fit around the adapter, unfortunately I didn't see this until it was too late. This actually seems to make more sense since you are not hacking your transmission up. If I can find the pics of the cuts again, I'll post them here.
3. Mounting Transmission inside
Source: https://www.jk-forum.com/forums/modi...dsheet-332076/
Use the transmission bracket/mount diagram that is provided by JSS/AEV. When you are doing the body-on install, you will have to install the Engine/Transmission first, then install the transfer case afterwards from underneath.
Fuel Line - The JSS kit no longer comes with fuel line adapters. According to JSS they have had known occurrences of the adapter coming off. With my kit, I was sent a nylon fuel line that is long enough to connect directly to the fuel rail all the way back to the fuel line coming from the gas tank. Very straight forward. You will not reuse the Hemi Fuel line any longer. Suggest replacing the plastic retainer clips while you are it.
Purge Line/EGR Solenoid - Reuse the 3.8 Purge Line and Solenoid. It will mount onto the battery tray.
Vacuum Lines - There are three vacuum lines on the black plastic intake manifold. One goes to the PCV valve at the back of the intake manifold, the other two are utilized by the EGR Solenoid and the brake boost.
A/C Compressor/AC Lines
Source: https://m.youtube.com/watch?v=D3G6Hrw9MBQ
Source: https://youtu.be/18Y9Kiajhhw
Source: My 2009-2011 Truck Hemi Install w/Jeep Speed Shop kit! - JKowners.com : Jeep Wrangler JK Forum
1. A/C Compressor - The 2014+ A/C Compressors will not work, not due to clearance issues, but because they come with a second connector on the back that does not work with the JSS harness. I bought a compressor for a 2010 Dodge Ram - GPD 9623373 from Rockauto. Be sure to get the combo deal that comes with the O-rings, gaskets, and dryer cylinder. The A/C Compressor modification is pretty easy. I had more room than I thought I would in the end, but I hope I never have to take it off. **On the 2016, instead of a long bolt to hold the compressor onto the engine, it is held on by a threaded stud and a nut. You will want to remove this stud/nut and replace it with appropriate size bolts instead.
2. A/C Lines - JSS will send you two lines that will attach to the firewall. You will reuse the line from the JK that has the transducer electrical plug in it. With body-on install; install the firewall attached lines before you install the engine into the bay. Just fair warning, it will be annoying trying to deal with the hoses of the A/C lines and the steering reservoir in that little space, but it can be done! The A/C lines will only fit one way with each hose. You will end up having to bend your A/C lines to get them to cooperate with the tight space.
Steering Shaft/Plate Modification
Source: https://www.jk-forum.com/forums/modi...dsheet-332076/
Source: My 2009-2011 Truck Hemi Install w/Jeep Speed Shop kit! - JKowners.com : Jeep Wrangler JK Forum
This is pretty straightforward. Remember to tie your steering wheel down before disconnecting the steering shaft. Try and hold the plate up to firewall to get an idea of the direction and distance you need to grind the hole out. "The 2007-2010 the pillow bearing is on the inside of the firewall so that is where you will need to mount the adapter plate. On the 2011 and up the pillow bearing is on the outside of the firewall, therefor the adapter plate will go on the outside." (src:da20captain thread). I used black RTV sealant with the plate to seal it up.
Battery Box/TIPM Mount/Air Box
Source: https://m.youtube.com/watch?v=zAFPylHSmKU
I installed mine after I installed the engine in the bay. It was a pain in the ass to get these to seat correctly. The large wire thats coming around and down the passenger side fender well will have to be released from it's clips and run along the top of the engine bay/battery tray, and then down and under the TIPM.
I feel like it may be easier with a body-on install to install the Battery Tray/TIPM prior to installing the engine. It's going to be tight any way, but I think it will be much less of a headache and dealing with the wiring harnesses that go under the TIPM and the routing of the wires along the edge of the fender. Again, this is not what I did, but thinking back, I think installing them first would be easier. Your call. =)
JSS Radiator/Shroud/Condenser/Fan
Before installing the heater lines to the engine--I used a water hose to flush the old coolant out (HOAT).. as the newer Hemi used OAT fluid. Don't mix them. Bad things.
1. JSS Radiator/Shroud/A/C Condenser - I bought a new JK A/C condenser because my old one was busted up from a tree limb. Install the A/C condenser and the A/C dryer cylinder to the radiator, then install the radiator to the front clip with original JK bolts. Then install the front clip. If you use the JSS Radiator and Shroud, the hoses listed in the JSS BOM will not fit. I ended up going to Autozone and Oreilly's and asking to look at their hose stock to find a couple that were pretty close to the shape that I would need and I still had to use a pair of scissors to cut them down some. To make them easier to install, apply a little bit dish detergent/water to piece that your hose is mounting on to. Should slide on pretty easy.
2. Fan/Clutch - I used an 18 inch fan Flex-a-lite fan and the Derale Fan Clutch. This manual fan clutch is non-thermal and will run all the time--Remember the threads on it are in reverse. You will have to cut off a piece of the black intake manifold, and bend the fan blades forward to make sure it clears the other pulleys. Do not install the fan clutch or the fan until after you have the engine mounted in the bay if you are doing a body-on install. You will have tilt the Hemi engine/trans at a very steep angle to get them in and over the front cross member, if you already have the fan/clutch installed, it will bang against the hoist. No bueno.
3. Transmission Cooler
Source: NEW JK Transmission cooler mounts - JKowners.com : Jeep Wrangler JK Forum
The JK Transmission cooler is pretty easy to install. JSS will send you the bolts and nutserts to install his brackets to the front clip, but you will need to get four more small bolts to install the cooler to the bracket. Install the brackets on the cooler with 4 bolts/washers/nuts. These were not provided to me by JSS. I used the same size bolts that he sent with his brackets, purchased from Autozone. (They are standard by the way, not metric). After the brackets are installed on the cooler, hold up the cooler up to the radiator/frame and you will see two circles that line up with the top two holes of the cooler brackets. Use a drill bit slightly smaller than the nutserts to drill out the circles on the frame. Thread the bolts into the nutserts and then ever so elegantly use a hammer to install the nutserts into the frame. Remove bolts from nutserts--install cooler bracket with the top bolts... now you can use the bottom holes to punch/mark where the bottom holes will need to be drilled. Repeat drill/hammer process. Install transmission cooler w/bracket.
**If you have the transmission lines with the quick disconnects at the end, you can use two Hayden 397 transmission fittings to plug into the quick disconnects and then cut the hoses to length to the end of the transmission lines and use ring clamps to tighten them down. The quick disconnects make it look nice and clean up front.
Throttle Body Adapter
Source: https://www.jk-forum.com/forums/modi...dsheet-332076/
The JSS kit moves the throttle body from the intake manifold to the passenger side for a cold air intake type setup. JSS provided the bolts for the adapter. It's pretty straight forward. Just like da20captain's thread mentions, you will be required to get a coupler hose and two clamps to go between the Intake Adapter and the Air Filter Mount/box. The diameter is 3 1/2"'.
If I'm missing something let me know. Probably will make another couple of updates to it.
I may not die a happy man, but at least I'll die a Hemi man.
.. My dad groaned at this.
Last edited by feroxjb; Oct 14, 2016 at 07:08 PM.


Trending Topics

JK Newbie

Joined: Sep 2013
Posts: 82
Likes: 0
From: Temecula, ca
me too
I like the V8 swap a lot.
what year is your JK?
mine is a 2011 and my cruise still doesn't work.
I have almost 15000 miles on the hemi and its running like a dream... a dream with terrible mileage, but a dream.
it sure is fun to drive now.
I like the V8 swap a lot.
what year is your JK?
mine is a 2011 and my cruise still doesn't work.
I have almost 15000 miles on the hemi and its running like a dream... a dream with terrible mileage, but a dream.
it sure is fun to drive now.
JK Junkie

Joined: Feb 2012
Posts: 3,068
Likes: 116
From: Bunnlevel, NC
Mine is a 2011, but I'm running an L96 with a 6L80E... cruise and all that stuff works great.
Thread Starter
JK Enthusiast
Joined: Apr 2009
Posts: 313
Likes: 0
From: San Antonio, TX
