Jeep Wrangler JK: Shock Absorber Reviews and How-to
Shock absorbers mount between the wheels and vehicle body. They reduce effects like body sway and jarring that occurs when driving over rough surfaces. Shock absorbers vary by design, making research important when choosing one for your needs.
This article applies to the Jeep Wrangler JK (2007-Present).
Shock absorbers use hydraulic fluid and gas to dampen movement as the shock compresses. Without a shock absorber, the coil spring and tires would provide the only cushioning. This would lead to bounciness and jarring, making your JK hard to withstand while driving. Shocks are a heavily used part that must remain leak-free. When a shock absorber breaks, you may notice your JK sagging on a corner or excessive play in the steering while driving over bumps. The shock absorbers are a fairly easy item to replace. They are often one of the first components swapped when modifying the JK for off-road performance.
Table of Contents
How to Install Shock Absorbers

Materials Needed
- Floor Jack
- Jack stands (x2)
- 19mm or 3/4" socket
- Wheel chocks (rear shocks only)
- Impact wrench (optional)
- 1/2" ratchet
- 13mm deep and shallow socket
- 15mm deep socket
- Vice grips
- 3/8" ratchet
- 6" 3/8" extension
- 13mm wrench
- 1/2" torque wrench
- 5/8" socket (rear shocks)
- 18mm wrench rear shocks)
- Pry bar (rear shocks)
Front Shock Absorbers
Step 1 – Raise and remove the front wheels
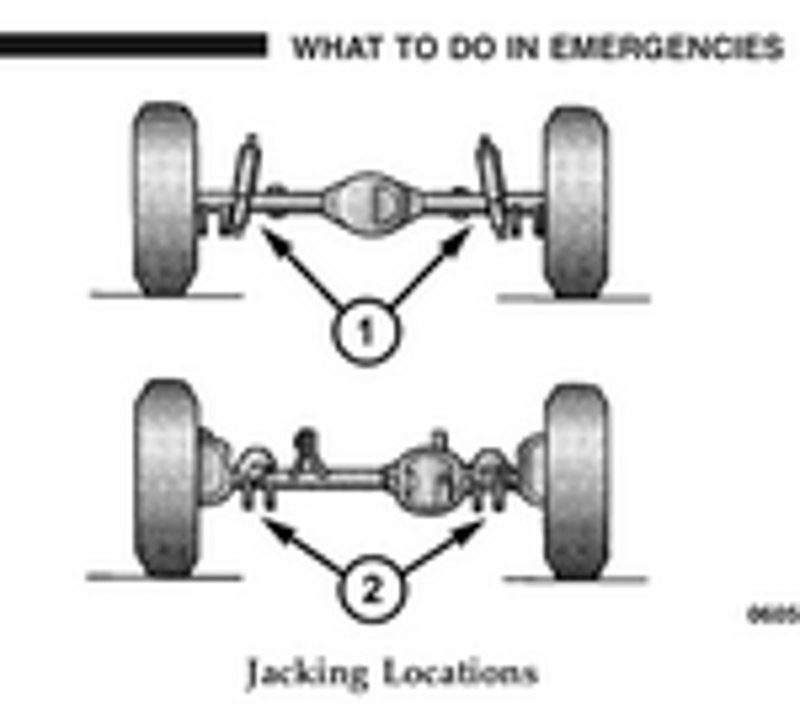
Engage the parking brake. If you don't have an impact wrench capable of removing lug nuts, loosen the lug nuts a full turn with the tires on the ground. Place the floor jacks pad under one of the front jacking points. Raise the vehicle high enough to place a jack stand beside it on the jacking point and lower the vehicle onto the jack stand. Remove the lug nuts with a 3/4" or 19mm socket.
Step 2 – Remove the lower shock mounting bolts
Locate the front shock absorbers. They are beside the coil springs. Two bolts hold the bottom of the shock to the axle. Use a 13mm shallow or deep socket to remove the nuts on the mounting bolts. Hold the mounting bolts stationary while you're loosening the nuts.

Step 3 – Remove the upper shock retaining nut
Remove the nut on the top of the shock by feeding a deep 15mm socket with a 6" extension through the hole on the shock tower. Your factory shock may have two upper nuts instead of one. Place a wrench on the nut below the shock tower. This nut is apart of the shock and keeps the shock from turning while loosening the upper nut. If this nut is not apart of your shock, attach a pair of vice grips to the shock to prevent it from turning.
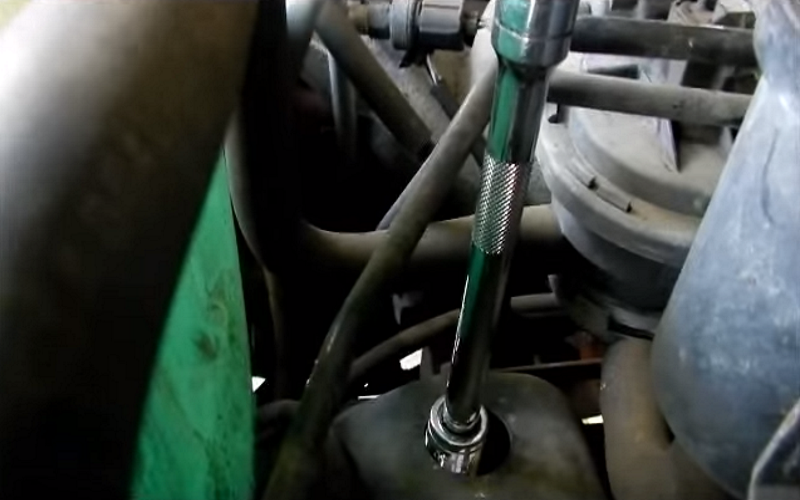
Figure 3. Reaching the upper shock nut through the shock tower. 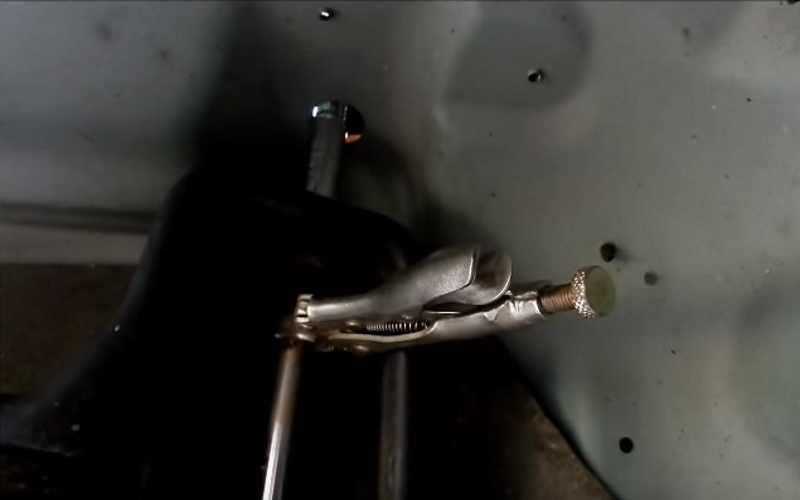
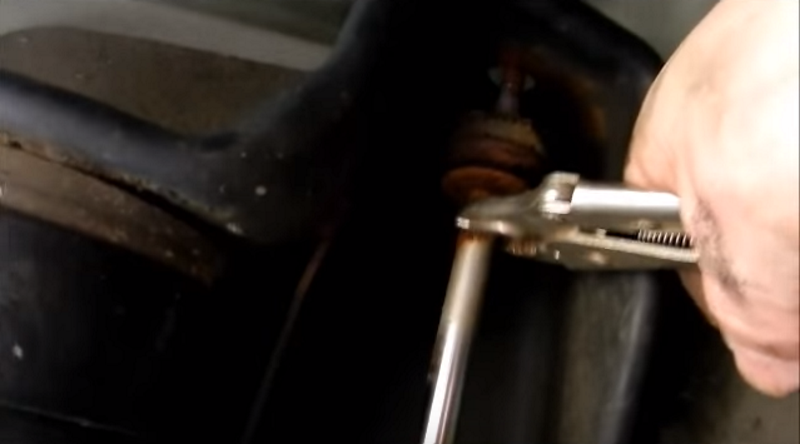
Figure 4. Using vice grips to keep the shock from turning.
Step 4 – Remove the shock
Compress the shock with your hands until the top of the shock can be moved out of the shock tower. Use a pair of pliers or vice grips to maintain grip with the shock.
Step 5 – Install the new shock
Assemble your new shock, noting the position of bushings and boots. There should be a bushing on each side of the shock tower. Read through your shocks installation instructions for specifics during this step, as they vary by manufacturer.
As your mounting the bottom of the shock to the axle, install both bolts into the mounting brackets at the same time. This will keep the shock flat against the bracket, making installation easier.
Tighten the upper nut to 20 ft/lbs and the bottom nuts to 50 ft/lbs. Re-install the wheels and tighten the lug nuts to 100 ft/lbs in a star pattern.
Rear Shock Absorbers
Step 1 – Raise and remove the rear wheels
Place wheel chocks in front and behind one of the front wheels. Follow the same instructions found in Step 1 of the front shock replacement how-to.
Step 2 – Remove the upper shock mounting bolts
Locate the upper bolts holding the top of the rear shock to the frame. Remove these with a 5/8" socket. You'll need a 6" extension, as well.

Step 3 – Remove the lower bolt from the shock
To remove this bolt, you must hold the nut stationary. Use a wrench and socket combination to remove the nut, and then pry upwards on the bottom of the shock to slide it out of the axle bracket.

Step 4 – Install the new shock
Install the upper portion of the new shock, but don't fully tighten the bolts. To install the bottom bolt, you'll need to compress the shock by hand far enough to slide it back into the axle bracket. The bolt hole in the shock and bracket will not line up until the shock is slightly compressed. Keep pressure against the shock with a pry bar while tightening the lower bolt.
Torque the upper bolts to 40 ft/lbs and the lower bolt to 50 ft/lbs. Re-install the wheels and torque the lug nuts to 100 ft/lbs. Tighten them in a star pattern.
Featured Videos: Front and Rear Shock Installation
-
How to Install Front Shocks on the Jeep JK
-
How to Install Rear Shocks on the Jeep JK
Shock Absorbers Review
Over the years, shocks have progressed rapidly in terms of technology. Shocks are now made with self-adjusting valves and high strength metals to perform in the toughest conditions. There are many choices when choosing a shock from companies with industry leading technology and lifetime warranties. The hardest quality to find in a shock is exceptional performance and comfort on-road and off-road. A shock that's soft in the mid range to reduce bumps felt during highway driving, but stiff enough to maintain tire traction with the ground while off-road is ideal for those using their JK for both purposes.
Rancho 9000X |
Bilstein 5100 |
Fox 2.0 |
O.M.E. |
Pro Comp MX6 | |
|---|---|---|---|---|---|
Price |
$500 | $280 | $130-$330 each | $100 each | $100 each |
Adjustable |
Yes |
No |
Yes |
No | Yes |
Ride Quality |
Stiff |
Stiff |
Stiff |
Soft |
Stiff |
Lift Friendly |
Yes | Yes | Yes | Yes | Yes |
Twin tube or Monotube |
Twin tube | Monotube | Monotube | Monotube | Monotube |
Warranty |
Limited Lifetime | Limited Lifetime | 1 year | 3 years or 60,000 kilometers | Limited Lifetime |
Best Value: Bilstein 5100
Rancho 9000X

Price – $500
Adjustable – Yes
Ride Quality – Stiff
Lift Friendly – Yes
Twin Tube or Monotube – Twin Tube
Warranty – Limited Lifetime
The Rancho 9000X is nine-way manually adjustable shock, making adjustment easy for everyday driving or maximum performance. It's a nitrogen gas charged shock and is backed by a limited lifetime warranty. Rancho is a division of Tenneco, makers of some of the most widely used suspension components in automotive. Rancho even offers you a 90-day free ride offer to see what the shock is capable of firsthand. Recommended for those looking for an adjustable shock at a competitive price.
Bilstein 5100

Price – $280
Adjustable – No
Ride Quality – Stiff
Lift Friendly – Yes
Twin Tube or Monotube – Monotube
Warranty – Limited Lifetime
Bilstein was started in 1873. Over the years, they've continued development in the aftermarket and original equipment manufacturers. The Bilstein 5100 shock features monotube gas pressure technology with self-adjusting deflecting disc valving. This creates a smooth even ride in conditions on-road and off. Bilstein backs their shock with a lifetime warranty to the original purchaser. Recommended if your looking for a shock with exceptional performance and comfort at a price that's hard to beat.
Fox 2.0
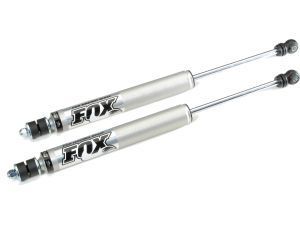
Price – $130-$330 each
Adjustable – Yes
Ride Quality – Stiff
Lift Friendly – Yes
Twin Tube or Monotube – Monotube
Warranty – 1 year
These shocks are made from high strength 6061 T6 aluminum and feature a clear anodized finish for corrosion protection. For those more focused in off-road performance, Fox offers a remote fluid reservoir option. This reservoir keeps the shock fluid cooler, maintaining performance during periods of high demand. Although built with quality components, Fox only warrants there shock for one year. Recommended for heavy off-road use.
O.M.E.

Price – $100 each
Adjustable – No
Ride Quality – Soft
Lift Friendly – Yes
Twin Tube or Monotube – Monotube
Warranty – 3 years or 60,000 kilometers
Old Man Emu focused on ride quality while developing there NitroCharger shock. This shock includes a triple stage valving process only rivaled by adjustable remote reservoir shocks. The shocks mid range (the area most used during highway driving) is multi-staged to provide a softer, more forgiving response over road imperfections. Old Man Emu backs their shock with a 3 year or 60,000 kilometer warranty. Recommended for the daily driven JK.
Pro Comp MX6
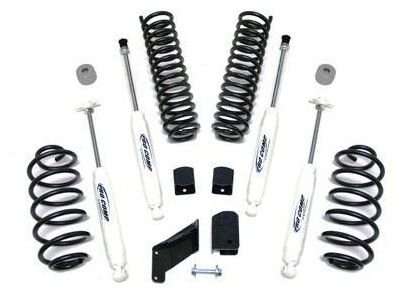
Price – $100 each
Adjustable – Yes
Ride Quality – Stiff
Lift Friendly – Yes
Twin Tube or Monotube – Monotube
Warranty – Limited Lifetime
Pro Comp MX6 shock are six-way adjustable and utilize a monotube design for improved on and off-road performance. The shocks feature double welded shock mounts for added stability and self-adjusting custom valving that responds to road conditions for a mixture of comfort and performance. These shocks are backed by a limited lifetime warranty. Recommended for JK owners after a shock with great features and an industry leading warranty.
Related Discussions
- Best Shocks for 4" Lift - JK-Forum.com
- Best Shocks - JK-Forum.com
- Shocks for Smooth Ride, No Lift - JK-Forum.com
- Shocks for Reasonable Money - JK-Forum.com
- Street Shocks for Soft Ride - JK-Forum.com


